Etendo Webhooks
Javapackage: com.etendoerp.webhookevents
Overview
What is a Webhook?
A webhook is a method used by web applications to send real-time notifications or data to other applications or servers. Webhooks operate using HTTP callbacks, which means that an application sends an HTTP request to a specified URL (the webhook URL) when a particular event occurs.
In simple terms, a webhook acts as a messenger that delivers a message (data payload) from one application to another when certain conditions are met. Webhooks enable applications to communicate and share information automatically, making it easier to integrate different services and create seamless workflows.
By using webhooks, you can keep your applications in sync, automate processes, and extend the functionality of your applications with minimal effort.
This documentation will guide you through the process of setting up and using webhooks in Etendo Classic. Webhooks allow you to execute actions via a URL call, providing a powerful way to integrate with external services.
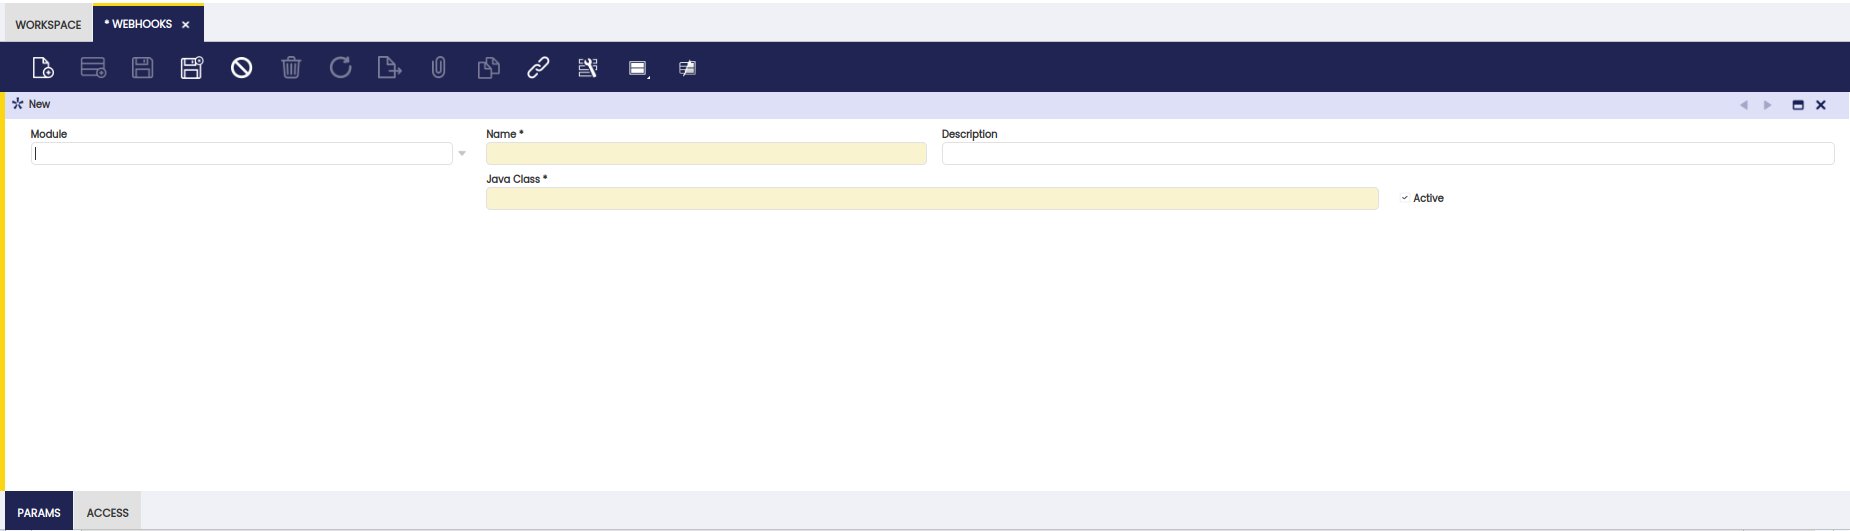
Webhook Description
Webhook Header Fields
| Field | Description |
|---|---|
| Module | Module in which the webhook will be created |
| Name | Webhook name |
| Description | Webhook description |
| Java Class | Class in which the webhook service was created |
| Allow to give access to role | Check if it is allowed to give access to roles via secure web services |
| Active | Webhook status (Active by default) |
Webhook Tabs Fields
Webhook window has 2 tabs: Access and Params.
The params tab allows you to create parameters that will be used in the URL call.
The access tab allows you to create access that will be used in the URL call.
Params
| Field | Description |
|---|---|
| Name | Parameter name that will be used in the URL call |
| Is required | Whether the parameter is required or not |
| Active | Parameter status (Active by default) |
User Access
Allow execution via token.
| Field | Description |
|---|---|
| Active | Access status (Active by default) |
| Token | Selector with the token that will be used in the URL call created on User API Token window |
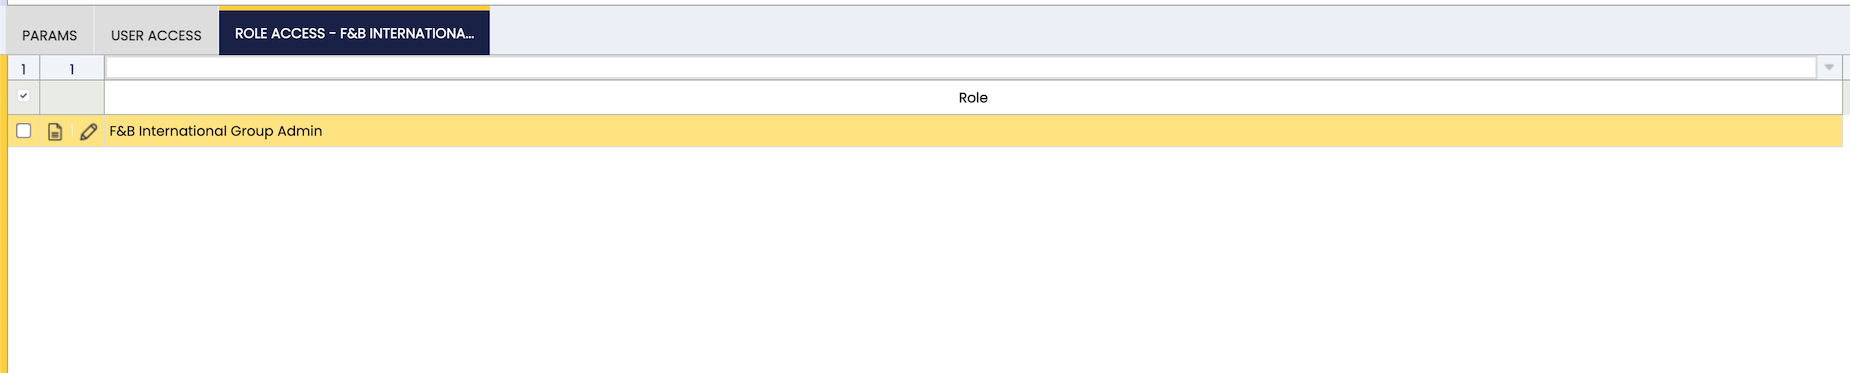
Role Access
If you need to allow authenticated users with SWS read the guide: How to use secure web services. For this you have to add roles that are allowed to execute a webhook in the Role access tab.
Webhook Usage Example
Setting up Webhooks
- Navigate to the new menu option:
Application → General Setup → Application → Webhook Events → Webhooks -
Create a new webhook by filling in the required fields:
Field Value Name Alert Description Create alert with custom message Java Class com.etendoerp.webhookevents.ad_alert.AdAlertWebhookService 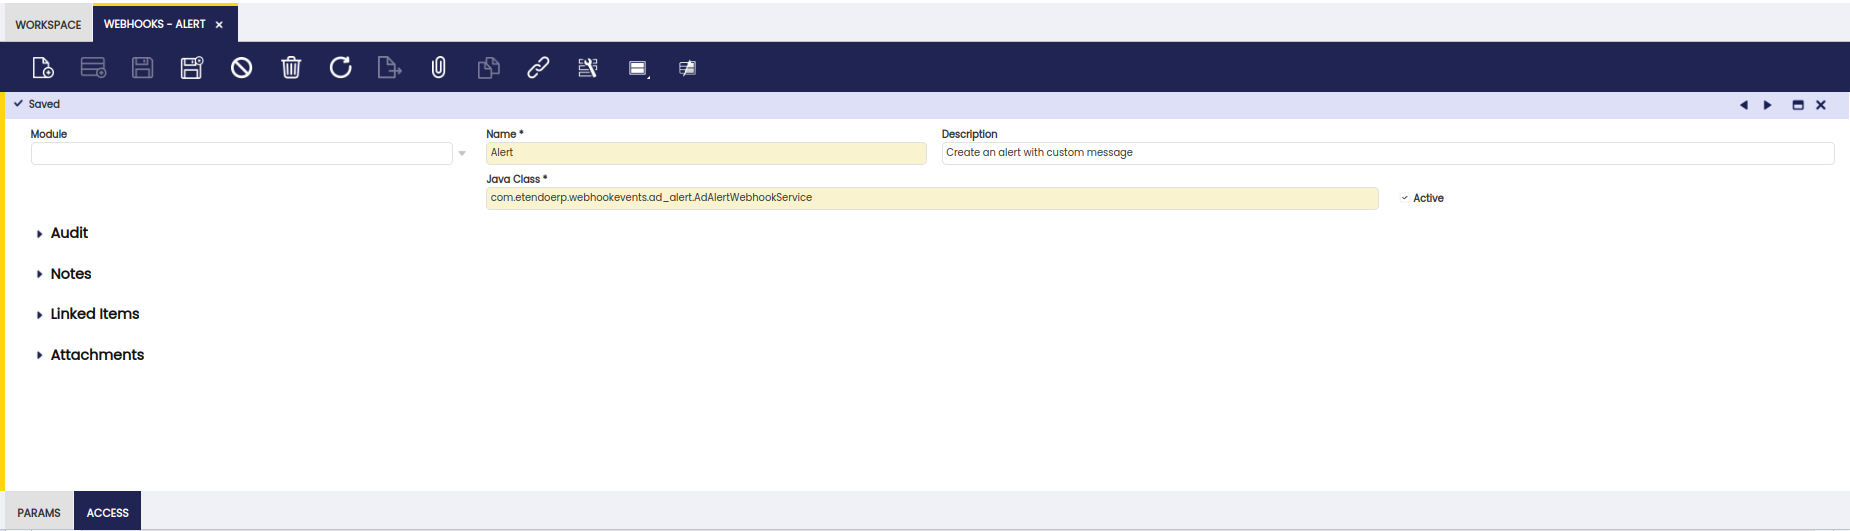
-
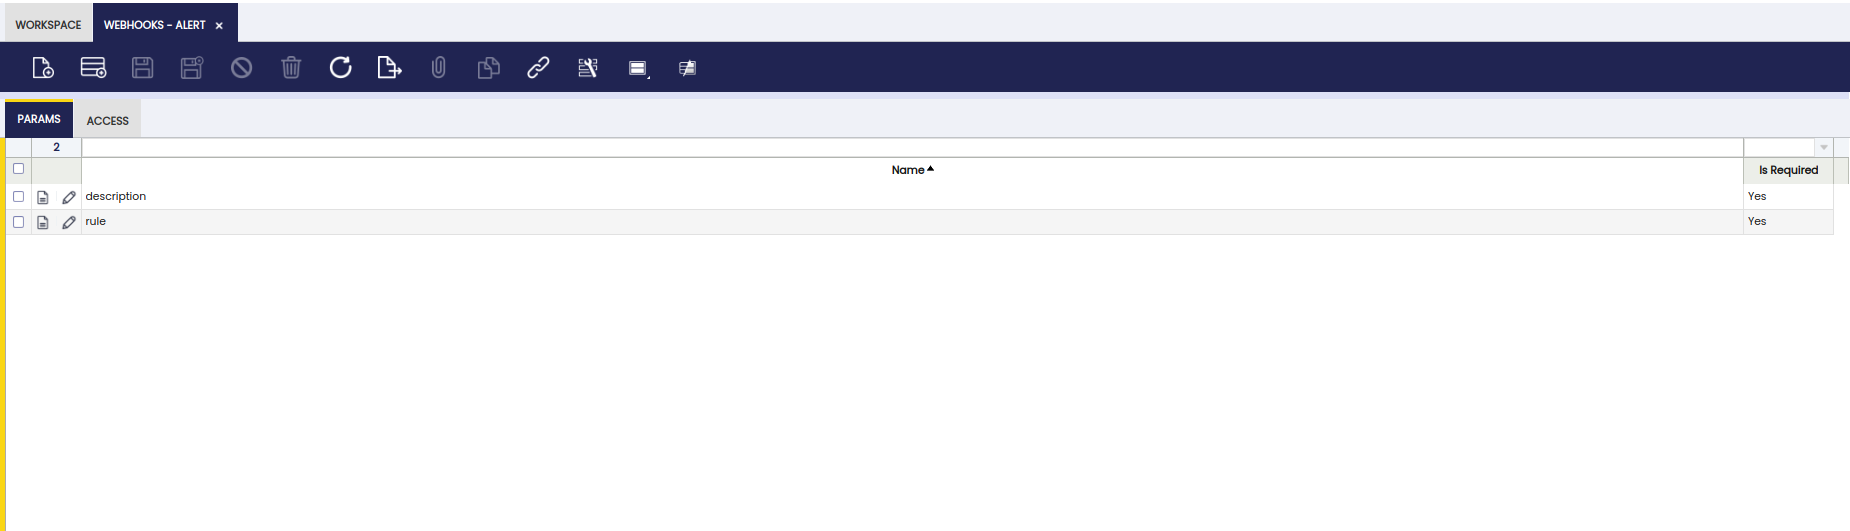
Focus on "Params" tab and create the following params:
Field Value Is required Name description 
Name rule
Role access
API Key Generation
- To give execution permission to a user, go to:
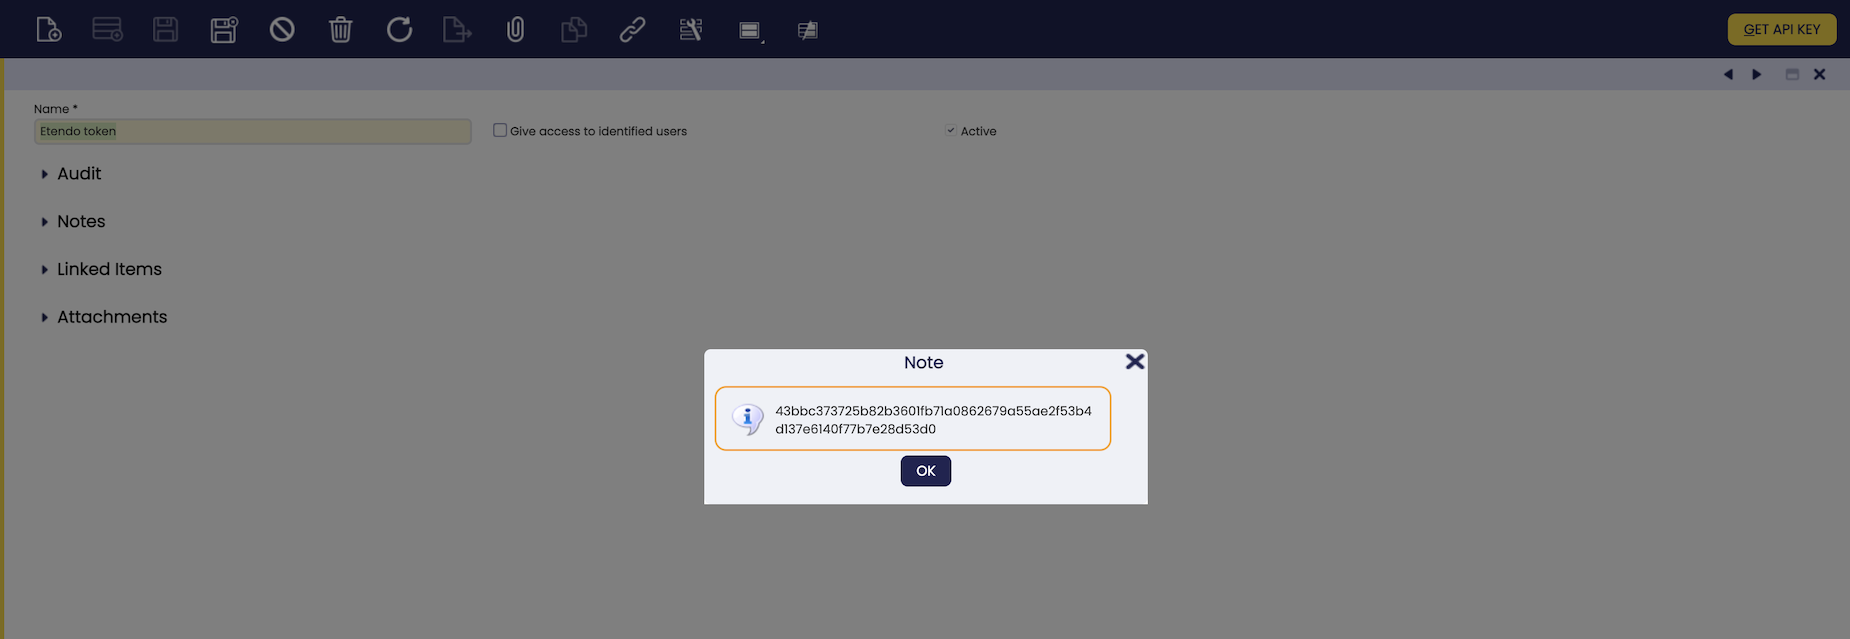
Application → General Setup → Application → Webhook Events → User API Token - Create a new API with the Name:
<<user>> token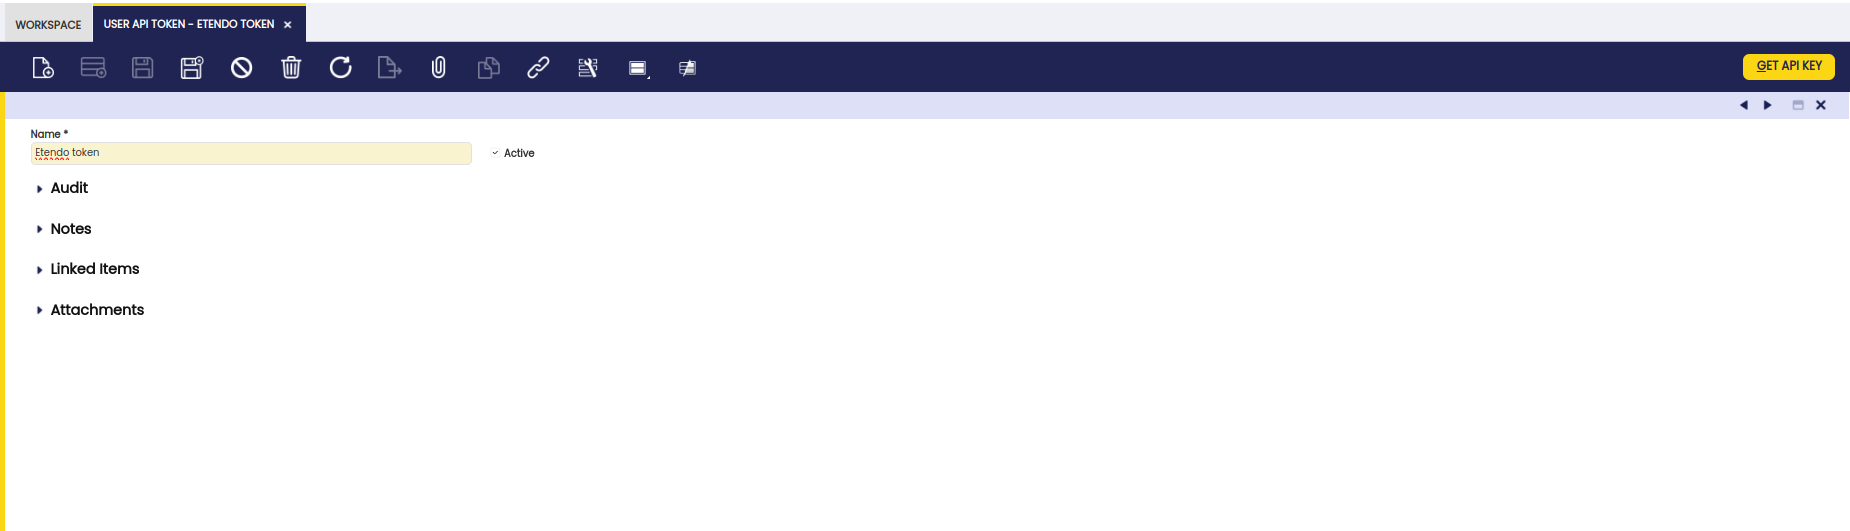
- After saving, run the “Get API Key” option, and save the resulting token (64-length random string) to your clipboard.
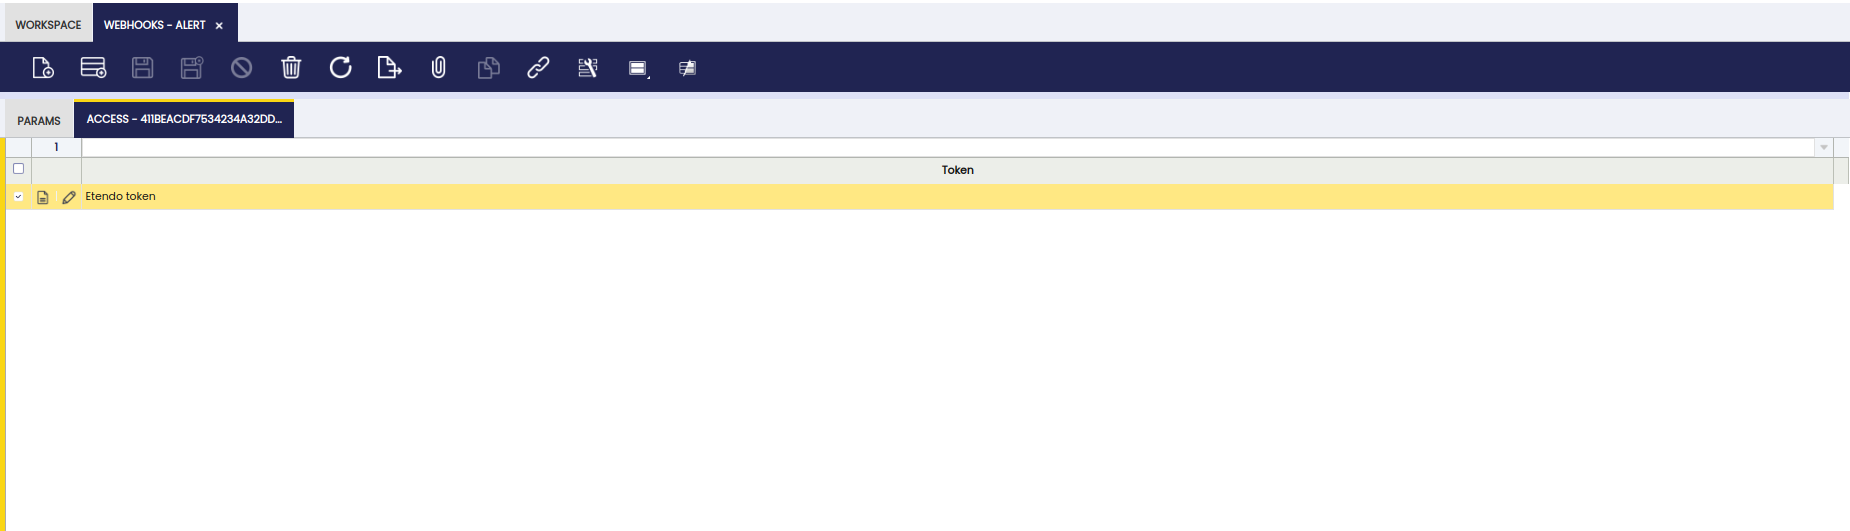
Assigning Webhook Access to Users
- Navigate to:
Application → General Setup → Application → Webhook Events → Webhooks - Select the created webhook and open the access tab.
- Create a new row and select the previously created API record.
Secure web servicess access
Assign allowed roles
In Webhooks window, add roles allowed to run the webhook.
Executing the Webhook
To execute the webhook, make a GET request using a REST client like Postman with the following syntax:
URL=http://localhost:8080/
CONTEXT=etendo
WEBHOOK_ENDPOINT=/webhooks/
[VARS]
WEBHOOK_NAME=name=alert
DESCRIPTION=new alert description
RULE=649BBFA37BA74FA59AEBE7F28524B0C8
Example URL:
With token
APIKEY=8b1012f0d442406ed602d87c13edcee9
http://localhost:8080/etendo/webhooks/?name=Alert&apikey=<api-key>&description=new alert description&rule=649BBFA37BA74FA59AEBE7F28524B0C8
With sws token
http://localhost:8080/etendo/webhooks/?name=Alert&description=new alert description&rule=649BBFA37BA74FA59AEBE7F28524B0C8
Add as authorization Bearer Token, the JWT obtained via SWS login.
Expected response
Success
This webhook creates an alert, and you can visualize it in the "Alert Management" window.
The response will return a status code 200 and the alert ID, for example:
Example code usage
/**
 * Example webhoook to take as a starting point.
 * This service receive a description and a alert rule ID and insert one standard alert
 */
public class AdAlertWebhookService extends BaseWebhookService {
  private static final Logger log = LogManager.getLogger();

  @Override
  public void get(Map<String, String> parameter, Map<String, String> responseVars) {
    Alert alert = new Alert();
    alert.setAlertRule(OBDal.getInstance().get(AlertRule.class, parameter.get("rule")));
    alert.setDescription(parameter.get("description"));
    alert.setReferenceSearchKey("");
    OBDal.getInstance().save(alert);
    OBDal.getInstance().flush();
    responseVars.put("created", alert.getId());
  }
}
Use Cases
SimSearch webhook
The SimSearch webhook performs fuzzy matching over Etendo entities and returns the closest records for a given search term. It is used in Copilot flows where extracted or user-provided text must be mapped to existing records, for example matching OCR results against Business Partners, products, or documents.
Performance considerations
If SimSearch is still slow in your environment, especially on large tables, you can add a PostgreSQL trigram index to the identifier column used by the search.
Prerequisite
Trigram indexes require the pg_trgm PostgreSQL extension to be enabled in the database.
The index expression should match the expression used by the lookup. For example, if the search runs on the uppercase invoice document number, create the index on upper(documentno::text):
CREATE INDEX IF NOT EXISTS c_invoice_documentno_trgm
    ON c_invoice
    USING gin (upper(documentno::text) gin_trgm_ops);
Pros:
- Faster fuzzy searches on large tables.
- Better response time in OCR-driven flows and other bulk matching scenarios.
- Lower database CPU usage for repeated similarity lookups.
Cons:
- Higher disk usage because the extra index must be stored and maintained.
- Slower
INSERT,UPDATE, andDELETEoperations on the indexed table. - Reindexing, vacuuming, and initial index creation can be expensive on large datasets.
- The index only helps when it matches the actual search expression used by the query.
For production environments, benchmark the query first and add trigram indexes only to the columns that are proven bottlenecks.
Tokens Visibility
Note
 Users can visualize tokens of their current profile.
Warning
 Other users cannot access another user's token. The API Token Window and webhook access tab will be empty.
Error Handling
Failure
If a user calls a webhook without a token or includes an incorrect API token, the backend will respond with a 401 response and a message.
Failure
If a user calls a webhook with an incorrect webhook name, the backend will respond with a 404 response and a message.
Failure
If a user calls a webhook without access, the backend will respond with a 401 response and a message.
Failure
If a user calls a webhook with a missing required parameter, the backend will respond with a 500 response and a message.
Failure
If a user calls a webhook without a newly required parameter (after the backend configuration is changed), the backend will respond with a 500 response and a message.
Failure
If a user calls a webhook with revoked access, the backend will respond with a 401 response and a message.
This work is licensed under CC BY-SA 2.5 ES by Futit Services S.L.