How to Create Scan Process
Overview
This document explains how to define a scanning process that can be executed from the mobile application to scan codes using the mobile camera.
It is important to note that any scanning process must have these specific steps:
- Grouper: The items that are going to be scanned must be grouped under a container.
- Items: Here you can scan different types of barcodes (in all encodings) or QR representing different items such as products, invoices, assets, etc...
Optional:
- Quantity: It is possible to specify the quantity of the scanned items.
Scanning process definition in Etendo
Warning
The environment must have at least one module under development, and the process identifier must include the prefix of that module.
-
First of all, you have to create a process. Log in as "System administrator. Open the
Application>Application Dictionary>Process Definitionwindow and create a new record.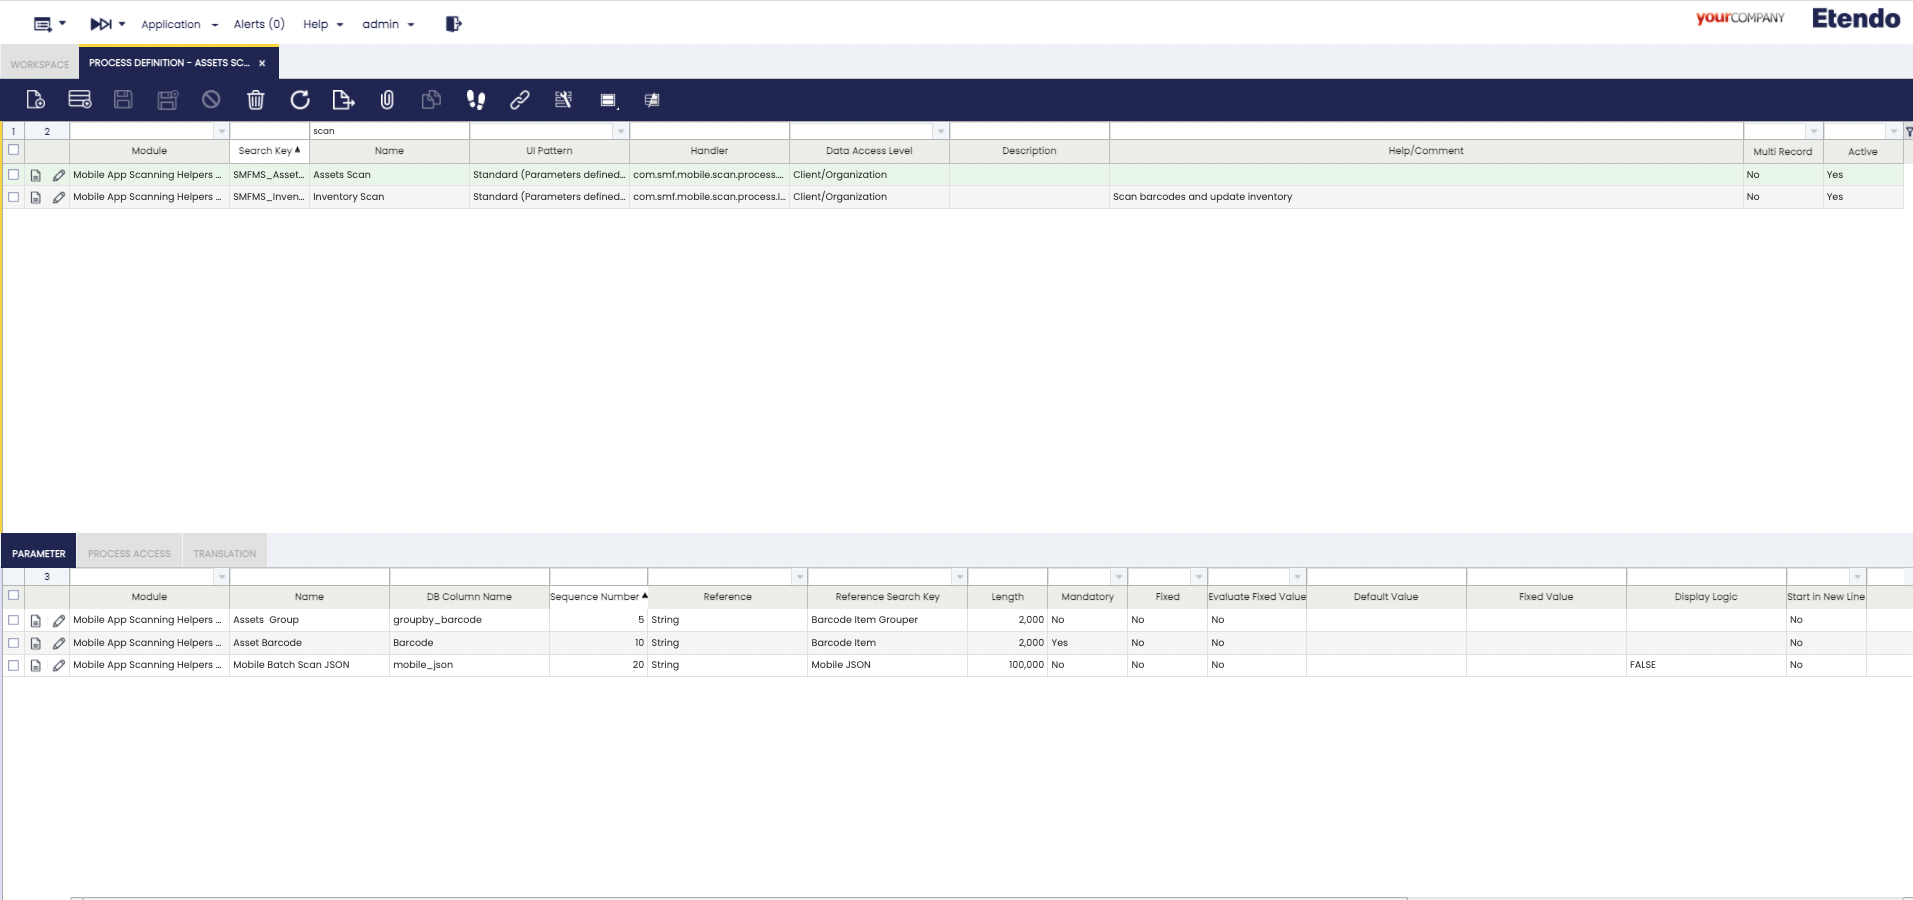
- Module: It refers to the module where the process will be added.
- Identifier: It is the identifier used to save the process in the database.
- Name: It is the name assigned to the process, which will be shown in the application.
- UI pattern: you must select standard.
- Handler: here you enter the Java class that is executed when the process is invoked.
- Data access: you must select Entity/Organization.
- Help/Comment: This section is displayed when the process is started. It briefly describes to the user what the process will be about.
- Parameter:
- Module: Module to which the parameter belongs, by default it is the same as the one assigned to the parent process.
- Name: It is the name that will be shown inside the entries in the mobile application.
- DB Column Name: It is the name with which the parameter is stored in the database.
- Sequence: It is an identifier of the order in which the fields are displayed.
- Reference: It is an identifier of the type of reference stored.
- Key Reference: It is the specific type of the referenced data.
- System element: This field refers to the type of data associated to the parameter.
- Help/Comment: Must be completed in case you want to show help on how the process continues when the parameter is displayed.
Info
It is important to define all the parameters specified in the screenshot, and with the same types of references for the mobile process to behave properly.
The name of each parameter must be customized for each process. Optional: It is posible to add a selector (in case the element to scan has selectors defined) and quantity parameter (to define the amount of items scanned). -
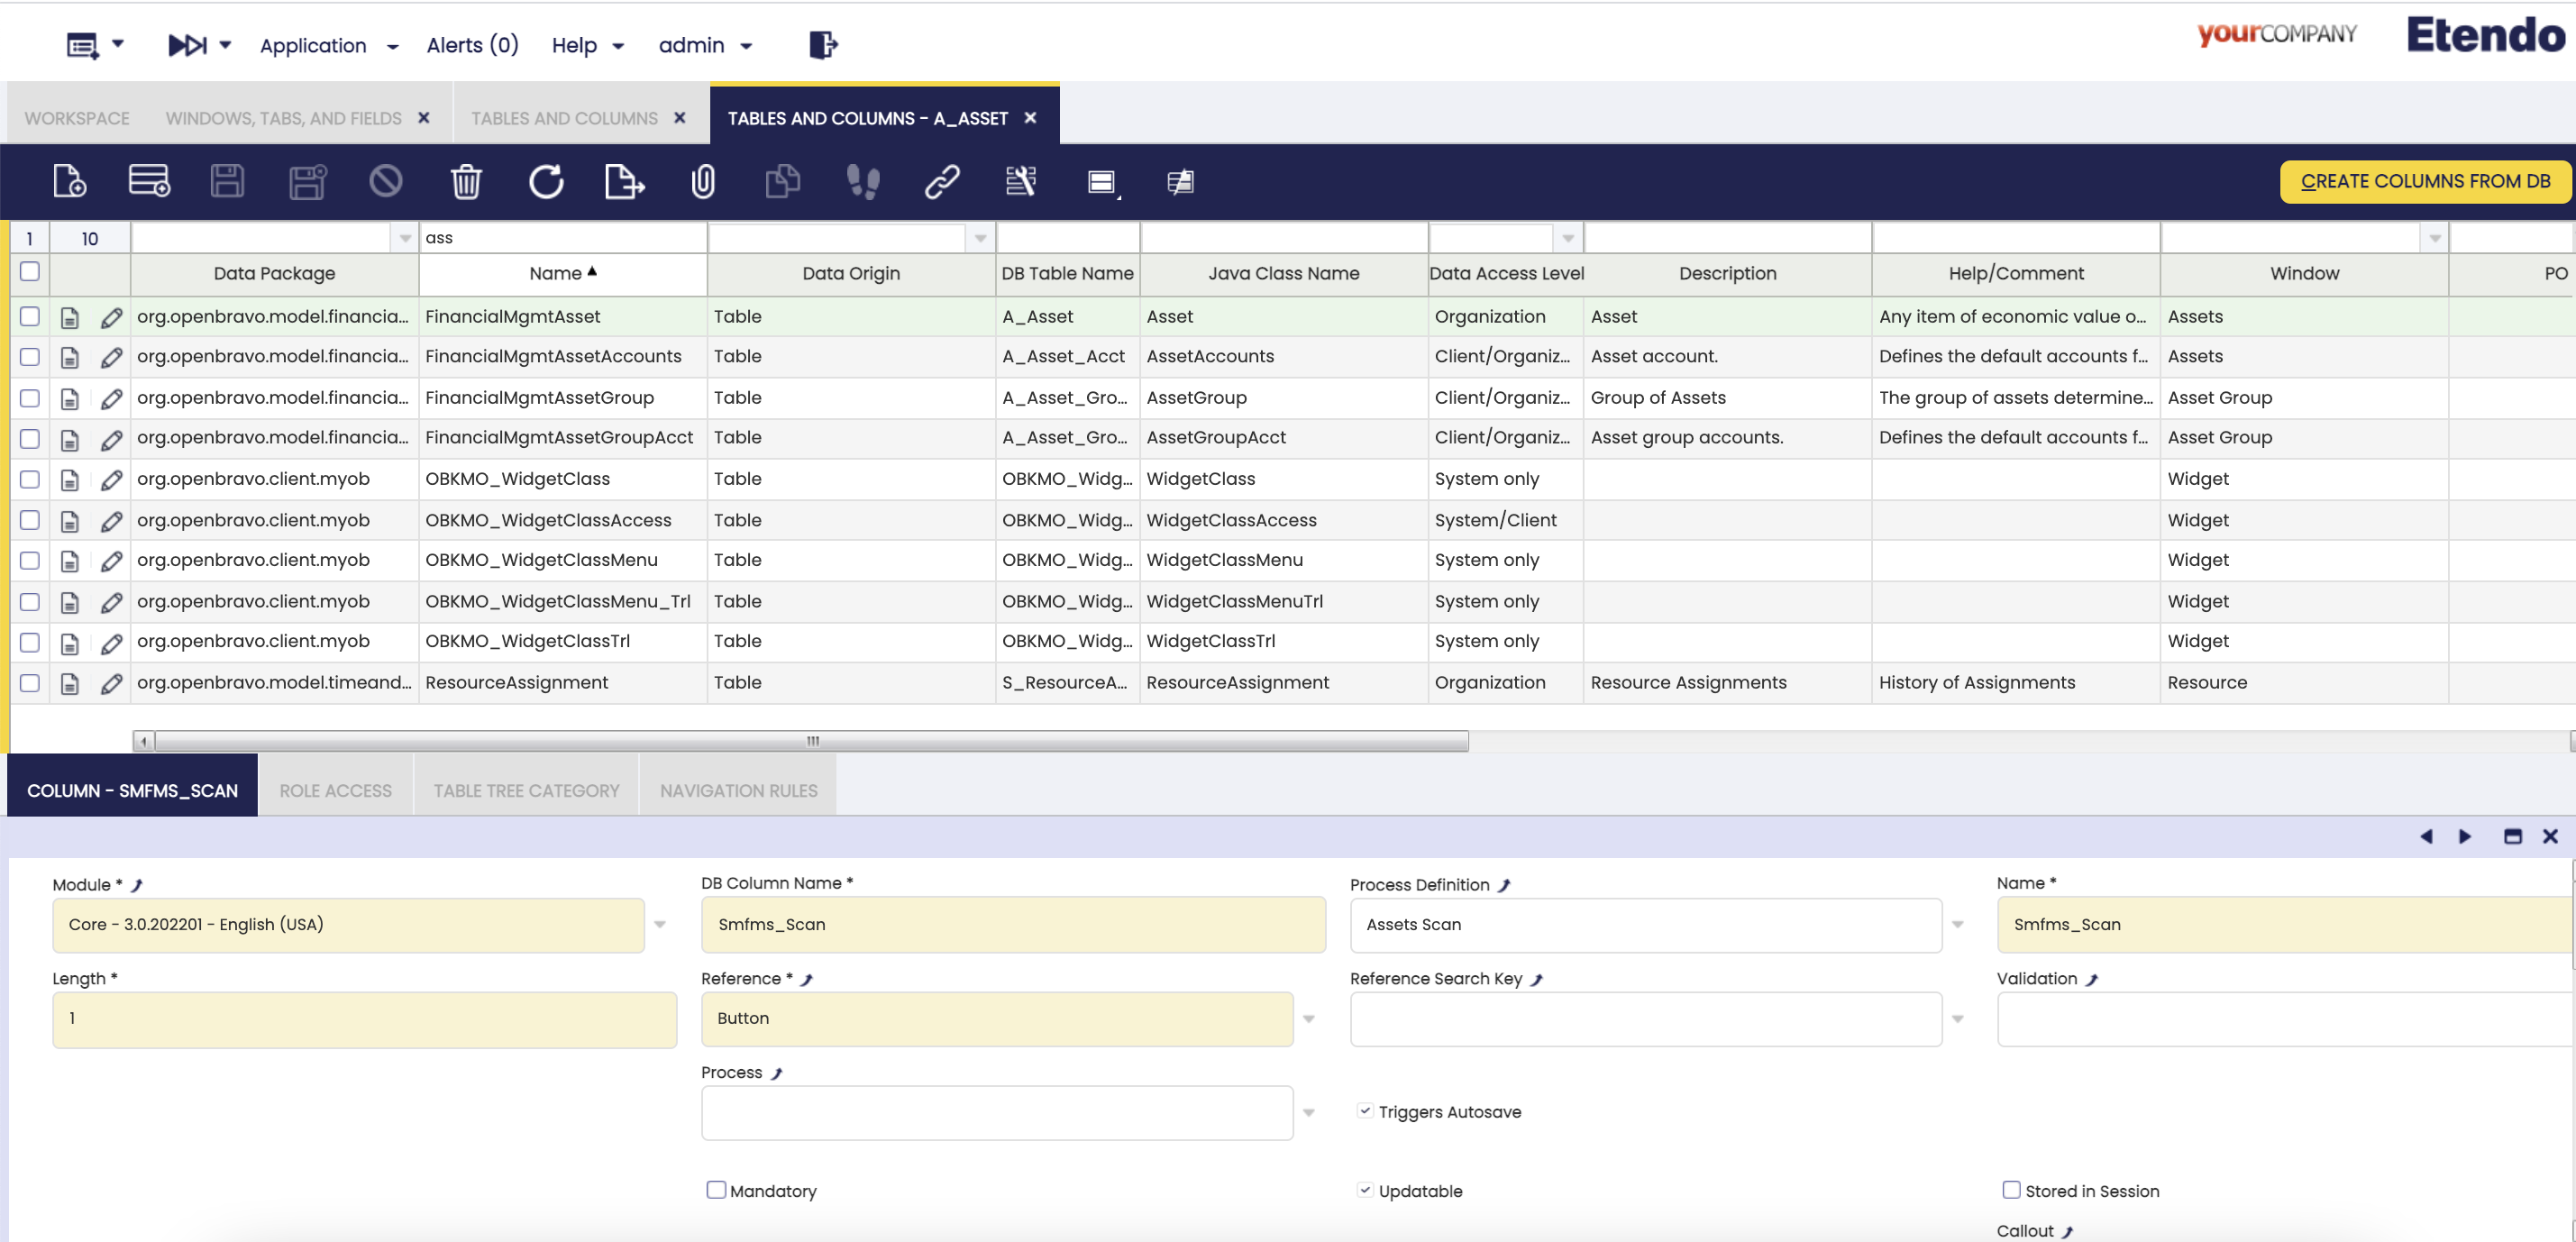
Define a db column in the table in which you want to add a scan process, to add a button to execute the process. E.g.:
-
To associate the process with the button,open
Aplication>Aplication Dictionary>Tables and Colums, search the table and press CREATE COLUMNS FROM DB. This process will create the column. -
Change the reference to Button and in Process Definition select the process created recently.
-
In
Application>Application Dictionary>Windows,Tabs and Fields, search for the windows where you want the process. E.g. Search asset windows and then assets scan field in the main tab search. Uncheck "Displayed" (because the scan should only be shown in the mobile app).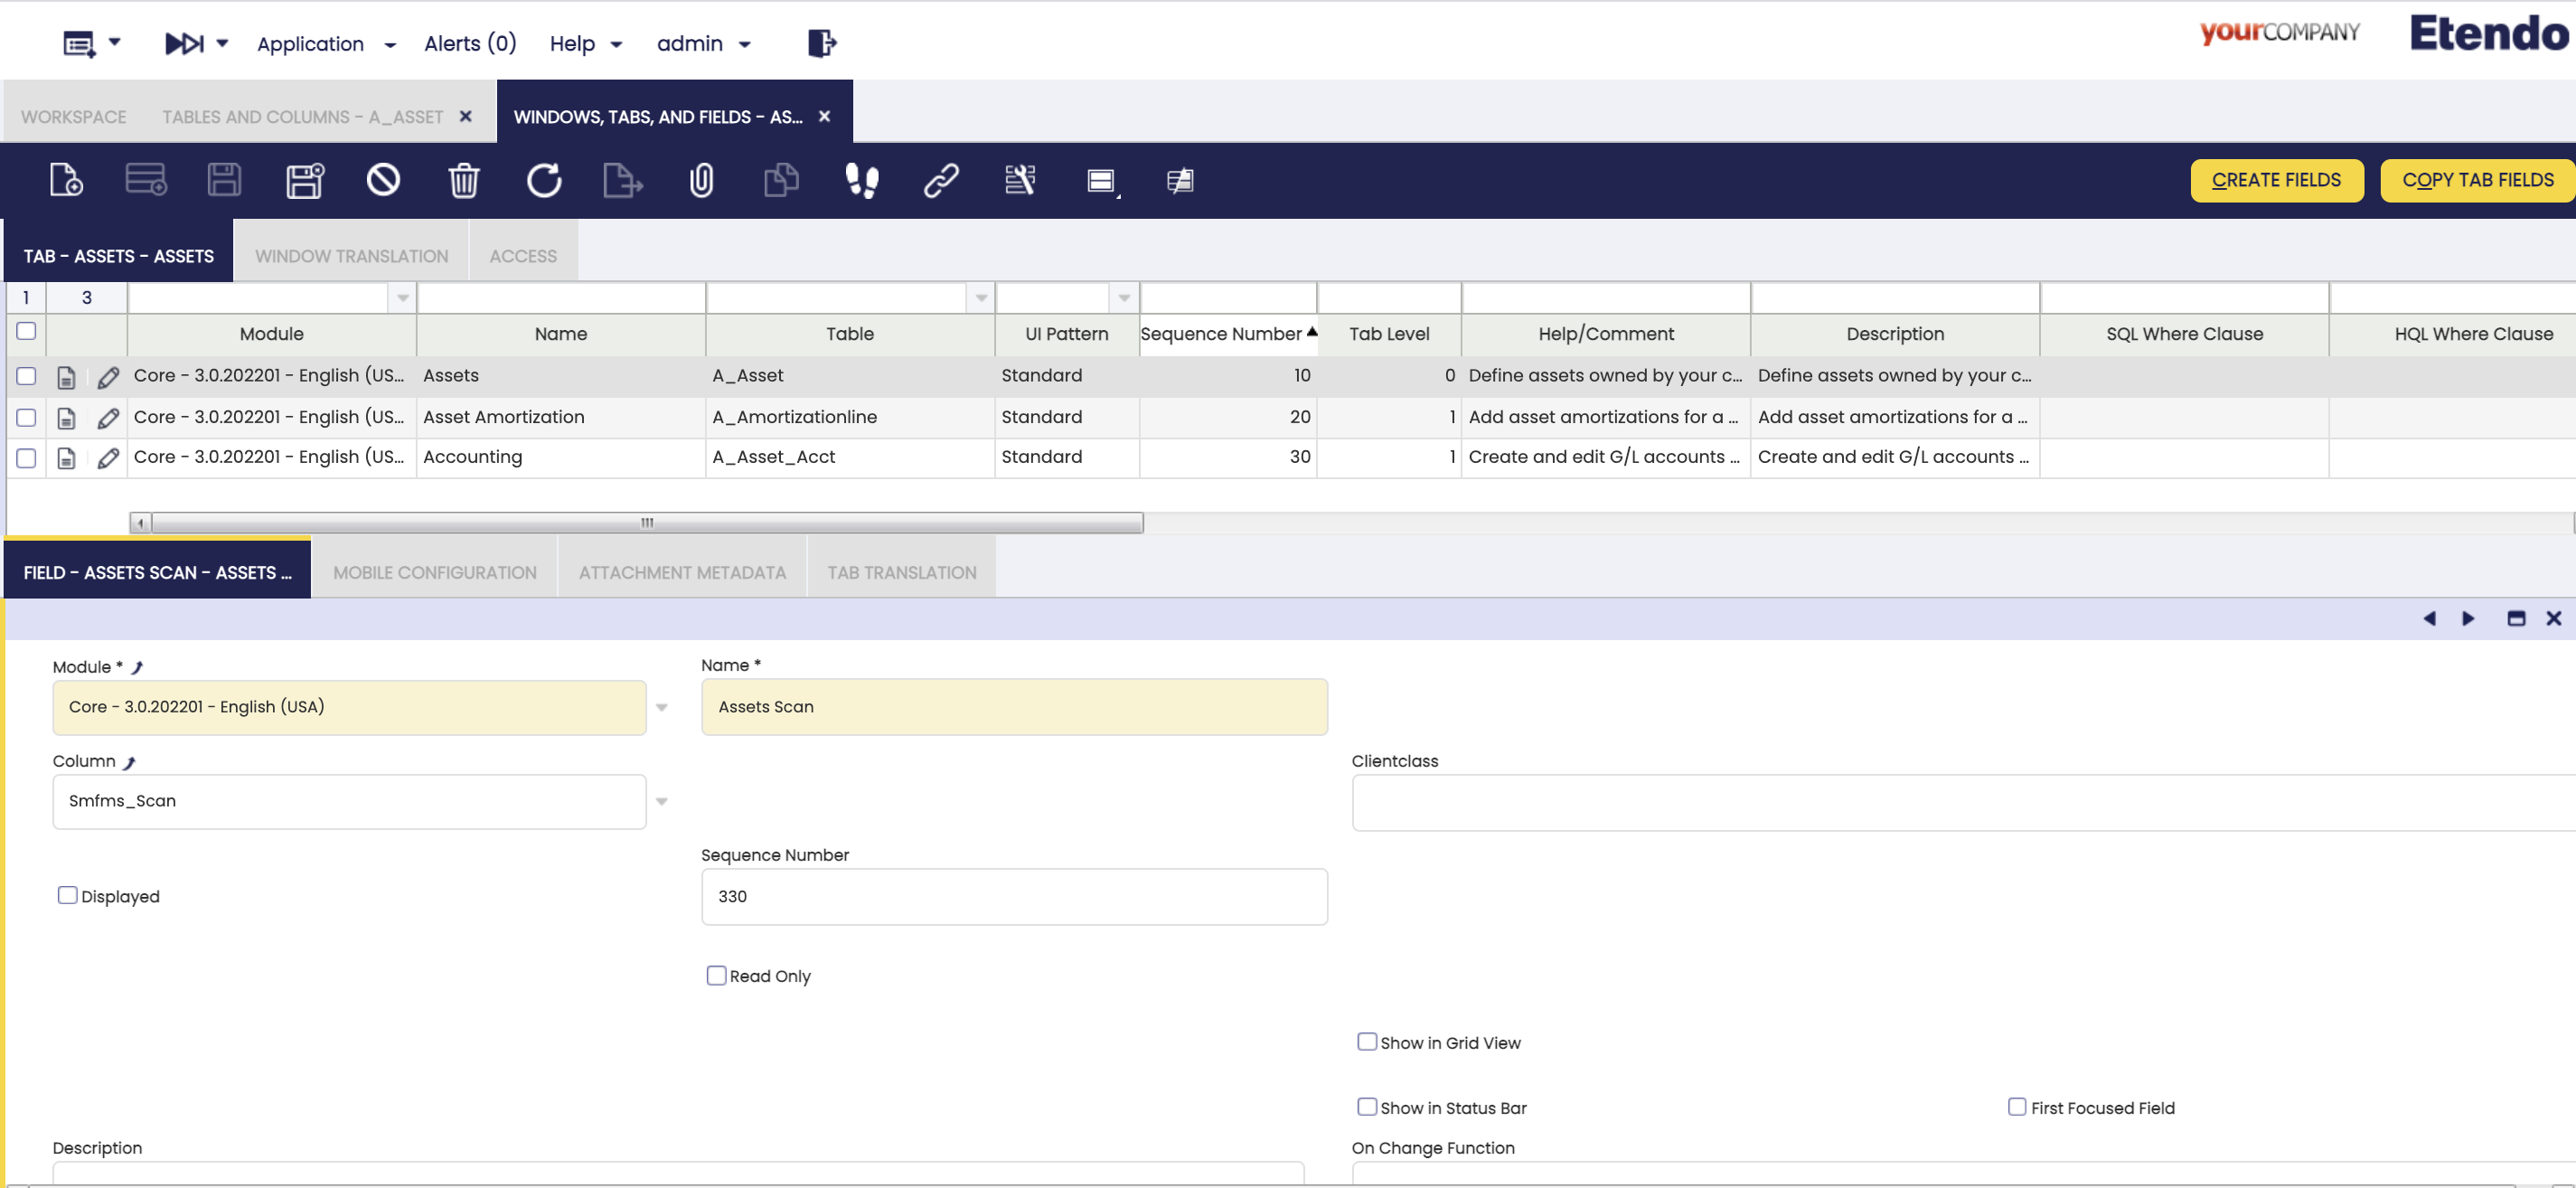
Success
When the process is executed from the mobile application, a Json will be sent to the backend with all the scanned information. This data must be processed from the Java class defined in the handler and the expected functionality must be performed.
An Example of this Java class is InventoryScan, which can be found in the com.smf.mobile.scan module.
This work is licensed under CC BY-SA 2.5 ES by Futit Services S.L.