Setup
Overview
This section describes the windows that are necessary to configure the accounting functionalities of Etendo. The corresponding windows are:
Accounting Transaction Details
Balance Sheet and P/L Structure Setup
Open/Close Period Control
Introduction
Open/Close Period Control feature manages the periods of an organization. This feature applies to organizations for which the "Period Control" feature is enabled.
The Period Control feature allows the user to assign a Fiscal Calendar containing years and periods (normally months) to an organization.
Overall, the "Period Control" and the "End Year Close" processes can be executed in Etendo by following the steps recommended below:
- The creation of the Years and the Periods (i.e. monthly periods) in the "Fiscal Calendar" window
- The opening of all the period/s, that means including the "13th Period" or adjustment period, in this window
- The closing of the standard period/s, that means excluding the "13th Period" or adjustment period, in this window.
This step can be done once the corresponding transactions have been posted to the ledger within a "standard" period.
Info
It is not mandatory to close the standard periods of a given year before running the Close Year process.
Closing the standard periods helps to track the periods which have been already reviewed and adjusted if required, and therefore closed in order not to allow any further posting within those periods.
- The posting of the accounting adjustments to the ledger if any, in the "13th Period" by using a G/L Journal/s.
- The execution of the Close Year process in the "End Year Close" window.
This process generates the closing accounting entries such as the P&L closing entry, and also closes the standard and adjustment periods if those are still open. After the Closing of the Year, all its Periods will be in Permanently Closed status. A Period in Permanently Closed can not be reopened, it is necessary to Undo the Closing of the Year first.
Additionally, the Undo Close Year process undoes all what has been done and therefore accounted for by the close year process. Besides, this process opens all the periods which were closed.
This is done to allow that the corresponding changes can be posted to the ledger as required in a standard period.
Once the corresponding changes have been accounted for, the "Close Year" process can be run once again. This process generates the closing accounting entries and closes all the periods again.
As already mentioned:
It is not possible to create years and periods directly on this window, use the Fiscal Calendar window to create new years and periods.
It is not possible to generate the closing accounting entries directly on this window, use the Close Year process which can be found in the End Year Close Window.
Finally, it is also possible to check the "Status" of a given period is to navigate to the Period Control tab of the Organization window.
Period Control
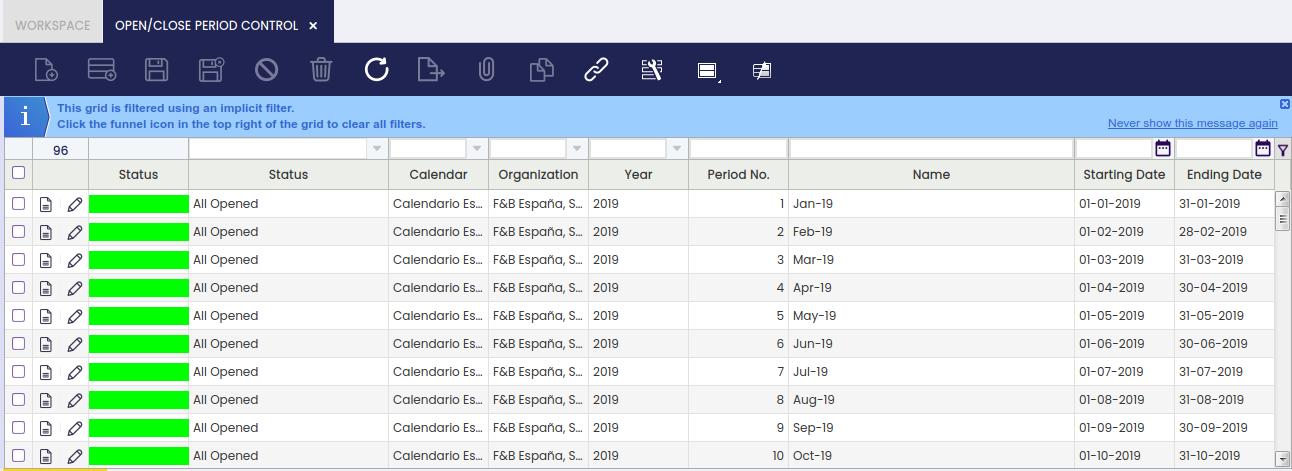
In Open/Close Period Control window all the Periods previously created in the Fiscal Calendar window are shown.
However, the records are filtered by their "Status" and "Organization", by showing only the Periods which are not in Closed Status and belong to the Organization in which the User is logged in. These filters can be removed by clicking on the funnel icon.
This window shows two Tabs. The first Tab shows all the existing Periods. Once selected a record in this Tab, the lower one shows all the Document Types and their Status in that Period. With this layout, it is possible to easily manage the status of a Period as a whole as well as the status of a particular Document Type inside a specific Period.
The way to manage the Opening/Closing of a Period is:
- Use the filters of the grid to show the desired Periods.
- Select the Periods for which the action is going to be performed.
- Click on the Open/Close Period, select the action to perform, and click OK.
Once done, Etendo informs that the process has been completed successfully.
The way to manage the Opening/Closing of a particular Document Type for a specific Period is similar:
- Use the filters of the grid to show the desired Document Type.
- Select the Document Types for which the action is going to be performed.
- Click on the Open/Close Period, select the action to perform, and click OK.
Once done, Etendo informs that the process has been completed successfully.
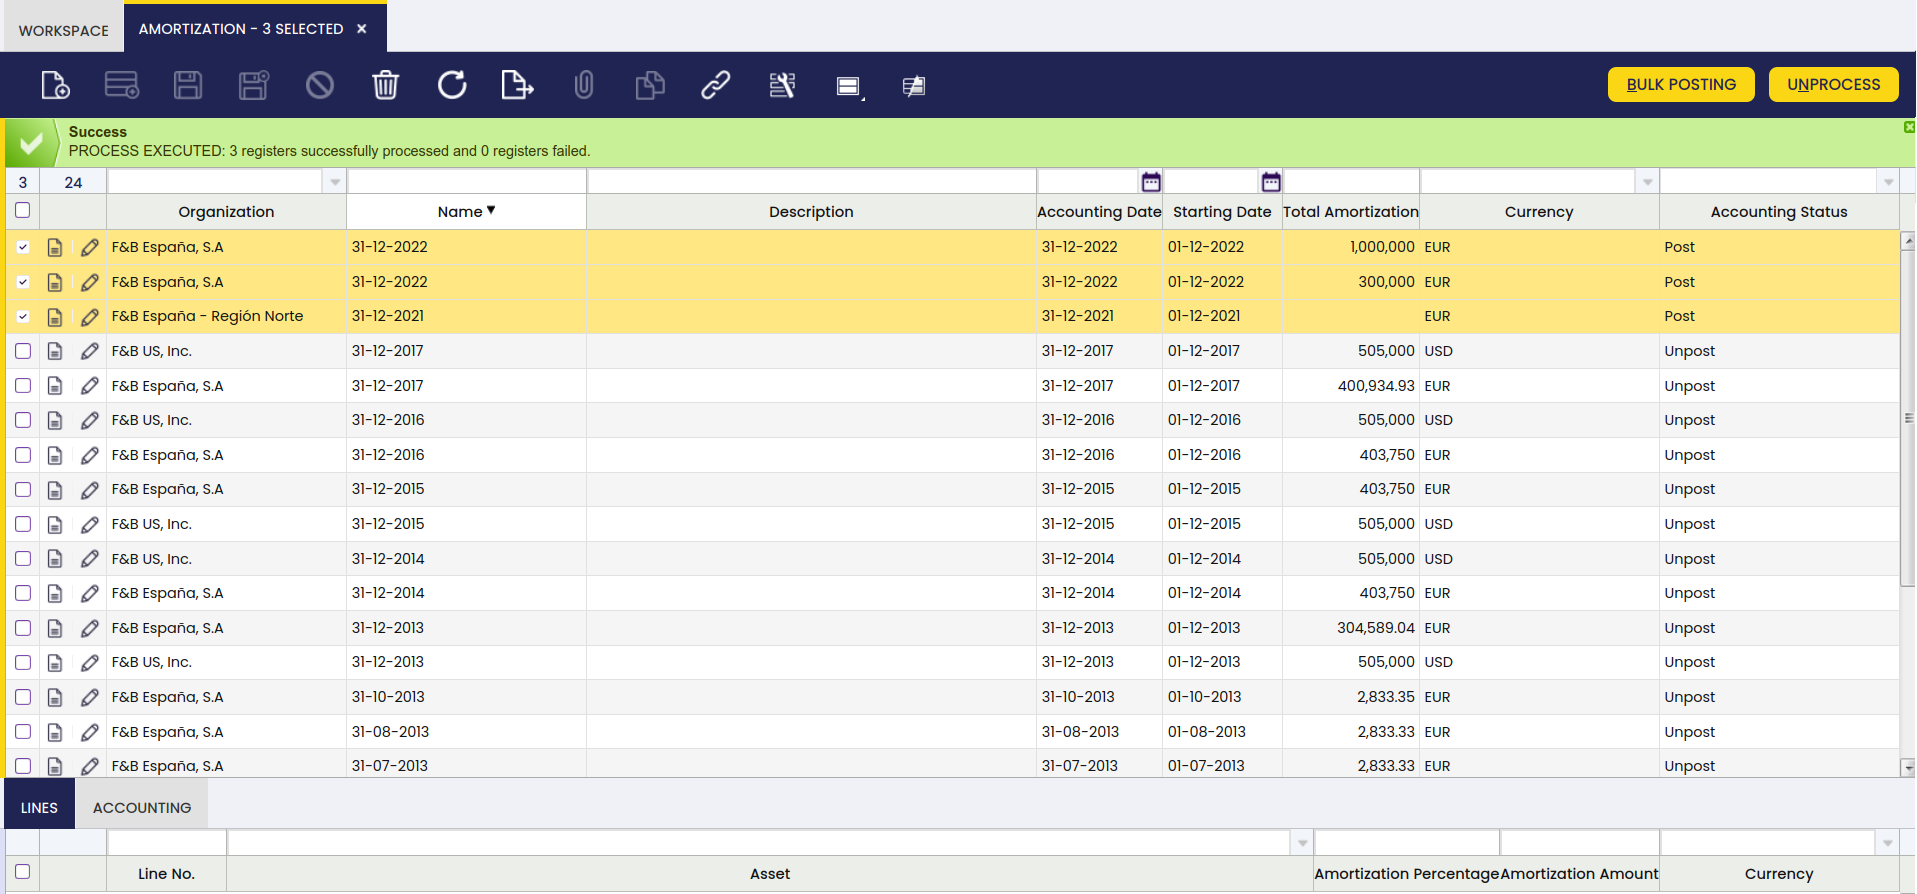
As shown in the image above the main fields in this window are:
- the Status. It is split in two columns. One that represents the Status with a color code, making it easier to understand the situation at a quick glance. The other one represents the Status by its name, making it possible to filter the records shown. The possible Status values are:
- All Never Opened, colored in gray. Recently created Periods.
- All Opened, colored in green. All the Document Types are open for this Period.
- All Closed, colored in red. All the Document Types are closed for this Period.
- Mixed, colored in orange. Not all the Document Types have the same Status value in this Period. For more information, refer to the Documents Tab below.
- All Permanently Closed, colored in red. All the Document Types are Permanently Closed for this Period.
- the Calendar
- Etendo automatically displays the calendar of the organization, as an organization can only have one calendar assigned. In fact, this field is a read-only field
- the Organization
- the Year
- the Period No.
- the Name of the Period
- the Starting Date of the Period
- the Ending Date of the Period
These fields can be used as filters to show the desired records. For example, filtering by a Calendar, and Organization and a Year it is an easy way to show all the Periods of a particular Year.
Then it is possible to select all records shown and Open or Close all of them at once.
- The Period Actions available are:
- Open Period
- This action opens the period/s.
- Close Period
- This action closes the period/s.
Once a period is closed, it is not possible to post or to undo the posting of any transaction in such period/s. A closed period/s can always be re-opened by just selecting it and executing the action "Open Period" for the period/s.
- This action closes the period/s.
- It is only possible to open and close the accounting periods of "Legal with Accounting" Organization types for which Allow Period Control check is enabled
- Open Period
- If a period is open for all document types, but it is closed for a given document type, for instance AP Invoice, it will be possible to post transactions of any type within that given period but AP Invoice transactions.
Period Control Example
The organization in this example has created three consecutive years and has open all the periods including the "13th Period" as shown in the image below:
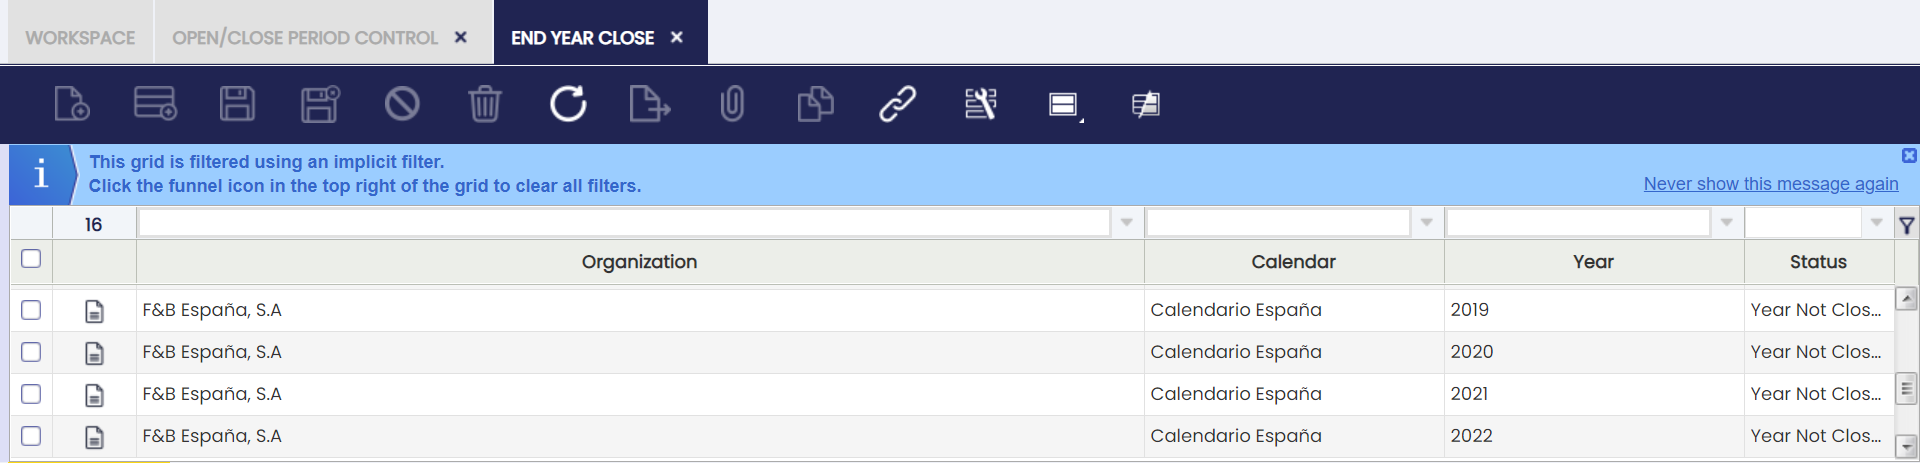
The configuration above means that the organization in this example can post any document to the ledger at any period within those 4 years. If the organization tried to post a sales invoice in Dec 2018, Etendo will show an error as that year/period does not exist.
The organization in this example needs to close the year 2019.
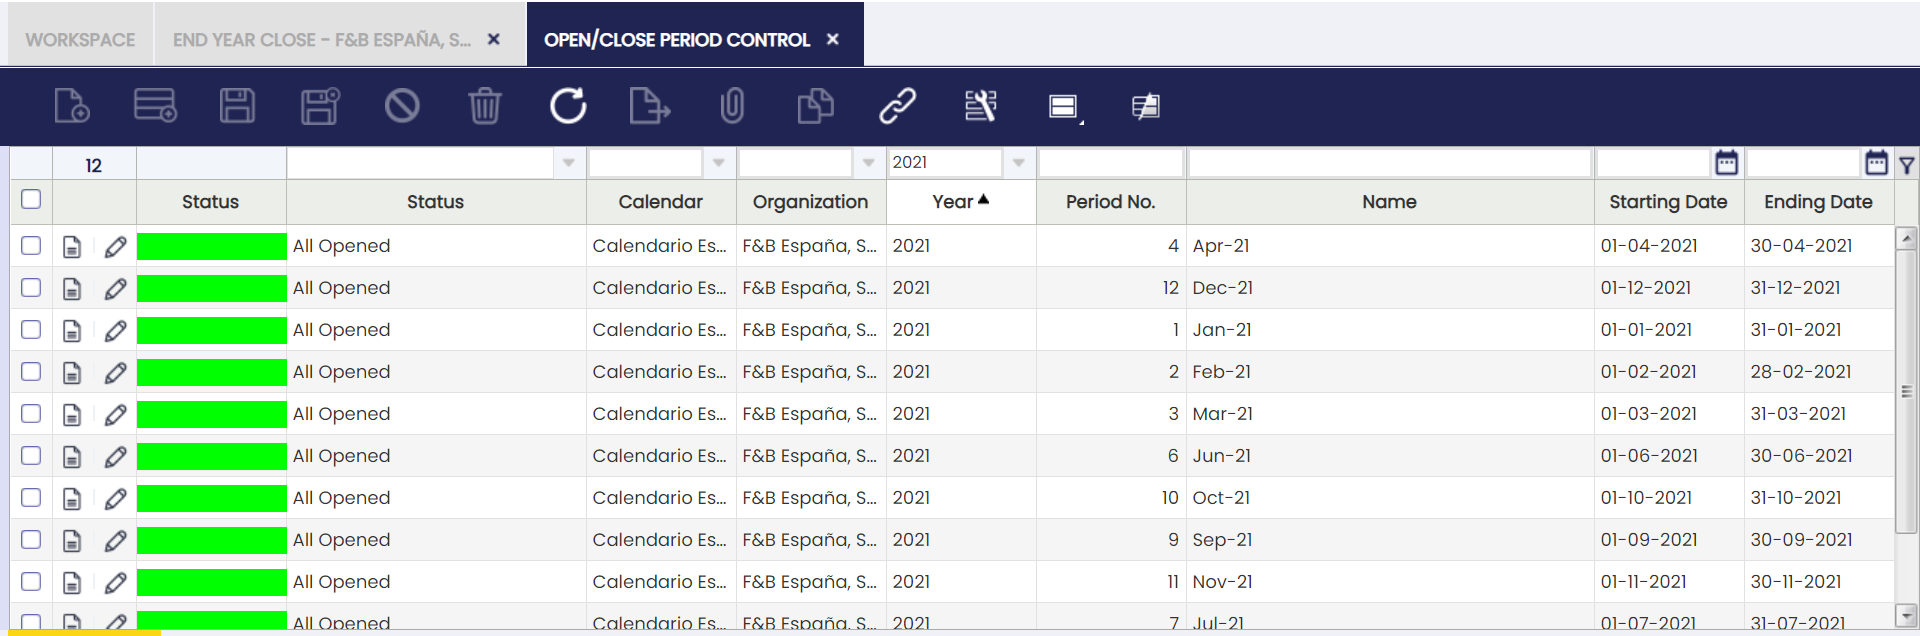
Before running the "Close Year" process for 2019, the organization in this example closes all the 2019 standard periods until Dec-19 in order not to allow any further accounting on any 2019 standard period. The process to do that is:
- Move to Open/Close Period Control Window.
- Use the filters of the grid to show the desired Periods. In this example, filter by Calendar, Organization and Year (i.e. 2019)
- As the Year has all its Periods Open, including the Adjustment Period, the Window should show thirteen records.
- Select all the periods except the 13th Period and click on the Close Period button and select the action "Close Period" (as this one allows the user to reopen the year/period if needed)
Above action closes all the 2021 standard periods until Dec-2021, therefore it is not possible to post any transaction to the ledger in any 2021 standard period anymore but:
-
to post "G/L Journals" to the ledger in the "13th Period"
-
and to post the "Closing" entries automatically created by the Close Year process to the ledger
unless:
- the corresponding 2019 standard period/s is/are re-opened. That is only possible if the 2019 year is not closed, otherwise the Undo Close Year needs to be run.
Documents
When a Period is created in the Fiscal Calendar Window, it is possible to Open or Close it in this Window. Performing these actions directly for that Period affects all the associated Document Types at once.
For example, opening a Period results in opening all the Document Types for that Period, making it possible to post transactions of any type within that given Period.
But it is also possible to Open or Close each Document Type in the same Period.
Once a Period is selected in the Periods Tab of this Window, all the available Document Types are shown in the Documents Tab, making it possible to select any of them and Open or Close it.
The way to manage the Opening/Closing of a particular Document Type for a specific Period is:
- Use the filters of the grid to show the desired Document Type.
- Select the Document Types for which the action is going to be performed.
- Click on the Open/Close Period, select the action to perform, and click OK.
Once done, Etendo informs that the process has been completed successfully.
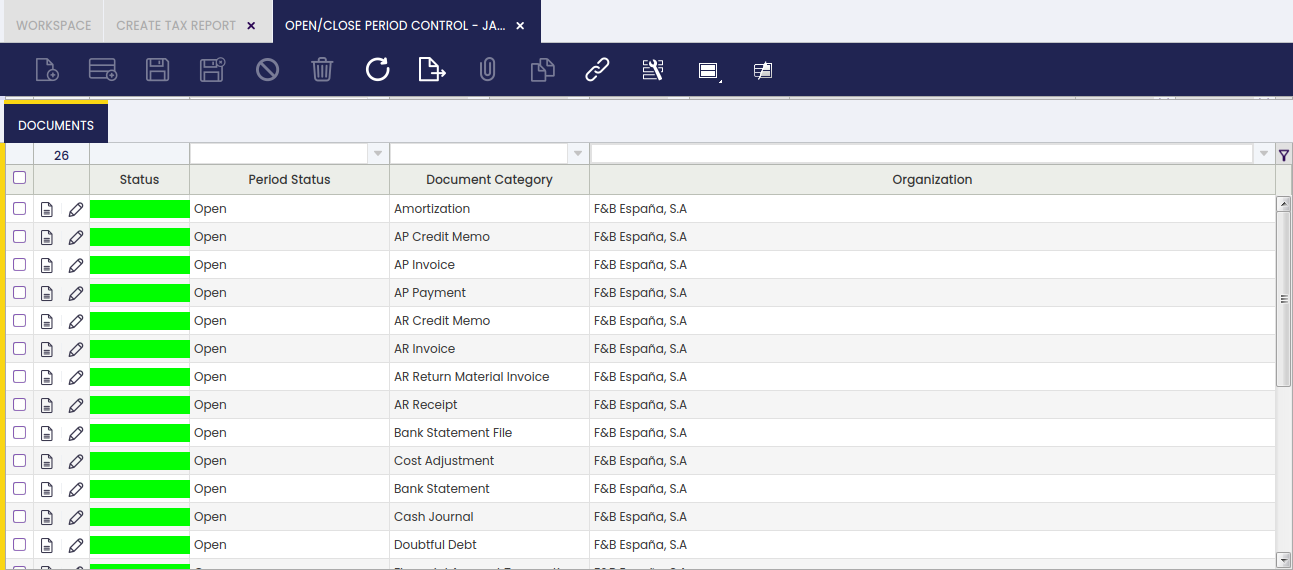
- As in the Periods tab, the Status is split in two columns. One that represents the Status with a color code, and one that represents it by its name. The possible Status values are:
- Never Opened, colored in gray. It belongs to a recently created Period.
- Open, colored in green.
- Closed, colored in red.
- Permanently Closed, colored in red. Document Permanently closed. Only by reopening a Year, it is possible to Open it again.
Notice that:
- 13th Period has only one Document Type, GL Journal, since in the Adjustment Period only GL Journal Transactions can be posted.
- If a period is open for all document types but it is closed for a given document type, for instance AP Invoice, it will be possible to post transactions of any type within that given period but AP Invoice transactions.
- If not all the Document Types of that Period have the same value, for example some are Closed and some are Open, then the Status of the Period is Mixed.
Financial Type
Info
To be able to include this functionality, the Financial Extensions Bundle must be installed. To do that, follow the instructions from the marketplace: Financial Extensions Bundle. For more information about the available versions, core compatibility and new features, visit Financial Extensions - Release notes.
Introduction
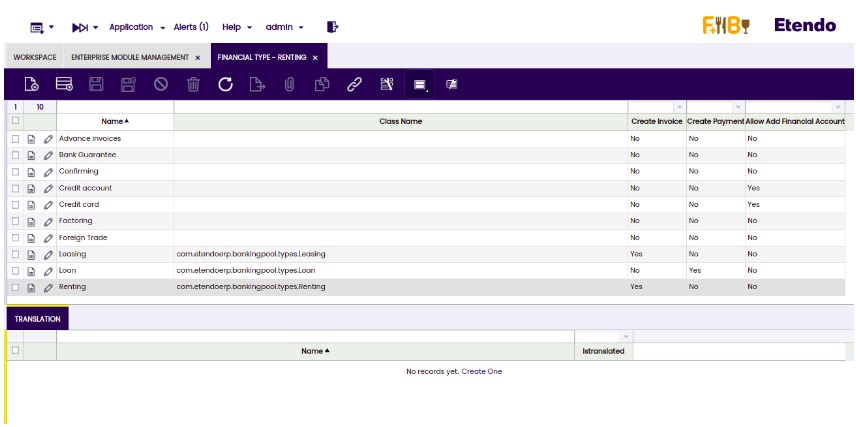
In this window, the user can configure the different options to use in the Financial Type Configuration window.
Info
For more information, visit Financial Type Configuration.
How to install the Financial Type dataset
Go to the Enterprise Module Management window and select the organization needed to import the date by default. Then, check the dataset called "Banking Pool" and click the OK button.
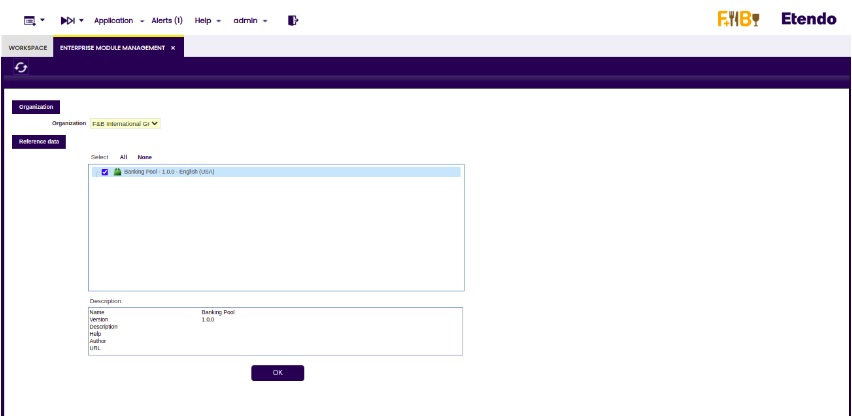
The information imported from the Financial Type window is shown.
Period Control Log
Introduction
This window shows the log for period control.
The periods of a year can be opened, closed and permanently closed. The Period Control Log Window shows all the Openings and Closings of the Periods that had taken place in the application, therefore it can be used to understand how the Status of a Period has changed over time.
When a Period is Open or Closed through the Open/Close Period Control Window, or has been permanently Closed as a result of the closing of a Year through the End Year Close Window, a record is created in the Period Control Log.
For example, this screenshot shows the Period Control Log for an Organization that has opened all of its Periods for the Year 2019:
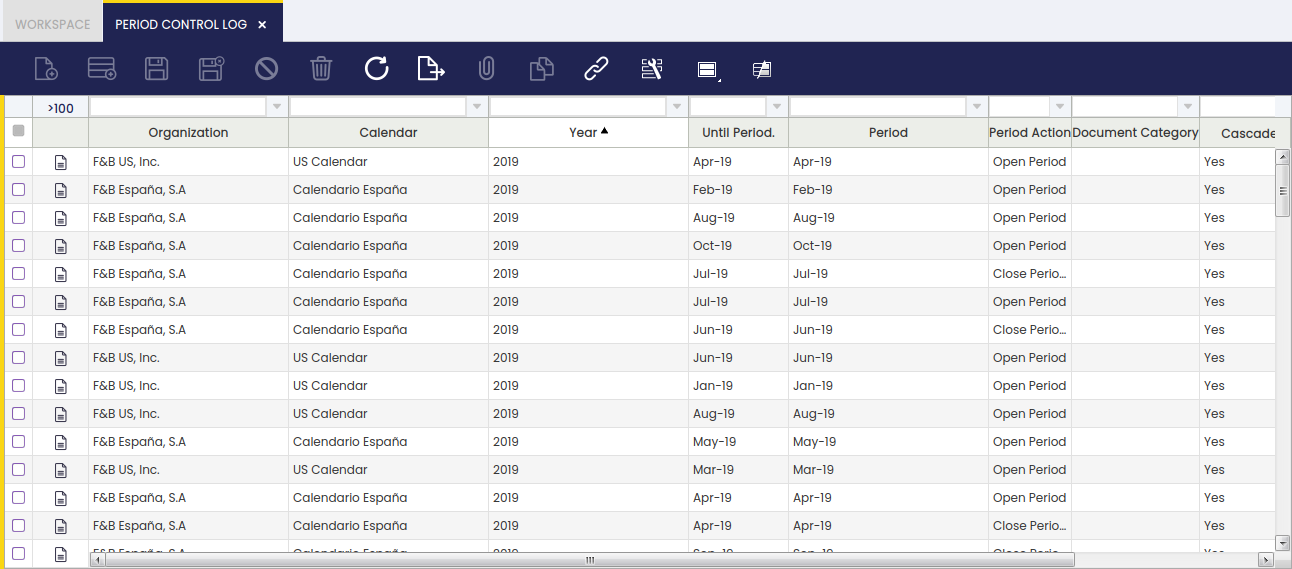
As shown in the image above, the main fields in this Window are:
- Organization.
- Calendar.
- Year.
- Period. The starting Period from which the Period Action is going to be performed (usually matches the Until Period)
- Until Period. The ending Period to which the Period Action is going to be performed (usually matches the Period)
- Period Action. The action that has taken place. It can be Open Period, Close Period or Permanently Close Period.
- Document Category. If the Period Action has been done only for Document Type, it will be shown here. This means that the Period Action has affected only the shown Document Type for that Period, not all the other Document Types, which remains in the same status as before.
Account Tree
Introduction
An account tree is the way Etendo captures the chart of accounts of an Organization. The chart of accounts is a list of the accounts used in an organization's general ledger.
Some countries such as Spain or France require that a specific chart of accounts is used in the statutory books, therefore the authorities can see the same list of accounts and the same level of detail in the P&L and Balance Sheet. In that case, Etendo provides a "Localization Pack" which includes the Statutory Chart of Accounts.
For instance, the Spanish Localization Pack includes
- the General Spanish CoA
- the PYMES Spanish CoA.
- and the Abreviado Spanish CoA.
After installation, the Charts of Accounts are available for selection during the Initial Client Setup and the Initial Organization setup.
On the other hand, some countries such as the USA do not require that specific level of detail.
Info
Each organization can define the chart of accounts that best suits their practices.
In that case, Etendo provides a Generic Chart of Accounts module which delivers a standard list of accounts which can be evolved for the organization's needs. After installation, the generic Chart of Accounts is available for selection during the Initial Client Setup and the Initial Organization setup.
As explained in the Chart of Accounts Module article, a chart of accounts module basically includes a CSV file which contains the account tree structure.
In Etendo, that creates:
- the organization's Account Tree or Chart of Accounts
- and besides a defaulted General Ledger configuration.
It is important to remark that it is not possible to apply a Chart of Accounts in the Enterprise Module Management window because a Chart of Account is not a dataset but a CSV file.
If the legal entity has already been created, the chart of accounts can be imported by using the Import Data module, this module allows importing products, business partners and accounts among others.
Additionally, a CSV file can be imported while running the Initial Client Setup or while running the Initial Organization Setup if the checkbox "Include Accounting" is checked, therefore the CSV file or accounting file can be selected.
Finally, a chart of accounts can also be created manually, regardless it is recommended to start from a sample chart of accounts like the generic one and evolve it for the company’s needs rather than starting from scratch.
Element
The account tree window allows the user to review and maintain the chart of accounts imported through a chart of accounts module, as well as to create new ones from scratch.
If a Chart of Accounts module or an accounting CSV file is installed and selected at client level through the Initial Client Setup process:
- the chart of accounts automatically created can be shared by any organization available in the client, as it is assigned to the organization (*)
As a side note, this is not the preferred method but to install it at organization level, see next paragraph.
If a Chart of Accounts module is installed and then selected at organization level through the Initial Organization Setup process, the chart of accounts automatically created is linked to the organization being created.
Element Value
Element value tab lists every chart of account elements from the chart of accounts headings to the subaccounts.
Every Chart of Accounts in Etendo contains different types of elements. There are four types of elements:
- "Heading", "Breakdown" and "Account" elements help to structure the chart of accounts in a way that the financial reports can be produced based upon that structure
- "Subaccount" element allows the user to post the transactions to the ledger
Besides, it is well-known that every account, subaccount in Etendo terms, needs to be included in a financial statement:
- "Asset", "Liability" and "Owner's Equity" account types need to be included in the Balance Sheet
- while "Expense" and "Revenue" account types need to be included in the Profit & Loss.
The best way to understand how a chart of accounts is captured in Etendo is by pressing the "Tree" icon 
Tree icon opens a new window which shows one tree branch per financial statement:
- Balance Sheet
- Profit & Loss
- and Temporary default accounts. This branch of the account tree gathers temporary defaults accounts which are not ledger accounts.

Besides, each tree branch contains several elements inside structured in a hierarchical way, for instance:
- Balance Sheet branch is split into:
- Assets
- Liabilities and Owner's Equity
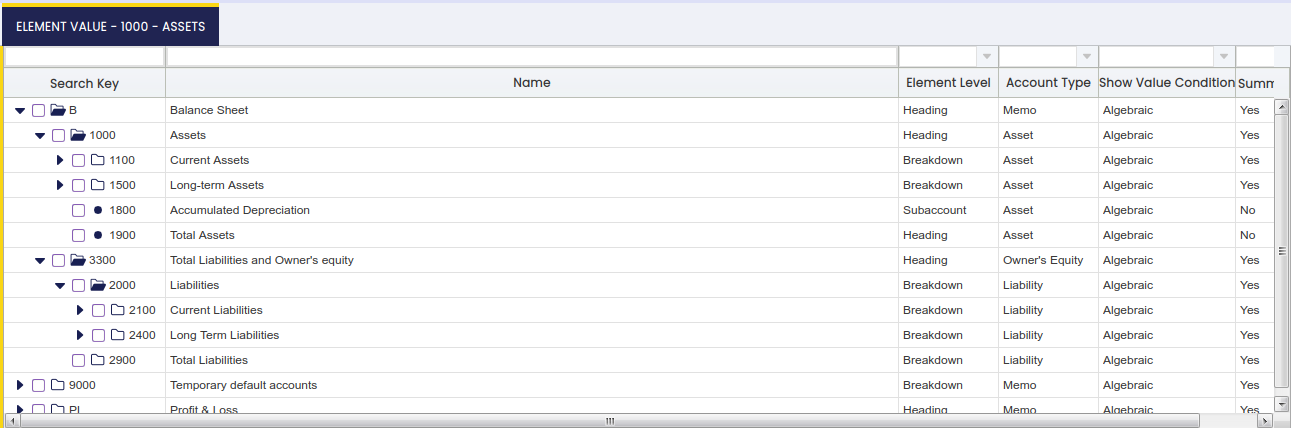
As shown in the image above "Assets" is also split into:
- Current Assets
- Long term Assets
- and Accumulated Depreciation
Same way "Equity" is also split into several accounts, in Etendo terms "subaccounts", such as "Capital Stock" or "Retained Earnings".
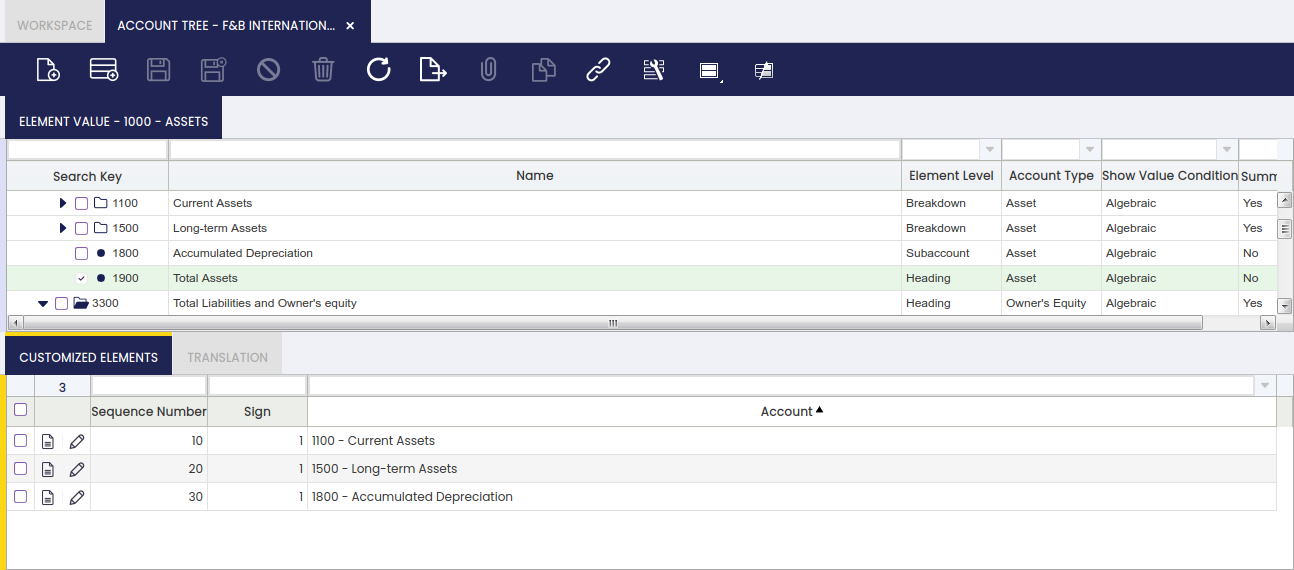
Back to the "Element Value" tab, there are several basic fields which help to define each chart of account element:
- the "Search Key" and the "Name" identifies the chart of account element.
- The search key can either be a single letter, a word or a number, however it is important to be aware that the "Search key" field is the field that Etendo uses while helping the user to create an account tree element.
- the Account Sign field is only shown and therefore editable if the general ledger configuration linked to the account tree is "NOT" set as "Centrally Maintained".
In that case, the account sign of each account tree element defines how the balance of that account is going to be shown in the financial statements:- if the account sign of an account tree element is "Debit", the balance of that account will then be shown as (Debit - Credit).
- "Asset" accounts type are normally set as Debit, therefore its debit balance is shown as positive in the Balance Sheet.
In the same way, its credit balance is then shown as negative in the Balance Sheet.
- "Asset" accounts type are normally set as Debit, therefore its debit balance is shown as positive in the Balance Sheet.
- if the account sign of an account tree element is "Credit", the balance of that account will then be shown as (Credit - Debit).
- "Liability" account types are normally set as Credit, therefore its credit balance is shown as positive in the Balance Sheet. Same applies to the "Owner's Equity" account type.
- "Revenue" account types are set as Credit, therefore its Credit balance is shown as positive in the P&L report.
- "Expense" account types are set as Credit, therefore its Debit balance is shown as negative in the P&L report.
- if the account sign of an account tree element is "Debit", the balance of that account will then be shown as (Debit - Credit).
- "Element Level". As already mentioned, there are four types of elements which help to structure a chart of accounts in a way that the financial reports can be produced right away based upon the chart of accounts structure.
It is important to remark that it is not mandatory to use the four elements but just the ones which help us to properly structure the Chart of Accounts,
having into account that the lowest one "Subaccount" is the only mandatory one because ledger entries are posted to the ledger through the subaccounts.
The four element types are:- Heading - the elements "B - Balance Sheet" and "1000-Assets" are heading type elements because those are at the top ones having other elements underneath.
- Breakdown - the element "1100 - Current Assets" and "1500 - Long-term Assets" are a breakdown of the heading "1000-Assets".
Often, the assets and liabilities on a balance sheet are broken down into current assets and long-term assets. Breakdown element type helps us to define this kind of situations. - Account - this level would help to split the element "1100 - Current Assets" into "1110 - Cash", "1200 - Accounts Receivable", etc, as a way to distinguish between the different types of current assets.
- Subaccount - this level is the lowest level of detail. For instance, the account element "1110 - Cash" can be split into the subaccounts "1120 - Checking Account" and "1140 - Petty Cash" subaccount to distinguish while posting to the ledger the transactions paid by check from the ones paid by petty cash.
- "Account Type". The options available are Asset, Liability, Owner's equity, Revenue and Expense.
Asset, Liability and Owner's equity account types are included in the Balance Sheet as well as in the "balance sheet closing entry" as described in the Close Year article.
Revenue and Expense account types are included in the Income Statement as well as in the "P&L closing entry" as described in the Close Year article. - "Summary Level" defines if an account tree element groups other levels underneath or not, therefore heading, account and breakdown levels can be marked as summary levels while subaccount should not. There can be heading elements which group other elements underneath, for instance the element "1000-Assets" while there can be heading elements which do not need to group other elements underneath but Customize Elements, for instance the element "1900-Total Assets". The first type needs to be configured as "Summary Level", the second type does not need to. Moreover:
- the amounts displayed in financial reports such as the Balance Sheet and the Income statement for a non-summary element is the sum of the debit and credit amounts posted to that account (subaccount).
The balance of that particular subaccount will then be shown as either positive or negative depending on its account sign or depending on what is centrally configured in the General Ledger Configuration - the amounts displayed in financial reports such as the Balance Sheet and the Income statement for a summary element is the sum of the amounts of the elements underneath.
The balance of that summary element will then be shown as either positive or negative depending on its account sign or depending on what is centrally configured in the General Ledger Configuration.
- the amounts displayed in financial reports such as the Balance Sheet and the Income statement for a non-summary element is the sum of the debit and credit amounts posted to that account (subaccount).
Additionally, there are other advanced fields which also help to configure more unusual scenarios. Those fields are:
- the "Show Value Condition" field defines if a chart of account element balance is going to be shown and taken into account in financial reports or not. The options available are:
- Algebraic, the chart of account element will be shown anyway regardless of the sign of its balance. This is the most commonly used.
- Negative Only, it will be shown only in case its balance is negative
- Positive Only, same as the previous one but just in case its balance is positive.
- "Element Shown" defines if an account tree element is going to be shown in the financial reports or not. This one can be used for elements used to execute calculations which do not need to be shown in a report.
- "Title Node" defines if an account tree element is going to be shown in the financial reports just as a "Title" without including its balance. This option works for heading account tree elements which balance is not 100% accurate for whatever kind of reason as there is another element which gets the correct balance value by using operations or customized elements between a set of given elements.
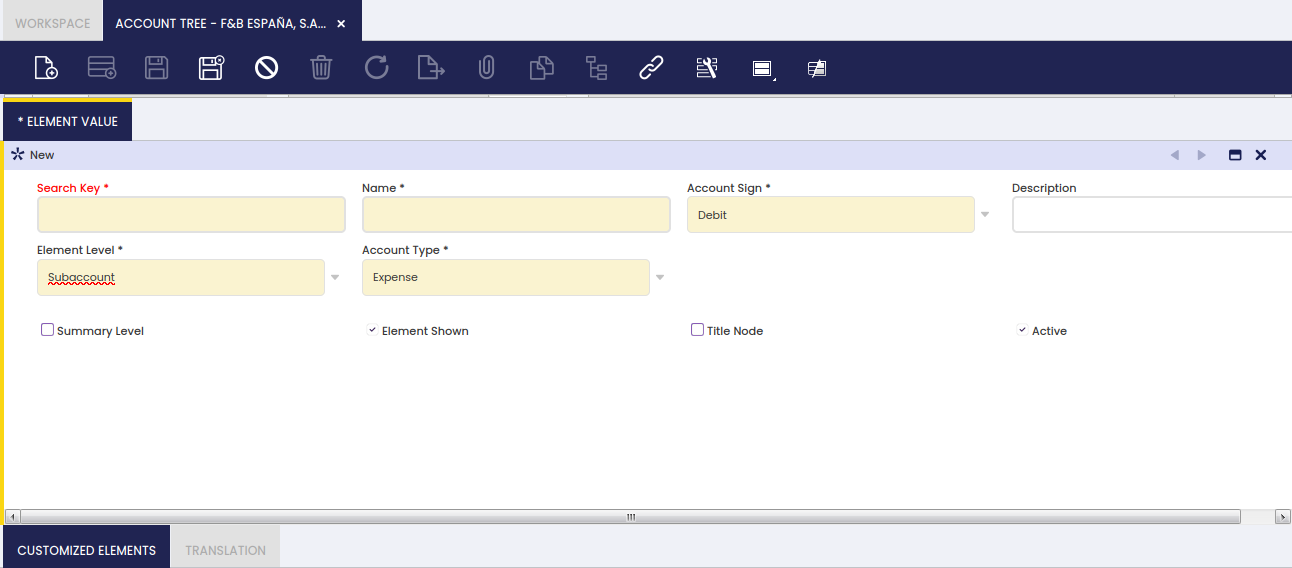
Customized Elements
The customized elements tab allows the user to get an account tree element as a combination of a given list of existing elements.
Once the account tree elements have been selected in a new record and in the correct sequence order, it is not required to specify a sign but just the elements which are going to be included. The customized elements need to be elements located at the same level within the account tree, otherwise a "recursive" calculation may happen.
For instance, the element "1900-Total Assets" is the sum up of three customized elements:
- current assets
- long-term assets
- and accumulated depreciation
as shown in the image below.
Translation
Account elements can be translated to any language required.
Account Tree creation
A chart of accounts creation from scratch implies to create each chart of accounts element one by one:
- Once created, the elements can be arranged in a hierarchical way according to the corresponding financial statement structure by using the "Drag & Drop" function of the Tree Structure feature.
- Moreover, Etendo considers the elements created in an alphanumerical order as a sorted list and finds the position in that sorted list where the new element needs to be positioned.
The steps to follow for the creation of a chart of accounts (CoA) are:
- select the "Organization" for which the CoA is going to be used while posting to ledger, for example "F&B US Inc."
- enter the "Name" of the Chart of Accounts, for example "Test CoA"
- set it up as "User Defined Type" to distinguish it from the imported Chart of Accounts
- select the Tree as "B&F International Group Element Value (Account, etc.).
Move to "Element Value" tab.
The first thing to do in this tab is to create all the "Heading" elements one per each financial statement, for instance "Balance Sheet" and "Income Statement".
Balance Sheet Node:
- create a new record
- enter "B" value in the field "Search Key"
- enter "Balance Sheet" value in the field "Name"
- select "Heading" in the Element Level field
- select "Memo" in the Account Type field
- select the value "Algebraic" in the field "Show Value Condition"
- set the field "Summary Level" to "Yes"
Profit and Loss Node:
- create a new record
- enter "P&L" value in the field "Search Key"
- enter "Profit and Loss" value in the field "Name"
- select "Heading" in the Element Level field
- select "Memo" in the Account Type field
- select the value "Algebraic" in the field "Show Value Condition"
- and set the field "Summary Level" to "Yes"
The next thing to do in this tab is to create one element value per each financial statement node:
- Balance Sheet nodes are "Assets", "Liabilities" and "Owner's Equity"
- Profit and Loss nodes are "Revenue" and "Cost of Goods Sold" among others
Balance Sheet Elements
Let us focus first on explaining the creation of the nodes/elements of a Balance Sheet financial statement.
An organization's balance sheet shows its financial situation at a given point in time, the three sections of a balance sheet are:
- Assets
- Liabilities
- and Owner's equity
therefore the next step to take is to create one chart of account element per each balance sheet node:
Assets Node:
To create a new record, enter a value in the field "Search Key", this value could be a number for instance ("1000") or a name ("Assets").
Info
It is recommended to use a number as that helps while creating a new chart of accounts elements. The following rule is considered while creating new chart of accounts elements:
Etendo first considers the elements in an alphanumerical order as a sorted list, finds the position in that sorted list where the new element needs to be positioned, looks at the element that precedes it and if that element is a summary element and the current element is not a summary one, adds the element as a children of that node otherwise add the element as a sibling of that node.
- enter "Assets" value in the field "Name"
- select "Heading" in the Element Level field
- select the value "Asset" in the field "Account Type"
- select the value "Algebraic" in the field "Show Value Condition"
- and set the field "Summary Level" to "Yes"
Once done, this node is dragged and dropped under the Balance Sheet node.
Liabilities Node:
- create a new record
- enter the value ("2000") in the field "Search Key"
- enter "Liabilities" value in the field "Name"
- select "Heading" in the Element Level field
- select the value "Liability" in the field "Account Type"
- select the value "Algebraic" in the field "Show Value Condition"
- and set the field "Summary Level" to "Yes"
Owners Equity Node:
- create a new record
- enter the value ("3000") in the field "Search Key"
- enter "Owner's Equity" value in the field "Name"
- select "Heading" in the Element Level field
- select the value "Owner's Equity" in the field "Account Type"
- select the value "Algebraic" in the field "Show Value Condition"
- and set the field "Summary Level" to "Yes"
Info
This time there is no need to drag and drop these two last nodes as Etendo does it according to the rule explained above.
Both the Liabilities Node and the Owner's Equity Node are summary nodes, therefore they are added as a sibling of the Asset Node (element that precedes them).
It is very common to break down assets and liabilities into current assets (or liabilities) and long-term assets (or liabilities).
Moreover, "Assets" can be split into "Cash", "Inventory" and "Accounts Receivable", "Liabilities" can be split into "Accounts Payable" and "Note Payable" and finally "Owner's Equity" can be split into "Common Stock" and "Retained Earnings" among others.
All of the above guides the creation of the following sub-nodes at a lower level underneath the heading nodes.
Current Assets Node:
- create a new record
- enter the value ("1100") in the field "Search Key"
- enter "Current Assets" value in the field "Name"
- select "Breakdown" in the Element Level field
- select the value "Assets" in the field "Account Type"
- select the value "Algebraic" in the field "Show Value Condition"
- and set the field "Summary Level" to "Yes"
Once done, drag this node under the "1000-Assets" node.
Long-Term Assets Node:
- create a new record
- enter the value ("1500") in the field "Search Key"
- enter "Long-term Assets" value in the field "Name"
- select "Breakdown" in the Element Level field
- select the value "Assets" in the field "Account Type"
- select the value "Algebraic" in the field "Show Value Condition"
- and set the field "Summary Level" to "Yes"
Info
This time, there is no need to drag and drop this last node as Etendo does it according to the rule explained above.
The Long-term Asset Node is a summary node, therefore it is added as a sibling of the Current Asset Node (element that precedes it).
Current Liabilities Node:
- create a new record
- enter the value ("2100") in the field "Search Key"
- enter "Current Liabilities" value in the field "Name"
- select "Breakdown" in the Element Level field
- select the value "Liability" in the field "Account Type"
- select the value "Algebraic" in the field "Show Value Condition"
- and set the field "Summary Level" to "Yes"
Once done, drag this node under the "2000-Liabilities" node.
Long-Term Liabilities Node:
- create a new record
- enter the value ("2500") in the field "Search Key"
- enter "Long-term Liabilities" value in the field "Name"
- select "Breakdown" in the Element Level field
- select the value "Liability" in the field "Account Type"
- select the value "Algebraic" in the field "Show Value Condition"
- and set the field "Summary Level" to "Yes"
Info
This time, there is no need to drag and drop this last node as Etendo does it according to the rule explained above.
The Long-term Liabilities Node is a summary node, therefore it is added as a sibling of the Current Liabilities Node (element that precedes it).
Cash Node:
- create a new record
- enter the value ("1110") in the field "Search Key"
- enter "Cash" value in the field "Name"
- select "Account" in the Element Level field
- select the value "Asset" in the field "Account Type"
- select the value "Algebraic" in the field "Show Value Condition"
- and set the field "Summary Level" to "Yes"
Once done, drag this node under the "1100-Current Assets" node.
Accounts Receivable Node:
- create a new record
- enter the value ("1120") in the field "Search Key"
- enter "Accounts Receivable" value in the field "Name"
- select "Account" in the Element Level field
- select the value "Asset" in the field "Account Type"
- select the value "Algebraic" in the field "Show Value Condition"
- and set the field "Summary Level" to "Yes"
Info
This time, there is no need to drag and drop this last node as Etendo does it according to the rule explained above.
The Accounts Receivable Node is a summary node, therefore it is added as a sibling of the Cash Node Node (element that precedes it).
Cash Node needs to have subaccounts elements underneath, for instance:
111200 Checking Account
- create a new record
- enter 111200 in the field "Search Key"
- enter "Checking Account" value in the field "Name"
- select "Subaccount" in the Element Level field
- select the value "Asset" in the field "Account Type"
- and select the value "Algebraic" in the field "Show Value Condition"
111300 Checking In-Transfer
- create a new record
- enter 111300 in the field "Search Key"
- enter "Checking In-Transfer" value in the field "Name"
- select "Subaccount" in the Element Level field
- select the value "Asset" in the field "Account Type"
- and select the value "Algebraic" in the field "Show Value Condition"
111400 Petty Cash
- create a new record
- enter 111400 in the field "Search Key"
- enter "Petty Cash" value in the field "Name"
- select "Subaccount" in the Element Level field
- select the value "Asset" in the field "Account Type"
- and select the value "Algebraic" in the field "Show Value Condition"
Above subaccounts are the ones used while posting ledger entries into the ledger.
Info
There is no need to drag and drop the three subaccounts above into the corresponding node as Etendo does it.
Accounts Receivable Node needs to have subaccounts elements underneath, for instance:
112100 Trade Receivable
- create a new record
- enter 112100 in the field "Search Key"
- enter "Trade Receivable" value in the field "Name"
- select "Subaccount" in the Element Level field
- select the value "Asset" in the field "Account Type"
- and select the value "Algebraic" in the field "Show Value Condition"
112200 Tax Receivables
- create a new record
- enter 112200 in the field "Search Key"
- enter "Tax Receivables" value in the field "Name"
- select "Subaccount" in the Element Level field
- select the value "Asset" in the field "Account Type"
- and select the value "Algebraic" in the field "Show Value Condition"
Above subaccounts are the ones used while posting ledger entries into the ledger.
There is no need to drag and drop the two subaccounts above into the corresponding node as Etendo does it as explained above.
The same steps need to be followed for the creation of other "Account" and "Subaccount" node types under the nodes:
- Long-term Assets
- Current Liabilities
- Long-term Liabilities
- and Owner's Equity
Last but not least, it is required to create a node which summarizes assets, another one which summarizes liabilities and the last one which summarized owner's equity.
Let's take the creation of total assets node, for instance:
Total Assets Node
- create a new record
- enter 1900 in the field "Search Key"
- enter "Total Assets" value in the field "Name"
- enter "1100+1500" in the field "Description" as a way to describe that this node sums up current assets and long-term assets.
- select "Heading" in the Element Level field
- select the value "Asset" in the field "Account Type"
- and select the value "Algebraic" in the field "Show Value Condition"
- navigate to Customized Element tab
- create a new record
- enter "1" in the field "Sign"
- select the Account "1100 - Current Assets"
- create a new record
- enter "1" in the field "Sign"
- select the Account "1500 - Long-term Assets"
Income Statement Elements
Now, let us briefly explain the creation of the nodes/elements of an Income Statement.
An organization's income statement shows the company's financial performance over a period of time (usually one year), therefore it has two main sections:
- the first section details the organization revenues
- the second section details the organization expenses
The income statement also takes into account the cost of the goods sold, therefore the gross profit refers to the sum of an organization's revenues minus the cost of goods sold.
Besides, it is very common to separate the "Operating Expenses" from the "Non-Operating Expenses", therefore it is possible to calculate the operating income as the difference between the gross profit and the operating expenses while the net income is the difference between the operating income and the non-operating expenses.
All of the above drives the creation of the nodes/ elements which once arranged will represent the structure of the organization's income statement.
The nodes to create for instance can be:
- The "Revenue" node:
- this "Heading" and "Revenue" account type node can include all the revenue subaccounts.
- The "Total Revenue" node:
- this "Heading" and "Revenue" account type node can include a customized element of the "Revenue" node above.
- The "Cost of the Goods Sold" node:
- this "Heading" and "Expense" account type node needs can include all the cost of the goods sold related subaccounts.
- The "Total Cost of the Goods Sold" node:
- this "Heading" and "Expense" account type node can include a customized element of the "Cost of the Goods Sold" node above.
- The "Gross Margin" node:
- this "Heading" and "Revenue" account type node is a customized element of the "Revenue" node and the "Cost of the Goods Sold" node above.
- the "Operating Expenses" node:
- this "Heading" and "Expense" account type node can include all the operating expense related subaccounts.
- The "Total Operating Expense" node:
- this "Heading" and "Expense" account type node can include a customized element of the "Operating Expenses" node above.
- The "Operating Income" node:
- this "Heading" and "Revenue" account type node can include a customized element of the "Revenue" node, the "Cost of the Goods Sold" node and the "Operating Expenses" node.
- The "Non Operating Expense" node:
- this "Heading" and "Expense" account type node can include all the non operating expense related subaccounts.
- The "Total Non Operating Expenses" node:
- this "Heading" and "Expense" account type node can include a customized element of the "Non Operating Expense" node above.
- and finally the "Net Income" node:
- this "Heading" and "Revenue" account type node can include a customized element of the "Operating Income" node above and the "Total Non Operating Expense" node above.
Temporary Elements
As already explained, there is a close relationship between an account tree and the General Ledger configuration in Etendo, as the Account Tree is a Dimension of the General Ledger.
The General Ledger configuration also includes a set of default accounts (or subaccounts in Etendo terms) to use while posting certain type of transactions. Those accounts need to be created in the account tree first and then be configured in the General Ledger Configuration tabs listed below:
- General Accounts
- Defaults
Most of those defaults accounts are ledger accounts such as:
- the "Income Summary" account
- the "Retained Earnings" account
- the "Vendor Liability" account
- or the "Customer Receivables" account
However, there are a few of these accounts which are not ledger accounts but what we can call "Temporary" accounts such as the "Suspense Balancing" account.
Info
It is not necessary to create a default ledger account as those are created as part of the account tree.
However, temporary default accounts need to be created in the account tree under a specific tree branch or node, in order to get that the balance of those temporary accounts is not taken while launching either the Balance Sheet or the Income Statement.
Therefore, a new "Heading" and "Summary" element needs to be created in the "Element Level" tab, that element can be named "Temporary Accounts".

Once created, the accounts below (subaccounts) can be created and move underneath it:
- Suspense Balancing account
- Suspense Error account

General Ledger Configuration
Introduction
The general ledger configuration indicates the way that the organization's financial transactions are going to be posted to the ledger.
A general ledger configuration is created whenever an accounting CSV file or "Chart of Accounts" module reference data is selected while running the Initial Client Setup process or the Initial Organization Setup process.
The general ledger configuration created by default can afterwards be customized to meet the organization's needs.
If the accounting CSV file or reference data is selected at client level, the general ledger configuration is assigned to the organization(*) therefore it is available to any organization within the client.
If the accounting CSV file or reference data is selected at organization level, the general ledger configuration is assigned to the organization making it available to that organization and any of its descendants.
Besides a general ledger configuration, those accounting files also create:
- the organization's Account Tree or Chart of Accounts
- and the general ledger default accounts
Etendo delivers accounting files through:
- the "Chart of Accounts" modules contained in a Localization Pack if available for your country
- and the Generic Chart of Accounts module
Additionally, a general ledger configuration can also be created manually, but once the corresponding Account Tree has been created.
Finally, it is important to remark that the organization's general ledger configuration and the organization's account tree (or chart of accounts) are linked to each other because "Account" is a mandatory dimension of the general ledger configuration.
General Ledger Configuration
The General Ledger Configuration window allows the user to review and maintain defaulted general ledger configurations and to create new ones if needed.
A general ledger configuration created by default can be changed to meet the organization's needs by changing the features below:
1. The Currency to use while posting transactions or journal entries to the ledger.
- The currency shown at first is taken from the currency entered either in the Initial Client Setup process or in the Initial Organization Setup process. This currency can be changed if needed before doing any posting.
An organization can have two general ledgers assigned, one inherited from its parent in a given currency (i.e. USD) and its own one which can be defined in a different currency (i.e. EUR).
That is, for instance, the configuration of the F&B España organization of the F&B sample client. This means that every time that an F&B España transaction is posted to the ledger Etendo will show two "Journal Entries Report" windows one for each general ledger, as shown in the images below:
2. The Allow Negative checkbox defines if negative posting is allowed or not while posting transactions to the general ledger.
Negative posting not allowed implies that a negative debit posting would turn into a credit posting and a negative credit posting would turn into a debit posting.
For instance, a purchase invoice generates the posting below:
| Account | Debit | Credit | Comments |
| Product Expense | Line Net Amount | One per invoice line | |
| Tax Credit | Tax Amount | One per tax line | |
| Vendor Liability | Total Gross Amount | One per invoice |
If that purchase invoice needs to be totally or partially voided or reversed, the posting will look like:
- in case of "Allow Negative" checkbox enabled
| Account | Debit | Credit | Comments |
| Product Expense | (-) Line Net Amount | One per invoice line | |
| Tax Credit | (-) Tax Amount | One per tax line | |
| Vendor Liability | (-) Total Gross Amount | One per invoice |
- in case of "Allow Negative" checkbox disabled
| Account | Debit | Credit | Credit |
| Product Expense | Line Net Amount | One per invoice line | |
| Tax Credit | Tax Amount | One per tax line | |
| Vendor Liability | Total Gross Amount | One per invoice |
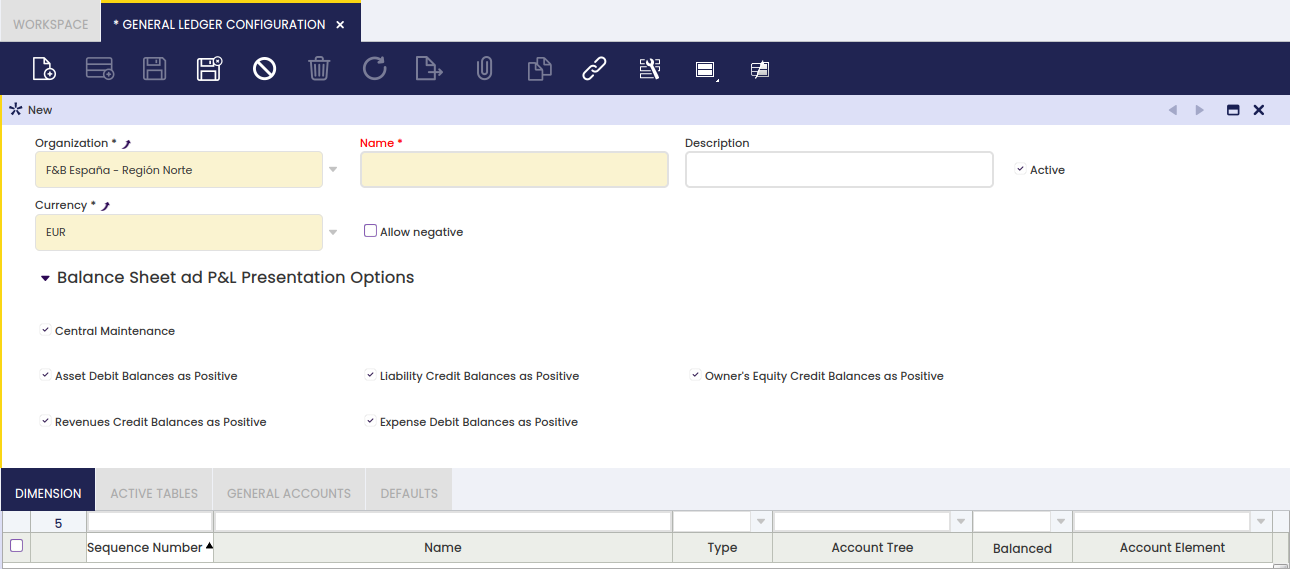
3. The general ledger can be set as "Centrally Maintained" or not in relation to the way that the Account Tree elements are going to be shown in the Balance Sheet and in the Income Statement
- If a general ledger is set as "Centrally Maintained":
- The field "Account Sign" is hidden in the Element Value tab of the Account Tree window
- It is possible to define at general ledger level whether the balances of any account type are going to be shown as "Positive" or "Negative" in the financial statements.
If the checkbox "Central Maintenance" is selected :- The Debit balances of the "Asset" account type will be shown as "Positive" in the Balance Sheet.
As a consequence of that, if an "Asset" account type has a credit balance that will then be shown as "Negative" in the Balance Sheet. - The Credit balances of the "Liabilities" account type will be shown as "Positive" in the Balance Sheet. The same applies to "Owner's Equity" account types.
- The Debit balances of the "Expense" account type will be shown as "Positive" in the Income Statement.
- Finally, the Credit balances of the "Revenue" account type will be shown as "Positive" in the Income Statement.
- The Debit balances of the "Asset" account type will be shown as "Positive" in the Balance Sheet.
It is possible to uncheck any of the checkboxes listed above. For instance, an organization might want to show the Debit balances of the "Expense" account type as "Negative" in the Income Statement.
- If the general ledger is NOT set as "Centrally Maintained":
- The field "Account Sign" is not hidden in the Element Value tab of the Account Tree window.
- Therefore, the account sign of each account tree element defines how the balance of that account is going to be shown in the financial statements.
Finally, it is important to remark that the "Central Maintenance" checkbox is not selected by default for the general ledgers created by default, as the corresponding accounting CSV files or reference data imported have their own configuration through the "Account Sign".
Dimension
Dimension tab allows the user to configure the organization's general ledger dimensions or to add additional accounting dimensions not centrally maintained in the client.
Etendo allows the user to manage mandatory and not mandatory accounting dimensions to be entered in the Dimensions section of the documents, which can be posted to the ledger.
Mandatory dimensions can be filled in or not depending on the document category being created. For instance, "Business Partner" and "Product" are mandatory dimensions that need to be filled in a purchase invoice but can be filled or not in a G/L Journal.
There are two "mandatory" dimensions at the organization's general ledger configuration level, which are:
- The "Account" as any document/transaction posted to the ledger needs to be posted in a ledger account (or subaccount in Etendo terms) of a given account tree or chart of accounts.
- The "Organization", as any document/transaction posted to the ledger, needs to be posted in an organization's general ledger.
Besides, if an organization belongs to a Client which centrally maintains the accounting dimensions, it is possible to add in this tab other dimensions such as the ones listed below which can even set as "mandatory" for the organization:
- Activity
- Asset
- Campaign
- Location From
- Location To
- Sales Region
On the other hand, let us take for instance an organization's general ledger for which the dimensions below have been selected in this tab because the organization belongs to a client which does not centrally maintain the accounting dimensions:
- Mandatory dimensions:
- Organization
- and Account
- Non mandatory dimensions which are set as "mandatory" in here:
- Business Partner, Product and Project
- Non mandatory dimension:
- Sales Region
The configuration above means that every time that a transaction of any kind (purchase invoice, sales invoice, G/L Journal) is posted to the ledger, all the mandatory dimensions above must be entered while there is an option to enter sales region information if any.
Moreover:
- some dimensions appear on some transactions and some do not. That depends on the document being created. For instance:
- The Account dimension always appears in the Lines tab of a G/L Journal, however it does not appear in the Lines tab of a purchase invoice as that data is automatically taken from the accounts (subaccounts) setup for the product, for the business partner and for the taxes, if any.
- Some dimensions appear either in the header and/or in the lines of the documents. That defaulted configuration can be changed only in the clients which centrally maintain the accounting dimensions and for the centrally maintained dimensions.
Active Tables
Active Tables tab allows the user to define which tables and therefore transactions are going to be posted to the ledger and which ones not.
The tables listed below are the tables suitable to be posted:
| Table name | Window |
| FinancialMgmtAmortization | Amortization |
| Invoice | Purchase Invoice Sales Invoice |
| Order | Purchase Order Sales Order |
| FIN_BankStatement | Financial Account - Bank Statement |
| FIN_Finacc_Transaction | Financial Account - Transactions |
| FIN_Payment | Payment In Payment Out |
| FIN_Reconciliation | Financial Account - Reconciliation |
| FinancialMgmtGLJournal | General Ledger Journal |
| MaterialMgmtShipmentInOut | Goods Receipt Goods Shipment |
| MaterialMgmtInternalConsumption | Internal Consumption |
| MaterialMgmtInventoryCount | Physical Inventory |
| ProcurementReceiptInvoiceMatch | Matched Invoices |
| ProcurementPOInvoiceMatch | Matched Purchase Orders |
| MaterialMgmtInternalMovement | Goods Movement |
| MaterialMgmtProductionTransaction | Work Effort Bill of Materials Production |
| FinancialMgmtBankStatement | Old payment flow - Bank Statement Set to Active = No |
| FinancialMgmtCashJournal | Old payment flow - Cash Journal Set to Active = No |
| FinancialMgmtDPManagement | Old payment flow - Debt-payment management Set to Active = No |
| FinancialMgmtSettlement | Old payment flow - Settlements Set to Active = No |
For instance, the records of the table "FinancialMgmtAmortization" are the amortization transactions which can be posted.
Info
The records of the tables above can be posted when the "Active" checkbox of these tables is set as "Yes".
There is a flag named "Disable for Background" next to each table above, which allows that a given table is not taken by the Accounting Background Process.
In other words, it is possible to configure that the transactions related to a given "Table", for instance the "Invoice" table, are not taken by that process, therefore, they will not be automatically posted.
Documents
Documents tab allows the user to define which document types of a table allow negative posting and if they use a different accounting process than the default one based on a given accounting template.
General Accounts
General accounts tab allows the user to define the accounts to be used in balancing entries and in the end-year closing process.
The mandatory "Income Summary" account is populated by default as part of the general ledger configuration. That account is obviously part of the organization's chart of accounts.
If an accounting CSV or reference data is not selected while running the Initial Client Setup process or the Initial Organization Setup process, this mandatory account needs to be manually entered here once the account tree and therefore the corresponding income summary (or net income) subaccount has been created.

The Income Summary account is used by the Close Year process as the P&L closing entry resets all revenue and expense account type and posts the difference in this account.
This tab also contains a set of "Suspense" accounts which needs to be created under a specific account tree branch as explained in the Account Tree creation article.
Those accounts can also be provided by the accounting files, in fact the Generic CoA provides these accounts.
The Suspense Balancing account is shown if the checkbox "Suspense Balancing Use" is selected. This account is used in those cases where an accounting entry can not be balanced while being posted. If there is no account in this field, Etendo shows an error.
The Suspense Error account is shown if the checkbox "Suspense Error Use" is selected. This account is used in those cases where an exception or error happens, preventing an accounting entry to be posted. If there is not an account in this field, Etendo will show an error.
Other accounts are:
The Retained Earning account if any automatically gets the P&L closing balance of a given year. If there is no account in this field, nothing will be automatically moved from the Income Summary account to the Retained Earning account.
The Currency Balance account is shown if the checkbox "Currency Balance Use" is selected. This account is used in those cases where there are currency rounding differences while posting a transaction. For instance, it could happen that the total invoice exchanged into a given currency does not 100% match with the sum of each invoice line exchanged into the same currency.
Finally, the Reverse Permanent Account Balances checkbox allows the user to include or not an entry to reverse the balance sheet accounts balances during the end year closing process.
Defaults
Defaults tab allows the user to maintain or to add a set of default accounts to use while posting a certain type of transactions.
The mandatory "Default" accounts are populated by default as part of the general ledger configuration. Those accounts are obviously part of the organization's chart of accounts.
If an accounting csv or reference data is not selected while running the Initial Client Setup process or the Initial Organization Setup process, these mandatory accounts need to be manually entered here once the account tree and therefore the corresponding subaccounts have been created.
The accounts selected here are defaulted to every Business Partner Category or Product Category, for instance, by using the action button "Copy Accounts".
The accounts defaulted to every business partner category, for instance, can be as well defaulted to every vendor or customer by using the action button "Copy Accounts", this time from the Business Partner Category window.
Finally, it is possible to override these defaults at business partner category level allowing vendor liabilities and customer receivables for different business partners to be posted to different accounts.
This last configuration change needs to be done in the vendor and/or customer windows.
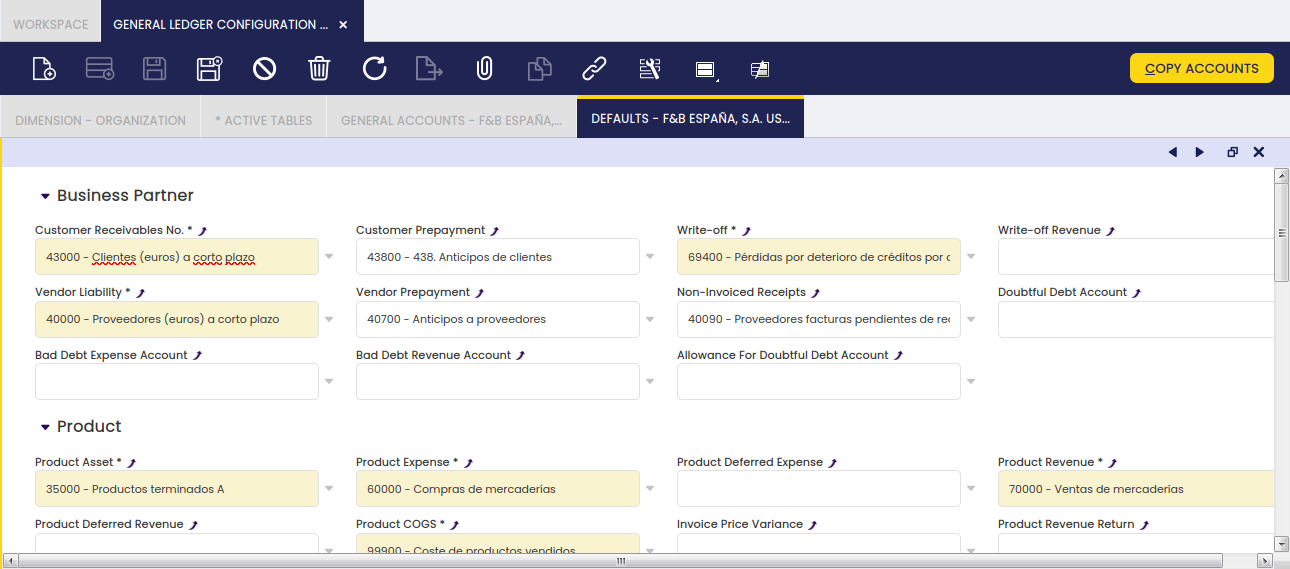
As shown in the image above, "default" accounts are:
- Customer Receivables
- Customer Prepayments
- Write Off
- Write Off Revenue
- Vendor Liability
- Vendor Prepayment
- Non-Invoiced Receipts
- Bad Debt Expense Account
- Bad Debt Revenue Account
- Allowance for Doubtful Debt Account
- Doubtful Debt Account
- Product Asset
- Product Expense
- Product Deferred Expense
- Product Revenue
- Product Deferred Revenue
- Product COGS
- Product Revenue Return
- Product COGS Return
- Invoice Price Variance
- Warehouse Differences
- Inventory Revaluation
- Work in Progress
- The "Bank Asset" default account is populated as:
- the Deposit Account
- the Withdrawal Account
- the Cleared Payment Account (Payment In)
- the Cleared Payment Account (Payment Out)
- The "Bank In Transit" default account is populated as:
- the In Transit Payment IN Account
- the In Transit Payment OUT Account
- The "Bank Expense" default account is populated as:
- the Bank Fee Account
- Bank Revaluation Gain Account
- Bank Revaluation Loss Account
- Tax Due
- Tax Credit
- Depreciation
- Accumulated Depreciation
Creation of a General Ledger Configuration
An Organization might have as many different General Ledgers as required.
By default, an organization can have only one general ledger assigned for simplicity reasons, unless:
- The organization has its own general ledger and another one inherited from its parent, that is, for instance, the case of "F&B España" sample organization.
- The advanced general ledger configuration is enabled at system level, as explained in the Organization article.
Info
It is recommended to create a new general ledger configuration and link it to an organization once it has been created the Account Tree to use while posting transactions to that new general ledger.
It is possible that an organization might require the same account tree but different general ledgers, one of them in USD and the other one in EUR.
The steps to follow to configure a general ledger are:
- Select the "Organization" for which the general ledger is going to be available, for instance "F&B US Inc.".
- Enter the "Name" of the General Ledger configuration, for instance "EUR General Ledger".
- Select the "Accounting Standard" for instance "US GAAP".
In the United States, "Generally Accepted Accounting Principles" (GAAP) is the name for the framework of accounting rules used in the preparation of financial statements.
This data is just informative without any business logic behind it. - Select the "Currency" to use for posting transactions to the ledger.
In the case of the F&B US Inc organization, the currency can be "EUR" therefore the F&B US Inc organization can get a double posting one in "USD" and the other one in "EUR". - Select the check "Allow Negative" in case negative posting is allowed as already described or not.
Once done, the newly created general ledger needs to be linked to F&B US Inc organization in the General Ledgers tab.
The organization of the example has now two general ledgers assigned:
- The inherited one (owned by its parent organization "F&B International Group") in "USD" currency.
- The newly created one in "EUR" currency.
Back to the General Ledger configuration window, the remaining steps to take to properly configure the general ledger are:
Navigate to the Dimension tab to add below listed mandatory dimensions:
- Create a new record and enter Organization in the field "Name".
- Select "Organization" in the field "Type".
- Select "F&B US Inc" in the field "Trx Organization".
- Select the checkbox "Balanced" and the checkbox "Mandatory".
- Create a new record and enter Account in the field "Name".
- Select "Account" in the field "Type".
- Select the already existing "Account Tree" in the field "Account Tree".
- Select the checkbox "Mandatory".
Non-mandatory dimensions can also be created as described below in case it is required to save additional information such as the business partner or the project while posting journal entries or any transaction type:
- create a new record and enter "Business Partner" in the field "Name"
- select "Business Partner" in the field "Type"
- create a new record and enter "Project" in the field "Name"
- select "Project" in the field "Type"
Navigate to the Active Tables tab to review the tables which are going to generate accounting. It is possible to enable accounting for the ones do not active for accounting.
Navigate to the General Accounts tab to configure the mandatory general account (Income Summary) as well as the accounts to use in case of suspense balancing or suspense error among others. Those accounts need to be previously created as described in the Account Tree creation article.
Finally, navigate to the Defaults tab to configure the default accounts which needs to be copied to other accounting configuration tab such as:
- the Product Accounting tab
- the Financial Account Accounting Configuration tab
- the Tax Rate Accounting tab
- etc.
Info
As every time that a transaction of any type is posted to the ledger, it is posted to the two general ledgers configured for the Organization.
Fiscal Calendar
Introduction
"Legal entities with accounting" organization types must have a fiscal calendar assigned, while the rest of organization types can inherit it from its parent.
A calendar contains years and the periods of each year required to get an accurate organization's accounting practice.
Calendar
The fiscal calendar window allows the user to create and maintain the organization's fiscal calendar.
A fiscal calendar is a collection of years to be created on demand as time goes by.
Each organization requiring a calendar needs to have one calendar assigned to it and only one therefore it is clearly known which calendar is going to be used while posting transactions and while opening and closing the accounting cycle. The procedure to do that is:
- Once the calendar is properly created in this window, it needs to be linked to the "legal with accounting organization" type by selecting it after enabling the checkbox "Allow Period Control".
All of the above is done in the Organization window.
Etendo automatically proposes the organization as * while creating a fiscal calendar:
- Accepting this default means that this calendar will be maintained at the client level and will therefore be available to all another organizations created within this client.
- Changing this default to other organization means that this calendar will only be available to that organization.
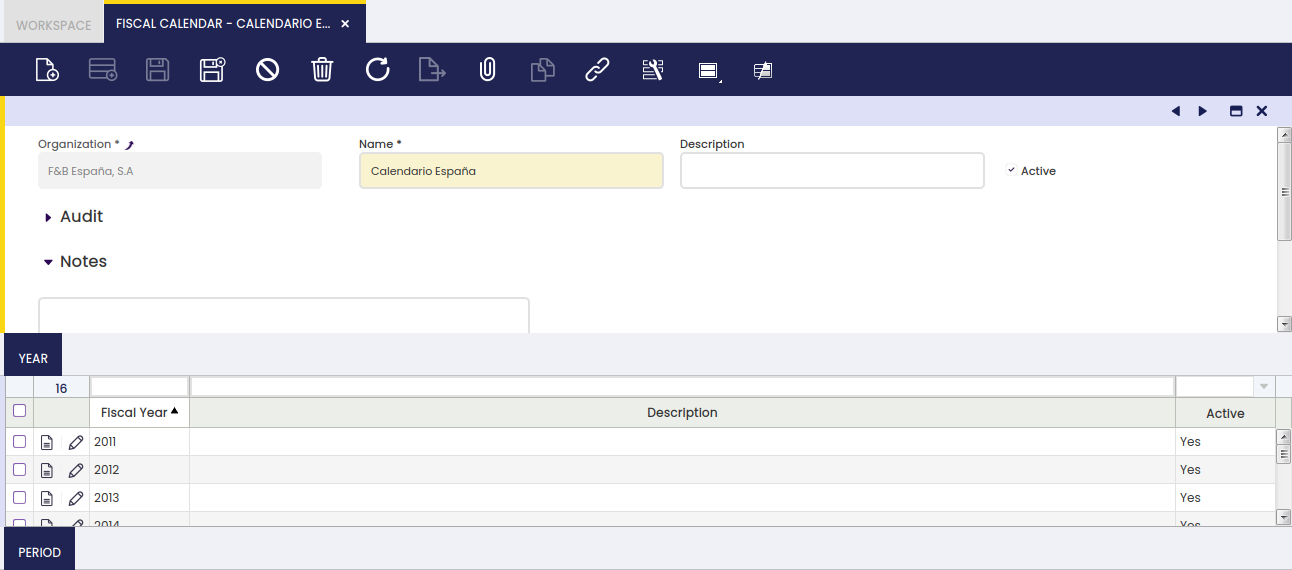
Year
Year tab allows the user to create as many fiscal years as required within a fiscal calendar.
A Fiscal Year is an accounting year which normally includes the twelve consecutive months over which a company determines earnings and profits.
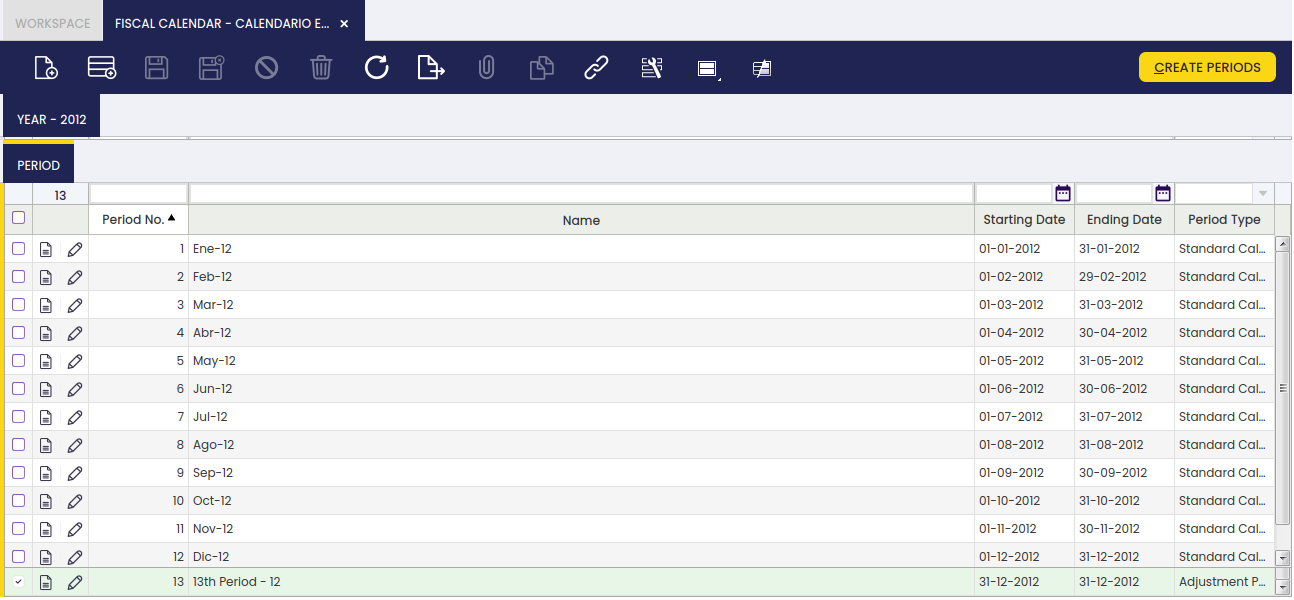
The button "Create Periods" allows the user to create the twelve consecutive months starting from "January, 1st" to "December, 31st" as "Standard Calendar Period" Types.
This process also allows the user to create the "13th Period" which is a period that can be used to make accounting adjustments and get them posted to the ledger by using G/L Journals.
The "13th Period" is an "Adjustment Period" that is the last date of the last standard calendar period (i.e 31-12-2012).
Once created, all the periods need to be opened in the Open/Close Period Control window.
The periods of an organization's fiscal calendar can be reviewed in the Period Control tab of the Organization windows. Note that:
- "Standard Calendar Periods" are opened for every "Document Category", which means that Etendo obviously allows the user to post any document type to the ledger within a standard calendar period open.
- while the "Adjustment Period" is only open for G/L Journal document category, which means that Etendo allows to post only G/L journals within the adjustment period.
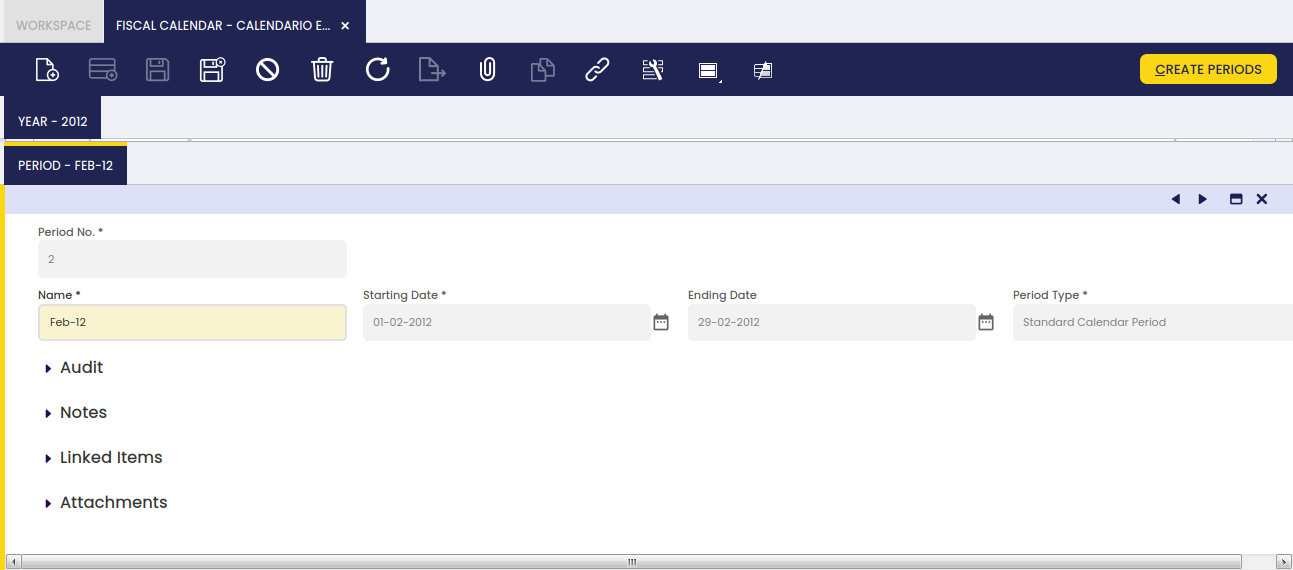
Additionally, it is possible to manually create the accounting periods of a year. That action requires to enter the data below:
- A consecutive period number: this number will be later on used to open/close consequent accounting periods at a time.
- A period name.
- The starting date of the period.
- The ending date of the period.
- The period type as "Standard Calendar Period Type" or "Adjustment Period" as required.
The values of a Period can be manually modified also, but only while this Period is in a Never Opened Status, once it has been open it will no longer be possible.
Etendo checks if another period with the same starting and ending date is already registered in the system, and it also checks if the date of a period overlaps the date of another period.
Finally, a year can be:
- "closed"
- and re-opened
Both actions are performed in the End Year Close window.
Period
The period tab lists all the periods of a year.
Account Combination
Introduction
An account combination is an Organization's General Ledger account.
Combination
The Account Combination window allows the user to review the Organization's General Ledger accounts.
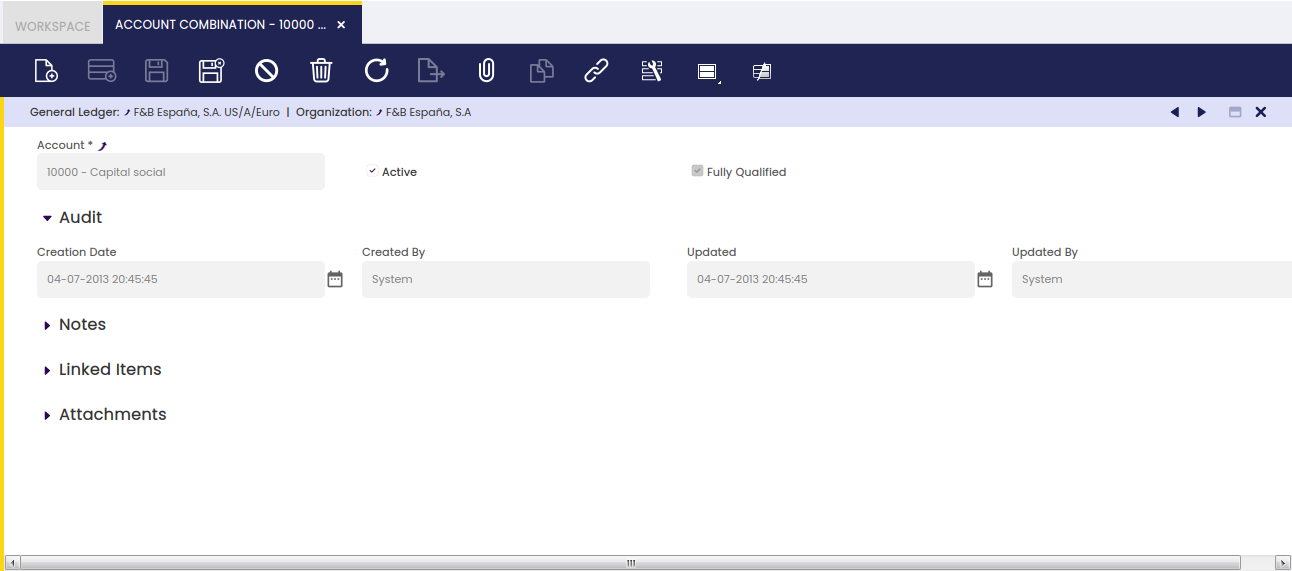
The accounts can not be created manually in this window, but in the Account Tree window.
Every time that an account (or subaccount in Etendo terms) is created in an account tree of a General Ledger, the corresponding account combination is also created in this window.
The account combination window shows the data below:
- the General Ledger
- the Organization
- and the Account
Accounting Process
Introduction
In this window, the user can configure necessary accounting processes.

Info
For more information, visit the developer guide on How to Create a Module that Adds an Accounting Process.
G/L Item
Introduction
A G/L item is an account item to be used for direct account posting.
Direct account posting refers to:
- entering and posting accounting entries in a G/L Journal by using the corresponding GL items and therefore their debit/credit accounts defined.
- creating and posting financial invoices such as Purchase Financial invoices, same applies to sales.
- or creating and posting G/L item payments in a GL Journal.
G/L Item
G/L Item window allows the user to create as many account items as required for an organization and general ledger.
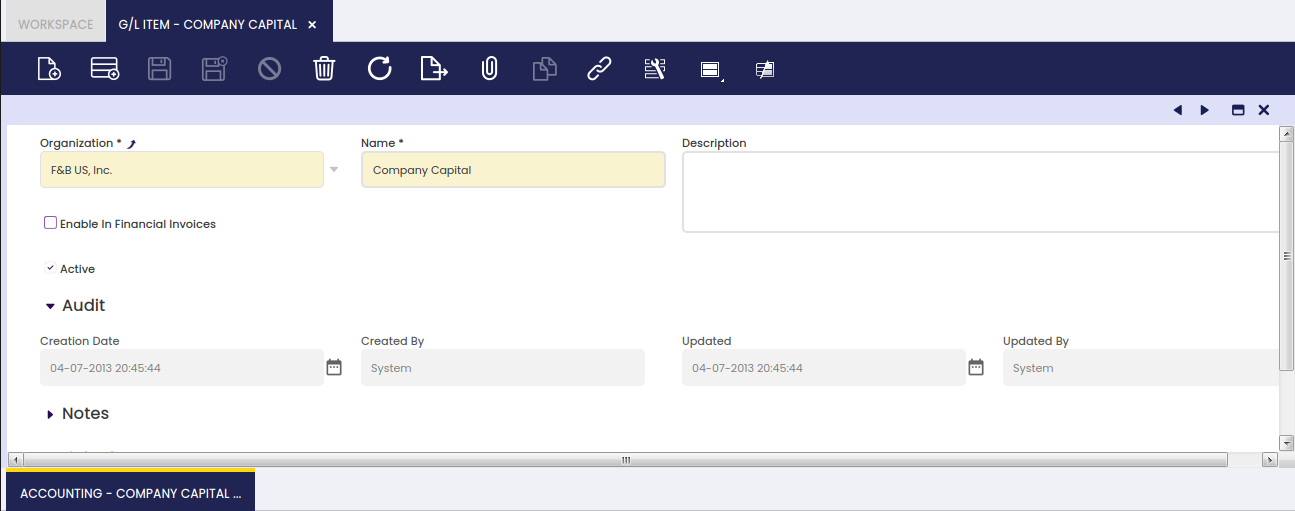
As shown in the image above, a G/L item or accounting item can be created by entering below listed basic information:
- the Organization, as always if a G/L item is created at (*) organization level will be shared across all the organization of the client.
- the Name of the item
- the flag "Enable in Financial Invoices" define if the item can be used as an account while creating and posting financial sales and purchase invoices, if that is the case:
- a Tax Category will have to be selected to get that purchase or sales taxes are properly calculated.
Accounting
Account items are directly related to the debit and credit accounts to be used while posting them.
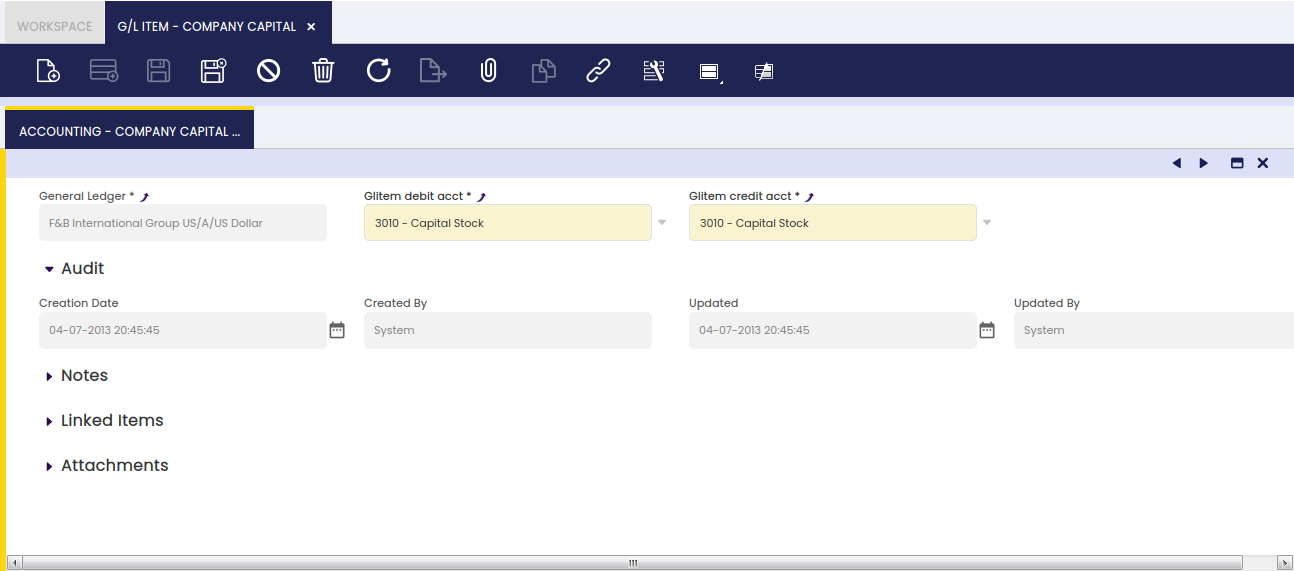
As shown in the image above, the accounting tab allows the user to enter debit and credit accounts for the G/L item. It is possible to enter a debit and a credit account for each organization's general ledger configuration.
G/L Category
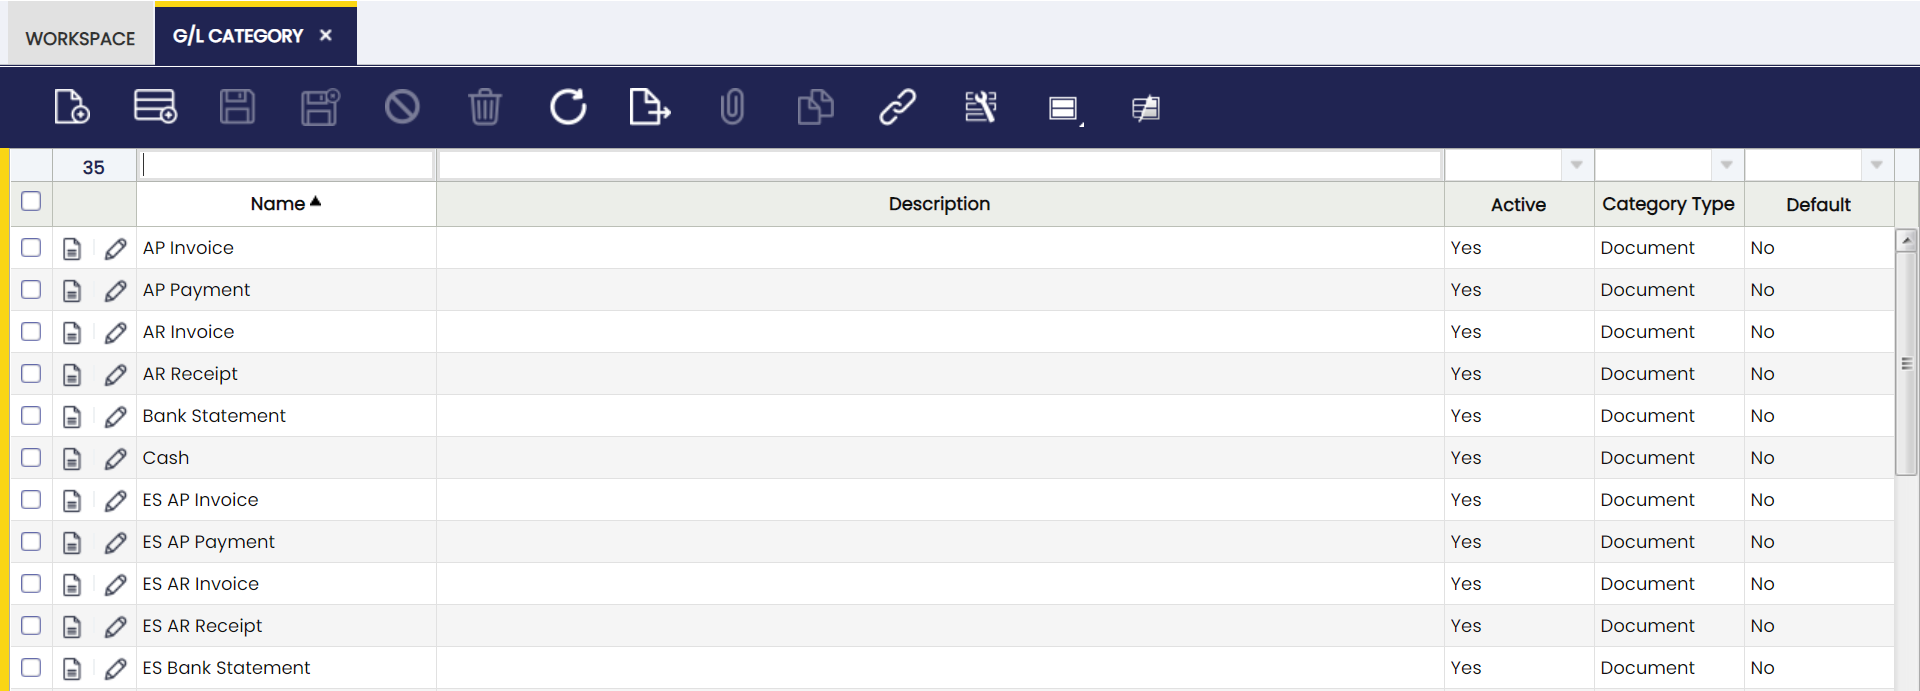
In this window, the user can define G/L Categories to be used in the General Ledger.
The G/L Category Tab defines optional identifiers for a document or journal. Each Category may be used on a document, import or manual journal.
The fields to note are: - ¨G/L Category: A classification used to group lines in the general ledger. - Client: Client for this installation. - Organization: Organizational entity within client - Name: A non-unique identifier for a record/document often used as a search tool. - Description : A space to write additional related information.** - Active: A flag indicating whether this record is available for use or deactivated. - Category Type: Source of the Journal with this category - Document Category: A classification of document types that are shown and processed in the same window. - Default: A value that is shown whenever a record is created.

Once the needed information is complete, the categories are defined as in the following example:
Document Type
Introduction
Each document type in Etendo refers to a business transaction such as purchase orders, shipments or sales invoices, among others.
Etendo includes a complete set of standard Document Types needed for the application to work properly.
This set is bundled into two reference datasets:
- Standard document types for orders, invoices, etc. and settings - Core - English (USA)
- Document types and default algorithm for bank statement auto matching - Advanced Payables
These datasets can be imported into the application during its initial setup using Initial Client Setup or Initial Organization Setup processes. Or if the application is already up and running, these datasets or their updates can be installed using Enterprise Module Management window.
The complete list of standard document types is the following:
| Document Type Name | Document Category | Business Transaction |
| AP CreditMemo | AP Credit Memo | Purchase Credit Memo |
| AP Invoice | AP Invoice | Purchase Invoice |
| AR CreditMemo | AR Credit Memo | Sales Credit Memo |
| AR Invoice | AR Invoice | Sales Invoice |
| Return Material Sales Invoice | AR Return Material Invoice | Return Material Sales Invoice |
| Reversed Sales Invoice | AR Invoice | Reversed Sales Invoice |
| MM Receipt | Material Receipt | Goods Receipt |
| RTV Shipment | Material Receipt | Return to Vendor Shipment |
| MM Shipment | Material Delivery | Goods Shipment |
| RFC Receipt | Material Delivery | Return from Customer receipt |
| Purchase Order | Purchase Order | Purchase Order |
| RTV Order | Purchase Order | Return to Vendor |
| Quotation | Sales Order | Sales Quotation |
| RFC Order | Sales Order | Return from Customer Sales Order |
| POS Order | Sales Order | Point of Sales Order |
| Warehouse Order | Sales Order | Warehouse Order |
| Standard Order | Sales Order | Sales Order |
| AP Payment | AP Payment | Payment Out |
| AR Receipt | AR Receipt | Payment In |
| Financial Account Transaction | Financial Account Transaction | Financial Account Transaction |
| Bank Statement File | Bank Statement File | Bank Statement |
| Payment Proposal | AP Payment Proposal | Payment Proposal |
| Reconciliation | Reconciliation | Reconciliation |
| Doubtful Debts | Doubtful Debt | Doubtful Debt |
| Cost Adjustment | Cost Adjustment | Cost Adjustment |
| Landed Cost | Landed Cost | Landed Cost |
| Landed Cost Cost | Landed Cost Cost | Landed Cost Cost |
| Inventory Amount Update | Inventory Amount Update | Inventory Amount Update |
It is also important to remark that new document types could be added to the list above, if that is the case an updated version of the "Reference Data" containing the new document types will be provided by Etendo. That newly created "Reference Data" will have to be applied to the corresponding Organization in the Enterprise Module Management.
Document Definition
Document type window allows the user to configure how each document type is going to behave in terms of accounting and sequencing among others.
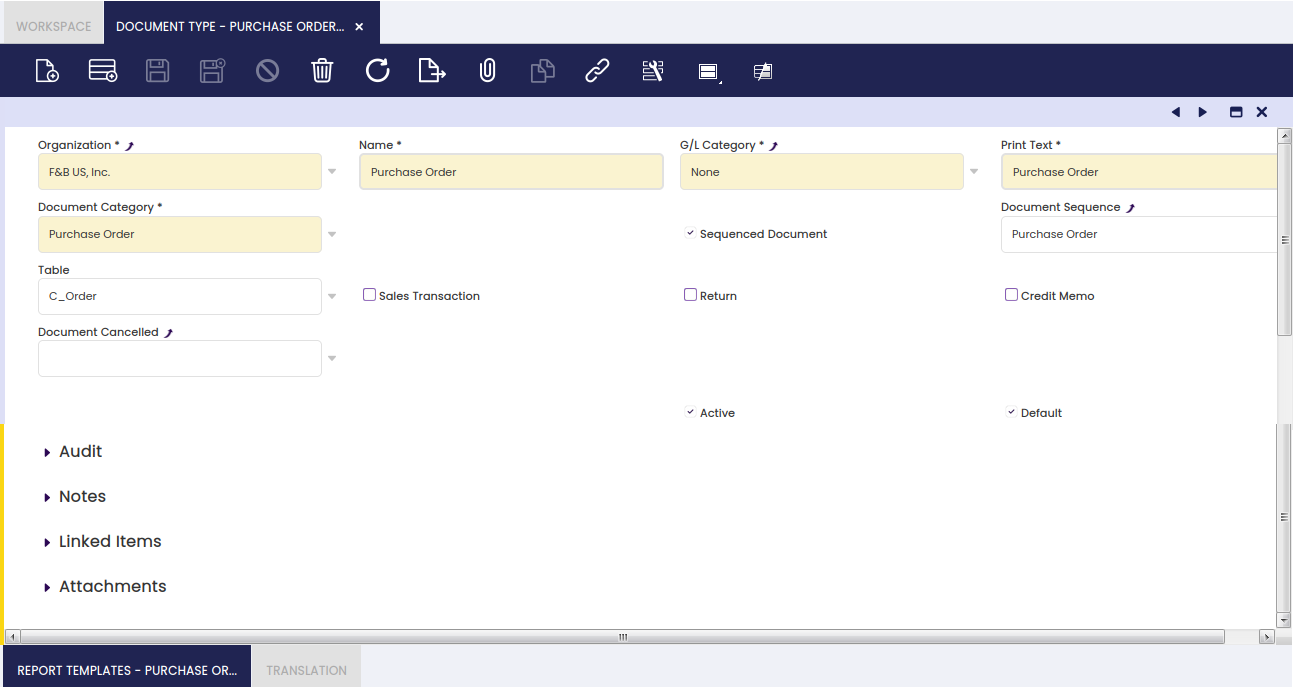
"Standard" Document Types can be customized as required by having into account that:
There are a few fields whose values should not be changed. Those are:
- the Organization
- the Document Category
- and the Table
The rest of the fields can be changed, for instance:
- the Name of the document
- the Print Text which is the name of the document to be printed while printing the document.
- the Sequenced Document flag could be disabled or enabled if it is required to either
- manually number a document type
- or automatically number a document type according to a given document sequence.
- Document Cancelled, if any, is the document to use for voiding a given document type. For instance, a "Reversed Sales Invoice" document type can be set as the document canceled of an "AR Invoice", therefore that one will be the one to use while voiding an "AR Invoice"(or sales invoice).
- A "Reversed Sales Invoice" document type is also an "AR Invoice" document type, but it can have a different sequencing by just linking it to a difference document sequence
- besides, it is set as a "Return" document type, which means that:
- it generates a "negative" sales invoices with a negative invoiced quantity/ies
- therefore, the posting will be opposite to the sales invoice one, as described below, in case Allow Negative checkbox is enabled and in case it is not:
| Account | Debit | Credit | Comments |
| Customer Receivables | (-) Line Net Amount | One per invoice line | |
| Tax Debit | (-) Tax Amount | One per tax line | |
| Product Revenue | (-) Total Gross Amount | One per invoice |
| Account | Debit | Credit | Comments |
| Customer Receivables | Line Net Amount | One per invoice line | |
| Tax Debit | Tax Amount | One per tax line | |
| Product Revenue | Total Gross Amount | One per invoice |
- the checkbox named "Credit Memo" is enabled by default for "Credit Memo" document types such as "AR Credit Memo" and "AP Credit Memo":
- "Credit Memo" document types are also "reverse" or "cancelled" documents type however, those behave differently than "return" document types, for instance:
- they generate invoices with "positive" invoiced quantity/ies
- therefore, the posting is always opposite to the invoices one, regardless the Allow Negative checkbox setup:
- "Credit Memo" document types are also "reverse" or "cancelled" documents type however, those behave differently than "return" document types, for instance:
| Account | Debit | Credit | Comments |
| Customer Receivables | Line Net Amount | One per invoice line | |
| Tax Debit | Tax Amount | One per tax line | |
| Product Revenue | Total Gross Amount | One per invoice |
- The field "Document Type for Order" allows the user to define for the Quotation "Document Type" the document (i.e Standard Order) to use while creating a sales order from a sales quotation.
- The field "Document Type for Invoice" allows the user to define the document (i.e. Return Material Sales Invoice) to use while creating a Sales Order from a Return Material Document Type, like Return From Customer.
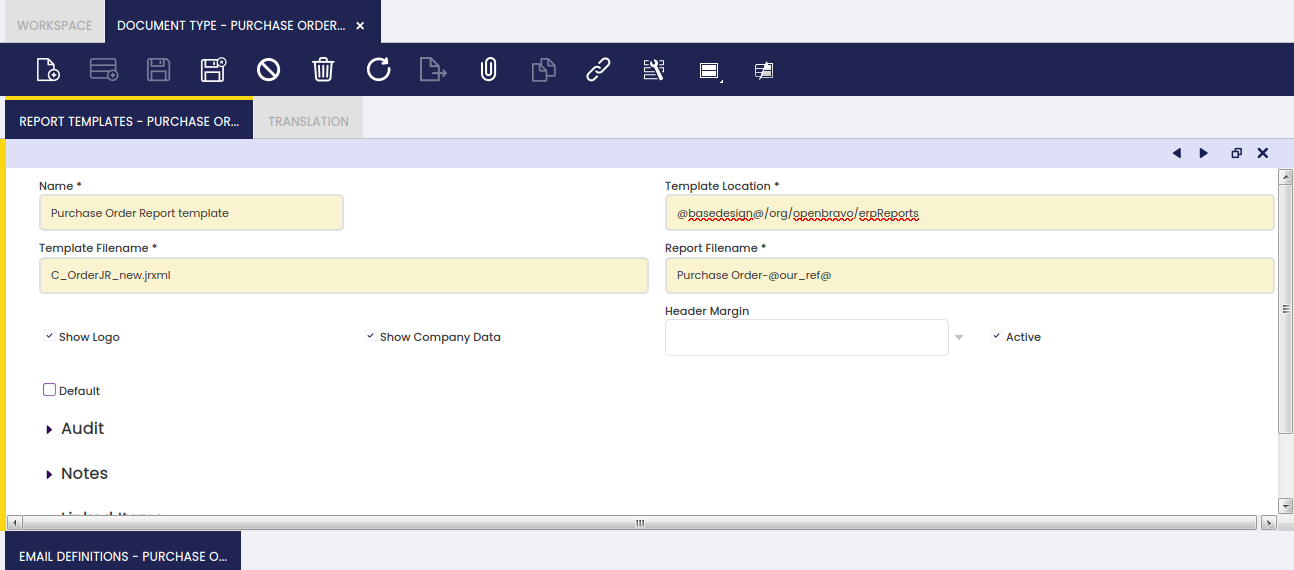
Report Templates
The report template tab allows the user to configure a different look and feel for the document types by setting up Jasper JRXML templates for each document type.
It is possible to print document types such as Goods Shipments or Sales Invoices by using the "Print" action button, which can be found in the Toolbar.
In Etendo, every document suitable to be printed is linked to a "standard" report template.
If necessary, report templates can be customized and even new ones can be created and therefore linked to a given document type.
Email Definitions
Emails definition tab supports the creation of as many email templates as required depending on the language to be used for sending the documents by email.
Documents can be sent by e-mail by using the action button Email which can be found in the Toolbar.
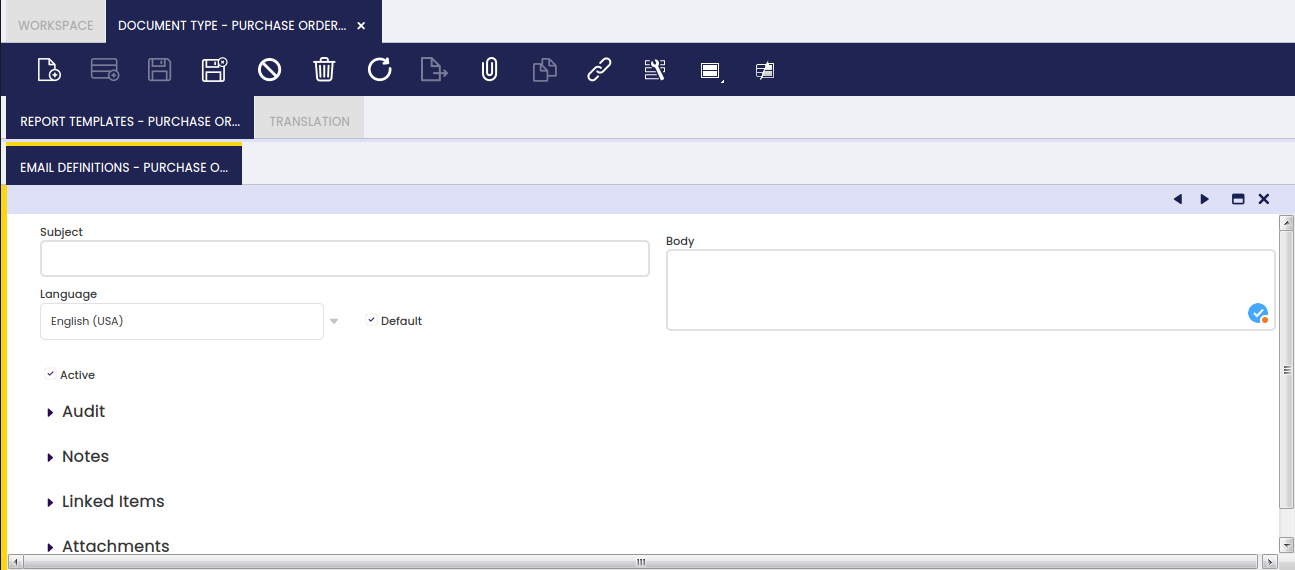
As shown in the image above, it is possible to define:
- a Subject template to be populated with "real" data every time a given document is sent by email.
- For instance "New Invoice (@our_ref@)" will turn into "New Invoice (SI/2589)" where SI/2589 is the number of the invoice sent by email.
- a Body template to be populated with "real" data every time a given document is sent by email.
- For instance:
- "Dear @cus_nam@, Find attached the invoice @our_ref@ corresponding to the products you received from F&B International Group."
will turn into - "Dear Healthly Food Supermarkets Co., Find attached the invoice SI/2589 corresponding to the products you received from F&B International Group."
- "Dear @cus_nam@, Find attached the invoice @our_ref@ corresponding to the products you received from F&B International Group."
- For instance:
Here is the list of possible tags:
- @cus_ref@: The document reference of the customer
- @our_ref@: The reference of the document
- @cus_nam@: The name of the customer
- @sal_nam@: The name of the sales rep.
- @bp_nam@: The Business Partner name [since 3.0MP27]
- @doc_date@: The document date [since 3.0MP27]
- @doc_desc@: The document description [since 3.0MP27]
- @doc_nextduedate@: The next due date (if document has associated any payment plan) [since 3.0MP27]
- @doc_lastduedate@: The last due date (if document has associated any payment plan) [since 3.0MP27]
Translation
Document types can be translated to any language required.
Document Sequence
Introduction
Every document in Etendo can be numbered and therefore linked to a document sequence.
Etendo "reference data" including the standard list of document types also includes a standard list of document sequence linked to those documents which make sense to number.
"Standard" document sequences are listed in the document sequence window.
It is important to remark that:
- it is possible to change "standard" document sequences, for instance:
- the "AP Invoice" document type is created by default linked to a document sequence which is setup as Auto Numbering
- that sequence can be changed by removing the Auto Numbering checkbox, which would imply that "AP Invoice" numbers will have to be manually entered according to the supplier's invoice number.
- The most common scenario is that different document types have different document sequences, however it is also possible that a set of different document types share the same document sequence in order to get the same consecutive numbering.
Sequences
Document sequence window allows the user to define how document sequences are going to behave.
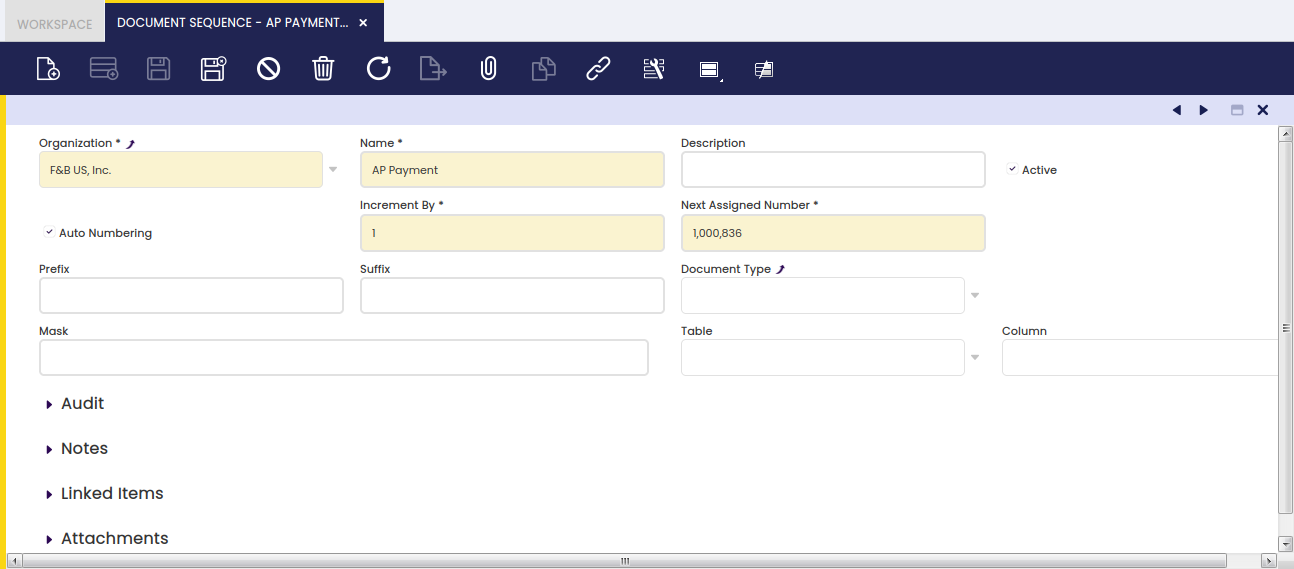
As shown in the image above, a document number sequence can be set as "Auto Numbering" which means that the document linked to that sequence will get a document number automatically generated by the sequence.
It is also possible to define how the "Auto Numbering" type document sequence are going to behave in terms of:
- how numbering is going to be incremented by
- what is going to be the next number assigned
- if it requires a given prefix or suffix
Info
The number logic is applied when saving the document.
Masked Sequences
Transactional and Non-transactional Sequences can be used in any document and any field. In this new sequences, the masks can be added with dynamic dates or strings.
The user can filter the new sequence according to the organization, document type and mask, the mask is ####### by default. This sequences could be created with the Create sequences process in General Setup > Aplication > Create Sequences window.
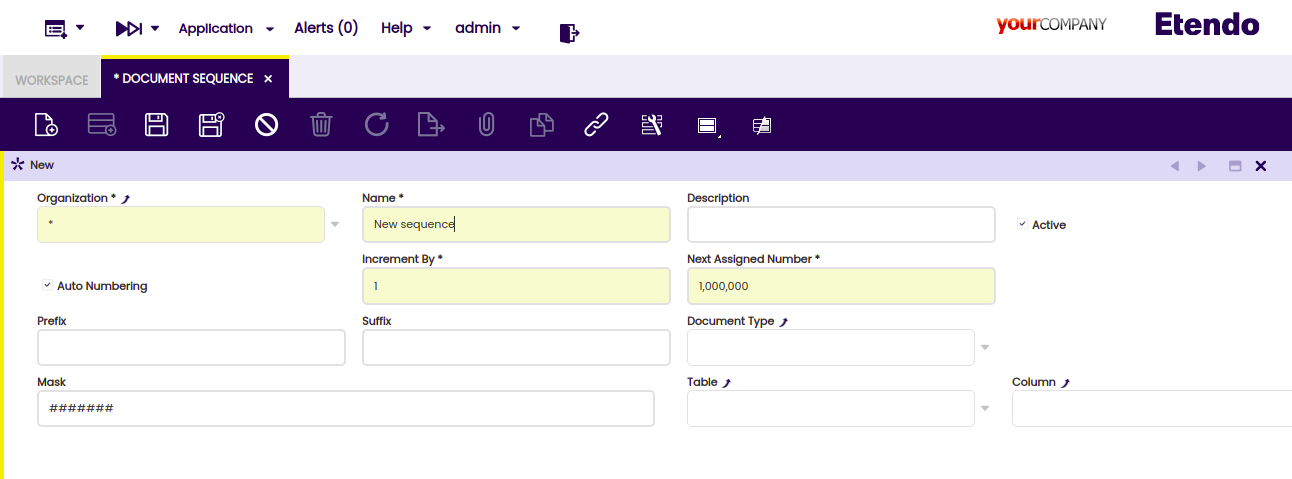
- Mask: It is a string to define a parse format, with the possibility of creating a dynamic date or literal substring in addition to the formatted incremental number.
Sequence Masking
Sequence masking always uses numeric key to parse the input. Therefore, the mask must have at least the same number of '#' or '*' chars as the length of the Next Assigned Number field. (Seven is the length of this field by default)
Data Time Formatting
| Letter | Type | Presentation | Examples |
|---|---|---|---|
| G | Era designator | Text | AD |
| y | Year | Year | 1996; 96 |
| Y | Week year | Year | 2009; 09 |
| M | Month in year | Month | July; Jul; 07 |
| w | Week in year | Number | 27 |
| W | Week in month | Number | 2 |
| D | Day in year | Number | 189 |
| d | Day in month | Number | 10 |
| F | Day of week in month | Number | 2 |
| E | Day name in week | Tuesday; Tue | |
| u | Day number of week (1 = Monday) | Number | 1 |
| a | Am/pm marker | Text | PM |
| H | Hour in day (0-23) | Number | 0 |
| k | Hour in day (1-24) | Number | 24 |
| K | Hour in am/pm (0-11) | Number | 0 |
| h | Hour in am/pm (1-12) | Number | 12 |
| m | Minute in hour | Number | 30 |
| s | Second in minute | Number | 55 |
| S | Millisecond | Number | 978 |
| z | Time zone | General time zone | Pacific Standard Time; PST; GMT-08:00 |
| Z | Time zone | RFC 822 time zone | -0800 |
| X | Time zone | ISO 8601 time zone | -08; -0800; -08:00 |
| ‘ ’ | Literal | Text |
Parse Formatting
| Letter | Type | Presentation | Examples |
|---|---|---|---|
| ## | Digit Key | Digit | 9 |
| ! | Literal Key | Literal | |
| l | Lower Case | Char | a |
| x | Hexadecimal | Number | 10F |
| U | Upper Case | char | A |
| A | Alpha Numeric | Number | h0l4 |
| ? | Character | Char | h |
| * | Anything | * | * |
Info
The parse is resolved in two steps, first dates and then types. For this reason if the parse formatting characters like ‘l’, ‘x’ ‘U’ or ‘A’ are used, the character ‘!’ should be used to escape each character.
Examples
| Mask | Input | Result |
|---|---|---|
| ##-### | 1 | 00-01 |
| #!### | 12 | 1#2 |
| ##-'YE!AR'-### | 21 | 00-YEAR-21 |
| yy-MM-dd/### | 1 | 21-08-31/01 |
| y-#### | 25 | 2021-025 |
Tax Category
Introduction
A tax category allows the user to group and manage similar product or services tax rates.
Not all the products and services have the same tax rate.
There are tax-exempt products and there are products or services to which a higher tax rate applies just due to the type of product or service.
Tax categories allow the user to group similar tax rates by having into account that:
- the same tax category can be assigned to more than one product or service, by taking into account that it is recommended to split the tax categories by item type.
- every product and service must be linked to one tax category same as each tax rate.
Therefore when that product or service is entered in an invoice only the tax rate/s which belong to that tax category will be used to get the applicable tax rate. - there are other variables which can reduce up to just "one" the correct tax rate to use while entering a product and a business partner in an invoice.
Those variables are related to the business partner tax category as well as the way each tax rate is configured.
Tax Category
It is possible to create as many tax categories as required to be later on linked to the corresponding tax rates and products.
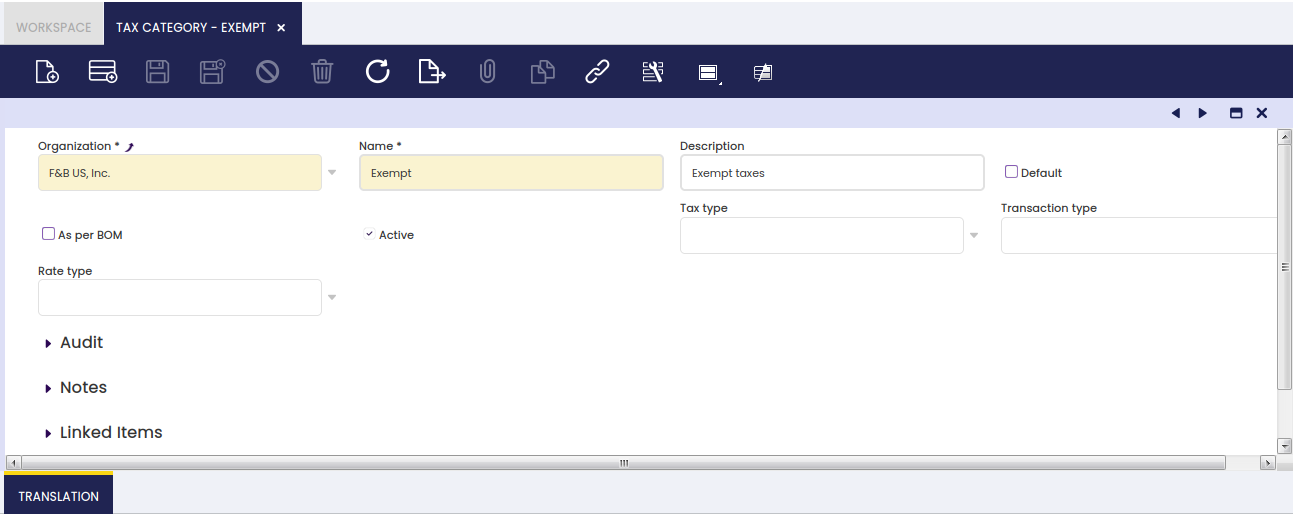
As shown in the image above, a tax category can be created by just entering:
- a Name
- and a Description
of the Tax Category.
Once created, the tax categories must be assigned to the corresponding products and services in the Product window.
If the tax category is flagged as As per BOM, it indicates that products with this category will use the products included in its Bill of Materials list to calculate proportionally the taxes. In this case, only one Tax_Rate has to be configured for this tax category flagged as Summary level.
Translation
Tax categories can be translated to any language required.
Business Partner Tax Category
Introduction
A business partner tax category allows the user to group and manage similar business partners tax rates.
Not all the business partners are subject to the same type of tax, that depends on the business partner activity type, for instance:
- there could be business partners subject just to VAT (Value Added Tax)
- and there could be business partners subject to VAT and to Income Tax
and even business partners subject to the same tax type could be tax-exempt or not depending on the type of activity they perform.
Business Partner tax categories allow the user to group similar taxes, and the same business partner tax category can be assigned to more than one business partner.
A business partner may or may not be linked to a business partner tax category:
- if a business partner is linked to a business partner tax category, only the tax rate/s which belongs to that business partner tax category will be used to automatically populate the applicable tax rate in an order/invoice line.
There are other variables which can reduce up to just "one" the tax rate automatically populated in an order/invoice line, while entering a business partner and a product in an order/invoice.
Those variables are related to the tax category as well as the way each tax rate is configured.
Info
It is important to remark that all available tax rates are available for manual selection in an order/invoice line regardless a tax rate is automatically populated by Etendo for that given order/invoice line.
The end-user could need to select a particular tax rate under a given business scenario that is not the common one.
Business Partner Tax Category
It is possible to create as many business partners categories as required to be later on linked to the corresponding tax rates and business partners, if applicable.
Once created, the business partner tax categories must be linked to the corresponding business partners, if applicable, in either:
- the Customer tab of the Business Partner window.
- and/or the Vendor/Creditor tab of the Business Partner window.
Tax Rate
Introduction
Each tax rate in Etendo is a combination of different variables such as the tax category, the rate and the business partner tax category among others. If all those variables are properly set up, the correct tax rate is automatically filled in every business transaction.
It is possible to create tax rates which are a combination of more than one tax rate. That scenario can apply to a business partner who is subject to VAT and Income tax at the same time while renting an office to a third party out of its "normal" business activities.
Applying Taxes
Taxes are applied to orders and invoices. In this process, there are two steps: associate the desired tax to the line and process the document that will apply the tax and calculate the actual amount.
Obtaining Default Tax
When in a document line (order or invoice) a product is selected, a default tax is associated to this line. Keep in mind that we can select the tax we want for this line. The selection of the default tax is achieved by the C_GetTax DB stored procedure. The rules followed by this procedure are as follows:
For sale transactions with an associated project, if a project has a tax rate, this tax rate is taken. This works when an order is generated by a Project (Order). In this case, the tax is taken directly from the project line tax. For sale transactions, if a partner is marked as tax-exempt, the selected tax will be the one checked as exempt with the most recent date relative to the ordered or invoiced date.
Otherwise, the tax is selected from the ones defined in the same tax category as the product on the line. Taxes with defined business partner tax category can only be applied to those business partners with the same tax category (for vendor or customer). If the tax does not have a business partner tax category, it can be applied to any partner (with or without an associated tax category). If a tax with business partner tax category and another one without it can both be applied, the one with business partner tax category will be selected. In addition to this, the “to” and “from” locations are taken into account. At first, those taxes defined for closer regions are selected (if a tax is for region and another one for country, the region one will be selected). This information is associated to the tax rate, through the “Tax Zone” tab. Taxes are applied taking into account if they are defined as Sales, Purchases or Both.
Apart from these rules, and only in the case of Purchase/Sales Orders and Invoices, the system filters the tax rates taking into account the Cash VAT flag defined at the document's header too, which is automatically set based on the organization's and the business partner's configuration for sales and purchase documents respectively (although it can be manually overridden afterwards). Thus, in case the document is enabled for the Cash VAT regime, the system will get a Cash VAT tax rate and the other way around.
Once the tax is selected (the default one, or another one selected by the user), an approximated amount is calculated by the SL_Order_Tax or SL_Invoice_Tax callouts. If the tax is checked as summary, the calculation will be done using the rate defined in the parent, not exploding it and taking the real values from its children. In addition, information c_order_tax and c_invoice_tax tables are populated with taxes at this point. The actual amount is calculated when the document is processed.
When creating a new invoice, it is possible to write down taxes manually and check them as “no recalculate”. In this case, the tax is applied with the amount written down in the tax tab of the invoice, so no recalculation will be done while processing the invoice. When a tax in an invoice is marked as recalculated, if the tax is edited manually all changes will be lost when processing the invoice. This is because the tax amount of the invoice is recalculated. “No recalculate” taxes are not associated to any invoice line, whereas the recalculated ones are. So when a tax comes from a line, it will be checked as recalculate. If it is manually created, it will not be checked, and this value will be not updatable.
Not recalculating taxes is useful for invoices that include tax lines without a product. For example, it can be used for imported products: these products usually have an invoice that is tax-exempt and another invoice that is created by the custom broker without any product, but a tax amount for the imported products.
Calculating actual amount
When these documents are processed (c_order_post and c_invoice_post), the actual taxes and amounts are calculated from the selected taxes (unless they are defined as “no recalculate” for invoices) following these steps:
Every tax at C_OrderTax or C_InvoiceTax tables is deleted. This is done because the taxes in these tables before the process of the document are for information only and can be inaccurate.
A new line is created in C_OrderTax or C_InvoiceTax tables for every different tax applied to the lines of the document (each line will have only one tax). The amount paid to the tax is calculated from the base amount of the lines that are associated to this tax.
For taxes defined as summary, a new line is inserted for each of its children and the amount is calculated taking into account whether or not the children are cascade.
Tax
Tax rate window allows the user to create as many tax rates as required.
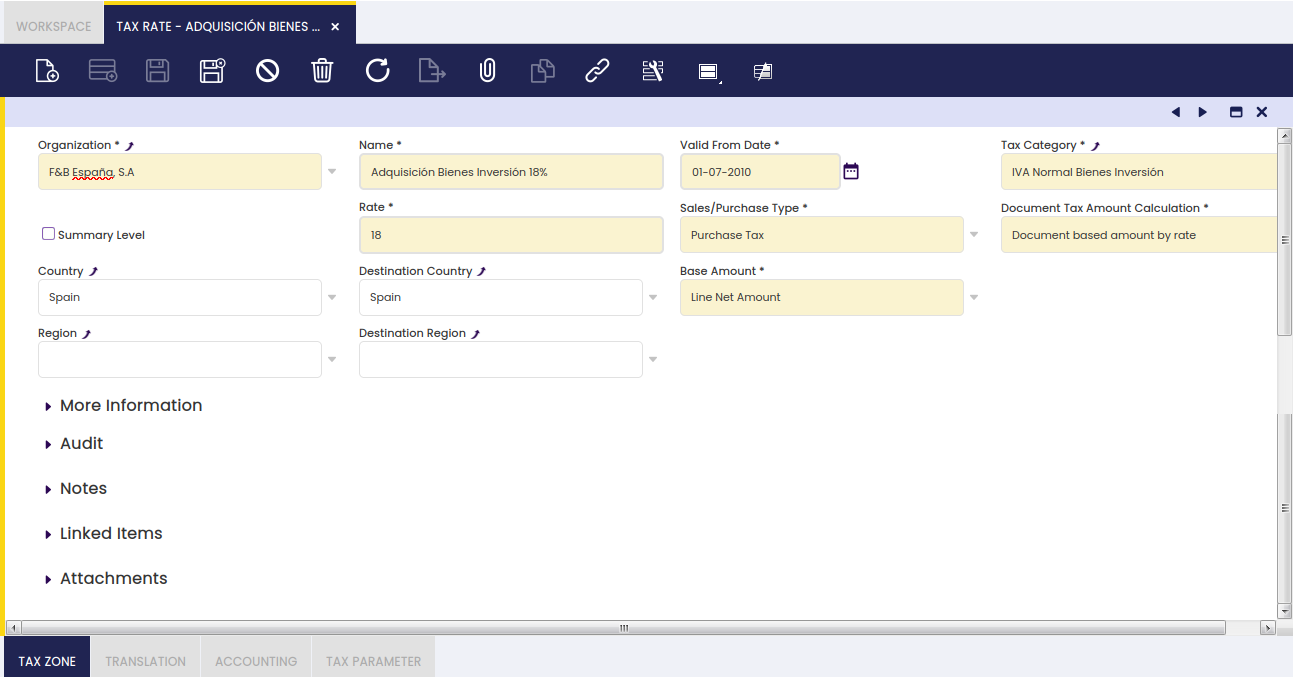
The fields to fill in to properly set up a tax rate are:
- "Valid From Date", which is the date when a tax rate becomes valid.
For instance, an existing tax rate increases its rate, in this case:- it is recommended to create a new tax rate configured with the new requirements, rather than changing the original tax rate which can be still in use if required.
That way, there will be two tax rates which are exactly the same for a given organization but the rate (%) and the valid from date.
- it is recommended to create a new tax rate configured with the new requirements, rather than changing the original tax rate which can be still in use if required.
- "Tax Category", as every tax rate must be linked to a given tax category as the way of grouping similar tax rates.
- "Rate", which is the % or rate of the tax
- "Sales/Purchase Type" as the way to distinguish between sales and purchase taxes.
The tax type is another variable which Etendo takes into account while retrieving the correct tax rate in either sales and purchase transactions. It is also a very valuable variable to take into account while reporting taxes as there are tax reports which require to submit purchase and sales tax information separately.
There is an additional option which is "Both", this option allows using the same tax rate for both purchase and sales transactions. - "Country/Region" and "Destination Country/Region".
Tax such as VAT and US Sales Tax take into account from where/to where a transaction takes place in order to get it subject to the tax or not.
These two fields allow the user to enter that information by taking into account if the tax is a "purchase" or a "sales" tax type, therefore, when issuing a sales invoice from F&B US Inc (USA Country and New York Region) to a customer also located in Destination Country USA and Destination Region New York, only the sales tax rates created within that specified Tax Zone would be applied. - "Summary Level", a tax rate can be defined as summary which means it will have some tax rates underneath.
Summary tax rates are also set as "Parent Tax Rate" therefore its child tax rates can be linked to it.
For instance, a sales invoice is issued to a business partner under a specific VAT regime which includes an additional tax rate besides the VAT rate.
For this scenario, it is required to create three tax rates, the parent one as summary, and two more for the VAT rate and for the other rate, both of them linked to the parent.
"It is important to remark that when issuing the sales invoice for that business partner, the tax rate shown/selected is the summary or parent one." - "Base Amount", which is the tax base amount to take into account in the tax amount calculation. The options available are:
- Line Net Amount
- Line Net Amount + Tax Amount
- Alternate Tax Base Amount
- Alternate Tax Base Amount + Tax Amount
- "Document Tax Amount Calculation" which is the way how the tax amount is going to be calculated per each tax rate (or %). The options available are:
- "Document based amount by rate", this option implies that the tax amount is going to be calculated as tax amount = (tax base amounts sum at the same rate * tax rate)
- "Line base amount by rate", this option implies that the tax amount is going to be calculated by line as tax amount = (tax base amount line 1 * tax rate) + (tax base amount line 2 * tax rate) + ....+ (tax base amount line n + tax rate).
Under "More Information" section, there are also few relevant fields:
- "Parent Tax Rate", tax rates belonging to a summary tax rate should be linked to them in this field therefore the tax rate tree is properly structured.
- "Business Partner Tax Category", a tax rate can be linked to a specific business partner tax category, therefore it will only apply to the business partners belonging to that category.
- "Withholding", a tax rate can be set as "Withholding" therefore it is properly managed as a separated tax type in the fiscal reports.
- Withholding tax rates are "negative" tax rates.
- Tax Exempt. A tax rate can be set as exempt therefore it is the one automatically shown in the order/invoice lines created for a given Customer set as tax-exempt as well.
- Cash VAT. This kind of tax rates are used to support the Cash VAT regime, which allows companies to settle the VAT amount when they have collected/paid the invoices instead of in the invoice creation. When using cash VAT tax rates, the Tax Due and Tax Credit Transitory accounts must be declared into the Accounting tab.
- Tax rates can also be setup as "Not Taxable". A not taxable tax rate can be linked to transactions subject to tax which become not taxable under a given situation. There are fiscal reports which require information about both type of taxes, exempt and not taxable.
- Specific tax rates can be setup as "Deductible" (for those Organizations for which tax deduction is NOT allowed).
- Specific tax rates can be setup as "Not Deductible" (for those Organizations for which tax deduction is allowed).
The way Deductible and Not Deductible tax rates behave in terms of accounting is explained below:
- Purchase invoice which includes a 100% deductible tax amount.
The VAT amount needs to be posted to the ledger in a Tax Credit account, therefore purchase invoice posting looks like:
| Account | Debit | Credit | Comments |
| Product Expense | Line Net Amount | One per invoice line | |
| Tax Credit | Tax Amount | One per tax line | |
| Vendor Liability | Total Gross Amount | One per invoice |
Purchase invoice which includes NOT deductible tax amount
The VAT amount can not be posted to the ledger in a Tax Credit account as it means an expense, therefore purchase invoice posting looks like:
| Account | Debit | Credit | Comments |
| Product Expense | Line Net Amount + Tax Amount | One per invoice line and tax rate | |
| Vendor Liability | Total Gross Amount | One per invoice |
Info
To be able to use the functionality described below, the Financial Extensions Bundle must be installed. To do so, follow the instructions in marketplace: Financial Extensions Bundle. For more information about the available versions, core compatibility and new features, visit Financial Extensions - Release notes.
The same behavior can be applied for the non-deductible tax.
By default, the accounting amount that is generated in the supplier invoices when a non-deductible tax range is used, is assigned to the accounting expense account configured in the "Accounting" tab of the product. With this improvement, the amount of that non-deductible tax can be assigned to a specific account, the one configured in the accounting of the tax range itself. To do this, check the "Use the configured account" checkbox located inside the "Accounting" tab in the "Tax rate" window.
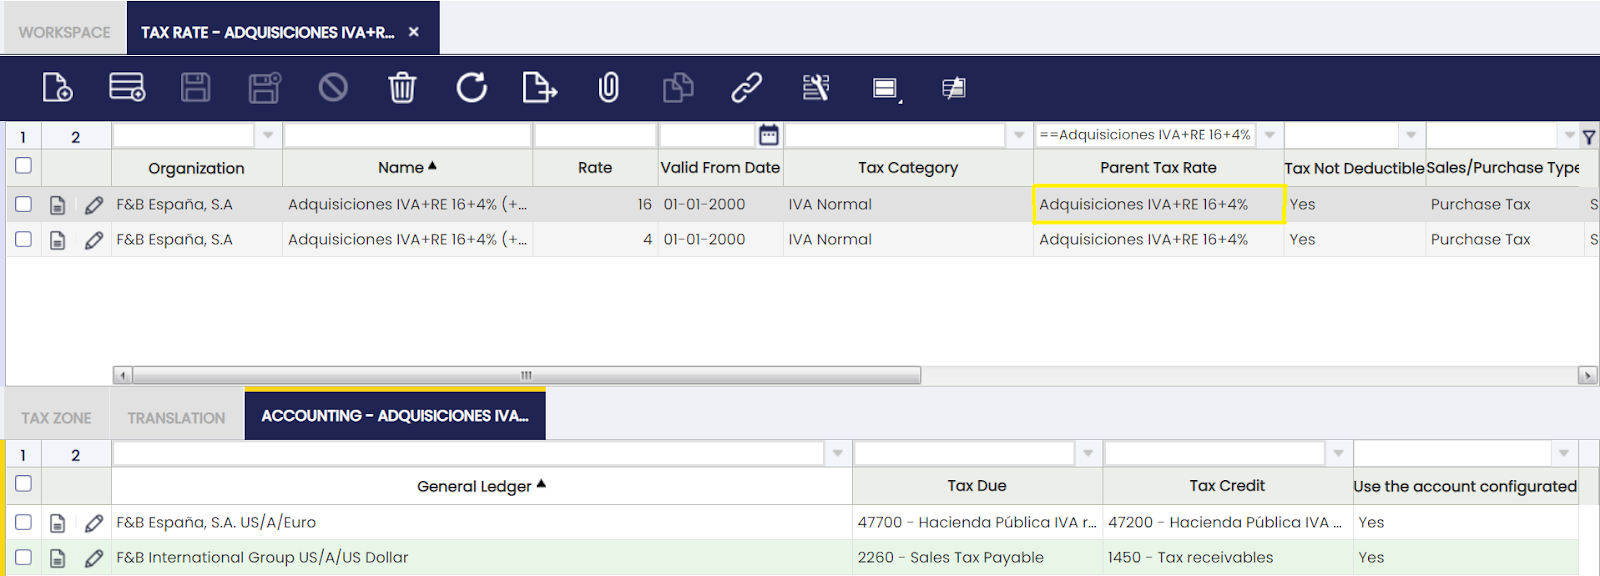
As system administrator user, activate the accounting template field in the Active Table tab of the General Ledger Configuration window and then, set the template called Purchase Invoice Not Deductible.
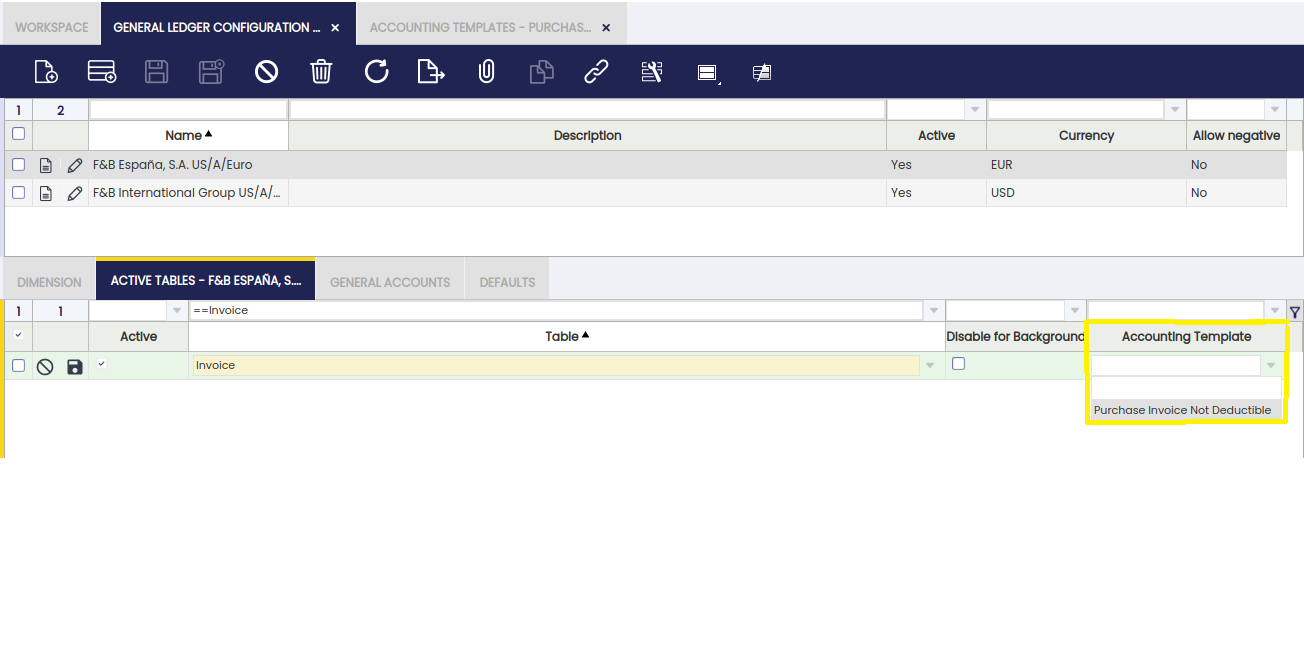
This checkbox, "Use the configured account", will only be visible if the checkbox under the heading "Non-deductible tax" was previously checked. The default value of this checkbox will be NO.
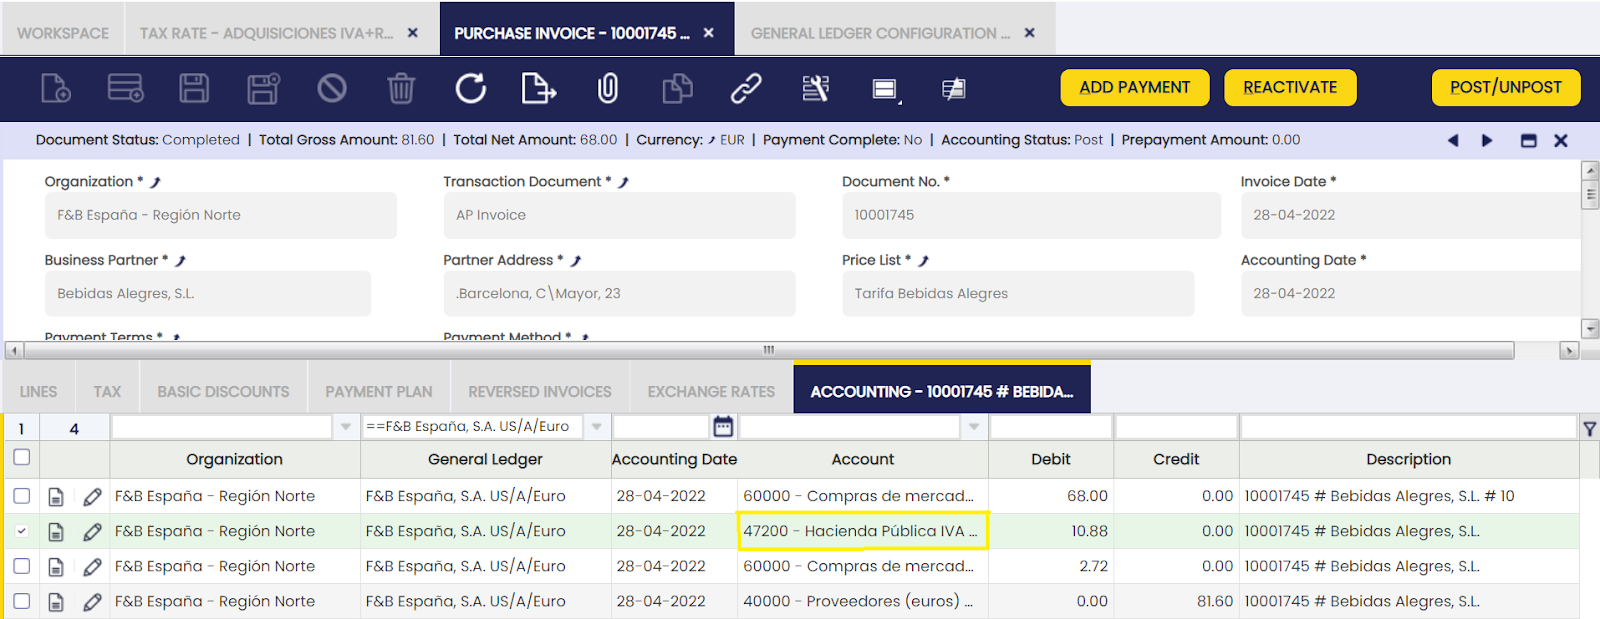
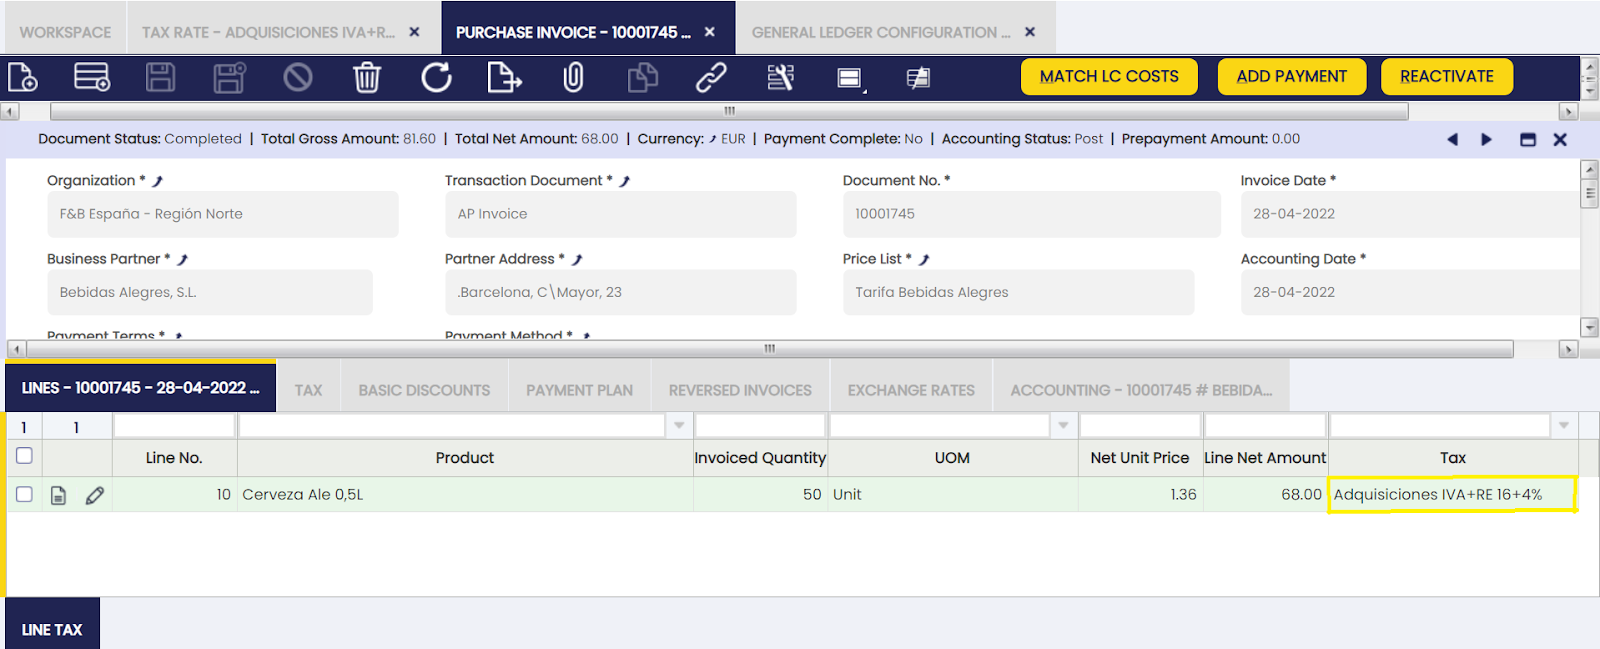
The VAT amount needs to be posted to the ledger in a Tax Credit account, therefore purchase invoice posting looks like:
| Account | Debit | Credit | Comments |
| Product Expense | Line Net Amount | One per invoice line | |
| Tax Credit | Tax Amount | One per tax line | |
| Vendor Liability | Total Gross Amount | One per invoice |
Tax rates examples:
- Simple tax rate
- "Purchase VAT Tax Rate at 18%" belonging to the tax category "Normal VAT for Products", Country/Region set to Spain and Destination Country/Region set to Spain.
- Summary tax rate
- "Service Sales VAT Tax Rate at 18.00% + Withholding (-15.00%)" belonging to the tax category "Normal VAT for Services" and to the business partner tax category "Business Partners subject to VAT and Income Tax".
This one must be setup as Summary type having two tax rates underneath which must belong to the same tax category and business partner tax category:- "Service Sales VAT Tax Rate at 18.00% + Withholding (-15.00%) (VAT 18%)", rate = 18,00
- "Service Sales VAT Tax Rate at 18.00% + Withholding (-15.00%)" (W -15%)", rate = -15,00
- "Service Sales VAT Tax Rate at 18.00% + Withholding (-15.00%)" belonging to the tax category "Normal VAT for Services" and to the business partner tax category "Business Partners subject to VAT and Income Tax".
Tax Zone
Tax zone defines the origin country/region and destination country/region where a given tax rate applies, for those cases where it is not enough to define only one "Origin" Country/Region and only one "Destination" Country/Region at header level.
For instance, an "Export" tax rate must detail as Origin Country/Region the location of the warehouse organization and as Destination Country/Region the rest of countries and regions where it is possible to export the goods. This tax rate would apply to sales transactions between the "local" organization and its customers located abroad.
The same would apply to an "Import" tax rate, in this case Origin Country/Region would be all the country from where goods can be imported and the Destination Country/Region would be Organization one.
Translation
Tax rates can be translated to any language required.
Accounting
Accounting tab allows the user to configure the account to be used while posting tax rate transactions to the general ledger.
- "Tax Due" account is the account used while posting sales tax amounts
- "Tax Credit" account is the account used while posting purchase tax amounts.
- "Tax Due Transitory" account is the transitory account used while posting sales tax amounts under the Cash VAT regime.
- "Tax Credit Transitory" account is the transitory account used while posting purchase tax amounts under the Cash VAT regime.
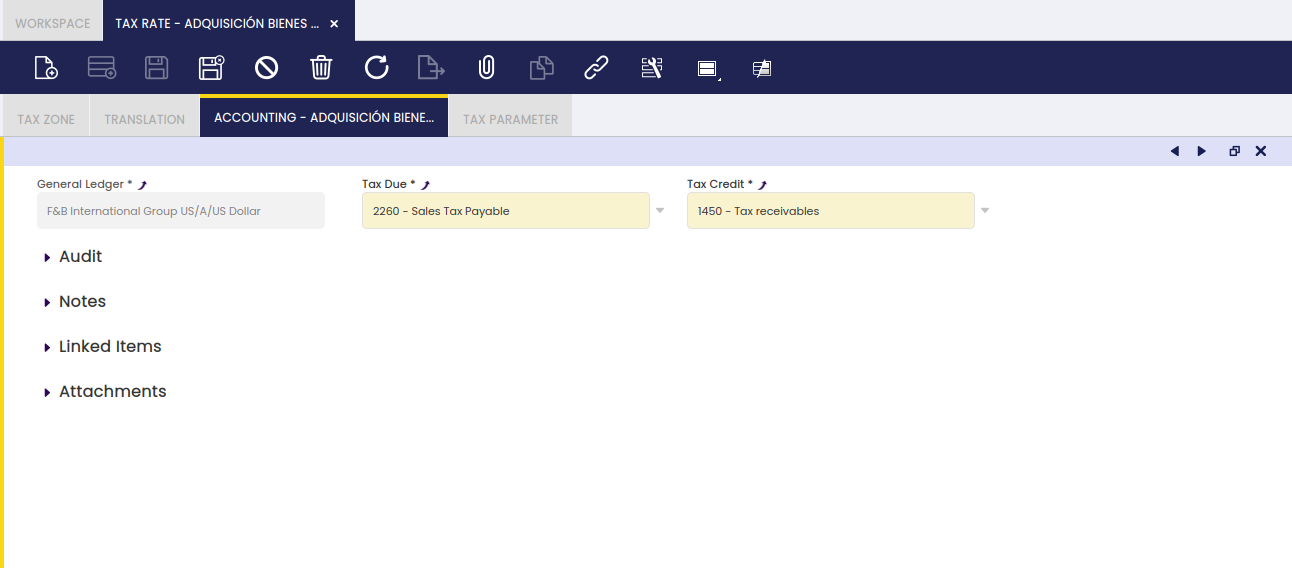
A purchase invoice posting looks like:
| Account | Debit | Credit | Comments |
| Product Expense | Line Net Amount | One per invoice line | |
| Tax Credit | Tax Amount | One per tax line. For Cash VAT regime the Tax Credit Transitory account is used instead. | |
| Vendor Liability | Total Gross Amount | One per invoice |
And a sales invoice posting looks like:
| Account | Debit | Credit | Comments |
| Customer Receivable | Total Gross Amount | One per invoice | |
| Product Revenue | Line Net Amount | One per Invoice Line | |
| Tax Due | Tax Amount | One per Tax Line. For Cash VAT regime the Tax Due Transitory account is used instead. |
"Negative" Withholding tax rates need to have specific accounting information in this tab in order to get that withholding tax amounts are posted in a different account.
Below posting applies in the case that the "Allow Negative" feature is not enabled either for the General Ledger configuration used while posting or for the Document Type which in this case is an "AP Invoice"
In other words, a negative withholding posting means a negative debit posting which will turn into a positive credit posting if a negative feature is not enabled.
| Account | Debit | Credit | Comments |
| Product Expense | Line Net Amount | One per Invoice Line | |
| Tax Credit | Tax Amount | One per tax line. For Cash VAT regime the Tax Credit Transitory account is used instead. | |
| Tax Credit | Withholding Amount | One per withholding line | |
| Vendor Liability | Total Gross Amount | (Line Net Amount+Tax Amount-Withholding Amount) |
Cost Center
Introduction
Cost Center is an accounting dimension which can be used while posting documents to the ledger.
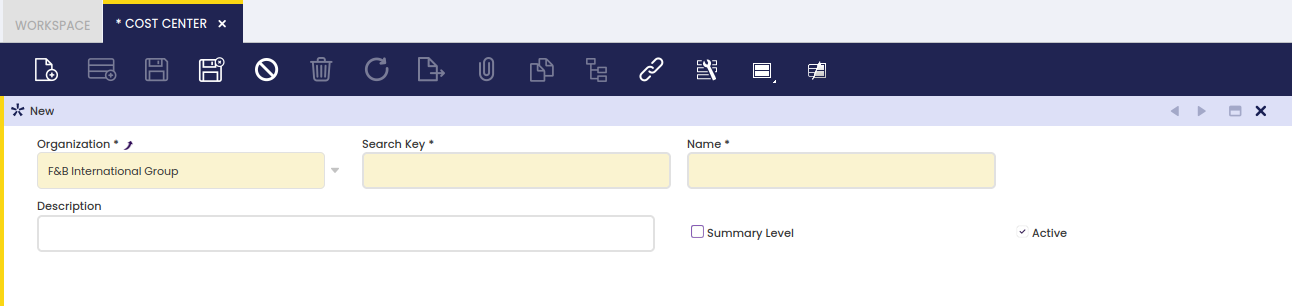
Cost Center
The Cost Center window allows the user to create organization's cost centers. It is used as a master of the cost centers of an organization.
A cost center can be created by just entering the name and the description of the organization's cost center. If a cost center is created for the (*) organization that cost center will then be available to all the organizations of the client. A cost center can be created as summary which helps to get a tree structure of cost centers.
ABC Activity
Introduction
Activity based costing (ABC) is a special costing model that identifies activities in an organization for which managing cost is required.
"Activity" is one of the dimensions which can be set up for a given general ledger configuration.
Activity
ABC Activity window allows the user to create as many activities as required per each organization.
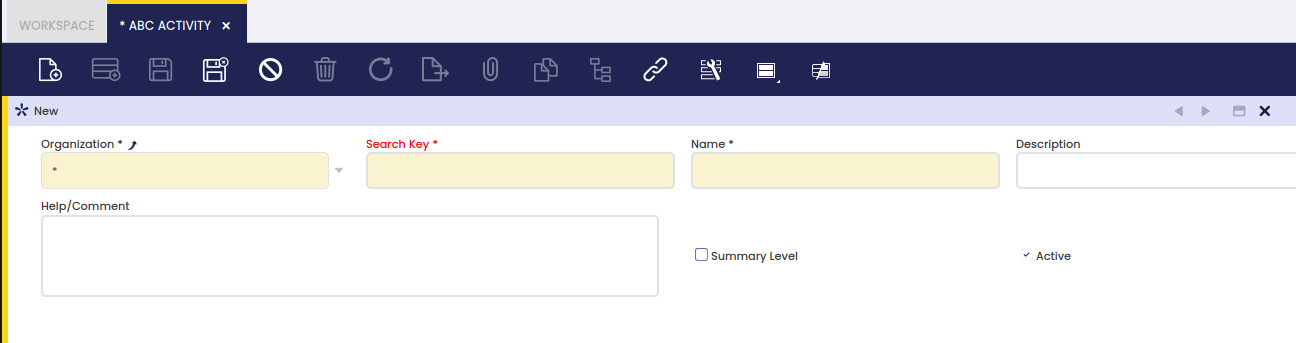
As shown in the screen above, it is possible to define summary activities which support a hierarchical structure or activities within an organization.
Accounting Templates
Introduction
Accounting templates in Etendo overwrite default accounting behavior. Each template is related to a specific table.
The accounting entries generated by Etendo usually need to be generated in a different way to fulfill the legal requirements for a concrete country. To support this kind of requirements, Etendo allows overriding the code that generates the accounting entries through what is called Accounting Templates. Each time a document is posted, the accounting engine checks whether any Accounting Template is defined for the associated table or for the concrete document and executes it instead of the default Core's code.
Warning
This is a powerful feature that must be used with caution. The code that generates the accounting entries must be deeply tested before deploying it in a real instance.
Creating the Accounting Template Configuration
The Java class that implements the generation of the new accounting entries is defined into the Accounting Templates window. The definition is quite simple and only requires a name, the Java class name, which must be inside the java package of the module, and the table for which the user wants to override its accounting entries (for example, C_Invoice for Invoices, M_InOut for goods shipments/receipts, etc.).

This Accounting Template will be later on associated with the Active Tables or a Document. So in this step it is important to define as many Java classes as Active Tables or Document to override their accounting behavior. For example, we can define an unique java class for overriding the accounting behavior of all the invoices (sales invoices, purchase invoices, purchase/sales credit memo, etc.), or alternatively define a class for overriding only the accounting entries for Purchase Invoices (AP Invoice) and keep the default behavior to the rest of the invoices.
Dataset definition
Dataset definition is a key step in this process. A wrong dataset definition can waste all previous work, so it is important to follow all these considerations:
- The dataset must belong to the accounting template module
- Try avoiding strange characters in the dataset's name. This string is used for generating the XML file name that stores the dataset.
- The Data Access Level must be set to System/Client, which means we allow users to apply the configuration only at Client level (Organization *).
- The Export allowed flag must be set.
- Inside the Table tab, include the AD_CreateFact_template table, which is the one that stores the Accounting Template configuration.
- The HQL/SQL Where clause is an important field, because it allows filtering the records the user wants to include into the dataset. In the example all the records that are inside the module java package name have been filtered.
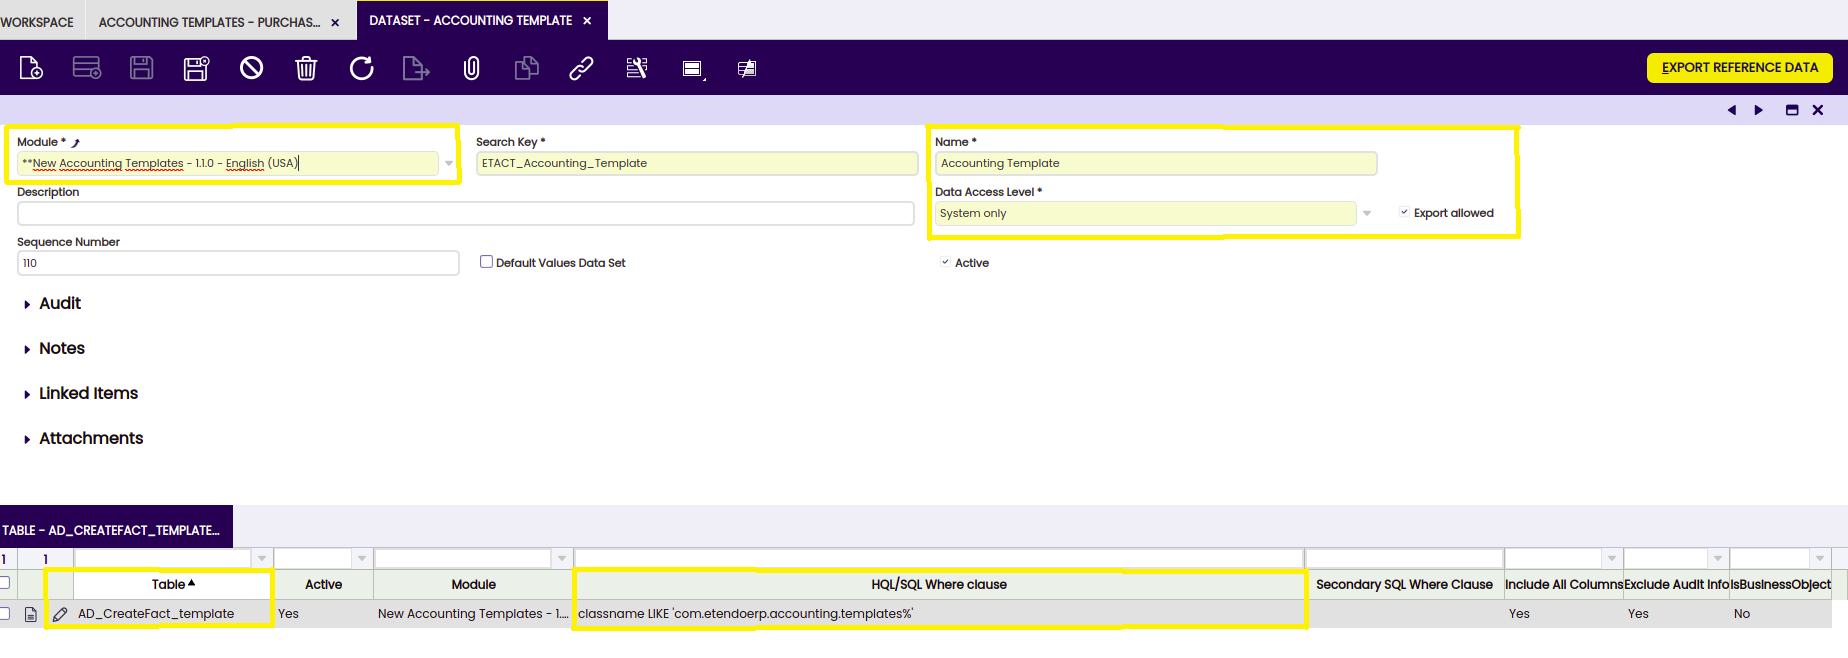
The dataset definition is ready, so the user just needs to export it to a file pressing the Export Reference Data button. This process queries the previous tables and gets all the records that fulfill the HQL/SQL Where clause, generating a XML file inside the module's referencedata/standard directory. As a fast check, this file can be opened using any plain text editor and the user can verify that it contains several lines. In case the file is empty, the user should double check the dataset definition, specially the HQL/SQL Where clause used for each table.
Testing the Dataset
The real test to ensure the taxes dataset is OK can be done inside the development instance. The test consists on creating a new client running the Initial Client Setup and selecting the new dummy accounting template dataset.
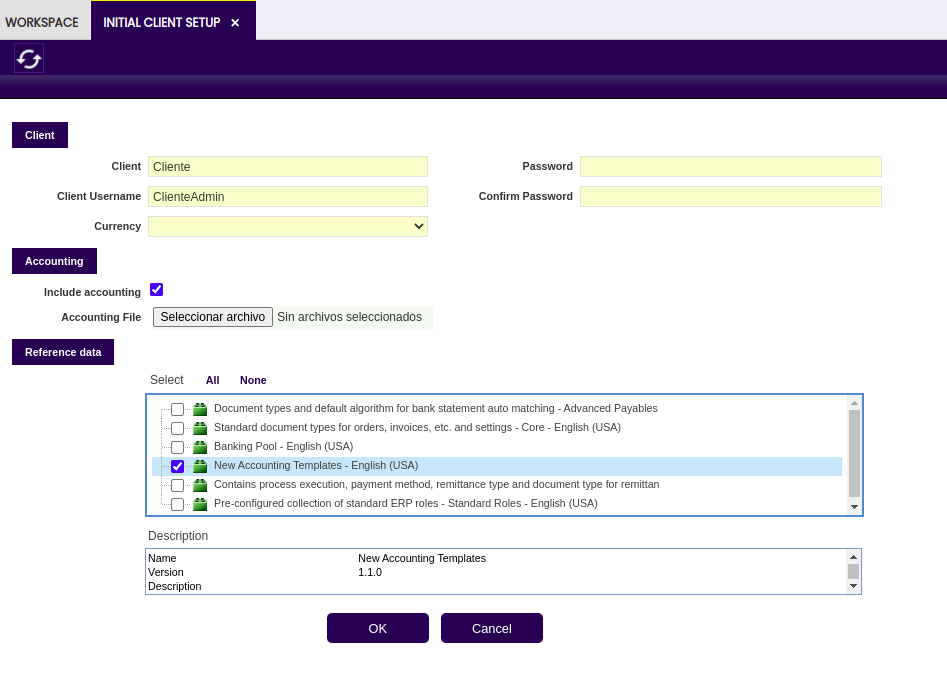
Info
If the data inside the dataset are consistent, the Initial Client Setup Process should be completed successfully, otherwise it will fail giving a description about the error.
After a successful Initial Client Setup, login into the new client, go to the Accounting Templates window and check the record is there.
Functional Specification
Overview
Nowadays, Etendo builds entries associated with documents following a hard-coded behavior. In order to modify the generated entry, code must be modified. The current code has become a module called core. If a module wants to modify accounting entries generated by documents, core must be modified, and this is not desired at all. With this new development in core, modules will be able to easily modify the entries generated by each document.
Scope
The aim of this project is to allow modules to modify the way entries are generated when posting documents.
Design Considerations
A new layer will be included between the document, and the logic that posts that document. In a new window each document is mapped to the servlet that implements the logic to post it. This way, just modifying the values on this window, accounting behavior is changed. If a new module wants to change the entry generated when posting an invoice, a new servlet is developed following the desired behavior. At the same time, the mapping of the invoices to the servlet that posts will be changed to the servlet developed in the module. This way, the whole application behavior is changed.
Functional Requirements
Info
Application is not affected by these developments, because all changes to the way the documents are posted are transparent to the user. Only a new window is necessary, that is configured automatically for the user when updating.
Balance Sheet and P/L Structure Setup
Introduction
Balance Sheet and P&L structure setup allows the user to configure the two main financial reports which are the Balance Sheet and the P&L.
Once configured, these two reports can be launched from the Balance Sheet and P&L window.
It is important to remark that the source of both reports structure is the organization Account Tree which therefore needs to be structured in a way to obtain a meaningful Balance Sheet and P&L reports.
Moreover, and as already described, an Account Tree or chart of accounts can be imported or can be manually created:
- in the case of imported account trees as a CSV file or as a reference data set:
- Etendo provides the localized account tree structure required to get localized balance sheet and P&L reports for a given country, for instance, the Spanish Chart of Accounts
- in the case of manually created account trees:
- it is key to take into account that financial reports structure relies on the account tree structure.
Setup
Each new record in the Balance Sheet and P&L structure setup window is a report.
It is really important the level up to which either a Balance Sheet or P&L report is defined. That level relies on the organization type selected because:
- If the organization selected is a Legal with Accounting which has other organizations underneath, the financial information provided by the reports will be a roll-up of the financial information of the organizations which belong to it. Roll-up means it produces an aggregated Balance Sheet. To get a consolidated Balance Sheet, transactions between organizations (intercompany transactions) need to be removed from the resulting report.
- The same applies in the case of organizations which are Organization type which have other organizations underneath sharing the same general ledger configuration and, therefore, account tree.
- If the organization selected is a Generic organization which belongs to a Legal with Accounting one, the financial information provided by the reports will be just the financial information of that organization.
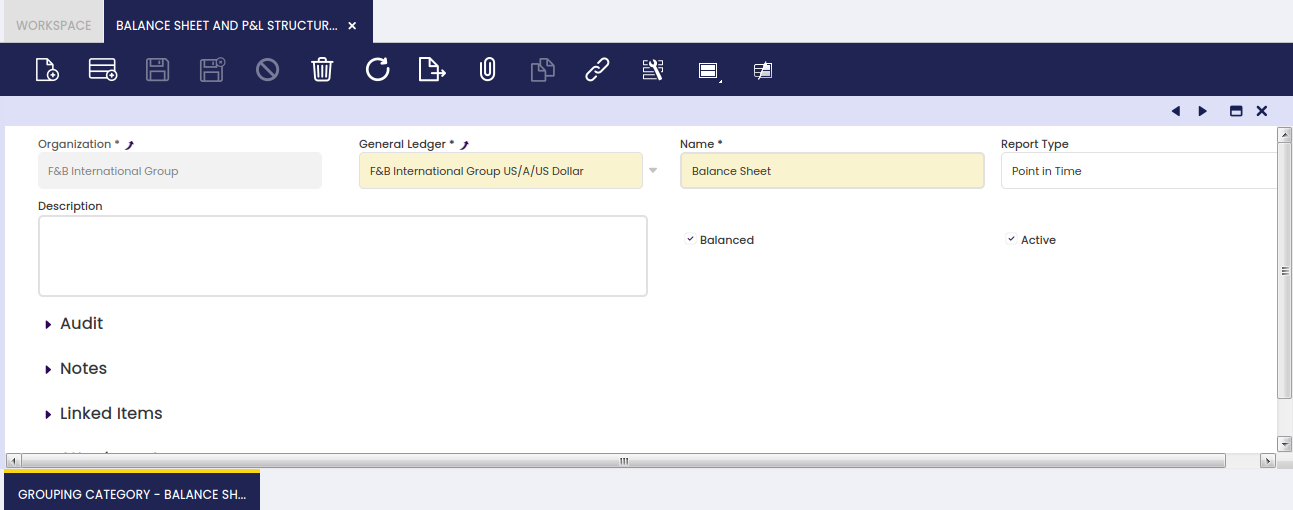
The fields to fill in this window are:
- the Report Name
- the General Ledger from which accounting information is required
- the Report Type. The options available are:
- Point in Time, this type is used for reports such the Balance Sheet as account's balance needs to be referred to a specific date.
- and Periodic, this type is used for reports such the P&L as used account's balance needs to be referred to a specific period of time, for instance a month, a quarter, a year, etc.
- finally the Balanced flag which must be activated whenever the report need to be launched just for "Legal with Accounting" organization types as that is the enterprise level where accounting balance is ensured.
This flag needs to be checked as active for the Balance Sheet report.
Grouping Category
Grouping category tab allows the user to define categories which groups report node/s. Each grouping category implies a page break in the report showing the defined report node/s.
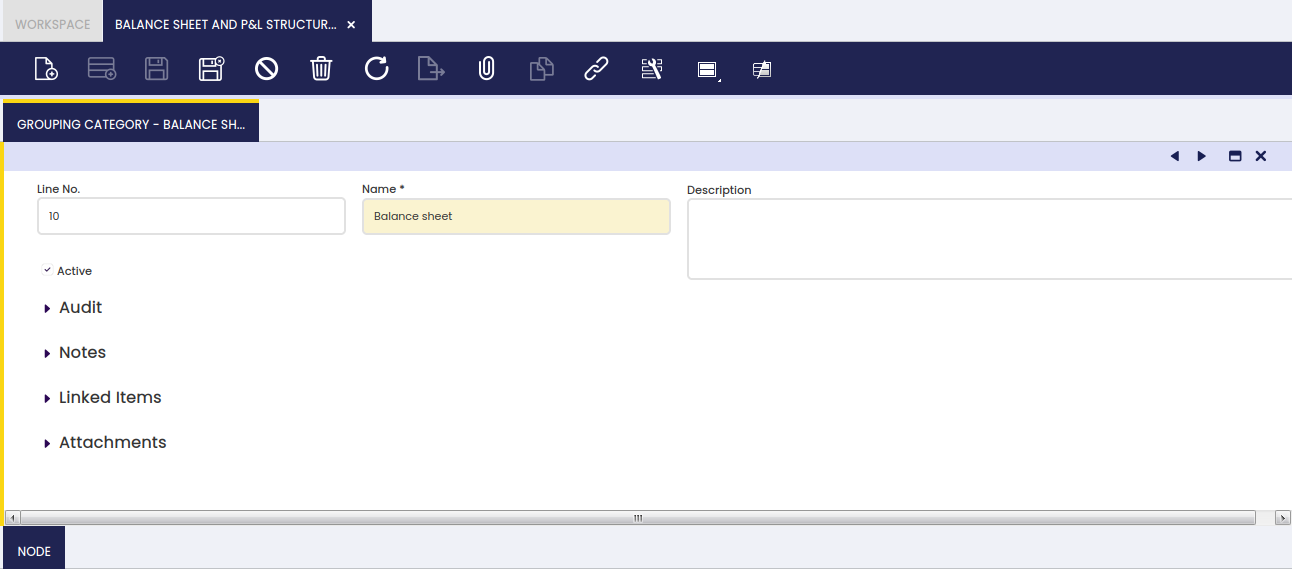
Node
A node defines the information shown in the report.
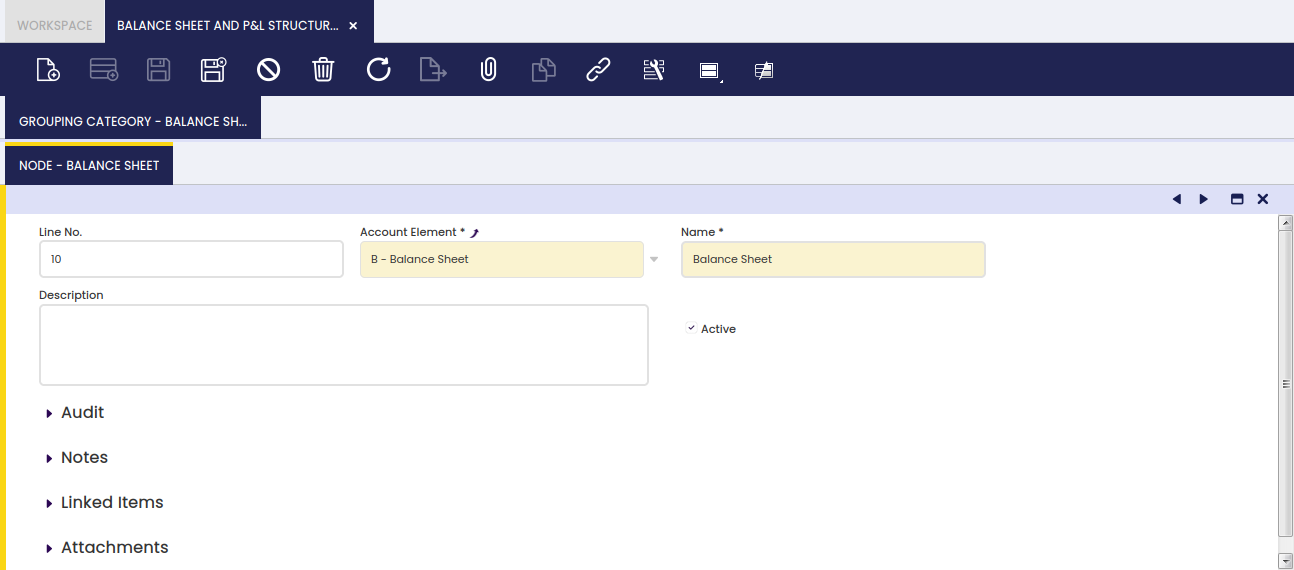
A report node is defined by:
- the Name of the node
- and the Account Element which is going to be shown in the report.
- The account elements selected here are usually "Heading" element level types,
therefore the calculated balance of the node will take into account and will show the balance of all the account elements of other types which are underneath it.
- The account elements selected here are usually "Heading" element level types,
Balance Sheet Structure Setup Example
One example of a Balance Sheet structure can be:
- Report Name: Balance Sheet
Report Type: Point in Time
Balanced: Yes- Grouping Category: Balance Sheet
- Node: Assets linked to the Account Element of the Account Tree which collects all the "Asset" accounts.
- Node: Liabilities and Owner's Equity linked to the Account Tree element which collects all the "Liabilities and Owner's Equity" account tree elements.
- Grouping Category: Balance Sheet
Above nodes must be an Account Tree element properly configured.
P&L Setup Example
An example for a Profit and Loss report would be:
- Report Name: Profit and Loss
Report Type: Periodic
Balanced: No- Grouping Category: Profit and Loss
- Node: Profit and Loss linked to the "Heading" Account Tree element which collects all the "Expenses" and "Revenue" account tree elements.
- Grouping Category: Profit and Loss
Above node must be an Account Tree element properly configured.
Bulk Posting
Introduction
This section describes the Bulk Posting module included in the Etendo Financial Extensions bundle.
Info
To be able to include this functionality, the Financial Extensions Bundle must be installed. To do that, follow the instructions from the marketplace: Financial Extensions Bundle.
Warning
Before using this functionality, remember that this module's background process can affect the performance of the system.
The Bulk Posting functionality allows the user to post or unpost multiple records by selecting the corresponding records and clicking the “Bulk posting” button. Also, the Accounting Status of the record/s is shown in the status bar, in form view, or in a column, in grid view.
This functionality is available in the following windows:
- Amortization
- Goods Movements
- Financial Account
- Matched Invoices
- Cost Adjustment
- Bill of Materials Production
- Internal Consumption
- Doubtful Debt
- Landed Cost
- G/L Journal
- Simple G/L Journal
- Work Effort
- Goods Receipt
- Goods Shipment
- Return Material Receipt
- Return to Vendor Shipment
- Sales Invoice
- Purchase Invoice
- Payment In
- Payment Out
- Physical Inventory
Accounting Status
All the records existing previously to the installation of this new functionality have a default “pending refresh” value in the column Accounting Status. To set the correct value for this column, it is necessary to configure the following preference to indicate the amount of days to be considered by the process to set the correct values of the previous records.
Preference Configuration
To configure the preference, go to the “Preference” window and create a new record with the property “Days Back to Refresh Accounting” and the default value “90”. If necessary, it is possible to create another preference by entering a new value and checking the “selected” box.
Background Process
It is necessary to run the “Refresh Accounting Status” background process to update the accounting status column.