title: How to Use Advanced Sequences
tags: - How to - Sequences - Transactional Sequences - Non-Transactional Sequences - Database Sequence Management
Sequences
Overview
This document covers how to use the implementation of sequences, explain all the features, and give some implementation example cases.
There are two base reference implementations defined that you can use or extend:
- Transactional Sequences: These sequences lock the table in the database to guarantee the generation of identifiers sequentially and avoid duplicates or gaps.
- Non-Transactional Sequences: In this case, the process to create sequences uses Database Sequences and should be used in cases where the gaps between numbers is not an issue.
Important
Please be aware that both Transactional and Non-Transactional Sequences, as configured in our system, are not supported within Database Stored Procedures (PLs). This includes specific processes like POSOrder, which cannot utilize these sequences. Implementing these sequences in PLs, such as within the POSOrder process, may result in system malfunctions or errors. These sequences are tailored for the application layer and may not align with the procedural context of direct database operations.
Quick Sequence Setup
-
First, log-in as “System administrator”. Open the
Application>Application Dictionary>Tables and ColumnsSelect the Column that you want to set as a sequence and change the Reference field to Transactional Sequence or non-Transactional sequence.Info
If you want to define a new sequence reference, you must add it in Reference Search Key field and the parent (Base Sequence) must be in the Reference field. See how to create a new reference in new sequence reference.
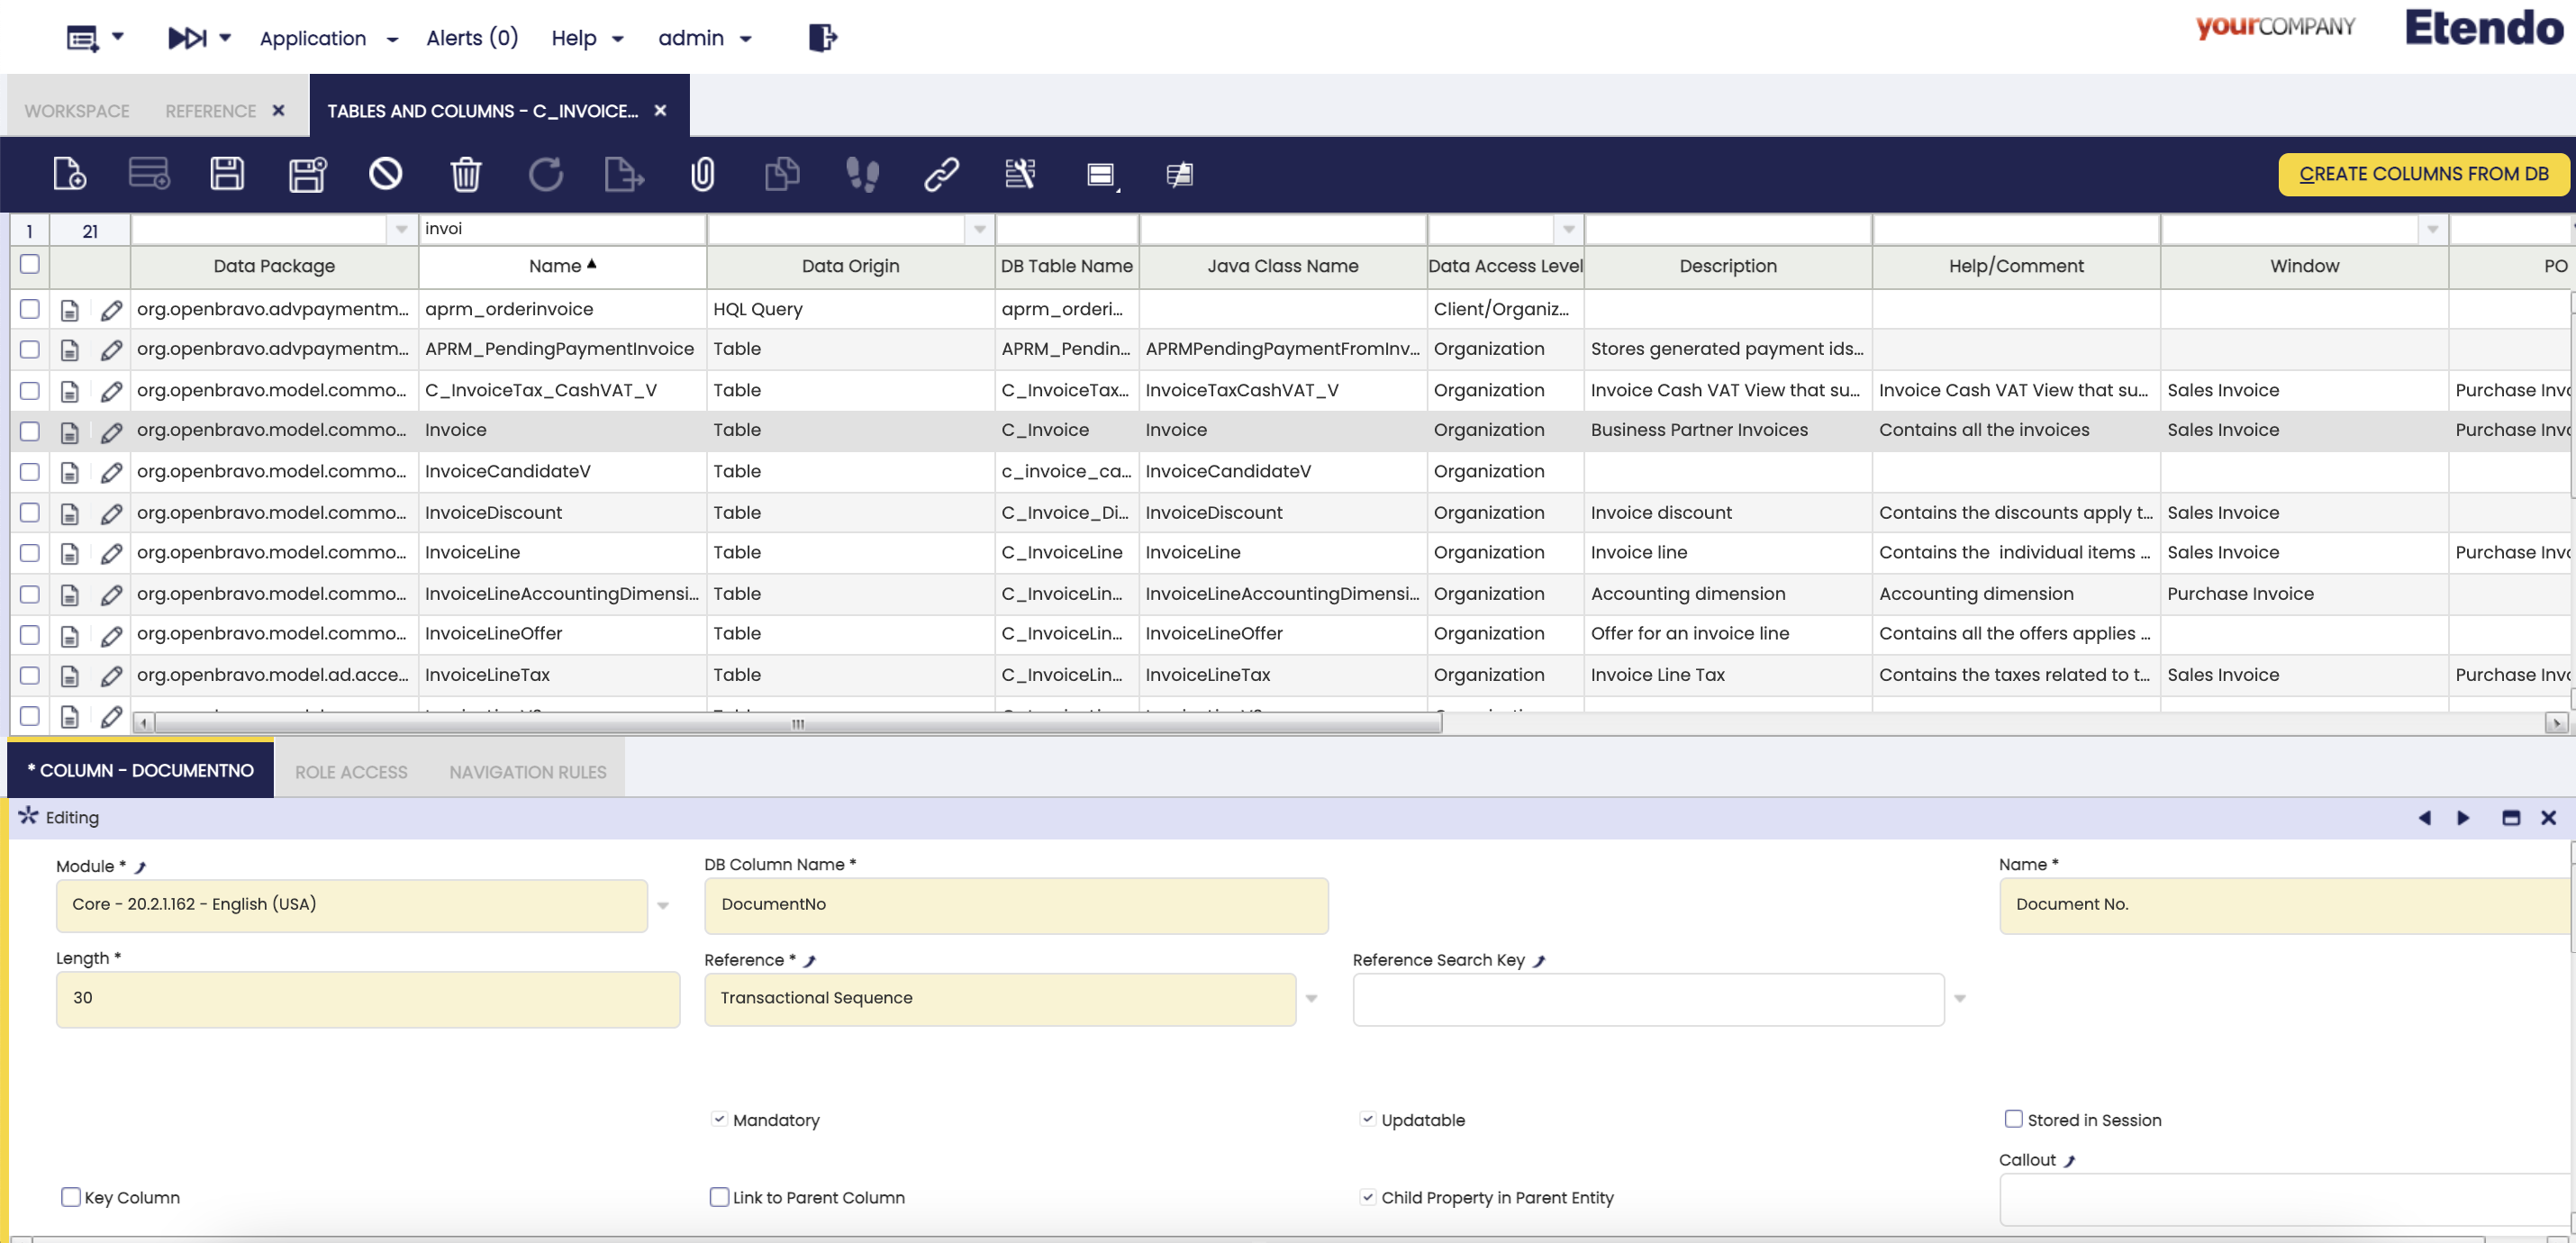
Adding transactional sequence in the invoice table -
Then, it is necessary to run a process in
Application>General Setup>Application>Create Sequencesto generate the sequences, selecting the root Organization where they will be created.Warning
To run this process, the user must be logged using the role which manages the sequence, not as system administrator.
Warning
This process will only generate the combinations for organization and document types, in case you want to generate sequences for the new dimensions described below, you must extend the
SequencesGeneratoraction and overwrite thegenerateSequenceCombinationandsetSequenceValuesmethods in order to generate the relevant combinations and set the newly added dimensions. You can also create the required sequences manually.
Executing the process to create new sequences
After that, in the
Document Sequencewindow you can see the sequences generated.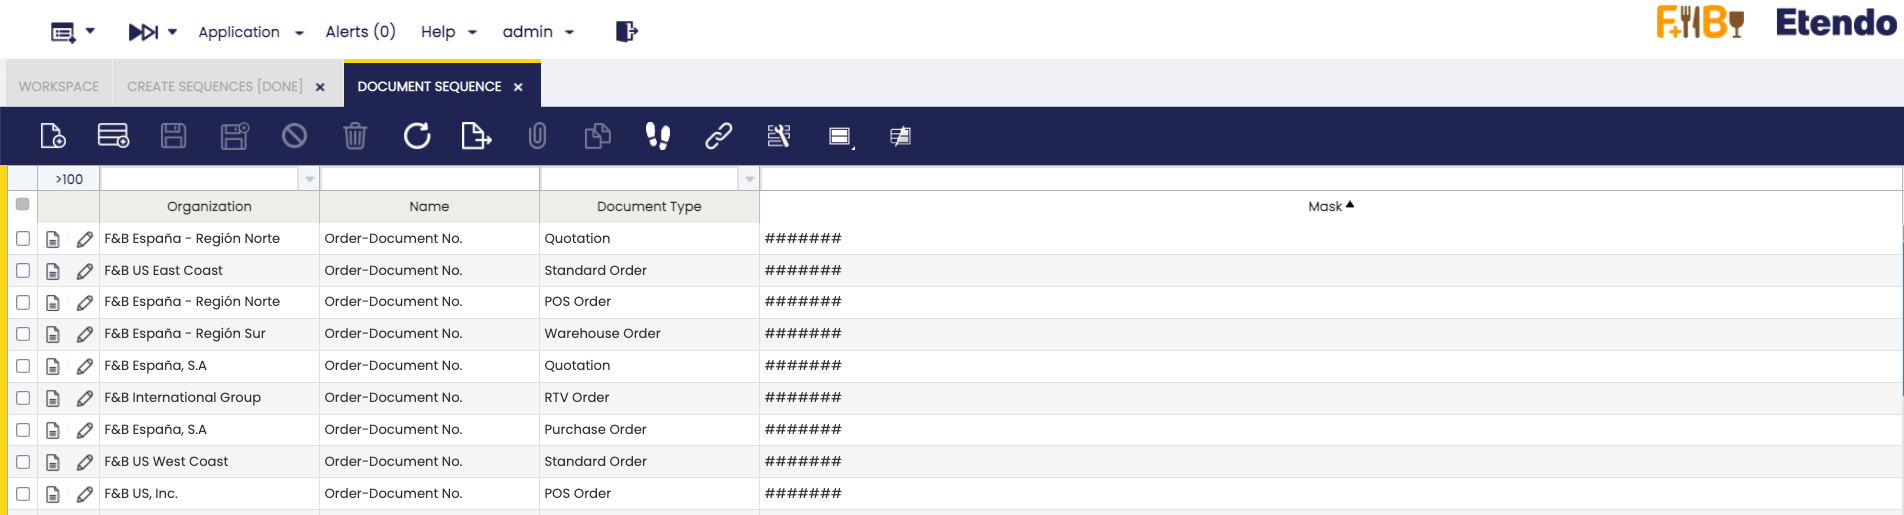
List of sequences generated by the process When you edit the record, you can see:
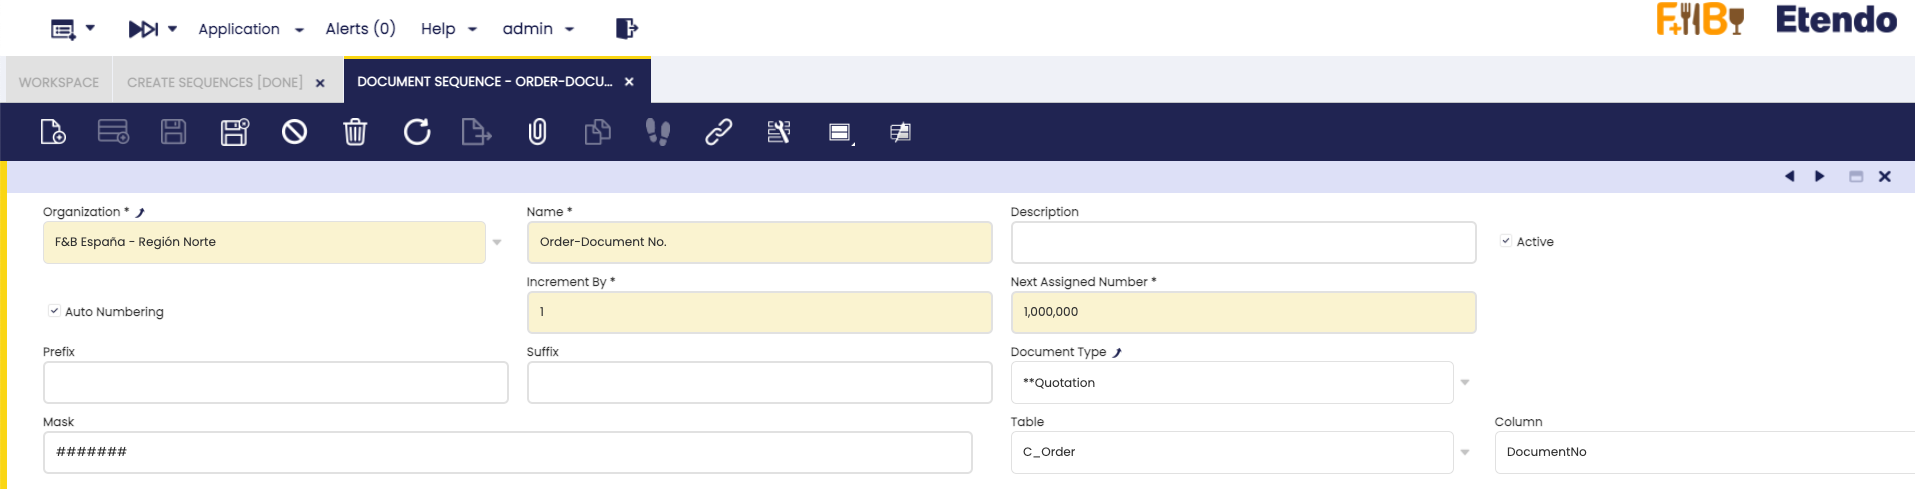
Sequence form view - Organization: Owner organization associated to the sequence.
- Name: An identifier using the Table and Column associated to the sequence.
- Description: Field to add information or details about the sequence.
- Auto Numbering: Check to define the increment and initial numbering.
- Increment By: Numeric Value to define the sequence increment.
- Next Assigned Number: Initial sequence number.
- Prefix: String at the beginning of the sequence (Supports masking).
- Suffix: String at the end of the sequence (Supports masking).
- Document Type : In case that the table has document types, a sequence for each document type will have been created.
- Mask: It is a string defining a parse format, with the possibility to define a dynamic date or literal substring, in addition to the formatted incremental number.
Info
For more information about masking see Sequences Masking user guide.
- Table: Defines the table in which the sequence type column is located.
- Column: The column where the sequence is defined.
-
In case the sequence is applied in DocumentNo field, the user has to ensure that the Document Type associated has the property
sequenced documentunchequed to avoid throwing the legacy process. To do that, first log in as a user, then openAplication>Finantial Management>Accounting>Setup>Document Type, select the Document Type associated and finally, edit it.Warning
If the step is not followed, the legacy process will be run.
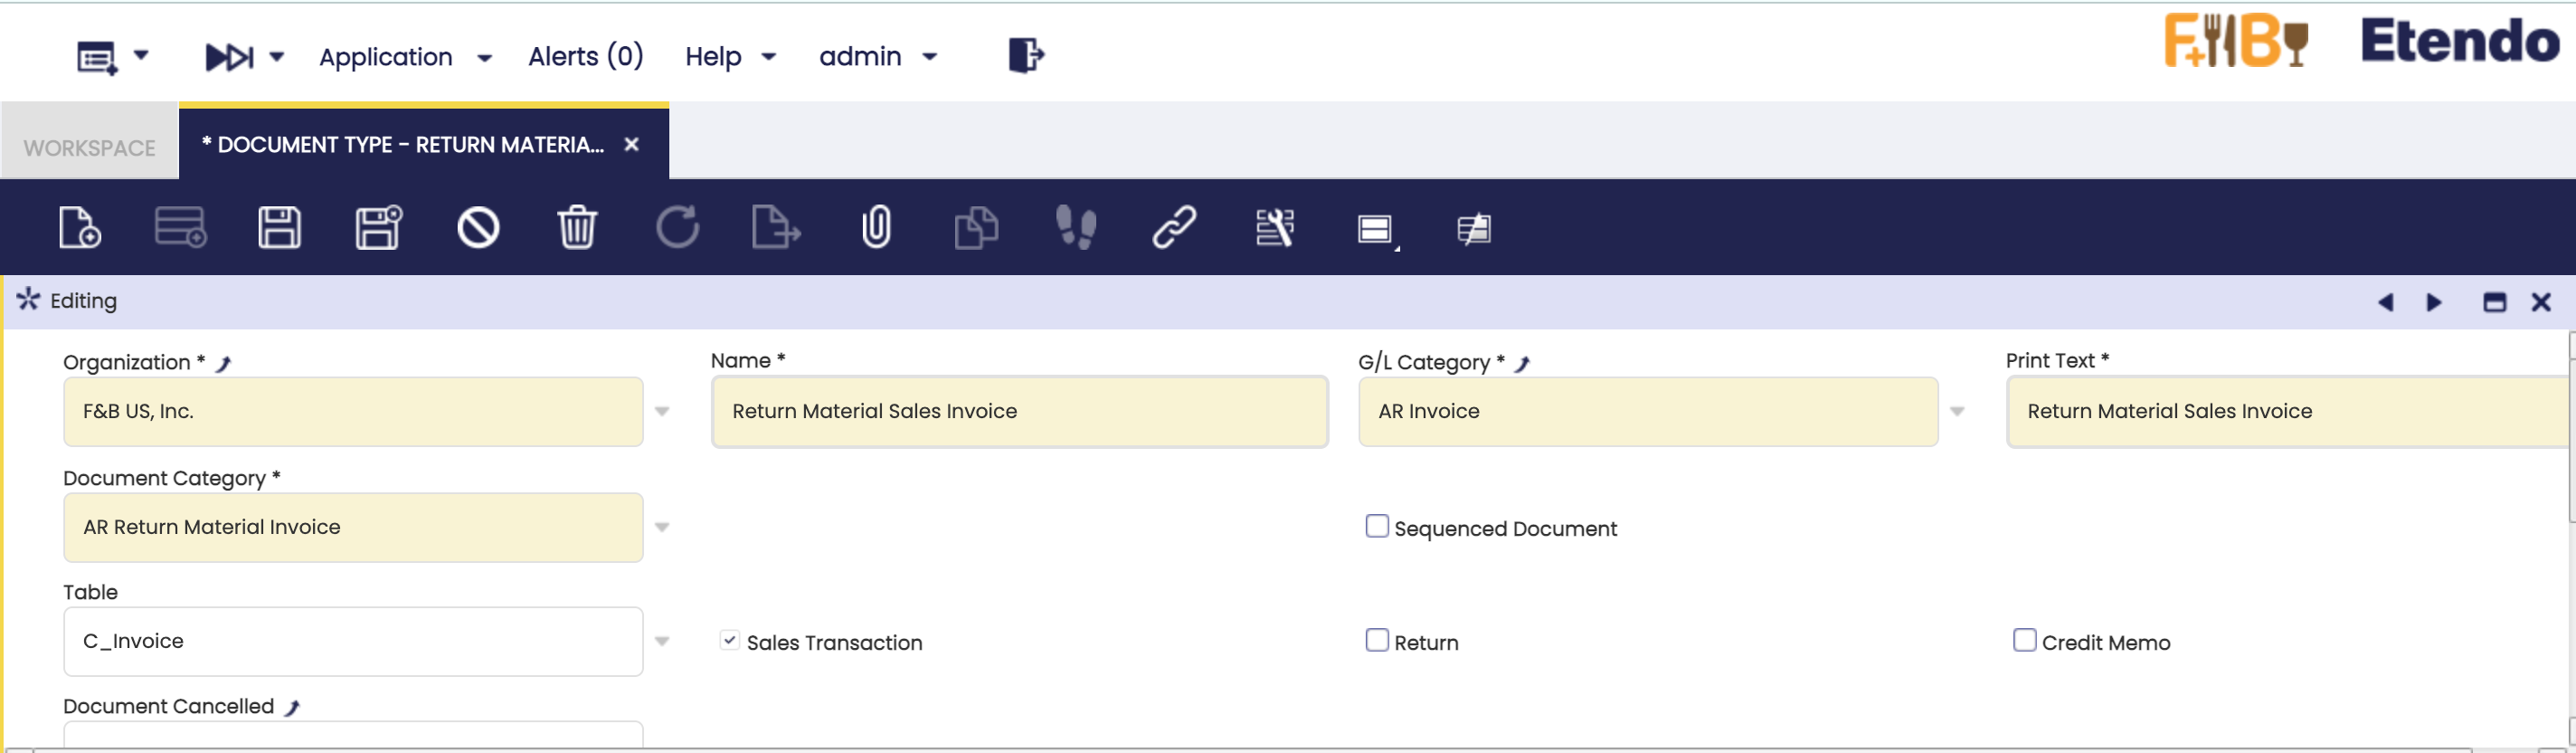
Document Type example -
Finally, you must compile the application. To do this, run:
-
To export the changes to your module, do not forget to do a:
New sequence reference
If you want to define a new reference with transactional or non-transactional parent reference, you must create a new record in the Reference window (Application > Application Dictionary >Reference) and set:
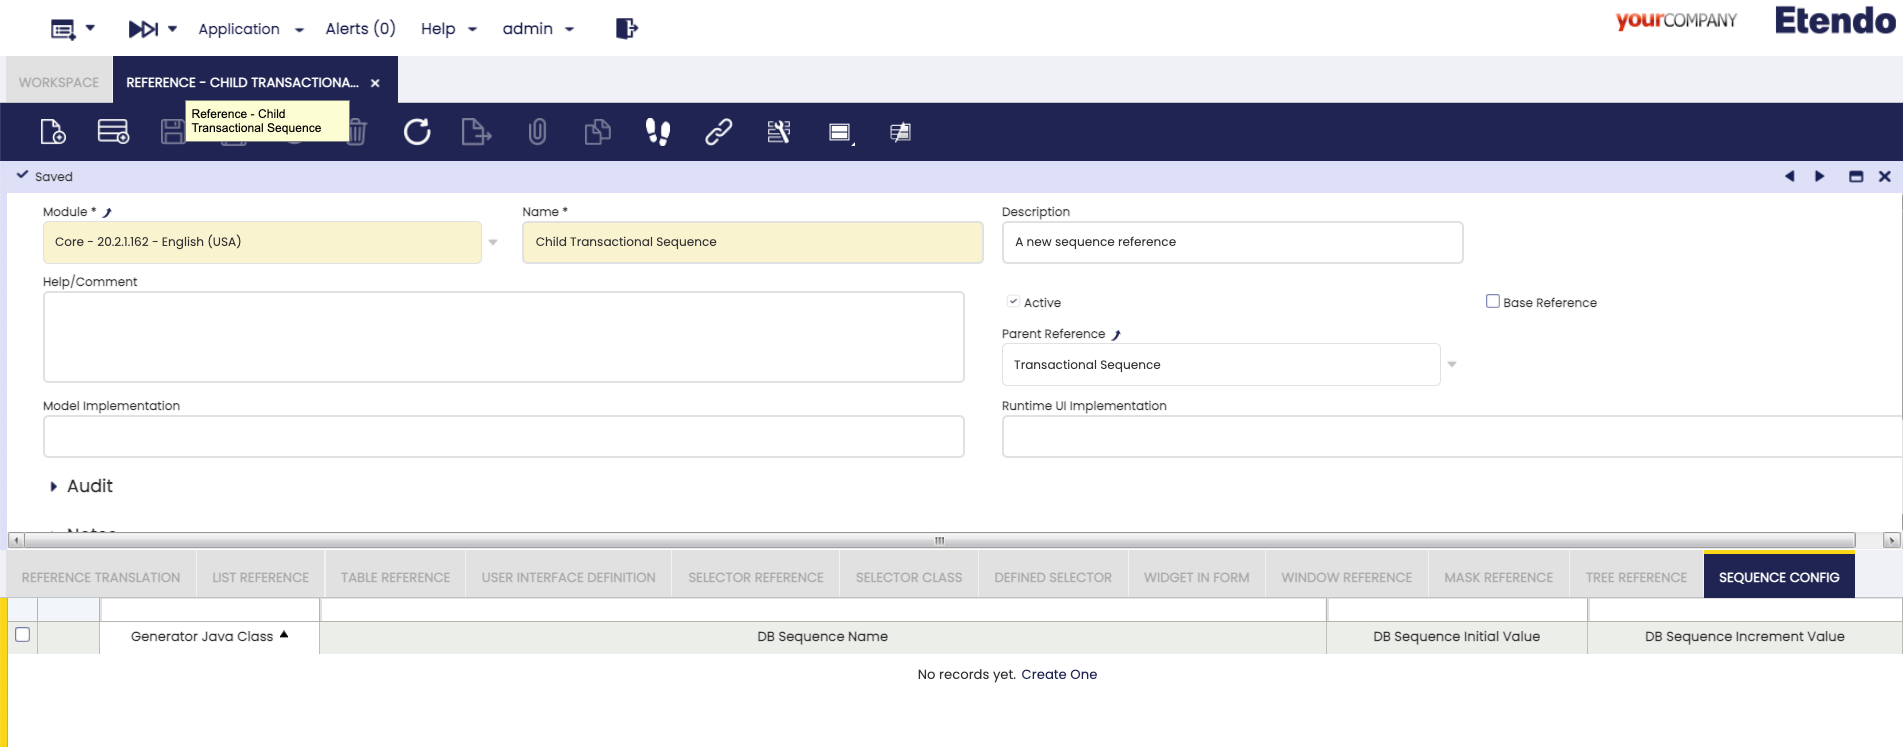
- Name: New reference identifier.
- Description: Field to add information or details about the reference.
- Parent Reference: Select transactional or non-transactional sequence.
Sequence Config tab:

- Generator Java Class: Class that generate the next sequence value using the document sequence definitions. (If it is empty, a default generator is used ).
When creating a non-transactional sequence, you must define:
- DB Sequence Name: Name of the sequence defined in Data Base.
- DB Sequence Initial Value: Initial sequence number.
- DB Sequence Increment Value: Numeric Value to define the sequence increment.
You can use a defined Sequence or create a new one using SQL:
CREATE SEQUENCE [ IF NOT EXISTS ] sequence_name
    [ AS { SMALLINT | INT | BIGINT } ]
    [ INCREMENT [ BY ] increment ]
    [ MINVALUE minvalue | NO MINVALUE ]
    [ MAXVALUE maxvalue | NO MAXVALUE ]
    [ START [ WITH ] start ]
    [ CACHE cache ]
    [ [ NO ] CYCLE ]
    [ OWNED BY { table_name.column_name | NONE } ]
| Postgres syntax to create a new sequence |
Info
In case the parent is Transactional Sequence only the Generator Java Class field will appear, but in case of the parent being a Non-Transactional Sequence you must define all the fiels.
Dimension List
A Dimension is a new filter clause used to select the sequence to be used when creating or saving a new record. The default dimensions are:
- Client
- Organization
- Document Type
This way you can have two different sequences depending on, for example, the Organization of the record. The same applies to the other default dimensions.
Info
Dimensions are currently supported only in Transactional Sequences.

Adding custom dimensions
If you want to add a new dimension to filter sequences, this dimension should be a column in both tables AD_Sequence and the table where the transactional sequence is used. You must also create a new reference, and create a new record in the Dimension List tab with this column (see how to create a new sequence reference above).
When a dimension is a foreign key column
-
To define a new dimension, you have to start adding a column in the
AD_Sequencetable, and a Foreign Key to the referenced column in an specific table. The dimension column must be created in the corresponding table (M_Productin this example) unless you decide to use an existing column as dimension.Warning
The name of the columns must be the same in both tables.
ALTER TABLE AD_Sequence ADD COLUMN <dimension>_id varchar(32),
ADD CONSTRAINT ad_sequence_<dimension> FOREIGN KEY (<dimension>_id) REFERENCES <table> (<dimension>_id)

ALTER TABLE M_Product ADD COLUMN <dimension>_id varchar(32),
ADD CONSTRAINT M_product_<dimension> FOREIGN KEY (<dimension>_id) REFERENCES <table> (<dimension>_id)
Note
Remember to replace
<dimension>with your desired name. -
Then you have to create the corresponding
AD_Columnregister in the Application Dictionary.Application>Application Dictionary>Tables and Columnssearch theAD_SequenceTable and create the new column. Then you must set theReferencefield of the dimension pointing to the foreign key table.Warning
If the table with the dimension records is a new table, it should be created in
Application>Application Dictionary>Reference, setting the Base Reference as Table, and adding the table in theTable Referencetab. -
Also, you have to create the field in the
Document Sequencewindow.Application>Application Dictionary>Windows, Tabs and FieldssearchDocument Sequencewindow and inSequencetab run the process to create the new field. -
If the dimension is a new column, you must to repeat the previous step to create the field in the table where the sequence is used.
-
Finally, go back to your Reference created previously and create a new register in the
Dimension Listtab, selecting the new column you just created, then execute a:
When a dimension is a List
-
First, you have to create a new column in AD_Sequence table to reference a list and do the same in the table which uses the sequence. The other option is to use an existing one.
Warning
The name of the columns must be the same in both tables.
ALTER TABLE public.ad_sequence
ADD COLUMN <list_name> character varying(60);

ALTER TABLE public.m_product
ADD COLUMN <list_name> character varying(60);
Note
Remember to replace
<list_name>with your desired name. -
Then, you have to create the column in the
Application>Application Dictionary>Tables and ColumnssearchAD_SequenceTable and create the new column. You must set theReferencefield of the new Column toListand indicate the corresponding Reference Search Key (Or define a new one). In the Default field you can set the id of one of the list elements and when a new Sequence is created, the reference automatically will be set. You also have to do the same in the table that uses the sequence, or you can use an existing one. -
Finally, go back to your Reference previously created and create a new register in the
Dimension Listtab by selecting the new column you have just created then, execute a:
Change sequence when change dimension
- If you want the sequence to change automatically when you change the dimension or the configured list, you must implement a callback or extend it if it already exists. The following example explains how to implement the callout, taking into account that the dimension used is the Product Category and that the order is automatically entered in the Search Key field.
public class ChangeSequenceAfterChangeProductCategory extends SimpleCallout {
  @Override
  protected void execute(SimpleCallout.CalloutInfo info) throws ServletException {
    final String strcProductId = info.vars.getStringParameter("inpmProductId");

    if (StringUtils.isBlank(strcProductId)) {
      try {
        OBContext.setAdminMode();
        Tab tab = OBDal.getInstance().get(Tab.class,info.getTabId());
        Field field = tab.getADFieldList()
        .stream()
        .filter(f -> ("inp" + Sqlc.TransformaNombreColumna(f.getColumn().getDBColumnName())).equals("inpvalue"))
        .findFirst()
        .orElse(null);
        String sequenceNumber = Utilities.getDocumentNo(field);
        info.addResult("inpvalue", "<" + sequenceNumber + ">");
      } finally {
        OBContext.restorePreviousMode();
      }
    }
  }
}
This work is licensed under CC BY-SA 2.5 ES by Futit Services S.L.