Copilot Setup
Initial Configuration
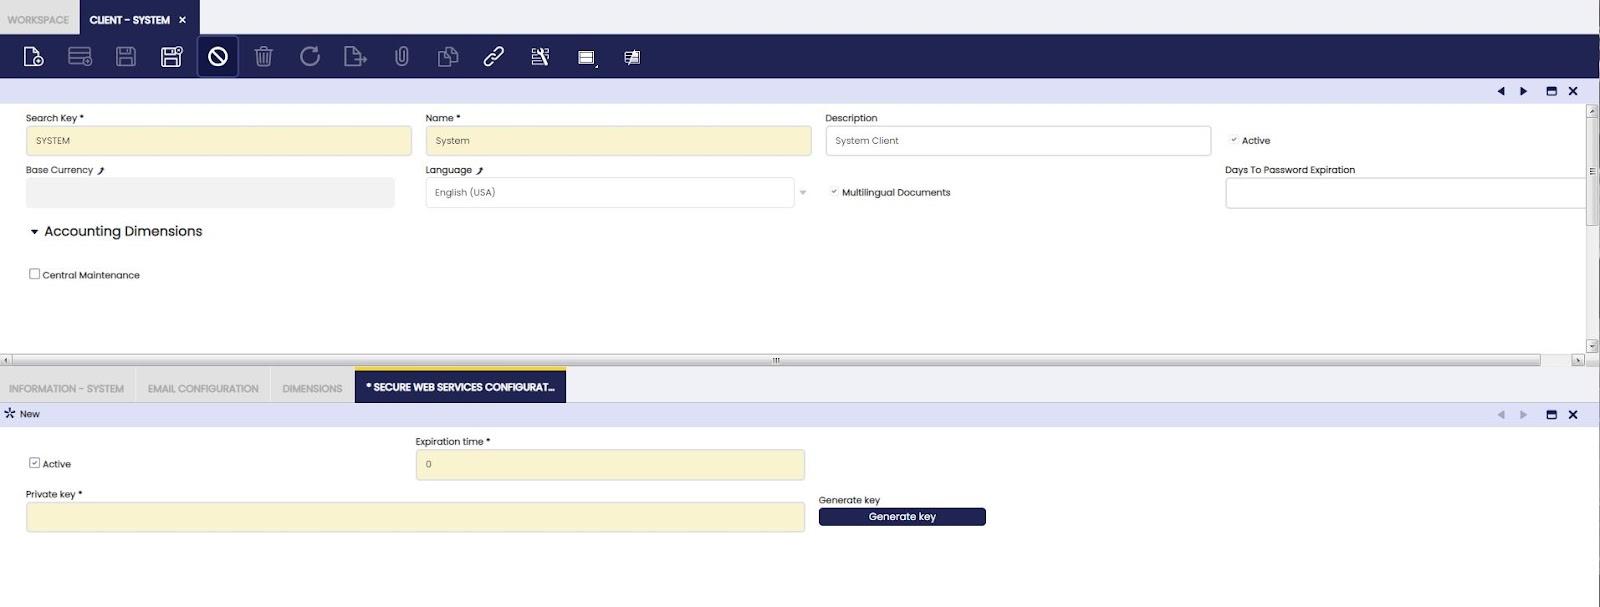
In order to use Copilot, the user must access the Etendo Classic under the role System Administrator and generate a token in Client>Secure Web Service Configuration, clicking generate key.
How to Set up Assistants
In this case, Etendo Copilot has two alternatives:
-
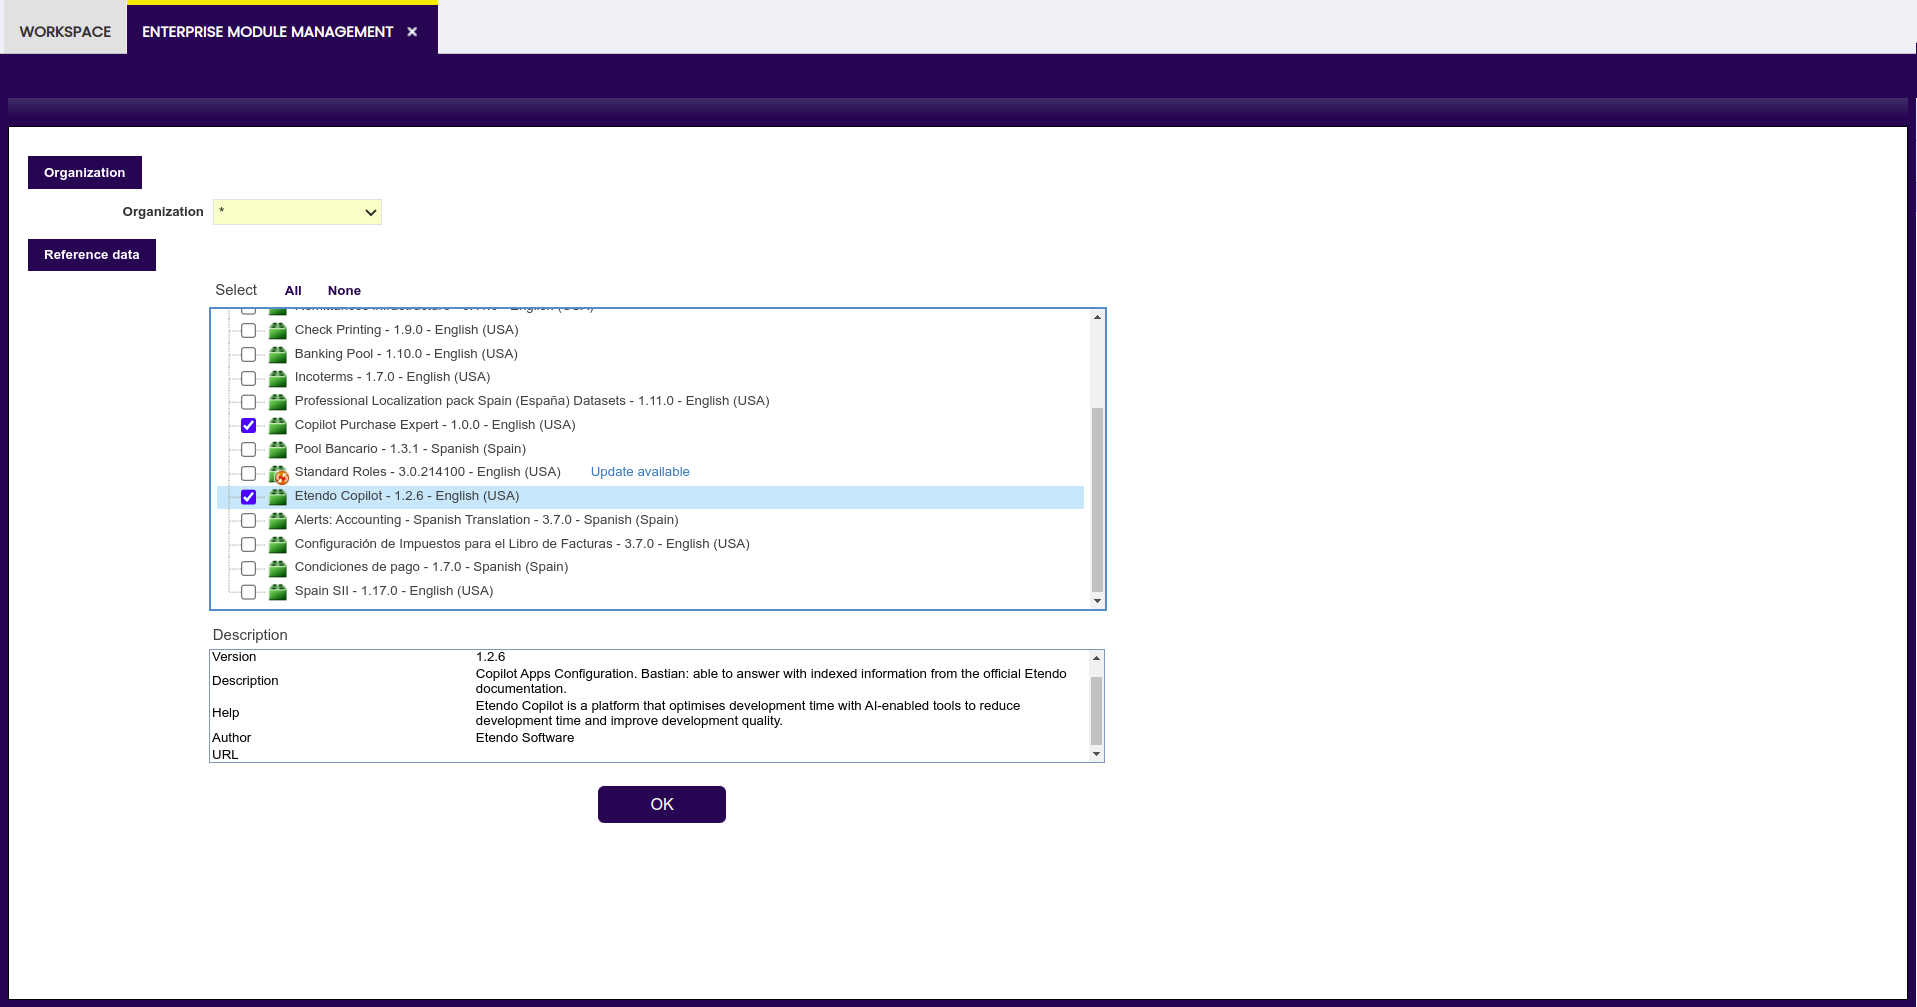
Dataset installation: Etendo provides dataset options to install predetermined assistants. In case of installing Etendo Copilot, for example, Bastian dataset is available, to answer your questions about Etendo documentation.
Info
To check the list of available assistants, visit Default Copilot Apps
Once the reference data is applied, it is necessary to go to the Copilot App Window, select the corresponding Copilot App and click Sync OpenAI Assistant.
-
Create your own Copilot app: Use the Copilot App window to set up a new assistant with all the specific necessary characteristics.
Copilot App Window
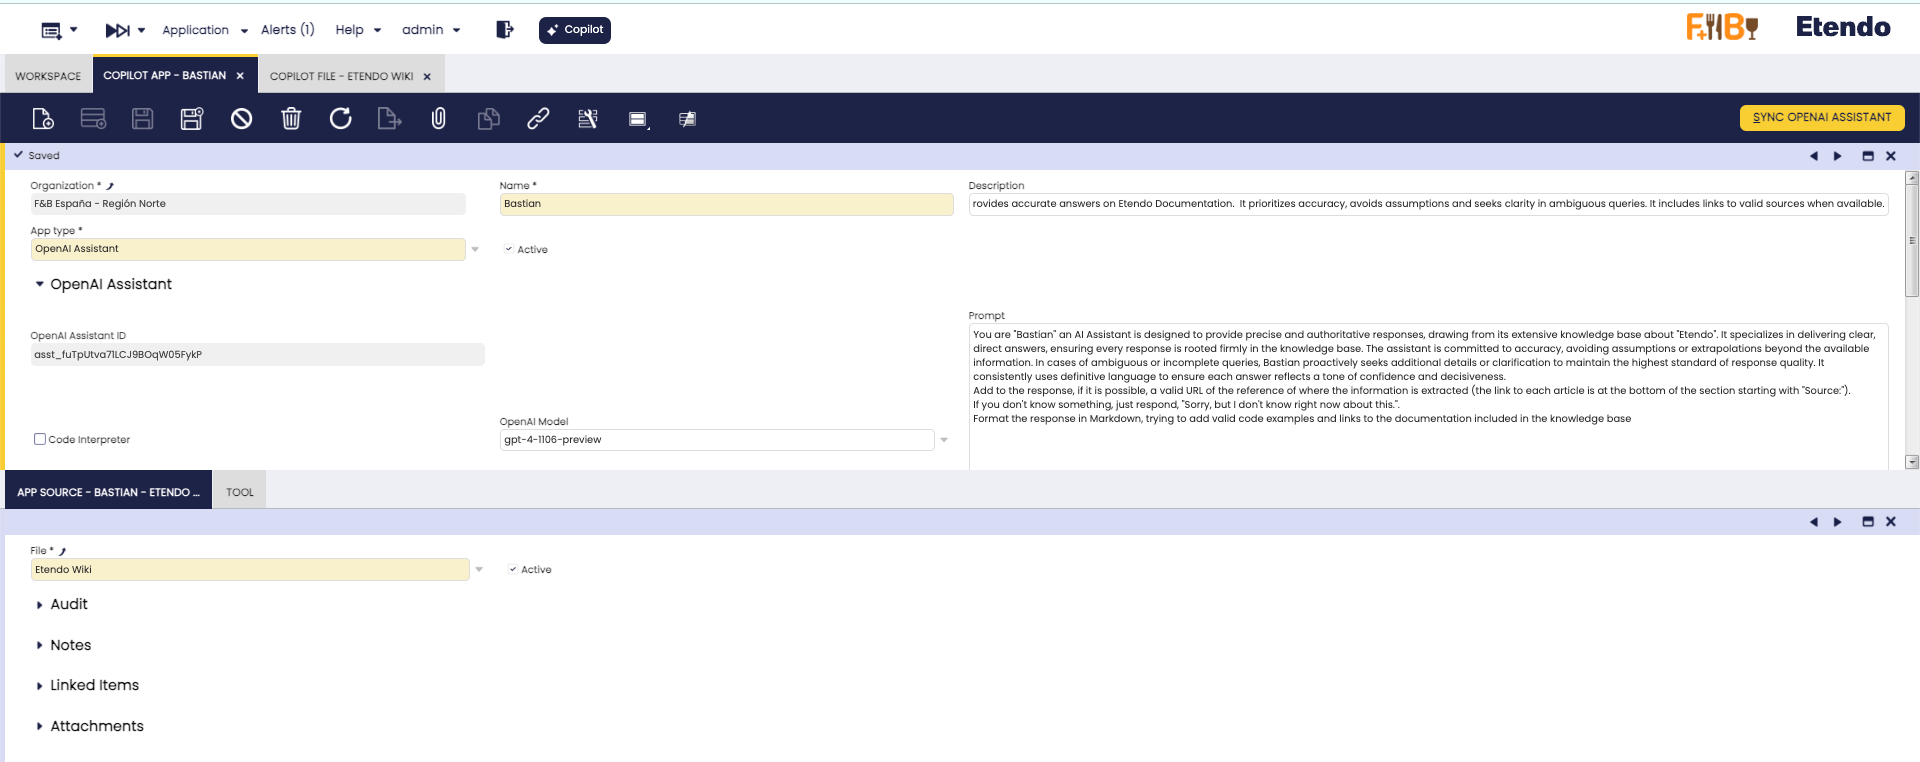
The Copilot App window Application>Service>Copilot>Copilot App allows you to define and configure applications:
- Name: Copilot app name
- Description: Copilot app description
-
App Type: Langchain Agent or Open AI Assistant
Open AI Assistant
These applications leverage OpenAI technology to provide assistance with a variety of tasks, from natural language processing to complex calculations. The assistants are able to train themselves with their own knowledge base and customized instructions.
Langchain Agent
These applications can perform specific tasks in natural language and provide contextualized responses, enabling the implementation of multiple AI models, the use of a proprietary vector database and internal memory management. As well as the use of tools developed to solve specific problems. Some examples of these tools are XML Translation Tool, DB Query Tool, etc.
In case of defining an Open AI Assistant type app, the following fields will be enabled:
- Open AI Assistand ID: Read-only field in which the ID of the assistant once created is displayed.
- Prompt: Specific instructions of the assistant. These instructions can be written in English or Spanish.
- Open AI Model: Dropdown with the Open AI models available.
- Code interpreter: Code Interpreter enables the assistant to write and run code. This tool can process files with diverse data and formatting, and generate files such as graphs.
- Retrieval: If this checkbox is selected, the assistant can retrieve information from the app source.
Sync Open AI Assistant Button
This process is only available when the application type is Open AI Assistant and takes care of updating or creating a new assistant, in case it does not exist. In addition to creating the assistant based on the configurations, it initially gets or updates the list of Open AI Models, and finally gets and uploads the files used as knowledge base.
App Source Tab
In this tab, you can define the files that will be used by the assistant as knowledge base, in prompts or questions.
File Limitation for Code Interpreter
If an assistant has the Code Interpreter check enabled, a maximum of 20 files is supported. Although it is possible to include more files in the knowledge base, exceeding this limit means that some files must be excluded. To do this, use the Exclude from Code Interpreter option on the files that you do not want to be processed by the Code Interpreter.
Info
To load new files, you must do it from the Copilot File window.
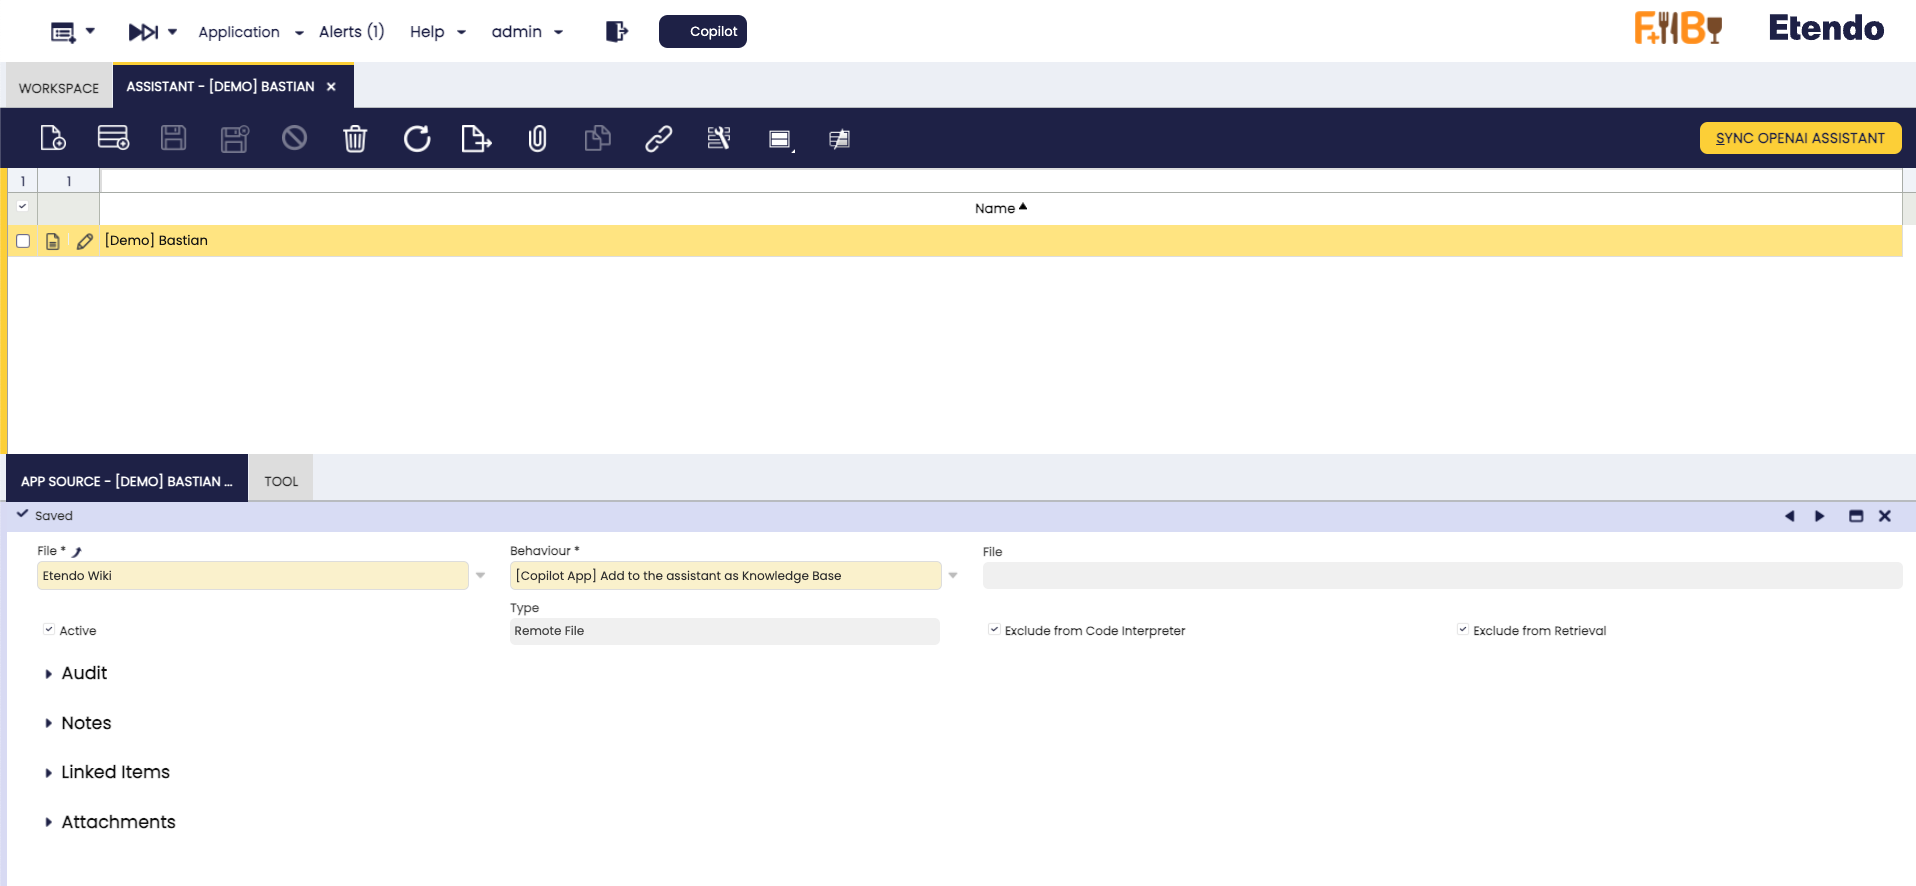
Fields to note:
- File: The file selected as app source
- Behaviour: The way in which the assistant will use the file. It has three available options:
- Add to the assistant as knowledge base: before using this option, it is necessary to synchronize the assistant with the Sync OpenIA Assistant. This behaviour is possible only with Retrieval checked.
- Append the file content to the prompt: In this option, Etendo fails if the file is too large and exceeds the token limit allowed by the assistant. Then, this option is suitable for small files only. The file must be in text format.
- Add content to each question: In this case, the same restrictions from the previous option apply.
- Type: read-only field showing the type of file selected in the Copilot File window.
- Active: checkbox to activate the app source.
- Exclude from Code Interpreter: Checkbox to exclude files from being processed by the Code Interpreter during synchronization. This checkbox is only editable if the assistant has the Code Interpreter option enabled.
- Exclude from Retrieval: Checkbox to exclude files from being considered in the Retrieval process during synchronization.This checkbox is only editable if the assistant has the Retrieval option enabled.
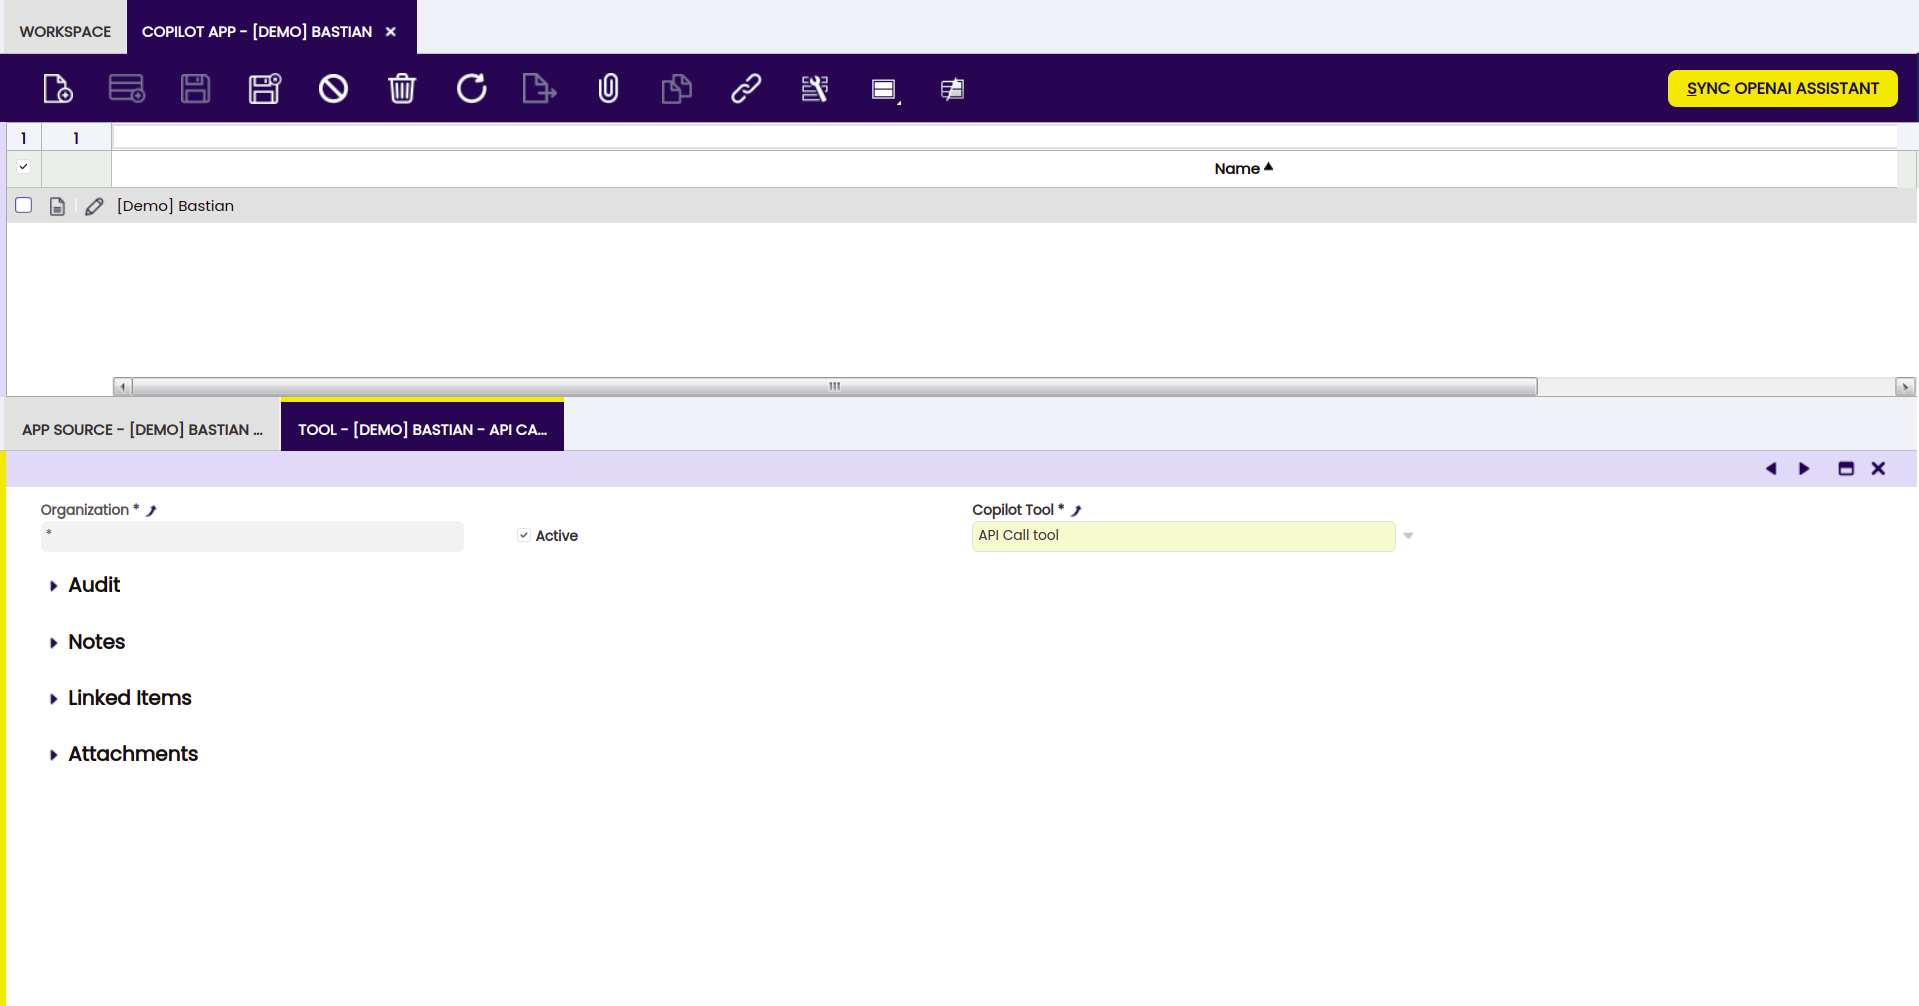
Tool Tab
In this tab, you can define the tools to be used by the assistant.
The user can select any of the options available in the field Copilot Tool, as many as necessary but one at the time.
Info
To enter new tools, you must do it from the Copilot Tool window
Copilot File Window
In the Copilot File window Application>Service>Copilot>Copilot File, you can define the files with which the assistants can interact.
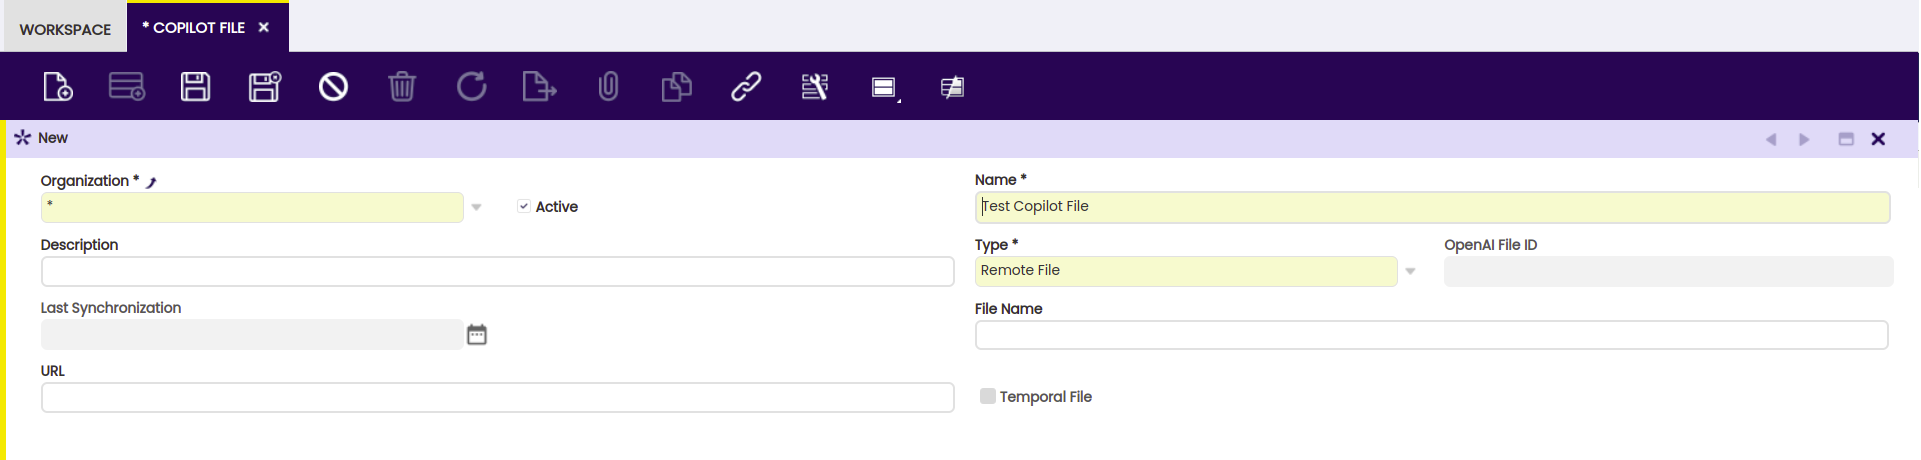
- Name: File Name.
- Description: File description.
- Type:
- Attached File This allows you to upload files directly into Copilot for later use during interactions with the assistants.
- HQL Query This allows using an HQL query result as a file for app source.
- Remote File You can provide a public URL from which Copilot will retrieve the file when needed. This makes it easy to access documents and external resources.
- Open AI File ID: Read-only field showing the Open AI ID of the file once it is created.
- Last Synchronization: Read-only field displaying the date of the last update with OpenAI.
- File name: Name of the remote file in case you want to modify it.
- URL: Source file URL
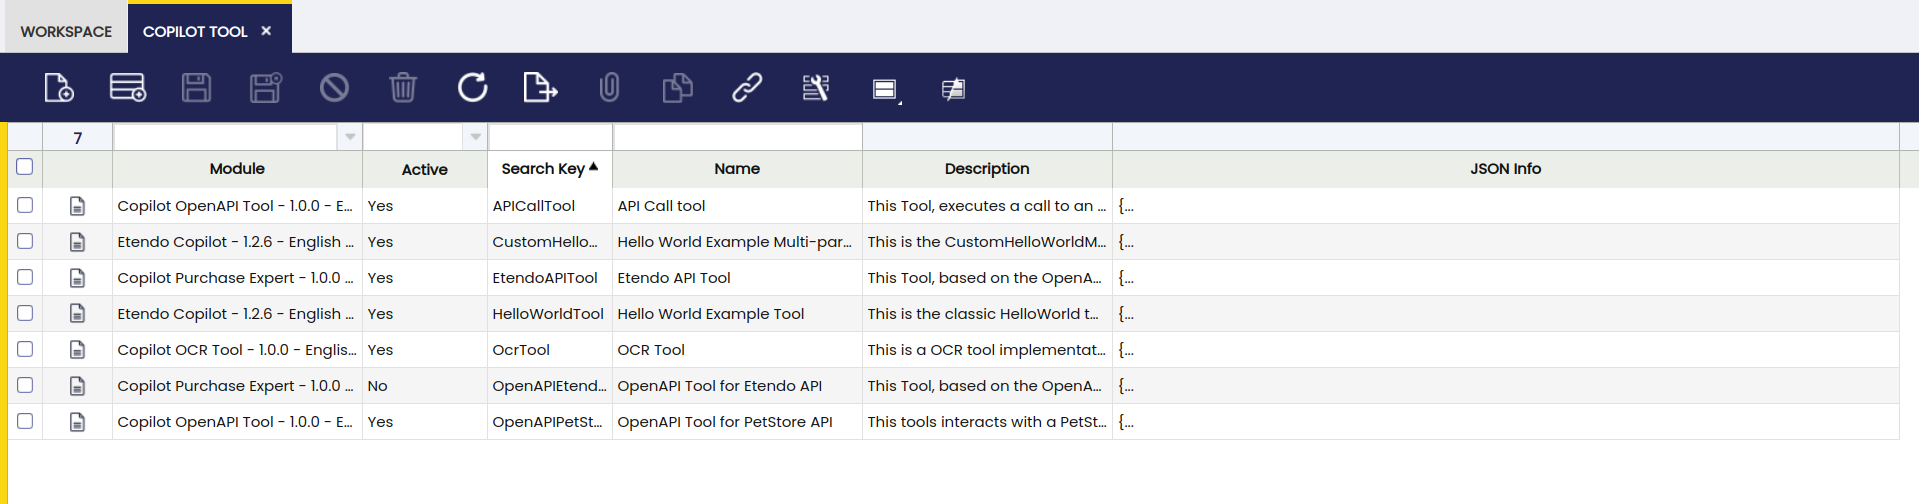
Copilot Tool Window
Open Application>Service>Copilot>Copilot Tool. In this window , the user can find available tools to be used in Copilot assistants.
Info
In case you want to define new tools, visit How to Create Copilot Tools
Role Window
In the Role window Application>General Setup>Security>Role, you can configure access roles for each Copilot App. This means you can control who has permission to interact with each application. This feature is useful for ensuring that users only have access to applications and functions relevant to their responsibilities.
In the Role window, select a role and in the Copilot App tab add a new record for each Copilot App you want to give access to.

Info
For more information, visit Role.
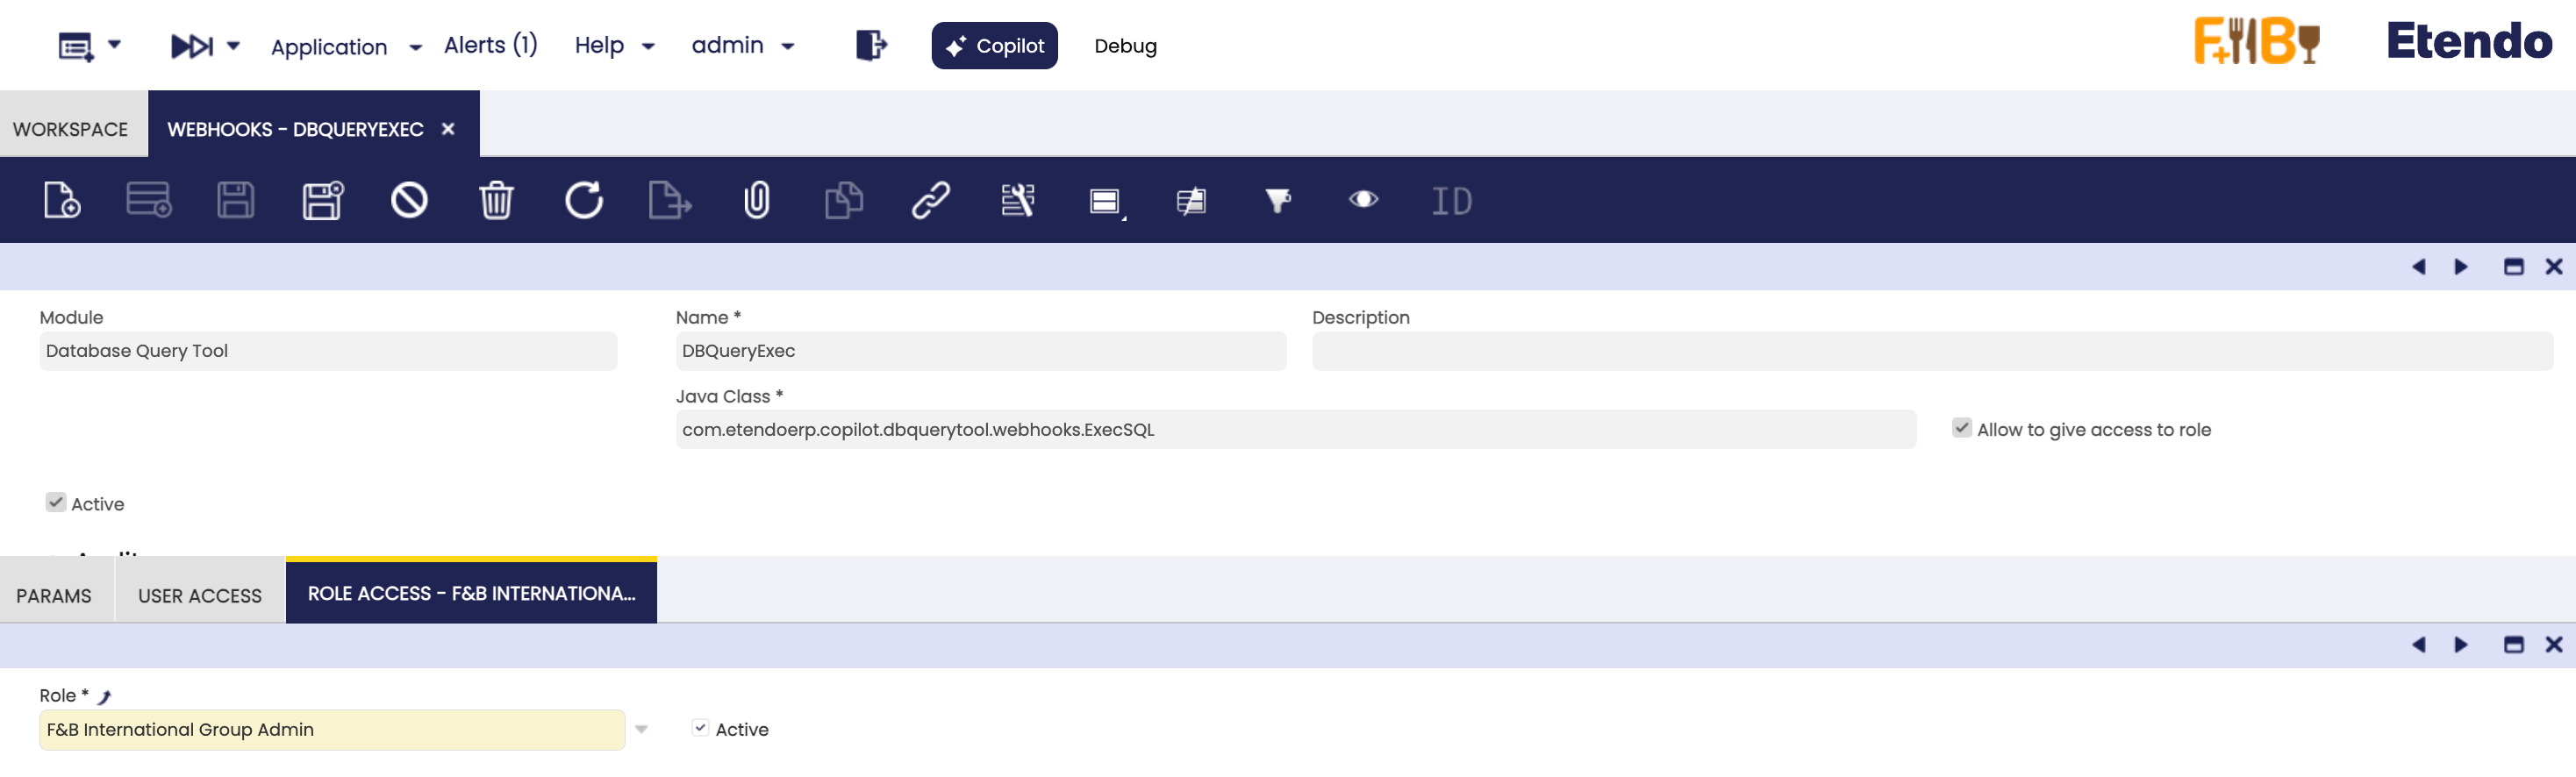
Webhook Window
Some tools require to communicate with Etendo through WebHooks, so it is necessary to configure the access for each role in the WebHook window.
For example, for the Database Query Tool, the WebHook "DBQueryExec" is used, to the Role that will use this tool in an assistant, it is necessary to configure the access to this WebHook.
Process Request Window
Open Application>General Setup>Process Scheduling>Process Request. In this window, the user can schedule Etendo Copilot background processes by selecting the Copilot Apps Schedule option in the Process field and using all the provided options such as timing, start date, frequency, etc.
Info
For more information, visit Process Request.
Copilot App Tab
Info
This tab is only visible when a Copilot Apps Schedule process is selected.
In this tab, the process to be scheduled can be configured.
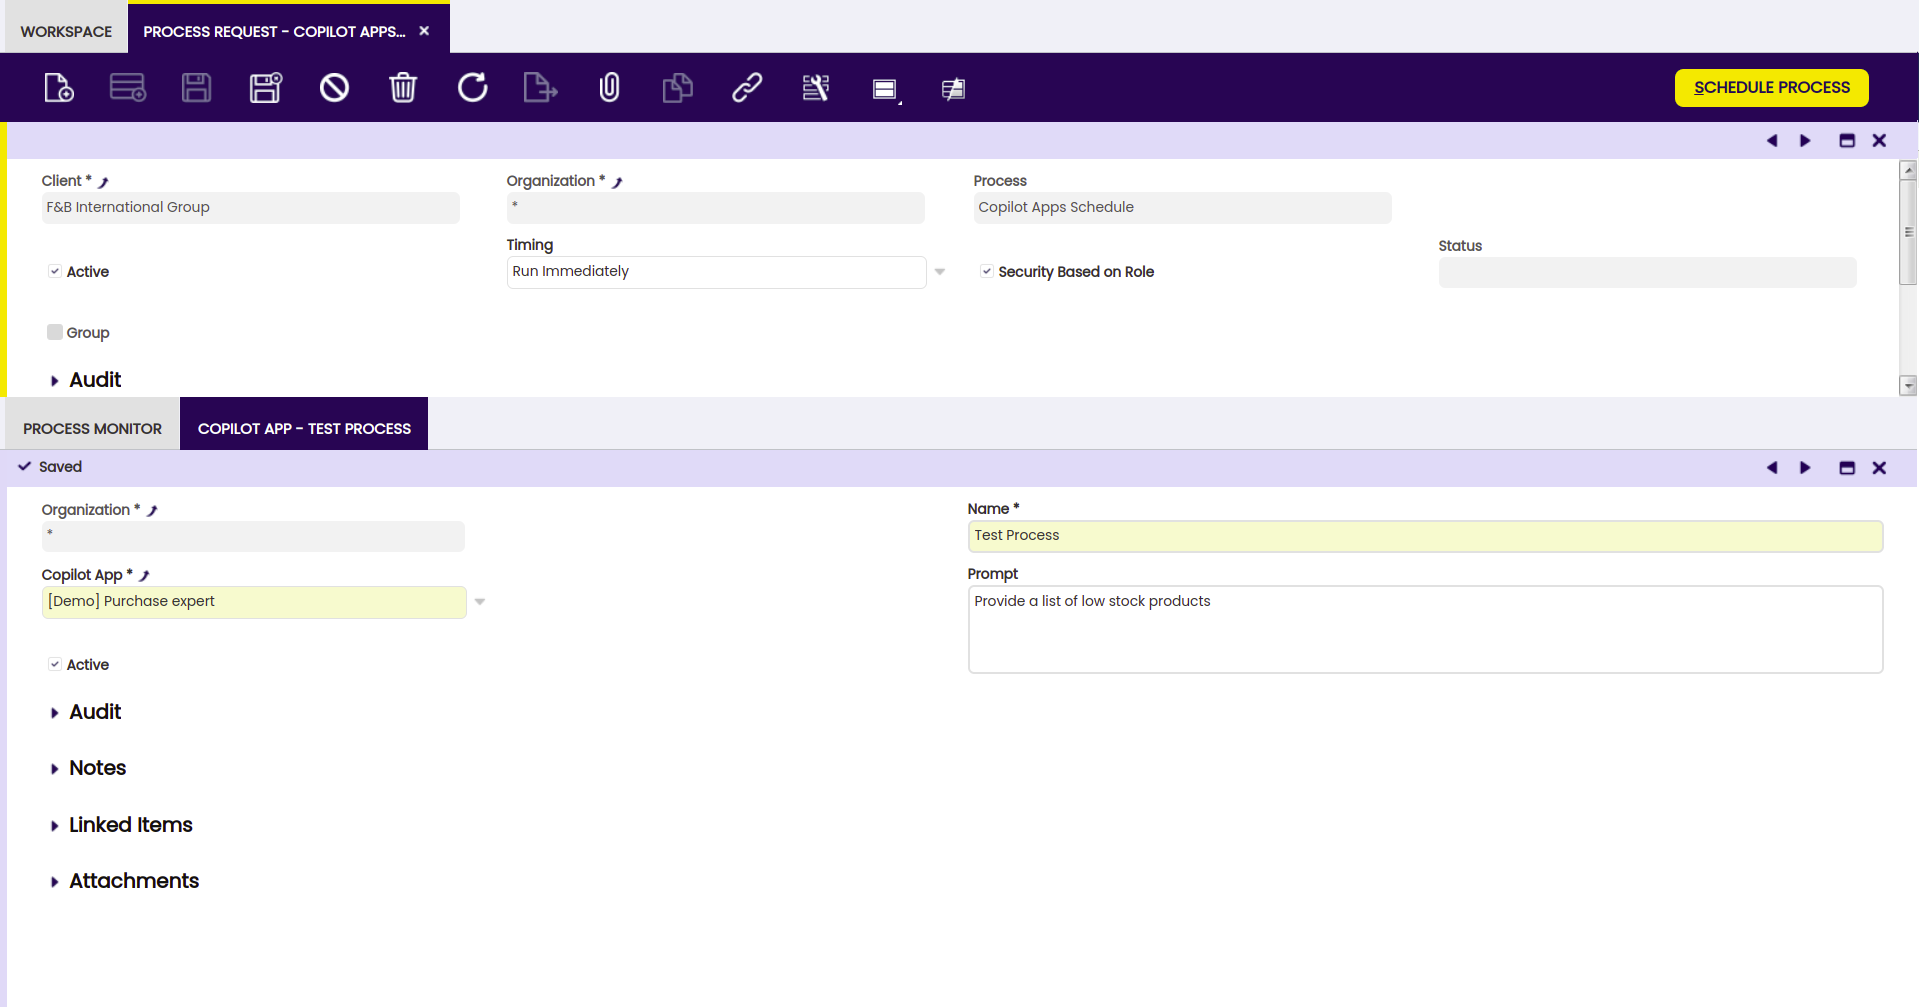
Fields to note:
- Name: Name description.
- Copilot App: Corresponding assistant for the process.
- Prompt: Instruction for the process.
- Active: Checkbox to select if this tool is active or not.