How to Add a Field to a Window Tab
Overview
The objective of this section is to show how you can add a new field to a tab in Etendo Classic.
It is closely related to the previous How to add Columns to a Table section.
The task of adding columns to an existing window is now very simple since most of the work (like defining references, elements) has already been done when adding the columns to the table.
On this page we will show an example of how to place the example_column field in the Production Run window using the create fields button.
Add the fields to the window example
The process to add new fields to an existing window is the same as the one to add fields to a new (empty) window. Going to Application Dictionary > Window, Tabs and Fields, we need to search for the Production Run window. Then, for that window, mark its Incidence tab.
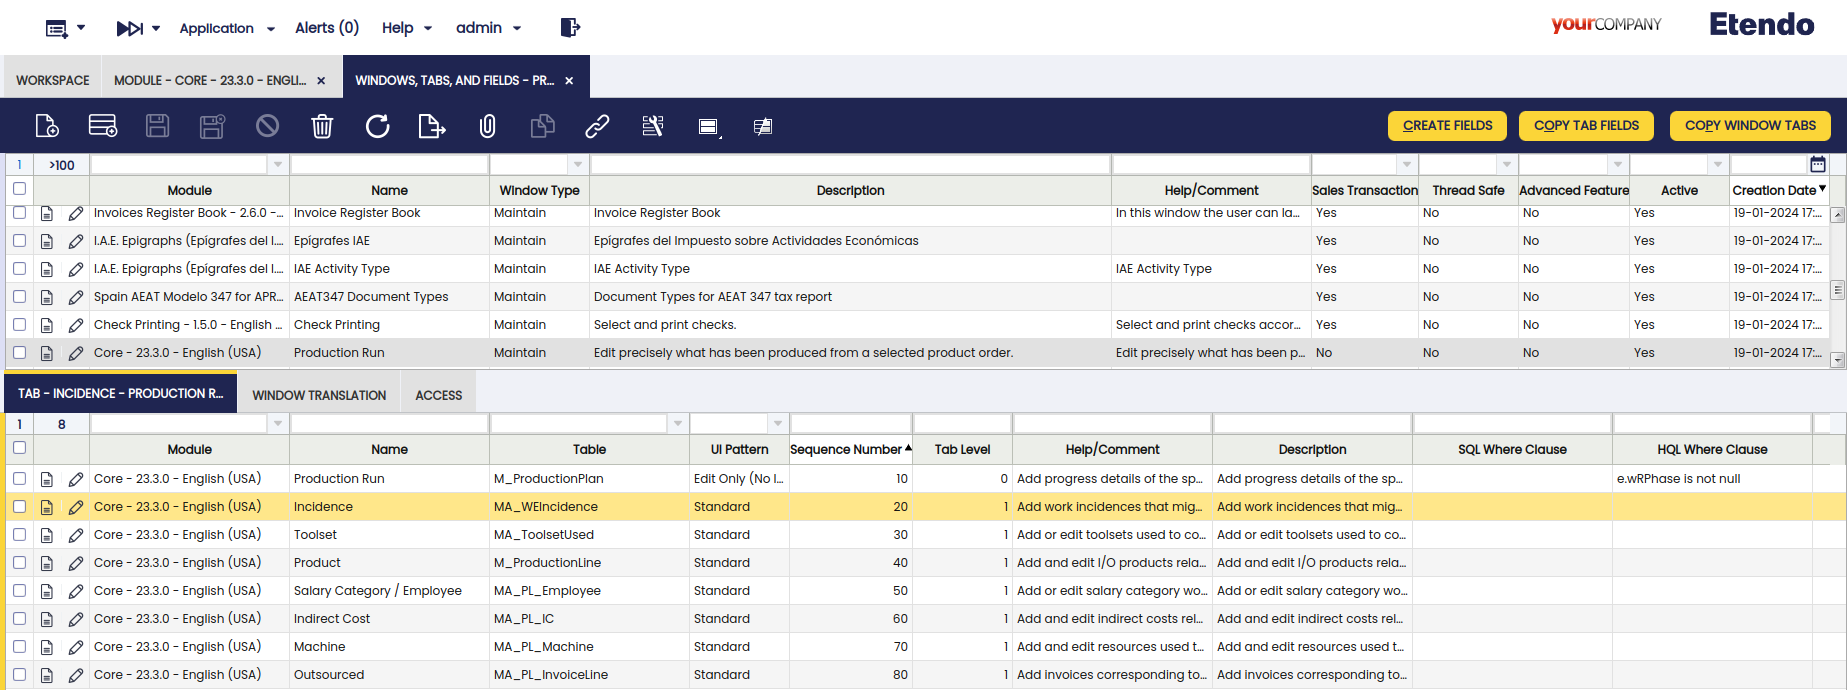
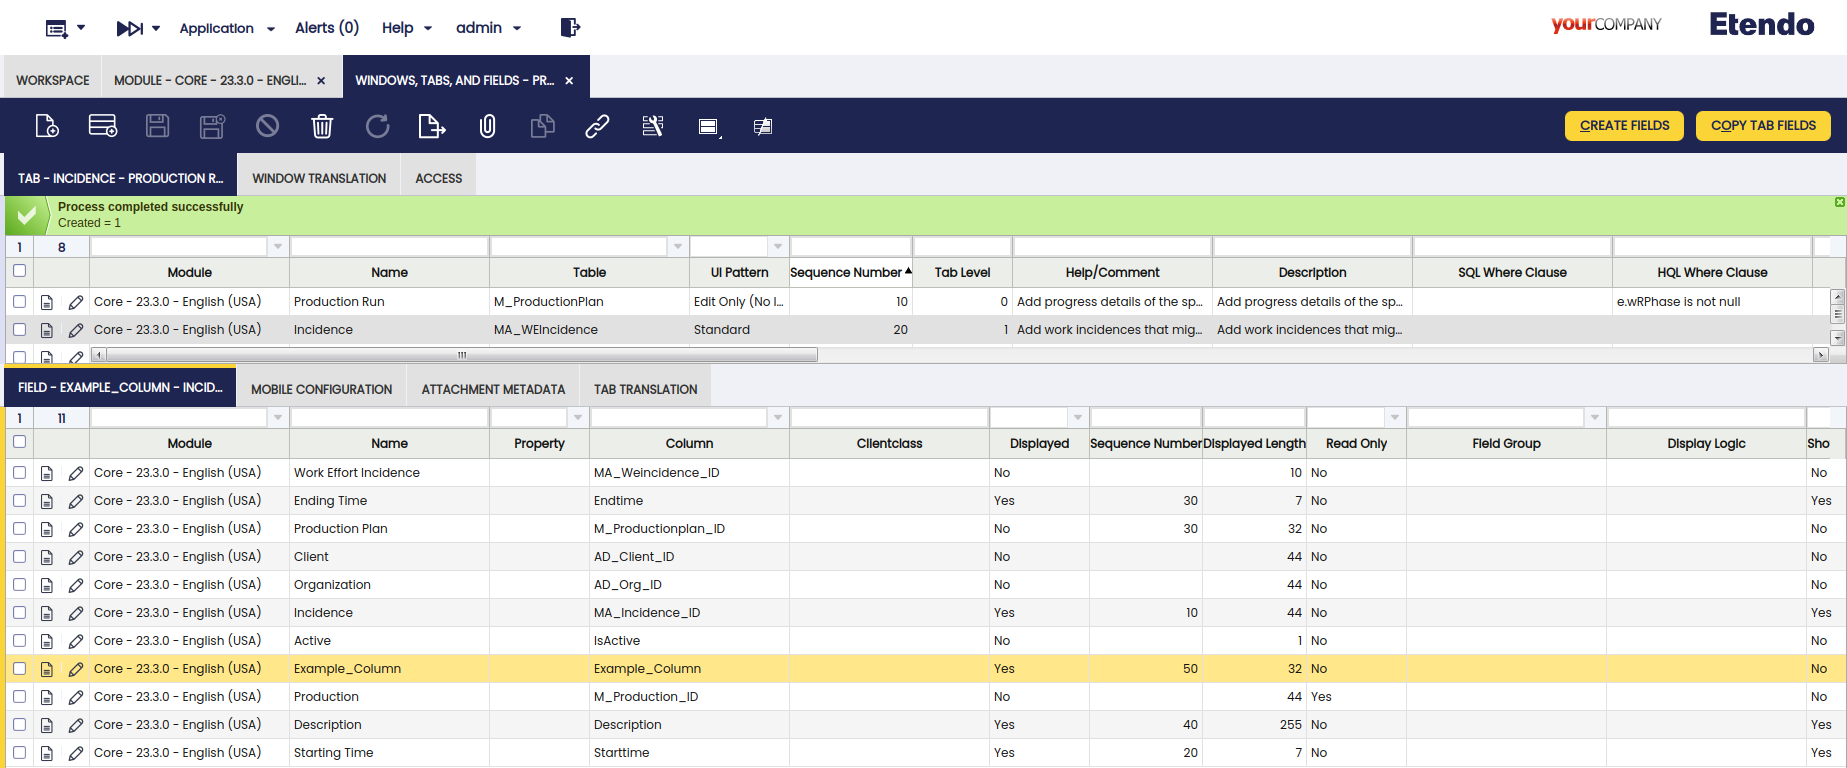
Now, we use the Create Fields process on this tab to let it add all columns of the underlying MA_WEIncidence table to this tab if they have not been previously added.
This will then add one new field to the tab matching the new column and automatically place the field into the module.
As a last step, the Synchronize Terminology process should be run to synchronize our newly added fields to the elements created for the columns they are based on, so that the UI labels for the new fields get the names defined in those elements.
If this window should also be used in classic UI mode then now ./gradlew smartbuild should be execute to compile the changed window.
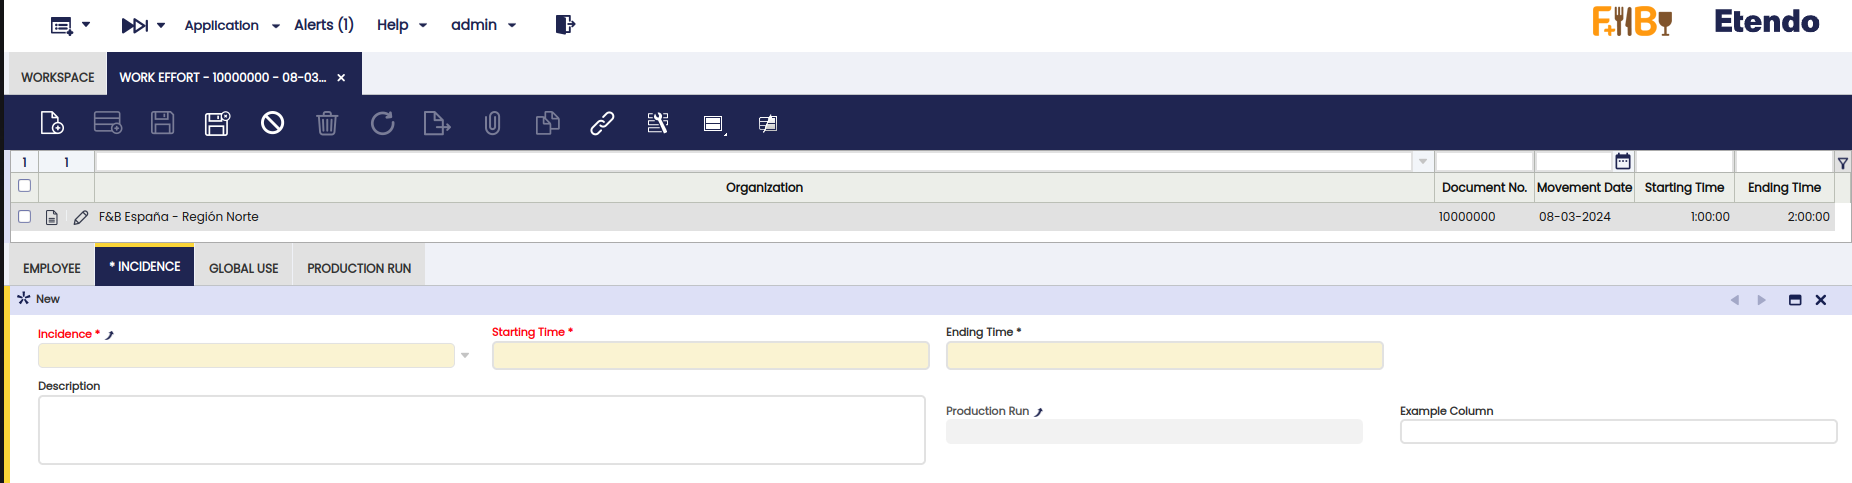
To see the changes in the new user interface just change the System Administrator role used for this section (Select a role where you have access to the window) and go to the modified window to see that it has the new field as shown here:
This work is a derivative of How to add a field to a window tab by Openbravo Wiki, used under CC BY-SA 2.5 ES. This work is licensed under CC BY-SA 2.5 by Etendo.