Business Partner Setup
Overview
Business partners can be grouped into different categories with the aim of helping their management and analysis.
You may want to group the suppliers of a certain type of products within the same category, in order for you to compare the purchase prices your company got from them in relation to the same type of products.
Or you may want to group the customers located in your country within the same category, a different one than the one which groups the customers located abroad, in order for you to compare national and foreign sales figures.
All of the above is possible due to the fact that Business Partner Group is a dimension of Purchase and Sales Reports.
To learn more, visit Procurement Analysis Tools and Sales Analysis Tools.
Finally, it is also important for you to take into account that each business partner category allows the user to set up a different set of ledger accounts to be used while posting transactions such as customer receivables or vendor liabilities.
Business Partner Set
Application > Master Data Management > Business Partner Setup > Business Partner Set
Overview
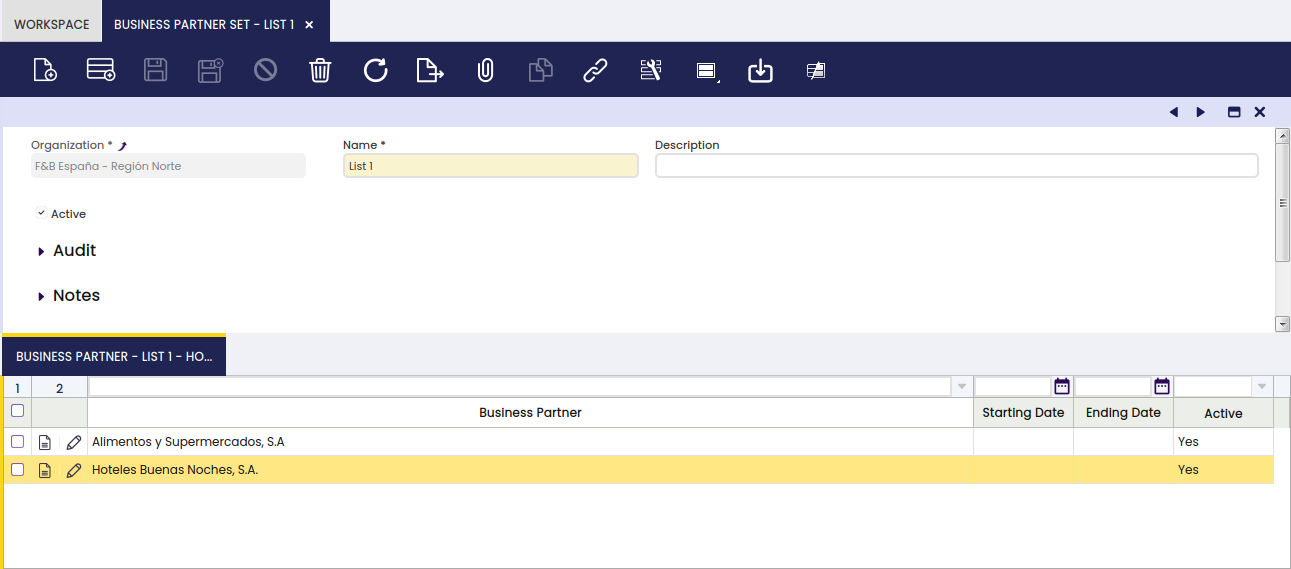
In this window the user can define lists of business partners to use in other functionalities.
Header
In the Business Partner Set header the fields to complete are the organization and the name of the list of business partners. It is also possible to add a description when necessary.
Lines
The lines tab allows the user to add the required business partners to the corresponding business partner set.
Business Partner Category
Application > Master Data Management > Business Partner Setup > Business Partner Category
Business partner category window allows the user to create and configure every business partner category your organization may need.
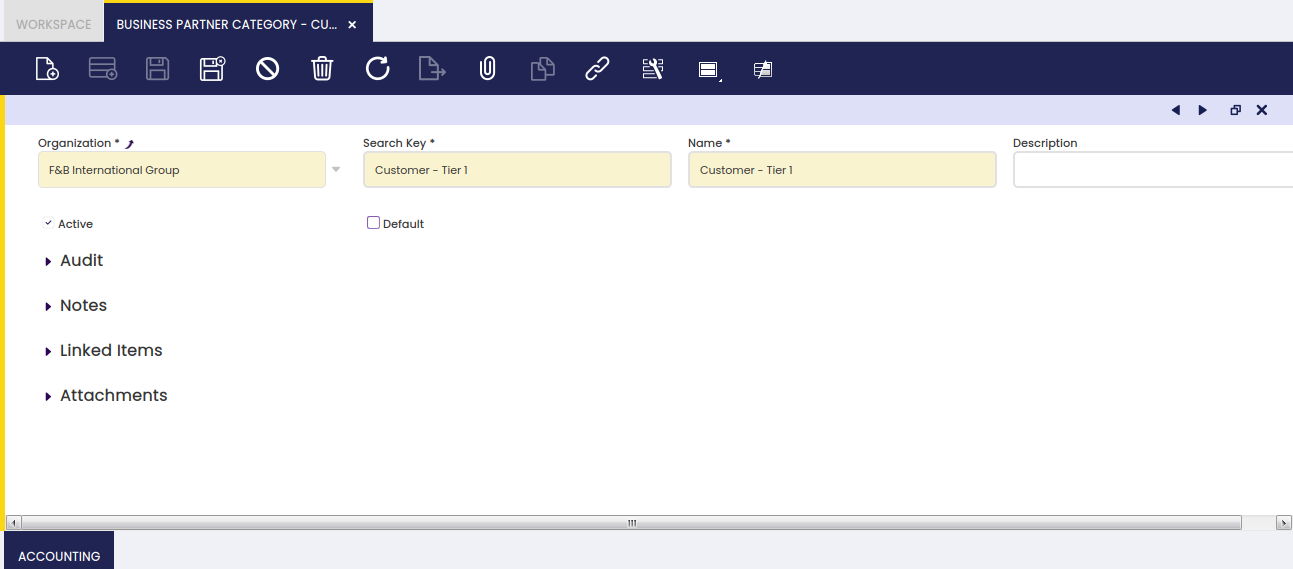
As shown in the image above, the creation of a business partner category requires entering below listed information for each category:
- a Search Key or short name which helps to easily find a category
- a Name
- and a Description
Accounting
Each business partner category allows the user to configure a different set of ledger accounts.
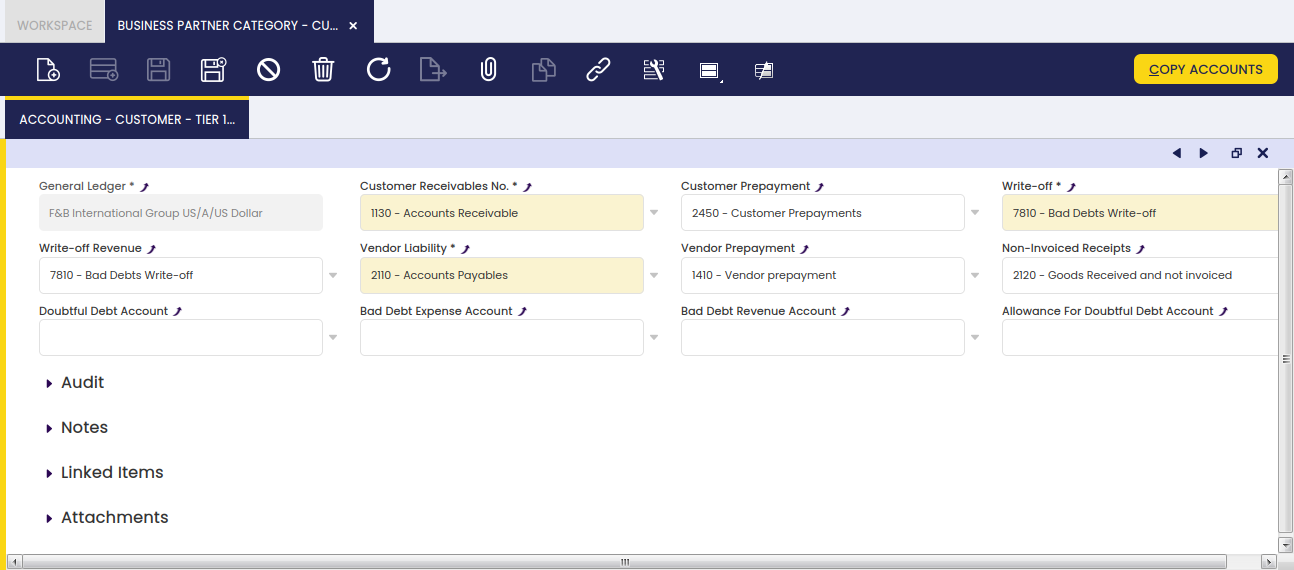
There are several business partner related accounts which need to be properly set up for the organization's general ledger configuration.
The "Copy Accounts" process of the Defaults tab of the General Ledger Configuration screen allows the user to automatically populate at least the mandatory ones shown in the image above.
The accounts automatically defaulted by Etendo can always be changed if required.
These ledger accounts are the ones to be used while posting business partner related transactions such as:
- Customer Receivables, sales invoices posting.
To learn more, visit Sales Invoice - Customer Prepayments, customer payments in advanced posting.
To learn more, visit Payment In - Vendor Liabilities, purchase invoices posting.
To learn more, visit Purchase Invoice - Vendor Prepayments, vendor payments in advanced posting.
To learn more, visit Payment Out - Non-invoiced Goods Receipts, Goods Receipt posting
To learn more, visit Goods Receipt - Write-off amounts, or amounts your company expected to get paid by a customer which are not going to be paid anymore.
To learn more, visit Payment In - Revenue Write-off amounts, or amounts to be paid by your company to a supplier which are not going to be paid anymore.
To learn more, visit Payment Out - Doubtful Debt Account, doubtful debts posting.
To learn more, visit Doubtful Debt Run - Bad Debt Expense Account, expense amount classified as bad debt.
To learn more, visit Doubtful Debt Run - Bad Debt Revenue Account, revenue amount classified as bad debt.
To learn more, visit Doubtful Debt Run - Allowance for Doubtful Debt Account, amount used to provision against possible bad debts.
To learn more, visit Doubtful Debt Run
The "Copy Accounts" action button allows the user to copy the accounts defaulted in this window to either:
- the Customer Accounting tab
- or the Vendor Accounting tab
Invoice Schedule
Application > Master Data Management > Business Partner Setup > Invoice Schedule
Overview
Invoice schedule window allows the user to define and configure how often and by when an organization can issue invoices to be sent to customers.
Invoice Schedule
An organization can agree and therefore define specific schedules for issuing invoices, schedules which will then need to be linked to the corresponding customers.
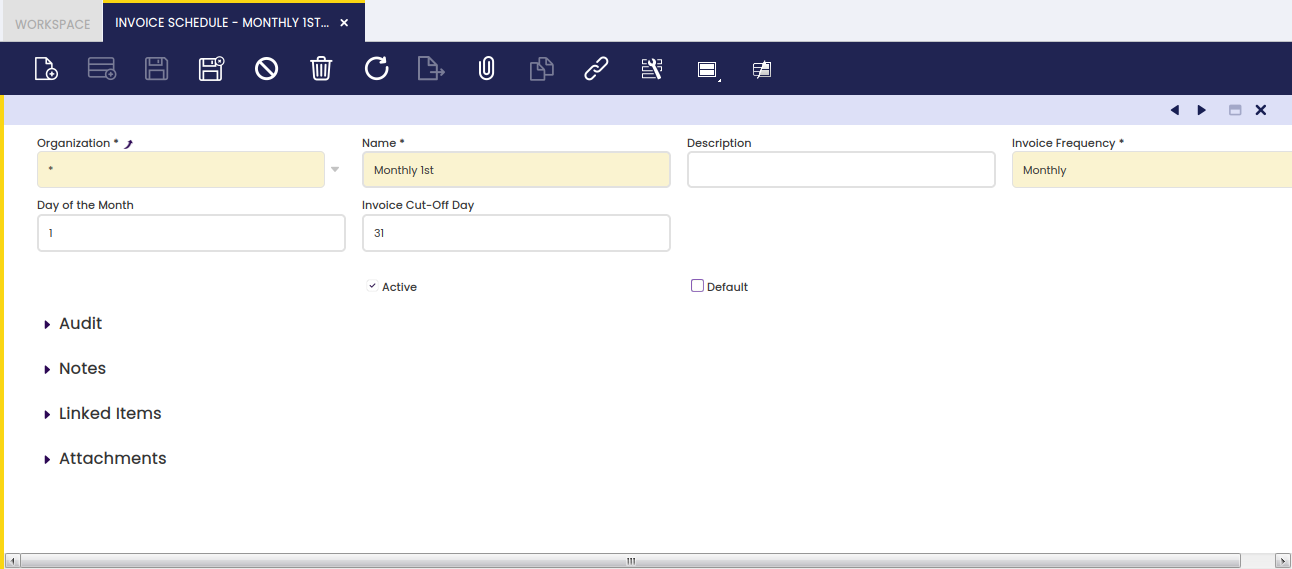
As shown in the screen above, an invoice schedule can be easily created by entering below data:
- a Name for the invoice schedule
- a Description if needed
- the Invoice Frequency which defines how often sales invoices are going to be issued. The values allowed are:
- Daily - a daily invoice schedule does not require any additional setup as it implies a daily generation of sales invoices.
- Monthly or Twice Monthly - a monthly or twice monthly invoice schedule requires to enter additional data such as:
- Day of the Month - this is the day when the invoice is generated, by example: 1st February.
- Invoice Cut-Off Day - this is the last day for including the orders to be invoiced, by example: 31st January
- Weekly - a weekly invoice schedule requires to enter additional data such as:
- Day of the Week - when the invoice is going to be generated, by example: Saturday
- Day off the Week Cut-Off - this is the last day of the week for including the orders to be invoiced, by example: Friday.
The process "Generate Invoices" takes into account both:
- the "Invoice Terms",
to learn more about "Invoice Terms" visit "Master Data Management // Business Partner // Customer tab". - as well as the "Invoice Schedule"
agreed and therefore assigned to each customer.
To learn more about this process, visit "Sales Management // Transactions".
Title
Application > Master Data Management > Business Partner Setup > Title
Overview
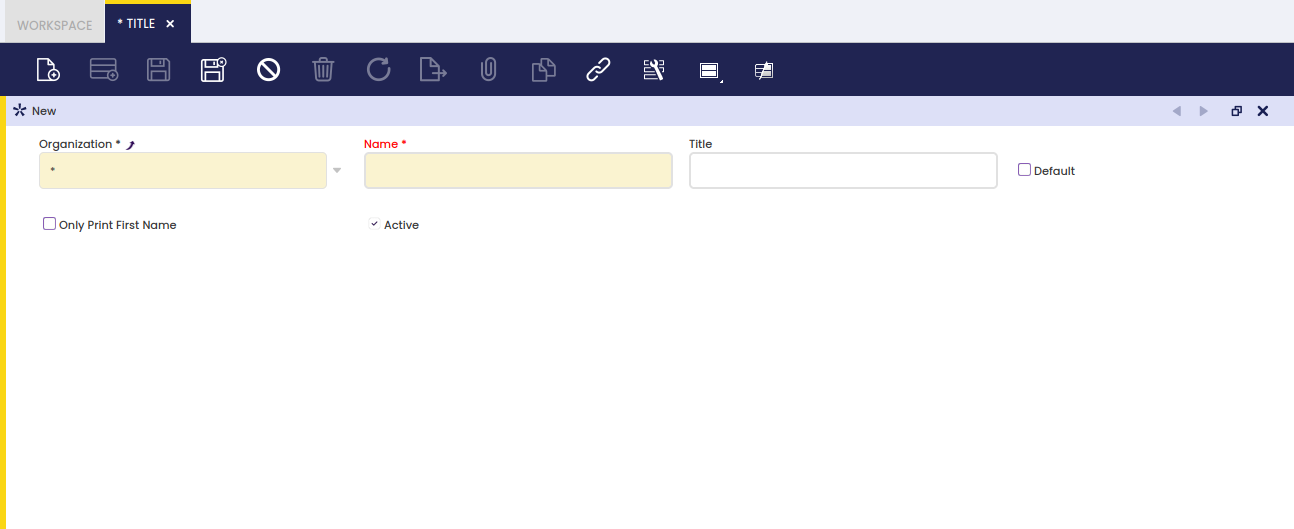
Title window allows the user to set up business partner titles such as Mr or Madame to be used while contacting business partners.
The same applies to any type of "Contacts" entered in Etendo.
This is an "Advanced Feature". To be reviewed, as I do not see where Titles can be assigned to business partners and contacts.
Title
There are many titles to use while contacting business partners of any type as well as contacts.
Once the required titles have been properly entered and configured, you can link them to the corresponding business Partner "Contact/s" in the Business Partner window.
Translation
Business partner titles can be translated to any language required.
The way to get that is as simple as:
- select first the language required
- and then enter the title name translated into that language.
Payment Term
Application > Master Data Management > Business Partner Setup > Payment Term
Overview
A payment term specifies the period allowed to pay off an amount due.
A vendor or a customer may demand a deferred payment period of 30 days or may even demand to partially pay their debts or collect in two or more deferred periods.
Therefore "Payment Terms" will generate a list of scheduled payment/s against an invoice, each payment/s will have a due date and a due or expected amount to be paid.
In other words, each payment term line and/or header is a different scheduled payment against an invoice.
The way it works is:
- Payment terms must be first properly created and configured as described in this section.
- Then payment terms must be linked to each business partner as described in the "Master Data Management // Business Partner" section.
- Finally, every time an invoice is booked for that business partner the payment terms setup by default will be applied and therefore used for the creation of the corresponding Invoice "Payment In/Out Plan".
A payment in/out plan lists as many scheduled payments against an invoice as due dates configured in the payment term associated with that invoice.
Header
Payment Term window allows the user to create and configure the payment terms to be linked to the business partners.

As shown in the screen above a payment term which only has a deferred period such as "100% in 120 days", can be created by entering below data in the payment term header window:
- an "Offset Month Due" which is the length of the payment period agreed in months, by example "4" as four months.
- or an "Overdue Payment Days Rule" which is also the length of the payment period agreed but in days, by example "120" as one hundred and twenty days.
- Fixed Due Date flag allows you to enter a fixed maturity payment date, such as 20th of each month, by example.
- Next Business Day flag allows you to set as payment date not exactly the corresponding due date but the next business day, this helps avoid due dates calculation over the weekend.
- Overdue Payment Day Rule allows you to enter a fixed payment day.
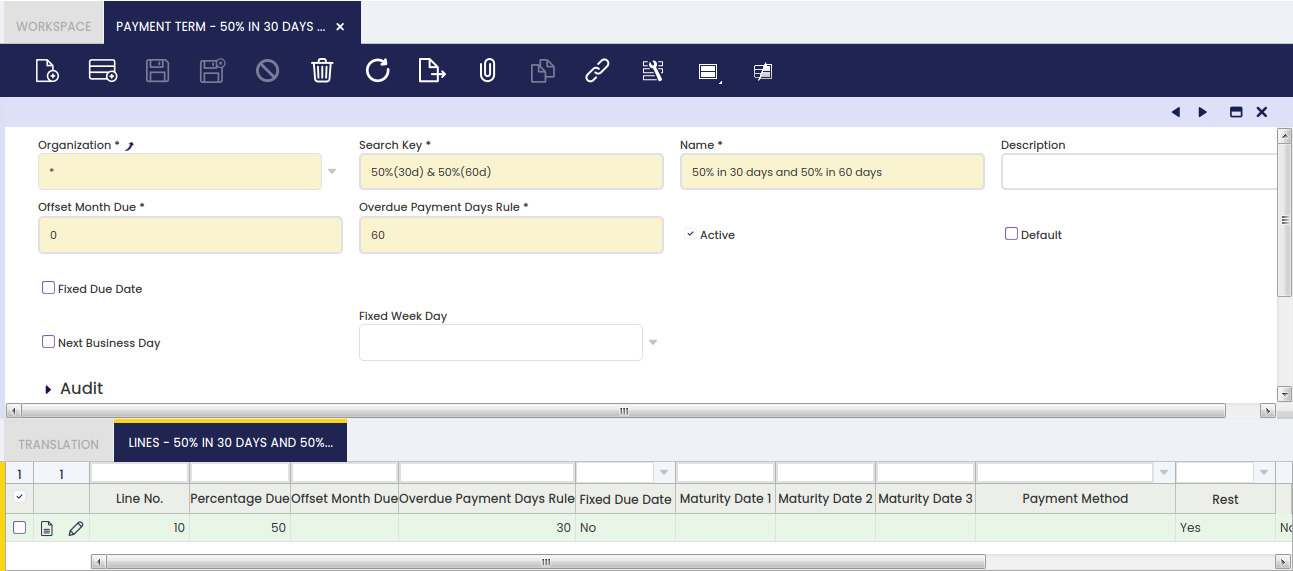
It is important to remark that in the case of defining a payment term split into more than one deferred period such as "50% in 30 days and 50% in 60 days", the second one (or the latest one in case of more than 2 deferred periods) must be setup in the header not in the lines as shown in the image below:
Translation
Payment Terms can be translated to the language required.
The way to get that is as simple as:
- selecting first the language required
- and then entering the payment term name translated into that language.
Lines
It is possible to split payment terms into more than just one payment term line.
The information you can enter for each payment term line is:
- Percentage Due - or the percentage of the due amount to be paid each time or for each payment term line.
- Etendo first shows a "100.00 %". That value can always be changed as needed for the lines.
- Etendo sums up the percentage enter for each payment term line
- therefore the remaining % up to 100.00%" is the one which will apply to the very last payment term set up in the header.
- Offset Month Due - or the length of the deferred period in months
- Overdue Payment Days Rule - or the length of the deferred period in days
- Fixed Due Date - this one allows you to enter a fixed maturity payment date such as 20th of each month.
- Payment Method - you can get that a payment term line uses a specific payment method which would overwrite the overall one used at invoice level.
- Rest - this flag implies that the due amount calculated is not the total amount of the invoice but the total amount of the invoice decreased by the previous due amount
- therefore the very last due amount will just be the remaining amount.
- Exclude Tax - if a payment term line is marked as "exclude tax" the corresponding schedule payment will not include taxes.
- that time the amount due is the [total net due amount * percentage due]
- those taxes will be taken into account in the very last payment together with the remaining due amount including taxes.
- Fixed Week Day - a fixed day of the week can be selected to get that calculated due dates matches exactly that day of the week.
- Next Business Day - allows you to set as payment date not exactly the due date but the next business day.
Return Reasons
Application > Master Data Management > Business Partner Setup > Return Reasons
Overview
In this window you can configure different reasons because either you return goods or the customer returns goods. This is the reason why these values are used in Return to Vendor and Return from Customer windows
Return Reasons
This window is in Application||Master Data Management||Business Partner Setup||Return Reasons
![]()
Fields:
- Return from customer: When this flag is marked, the value will be available in the window Return from Customer window
- Return to vendor: When this flag is marked, the value will be available in the window Return to vendor window
Volume Discount
Application > Master Data Management > Business Partner Setup > Volume Discount
Overview
Volume discounts are discounts which apply after getting a certain volume of sales of specific products or product groups.
Volume discounts are incentives intended to encourage the purchase of goods in greater quantities. This incentive is normally offered to pass on some of the economic efficiencies gained through larger orders, to improve customer relations, and to increase total volume of sales.
Volume Discounts
Volume Discount window allows the user to create and properly configure volume discounts related to specific products and/or product groups, which are later on assigned to selected business partners.
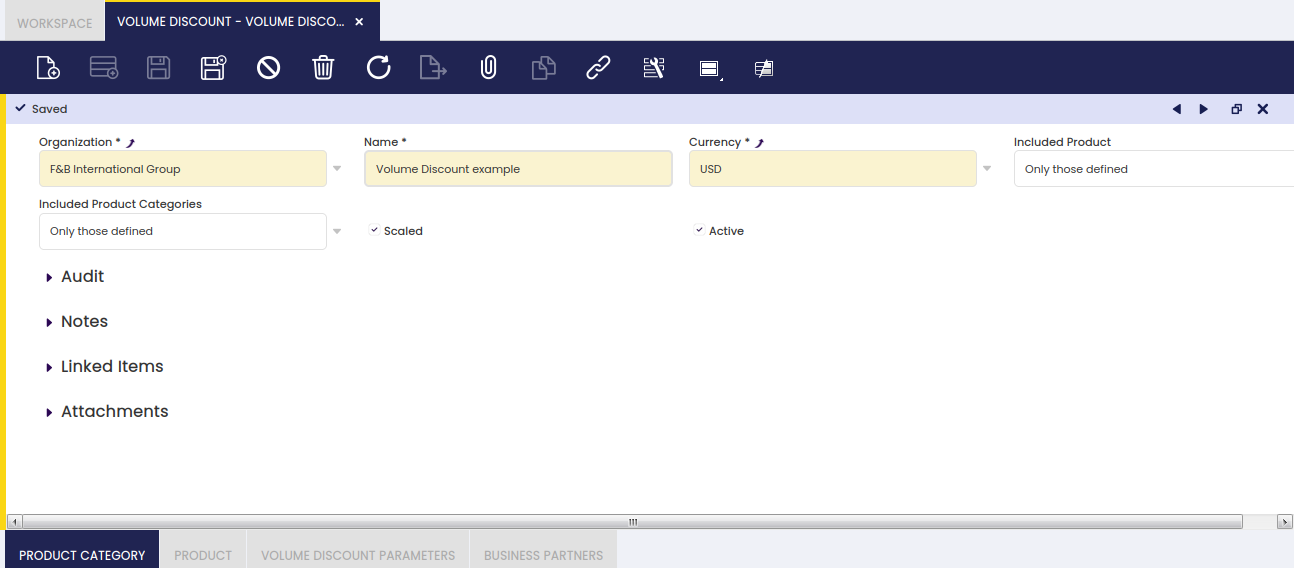
As shown in the image above, a volume discount can be created by just entering below data in the "Volume Discount" header window:
- the "Name" of the volume discount
- the "Currency"
- the "Included Products" to which the volume discount will apply. Available options are:
- Only those defined - which means applicable to all the products defined in the "Product" tab below.
- or All excluding defined - which means all products but the ones defined in the "Product" tab below.
- the "Included Product Categories" to which the volume discount will apply. Available options are:
- Only those defined - which means applicable to all the product categories defined in the "Product Category" tab below.
- or All excluding defined - which means all product groups but the ones defined in the "Product Category" tab below.
- Scaled - A volume discount can be scaled which means that it is possible to define a set of amount ranges having a different discount. To learn more, visit the "Volume Discount Parameters" tab below.
Product Category
A volume discount can be configured for a set of product categories or can be configured for all product categories but for a set of them.
Therefore, and depending on the criteria taken, you could select here the products to either include or exclude of a given volume discount.
Product
A volume discount can be configured for a set of products or can be configured for all products but a set of them.
Therefore, and depending on the criteria taken, you could select here the product groups to either get included or excluded of a given volume discount.
Volume Discount Parameters
Volume discount parameters are a discount % as well as the minimum amount up to which the discount % is applied.
Besides, it is also possible to configure not just a minimum amount up to which a given discount % will apply, but a set of amount ranges to which a different discount % will apply.
As an example, you could configure a volume discount which applies:
- a 2% to the amount range =0,00 to 9,999.99
- a 5% to the amount range = 10,000.00 to 24,999.99
- and a 10% to a minimum amount up to 25,000.00
Business Partners
Volume Discounts can be assigned to selected business partners within a given time period.
You can also get a volume discount applied to a selected business partner starting from a given "Valid From Date".
Regardless volume discount makes more sense for "Sales Transaction", it is also possible to create and configure volume discounts to be applied to selected suppliers or vendors by:
- removing the "Sales Transactions" flag
- and by removing the filter "Customer" while selecting business partners in the business partner selector.
Basic Discount
Application > Master Data Management > Business Partner Setup > Basic Discount
A Basic Discount is a deduction from the total amount of an order or an invoice.
Overview
Discounts of this type means a sum of the total order / invoice discount amounts, excluding taxes per each tax rate.
Discounts tab can be found in the Purchase & Sales Order / Invoice windows and allows the user to add discounts manually or to review the ones automatically applied by Etendo based on the Business Partner Discount tab configuration.
Discounts
- When an order or an invoice is in Draft status, the total amounts are the totals amounts including tax, but excluding discounts.
- Once the order/invoice is Processed, Etendo calculates the monetary value of the corresponding discounts and shows them as new order/invoice lines.
- Discount lines have no product nor account but the discount product (see below).
- Besides, Etendo creates as many new invoice lines as discounts included in the invoice as well as tax rates (%).
- Discount lines have an ordered quantity equal to "1" and a Net Unit Price equal to the calculated discount amount with an opposite sign to the invoice amount (normally negative) in order to reduce it.
- Finally, discounts can be calculated in cascade.
- Cascade calculation implies that the first discount is applied to the total net amount and the second discount is applied to the total net amount already decreased by the first discount amount, and so on. Configured in the Business Partner Discount tab.
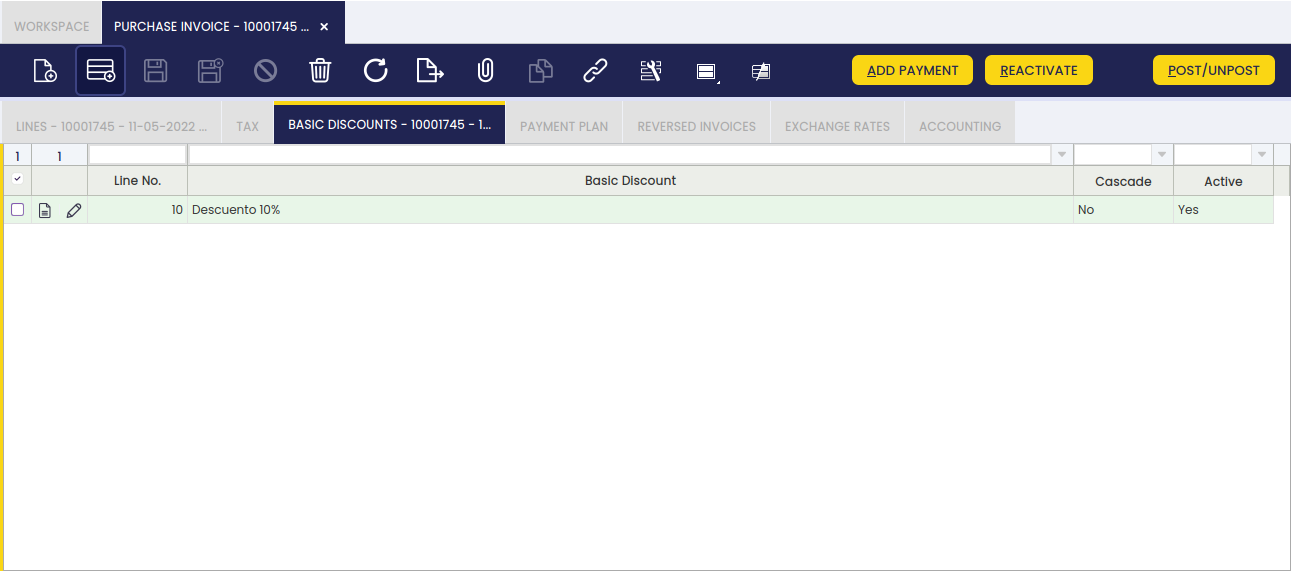
Example 1. Purchase invoice containing just one tax rate:
- Let us imagine a purchase invoice containing two invoice lines for a net line amount of 1,000.00 each.
- A 18% tax rate applies to both purchase order lines.
- There is a 10% Discount assigned to the supplier, therefore that discount is shown in the Discounts tab.
- Once above purchase invoice is booked:
- Etendo shows just one new line with below information:
- Product named Discount 10% which is the one created and linked to the discount.
- Invoiced Quantity equals to 1.
- Net Unit price equal to the applicable discount amount, which in our example is -200 (10% of the total net amount 2,000.00).
Example 2. Purchase invoice containing two different tax rates:
- Let us imagine a purchase invoice containing two invoice lines for a net line amount of 1,000.00 each.
- A 18% tax rate applies to the first purchase invoice line, and an 8% tax rate applies to the second one.
- There is a 5% Discount assigned to the supplier, therefore that discount is shown in the Discounts tab.
- Once above purchase invoice is booked:
- Etendo shows two new lines, each of them with below information:
- Product named Discount 5% which is the one created and linked to the "Discount".
- Invoiced Quantity equals to 1.
- Net Unit Price equals the applicable discount amount, which in our example is -50 (5% of the total net amount at a given tax rate 1,000.00).
Basic Discount
A total discount can be created and configured by entering a discount name, a discount product and a discount %.
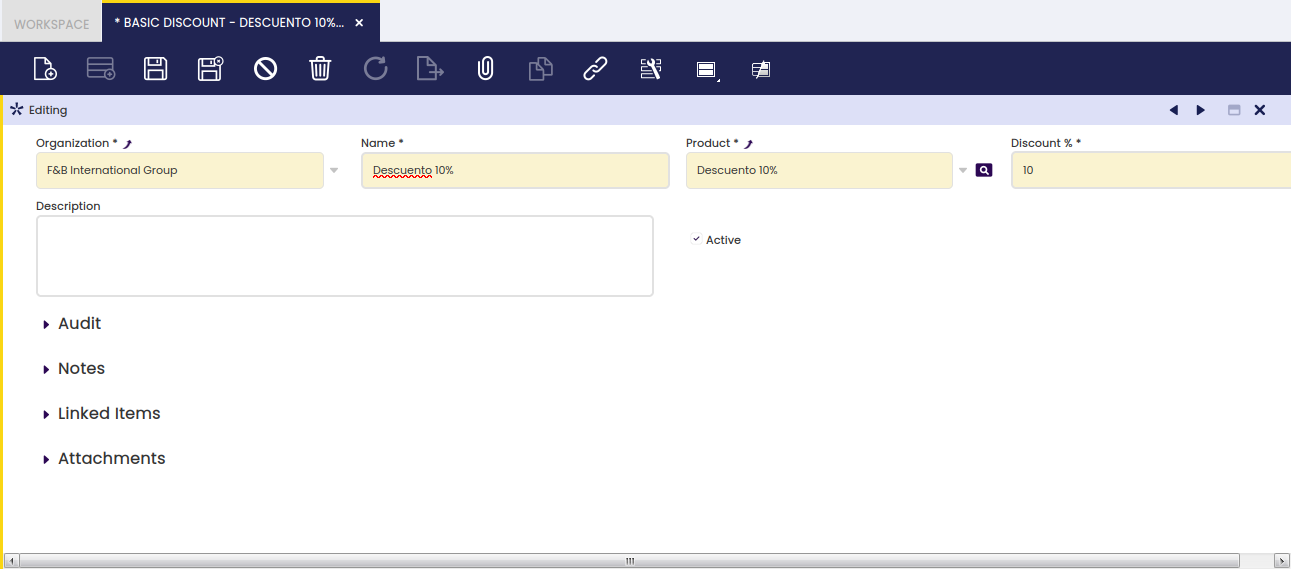
Fields to note:
- Previously created Product you could name the same as the discount name. That product is the one to be filled in the new orders / invoice line/s to manage this type of discounts (see above).
Salary Category
Application > Master Data Management > Business Partner Setup > Salary Category
Overview
Create salary categories to be applied to your employees/workers.
The salary category and related cost is used in the Production module for the calculation of the cost of a product that is the result of the production process.
All operations in the production process consist of activities. These activities have a cost center defined and how much time of that cost center is used. Each cost center has the employees that are part of the cost center, defined by salary category in the employee tab. The employee is set up as an operator in the employee tab of the business partner. Apart from the employee cost, also the machines cost used in the cost center and any indirect cost, such as electricity, is set up. Based on these components, a cost per hour related to the cost center can be defined. Based on the use of the cost center during production, a cost per produced unit is added to the total cost of the unit.
The salary category and related cost is also used in the Project and Service management module to calculate the profitability of a project. The cost related to a salary category for Project Management has to be defined with the 'per hour' unit of measure.
The setup of the salary category of the employee is done in the [Cost Salary Category] tab underneath the [Employee] tab of the Business Partner
Salary Category
It defines costs and date ranges for a specified salary category.
For the use of the salary category for the cost calculation in the Production and Project and Service management module, the cost applied checkbox is selected.
Cost
It creates a salary category.
Cost UOM: for Project and Service Management, the salary is set up per Hour, so that when the time expenses are entered, the cost of that time can be added to the profitability report.
Rappel Configurations
Application > Master Data Management > Business Partner Setup > Rappel Configurations
Info
To be able to include this functionality, the Advanced Rappels module of the Sales Extensions Bundle must be installed. To do that, follow the instructions from the marketplace: Sales Extensions Bundle. For more information about the available versions, core compatibility and new features, visit Sales Extensions - Release notes.
Rappels are discounts based on the volume of consumption of a business partner in a given period of time. This functionality allows the user to configure and grant rappels to business partners.
Requirements
Before the user is able to use this functionality, it is necessary to configure a new document sequence and a new document type to be used for Rappels.
Document sequence
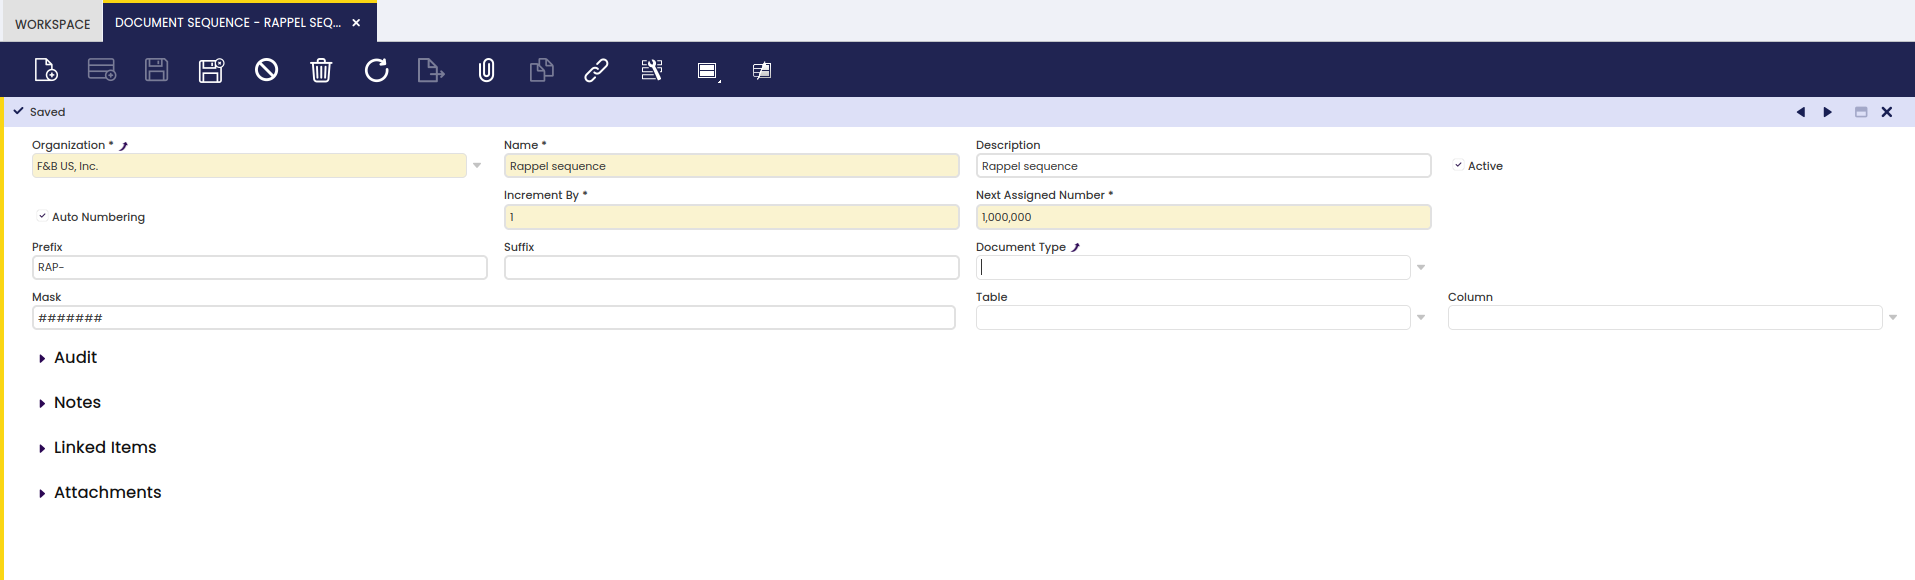
A specific document sequence for rappels is necessary to distinguish them from other transactions. In this window, create a new record and fill the corresponding fields:
- Organization: The name of the corresponding organization.
- Name: The name of the document sequence, in this case, “Rappel sequence”
- Active: Yes
- Auto Numbering: Yes
- Increment by: 1
- Next assigned number: 1,000,000
- Prefix: It is optional and, in this case, “RAP-” is entered to indicate that these transactions are Rappels.
Save the record and the document sequence for rappels is available.
Info
For more information, visit Document Sequence
Document type
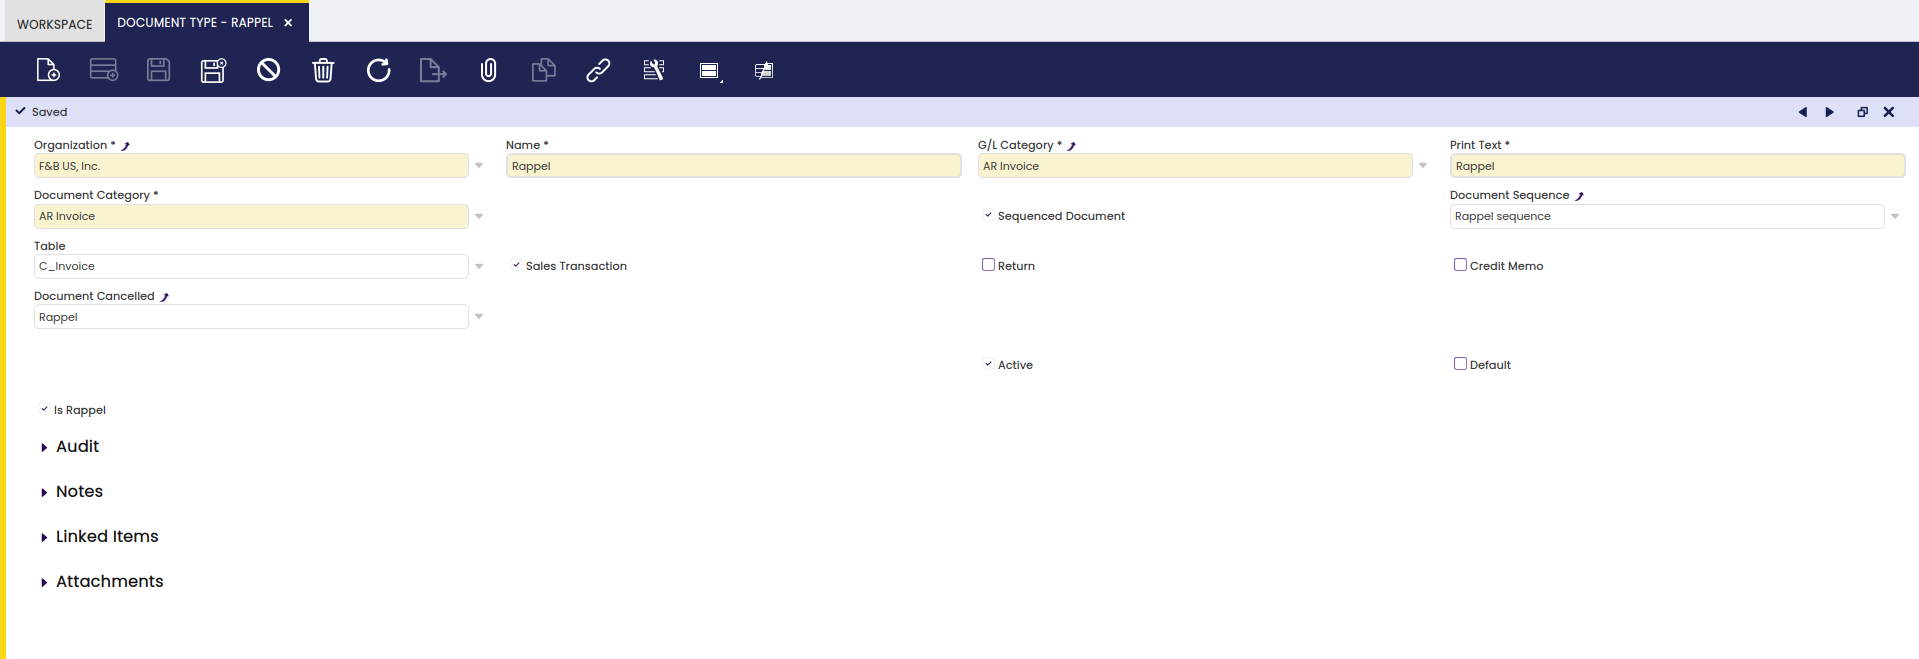
A specific document type is necessary for rappels. In this window, create a new record and fill the corresponding fields:
- Organization: The name of the corresponding organization
- Name: The name of the document type, in this case, “Rappel”
- G/L Category: In this case, select “AR invoice”
- Print text: In this case, “Rappel”
- Document Category: “AR Invoice”
- Sequenced Document: Yes
- Document Sequence: In this case, “Rappel sequence”
- Table: C_invoice
- Sales Transaction: Yes
- Is rappel: Yes
Save the record and the document type for rappels is available. After saving it, it is necessary to select “rappel” in the field “Document Cancelled” and save again.
Warning
For each organization, it is possible to configure only one "rappel" document type.
Info
For more information, visit Document Type
Rappel Configurations
In this window, the user can configure all the necessary aspects to grant rappels to certain business partners.
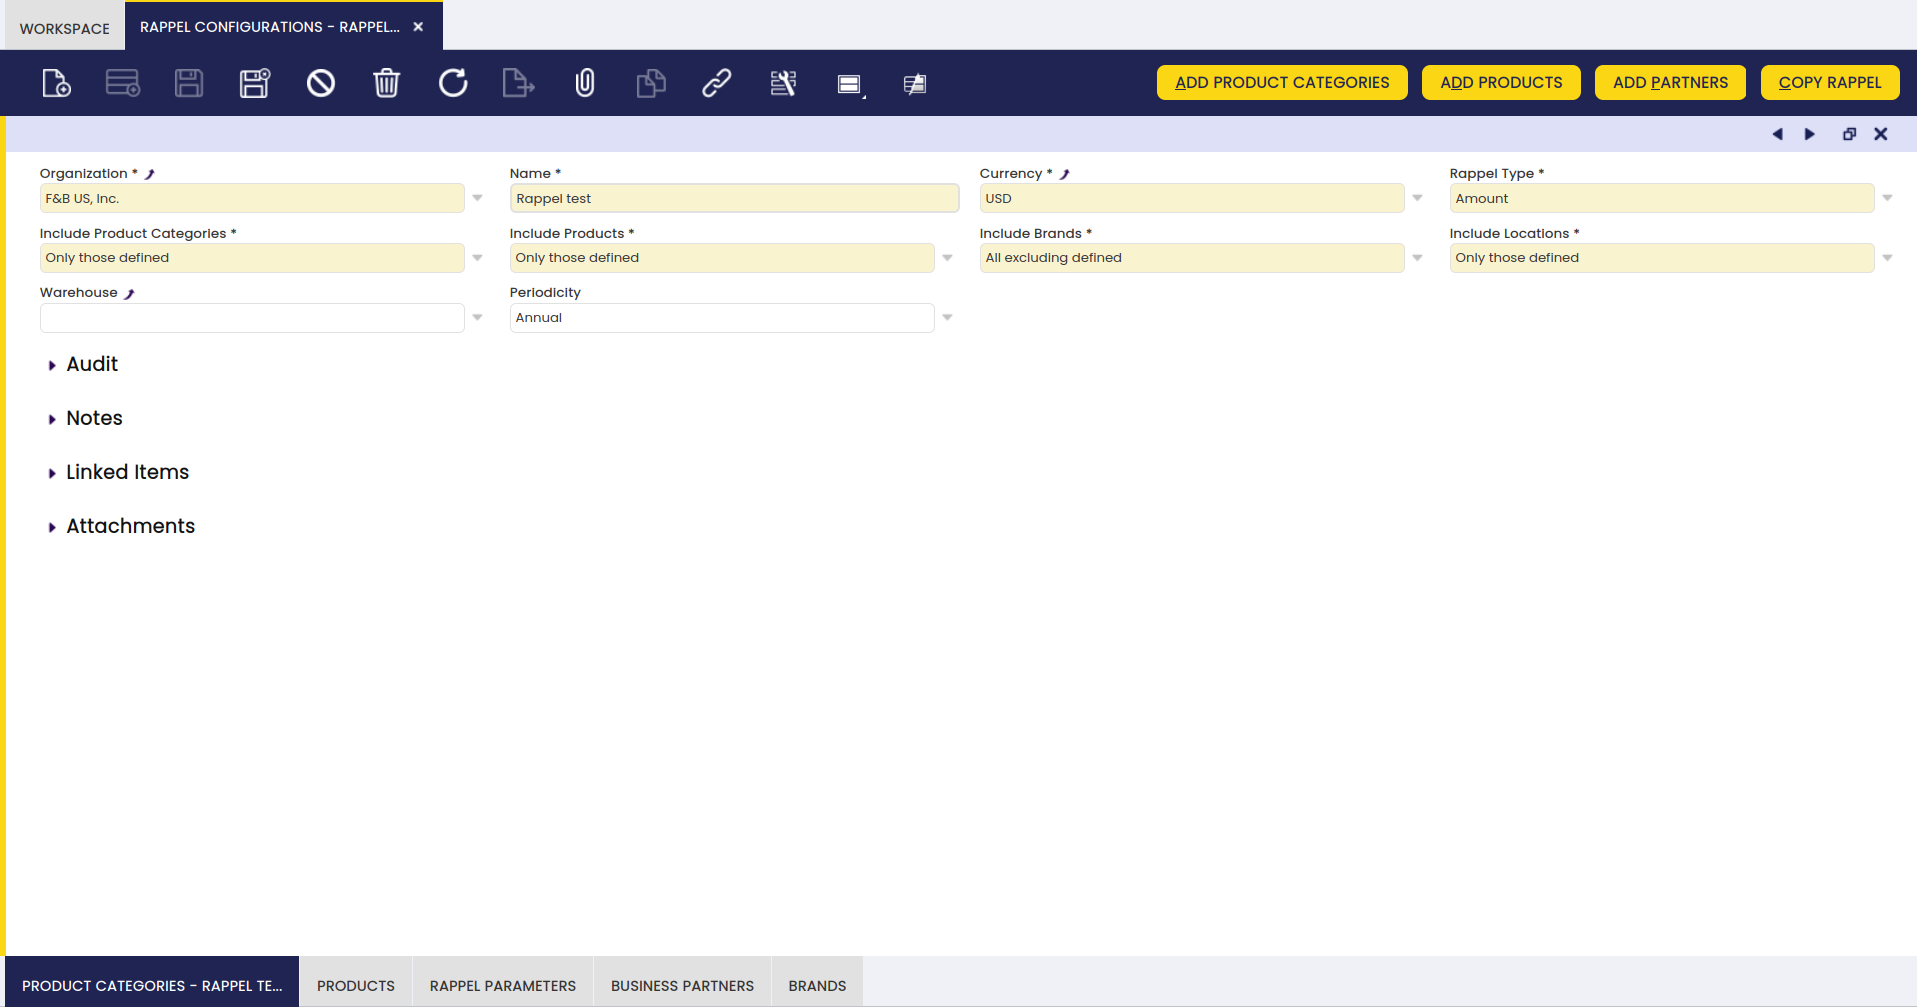
Header
This window contains the general data of the configuration. The relevant fields are described below:
- Name: It indicates the name assigned to the rappel.
- Currency: The user can select the currency of the rappel.
- Include Products: The user can define if the selected products are to be included or excluded (“all excluding defined” or “only those defined”).
- Include Product categories: The user can define if the selected product categories are to be included or excluded (“all excluding defined” or “only those defined”).
- Include Brands: The user can select certain brands to be included or excluded (“all excluding defined” or “only those defined”).
- Include Locations: The user can select certain locations to be included or excluded (“all excluding defined” or “only those defined”).
- Warehouse: It provides information about the warehouse of the products. By default, this field is empty. This is the case except for invoices created from goods shipments.
- Periodicity: It provides information about the suggested periodicity of the rappel (“annual”, “biannual”, “monthly” or “quarterly”).
- Type of Rappel: The user can select the type of rappel, it can be according to the amount of the consumption or the quantity of products consumed (“amount” or “quantity”).
Once this information is completed, the user is able to save the configuration and use the buttons in the window to configure specific aspects of each rappel.
Buttons
At the top of this window, four different buttons can be found.
- Add product categories: With this button, the user can select one or more product categories and add them to the rappel.
- Add products: With this button, the user can add one or more products to the rappel.
- Add partners: With this button, the user can add one or more partners to the rappel, and a date from and a date to must be assigned to determine the validity period for the created rappel.
- Copy rappel: With this button, the user can copy the characteristics of an existing rappel to the selected rappel.
Tabs
- Product Category: In this tab, product categories assigned to the Rappel are shown. It is also possible to assign new categories from this tab.
- Product: In this tab, products assigned to the Rappel are shown. It is also possible to assign new products from this tab.
- appel Parameters: In this tab, the discount percentage, minimum and maximum amounts can be assigned to the rappel.
- Business Partners: In this tab, the business partner to which the Rappel applies is shown. Here, it is possible to select the “from date” and “to date”. This tab also contains a sub tab called “B. Partners Location”, where the location of the business partner is indicated.
- Brand: In this tab, the brands of the products to which the Rappel applies or not can be selected.
Remember that the options selected in the tabs “Product Category”,“Product”, and “Brand” must follow a certain logic: the priority is the option selected in the tab “Product Category”. This means that more specific filters apply to the included or excluded product categories.
When selecting the option “only those defined” in the fields “include product categories” and “include products” of the header, if in the “product category” tab the user selects “water”, and in the “product” tab the user selects “white wine”, the rappel will only include the products belonging to the category “water” and not “white wine”.
Warning
When selecting the option “All excluding defined” in the “Include product categories” field and the option “Only those defined” in the “include products” field, if in the “product category” tab the user selects “water”, and in the “product” tab the user selects “sparkling water”, the rappel will not include the product “sparkling water” despite what is defined in the “product” tab, since the priority is in the defined “product category”.