Dev Assistant
Javapackage: com.etendoerp.copilot.devassistant
Overview
This page provides an overview of the tools, functionality, and usage examples of the various development agents available in Etendo. Dev Assistant streamlines workflow management for developers by offering specialized agents that simplify tasks such as creating buttons, windows, tabs and tables, event handlers, Jasper reports, background processes, and more. These agents are designed to improve productivity and reduce complexity, making it easier for developers to efficiently create and manage different components within the Etendo platform.
Info
To be able to include this functionality, the Copilot Extensions Bundle must be installed. To do that, follow the instructions from the marketplace: Copilot Extensions Bundle. For more information about the available versions, core compatibility and new features, visit Copilot Extensions - Release notes.
Warning
Consider that the agents are currently in their beta testing phase.
Agents
Dev Assistant Supervisor
The Development Agent streamlines workflow management for developers by offering specialized wizards that simplify tasks such as creating buttons, windows, tabs and tables, event handlers, Jasper reports, background processes, and more.
Functionality
The Development Agent acts as a built-in assistant that automates and accelerates repetitive tasks in an application's lifecycle, allowing you to focus on business logic and user experience. Its primary function is to eliminate "plumbing" and repetitive code: it automatically generates and configures your interface elements, binds event logic, builds reports, and orchestrates background processes, all without you having to manually write dozens of files or parameters. By integrating directly into your development environment, it ensures that each component complies with your project's conventions and minimizes configuration errors, thus optimizing your productivity and code quality.
Team Members
Background Process Creator
Background Process Creator is an agent specialized in the automatic creation of Background Processes in Java. The agent reads previously indexed code and uses examples of classes extending DalBaseProcess to build new Background Processes.
Tools
Functionality
Background Process Creator generates Background Processes in Java using indexed examples of classes that extend DalBaseProcess. To configure the agent properly, you need to provide the following parameters:
- Java package: The Java package where the new process will be saved. It should follow the format
java.package.of.the.module. - Name: The name of the Java file to be created.
- Search Key: A key that will be used to locate the process in other windows when necessary.
- Code description: The purpose and logic that the Background Process should fulfill.
Usage Example
-
To use this agent, it is necessary to log in as
System Administratorrole and set the role access. For this, go to the Assistant window, select Background Process Creator and synchronize it. Then, go to the Assistant Access window and give access to the role. -
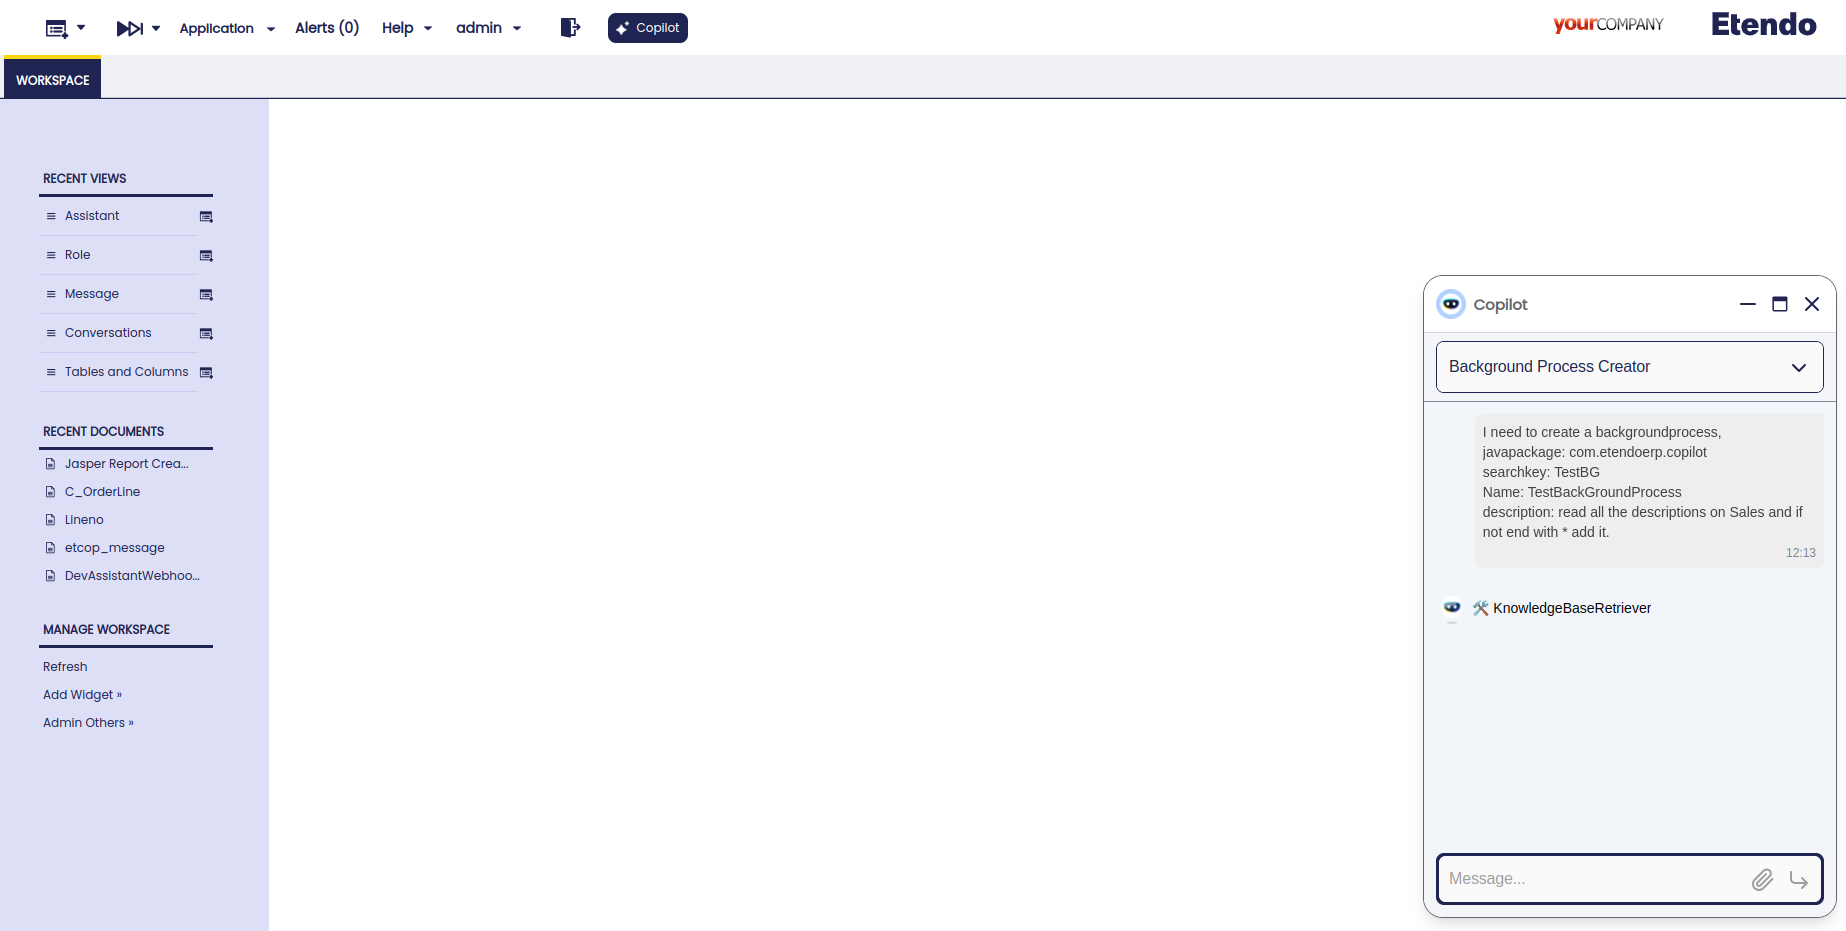
Open Copilot and select Background Process Creator, then ask to the agent what you need to create.
-
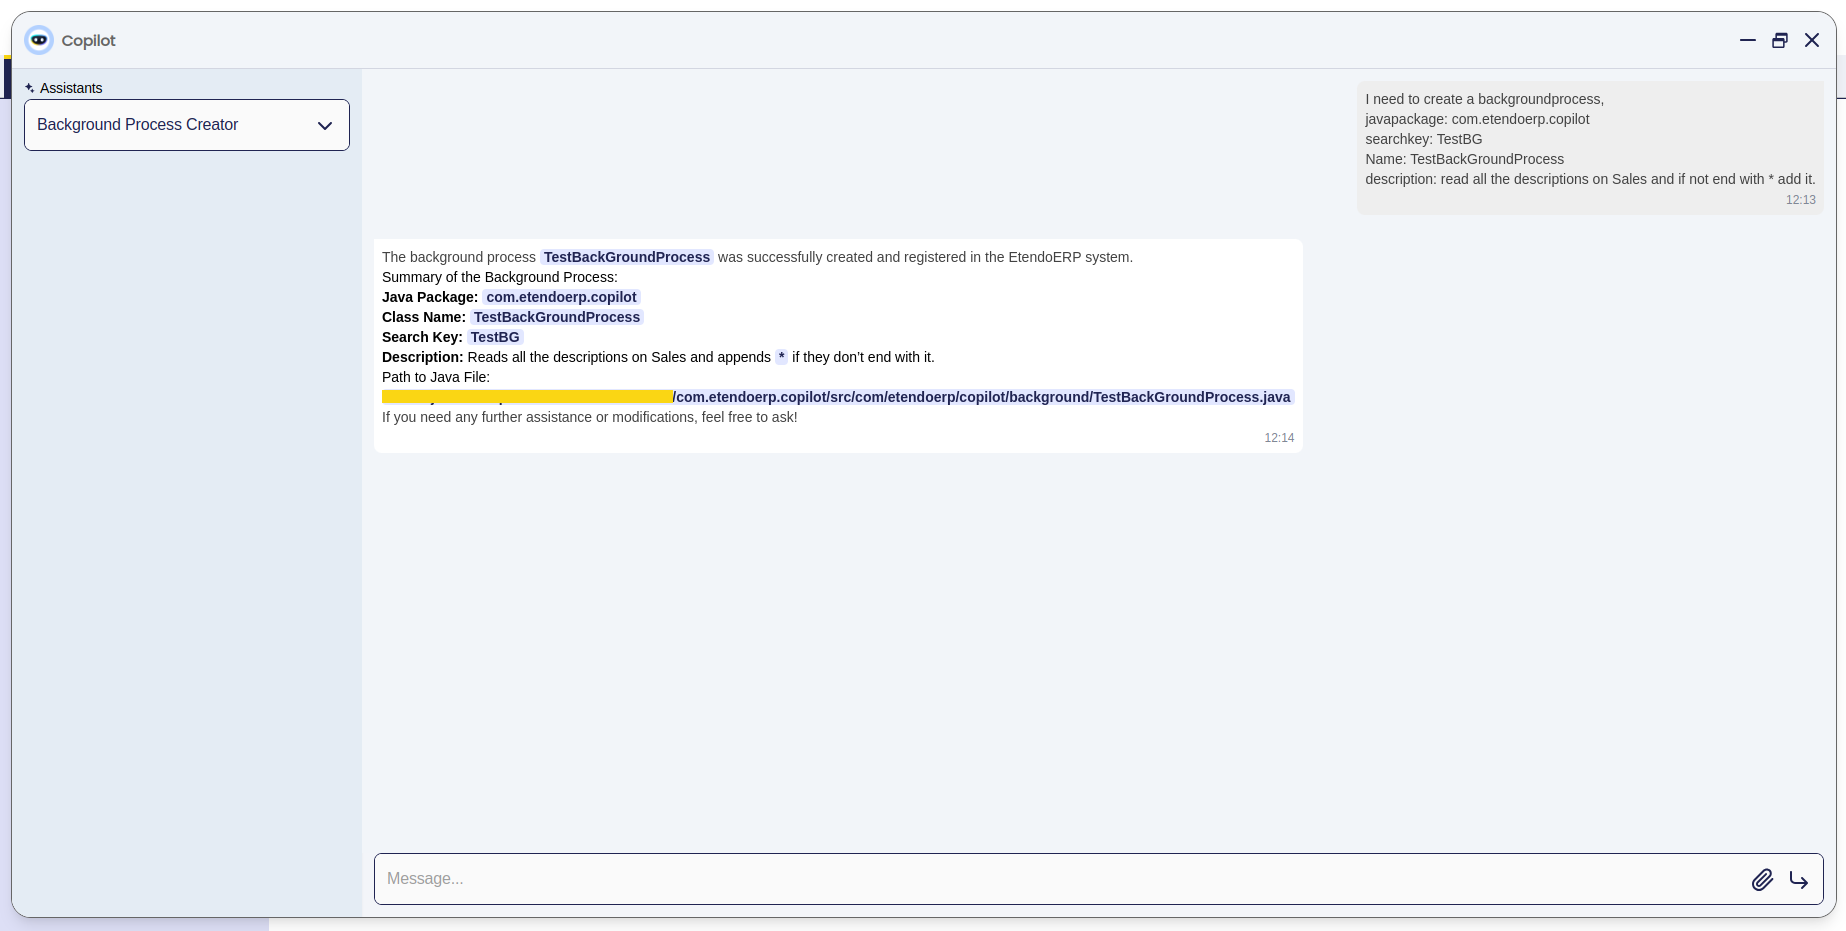
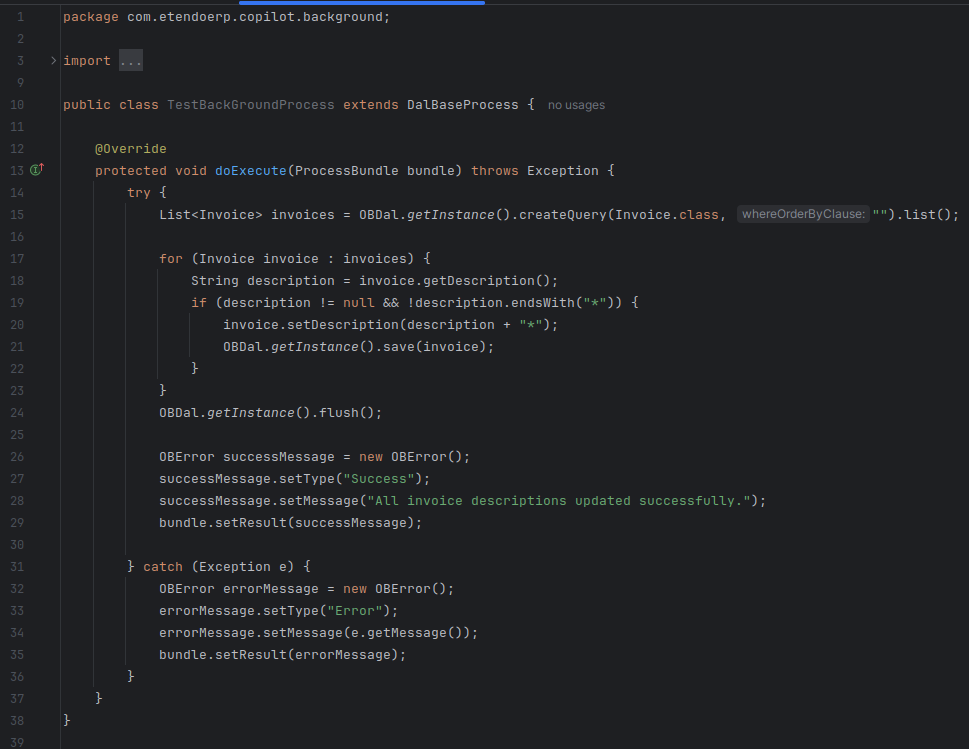
Then, this is the result given by the agent.
Button Process Creator
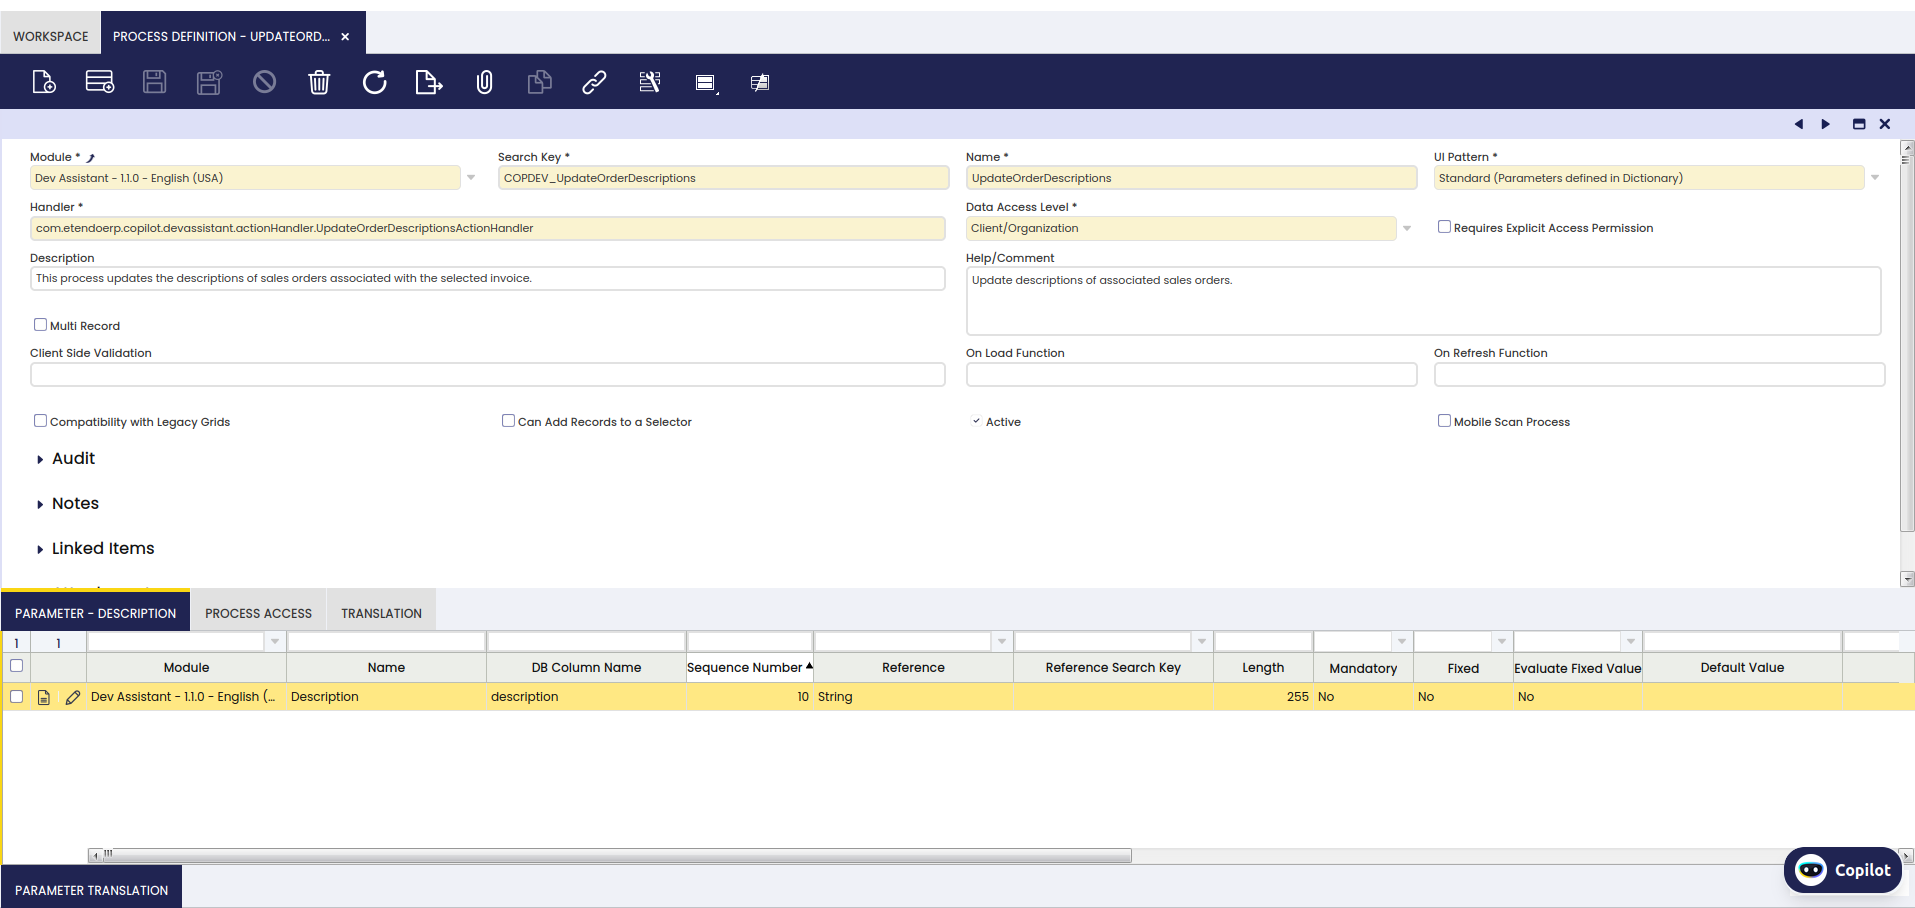
The Button Process Creator simplifies the process of creating and registering buttons and process definitions in Etendo Classic. By automating the workflow through webhooks, it removes the need for manual configuration, ensuring that your processes and buttons are set up correctly and efficiently.
Tools
Functionality
The Button Process Creation Assistant automates the creation of a button and the registration of a process in Etendo Classic through a webhook call. Through a webhook call, the tool ensures the correct setup by validating necessary parameters like the module prefix, Java package, and process name, making sure the search key is correctly formed. It then generates a Java class for the button, which extends BaseProcessActionHandler, and registers this button in the desired window, tab, and table within the Etendo system.
Additionally, it defines and registers the process by creating a process definition and associating it with any required parameters, including attributes like database name, length, and reference, ensuring integration and functionality within the system.
When creating a button or registering a process, the agent will request the following information:
- Java Package: The Java package of the module where the button's class will be created (e.g.,
com.etendoerp.module). - Module Prefix: A prefix for the module (e.g.,
COPDEV). - Window: The window in Etendo where the button will appear.
- Tab: The specific tab within the window where the button will be located.
- Table: The table associated with the process.
- Process Name: The name of the process to be created.
- Search Key: A unique search key for the process that includes the module prefix (e.g.,
COPDEV_ActualizarDescripciónPedido). - Parameters: Optional parameters for the process, including:
- BD_NAME: The database column name.
- NAME: The name of the parameter.
- LENGTH: The length of the parameter field.
- SEQNO: The sequence number of the parameter.
- REFERENCE: A reference for the parameter (if it's linked to another field or table).
- Help Comment: An optional help comment for the process.
- Description: An optional description for the process.
The webhook call used to register the process in Etendo will require the following body parameters:
body_params = {
    "Prefix": "COPDEV",
    "SearchKey": "COPDEV_ActualizarDescripciónPedido",
    "ProcessName": "ActualizarDescripciónPedidos",
    "HelpComment": "This process updates the description of associated orders.",
    "Description": "A process to update the description of the associated sales orders based on a text input.",
    "Parameters": [
        {
            "BD_NAME": "text_parameter",
            "NAME": "Description Text",
            "LENGTH": 255,
            "SEQNO": 10,
            "REFERENCE": "Text"
        }
    ],
    "JavaPackage": "com.etendoerp.copilot.devassistant"
}
This call registers the process in the system and attaches the necessary parameters.
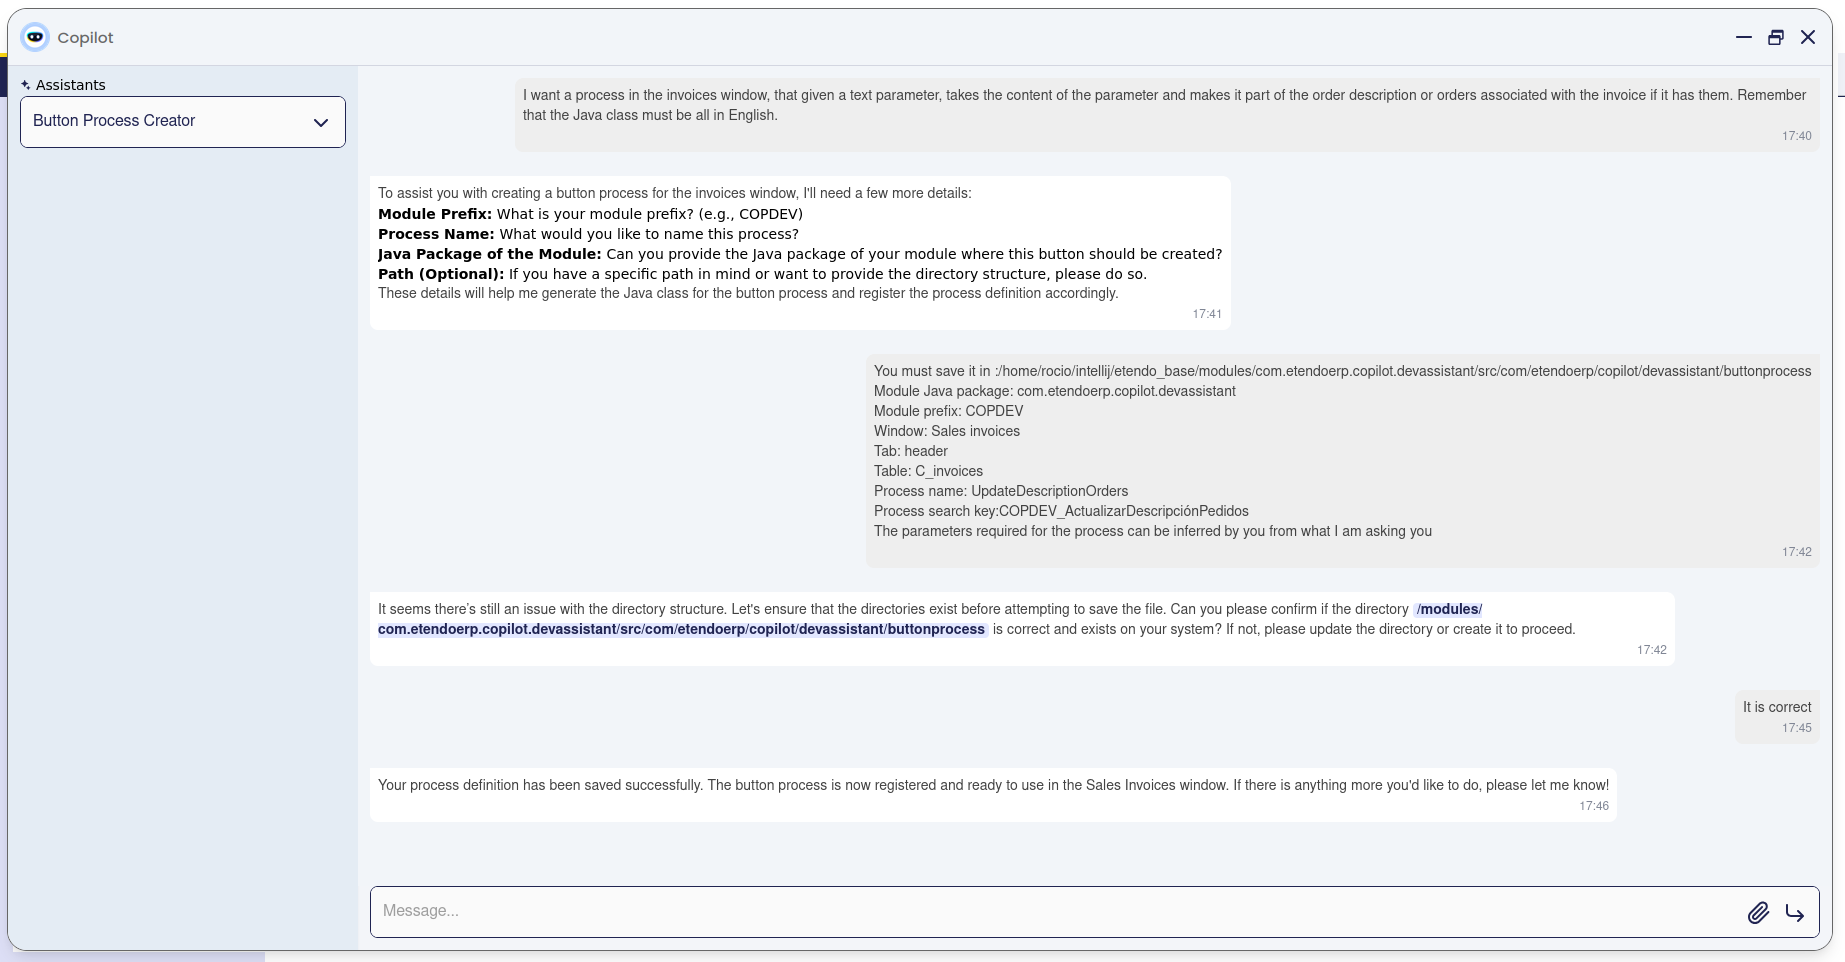
Usage Example
The process and the button will be automatically registered, and the user will be notified.
At this point, we will have the Java class of the button created along with the registered process.
Code Run
Code Run is an agent designed for executing Python commands in a controlled environment. It translates the request into Python or Bash commands to fulfill the task.
Tools
Functionality
Code Run enables users to execute Python scripts and commands dynamically, even if dependencies or configurations are missing. Key features include:
-
Dynamic Code Execution:
-
Allows running Python code snippets.
-
Example:
print('Hello, World!').
-
-
Natural Language Requests:
- Users can provide tasks in plain language (e.g., "Ping Google"), and the agent translates them into executable Python or Bash commands.
-
Automatic Dependency Management:
-
Identifies and installs missing libraries when a task requires them.
-
Example:
!pip install numpy.
-
-
Error Handling:
- Provides meaningful error messages for invalid commands or missing inputs.
-
Flexible Task Management:
- Supports file operations and multi-step workflows combining Python and Bash.
Usage Example
-
Log in to the system as the System Administrator role and configure the agent in the Assistant window. Synchronize it and grant access to the role in the Assistant Access window.
-
Open Copilot and select Code Run. Then, ask the agent what you need to execute.
-
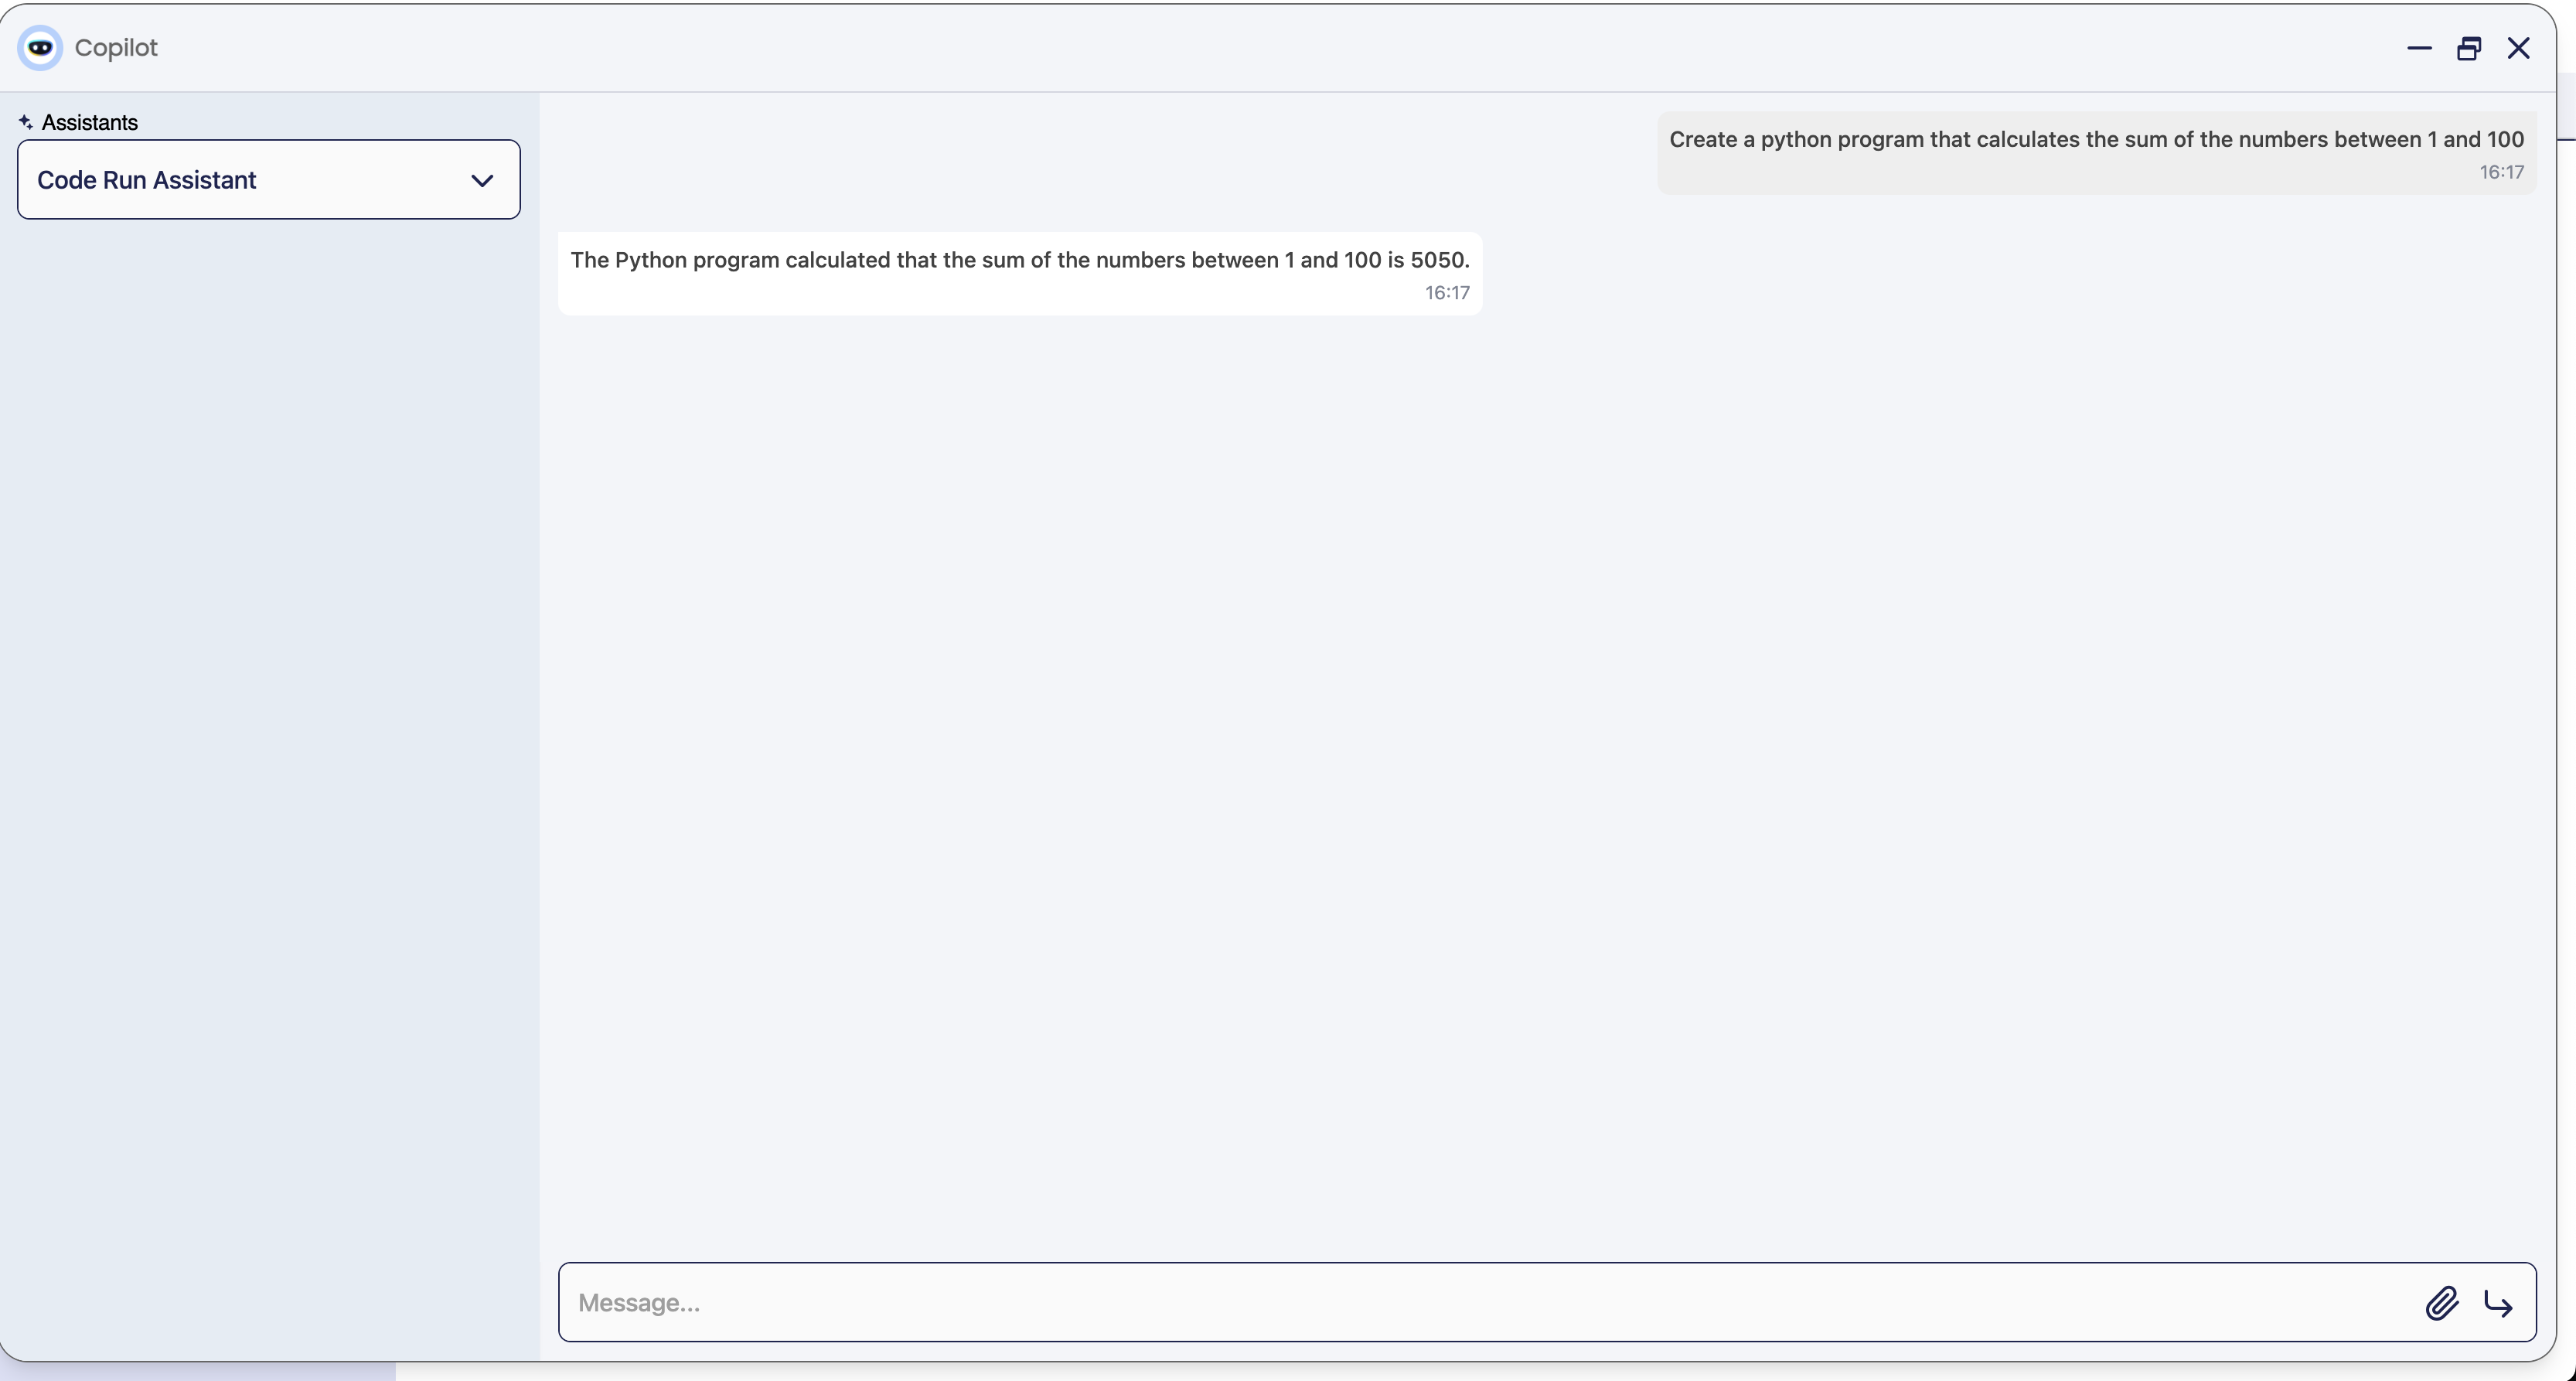
Example interaction and result:
Input:
- "Create a Python program that calculates the sum of the numbers between 1 and 100."
Execution:
- The agent processes the request and executes the following Python code:
```python def calculate_sum(start, end): return sum(range(start, end + 1))
# Calculate the sum of numbers between 1 and 100 result = calculate_sum(1, 100) print(f'The sum of numbers between 1 and 100 is: {result}') ```
Result:
- The agent outputs the result of the program:
Etendo Code Expert
Etendo Code Expert is an agent designed to read indexed files and provide answers related to their content.
Functionality
With this agent it is possible to ask code development questions and based on Etendo code indexed, the agent will give possible code suggestions or solutions. It can summarize, answer technical questions, suggest programming code improvements, and offer general assistance about files.
This assistant is useful for avoiding the need to manually review all files. Also, multiple files can be configured if necessary.
Usage Example
-
To use this agent, it is necessary to log in as
System Administratorrole and set the role access. This assistant do not include the path configured to the indexed files. To do that, go to the Knowledge Base File window inApplication>Service>Copilot>Knowledge Base Fileand select theEtendoJAvaSourceCodefile and, in the File Path Tab, specify the path where the code files you need the agent to read are located.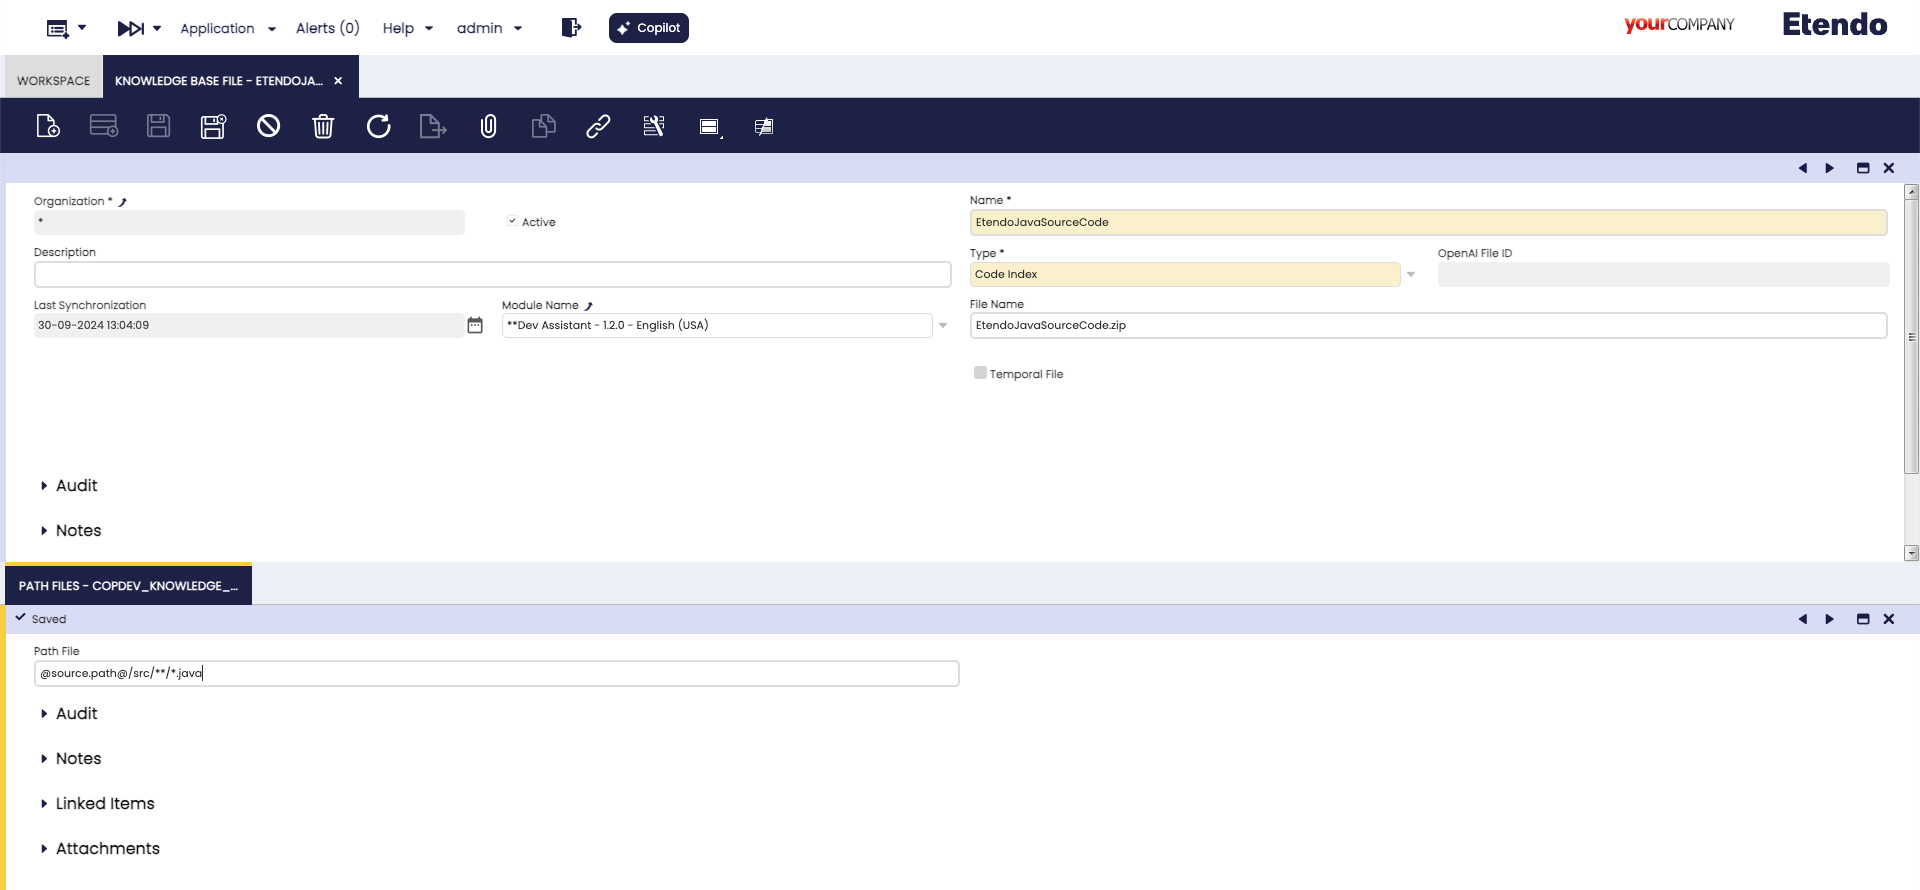
In this example using the path shown in the image, we will obtain all the files with Java extension from the Etendo core source code -
Then, go to the Assistant window, configure Etendo Code Expert and synchronize it. After that, go to the Assistant Access window and give access to the role.
-
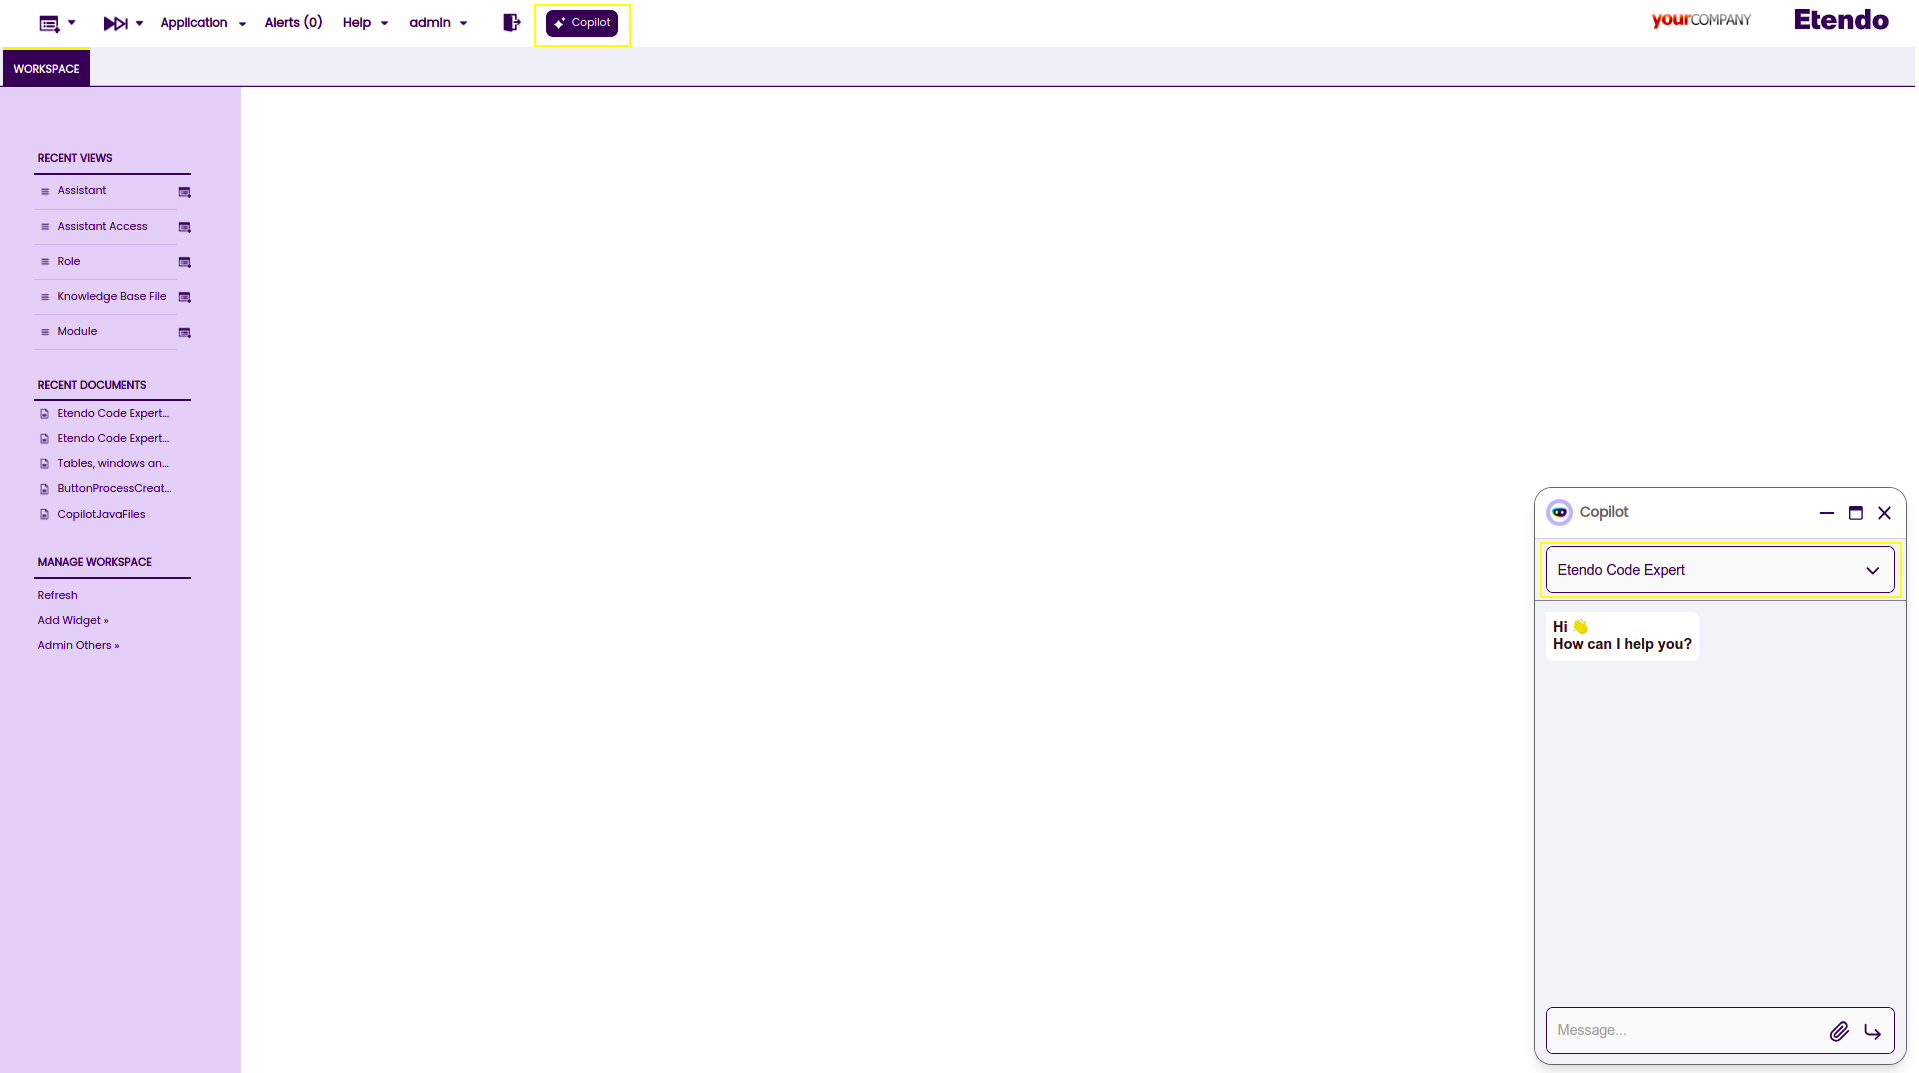
Start using the agent. Open Copilot and select Etendo Code Expert.
-
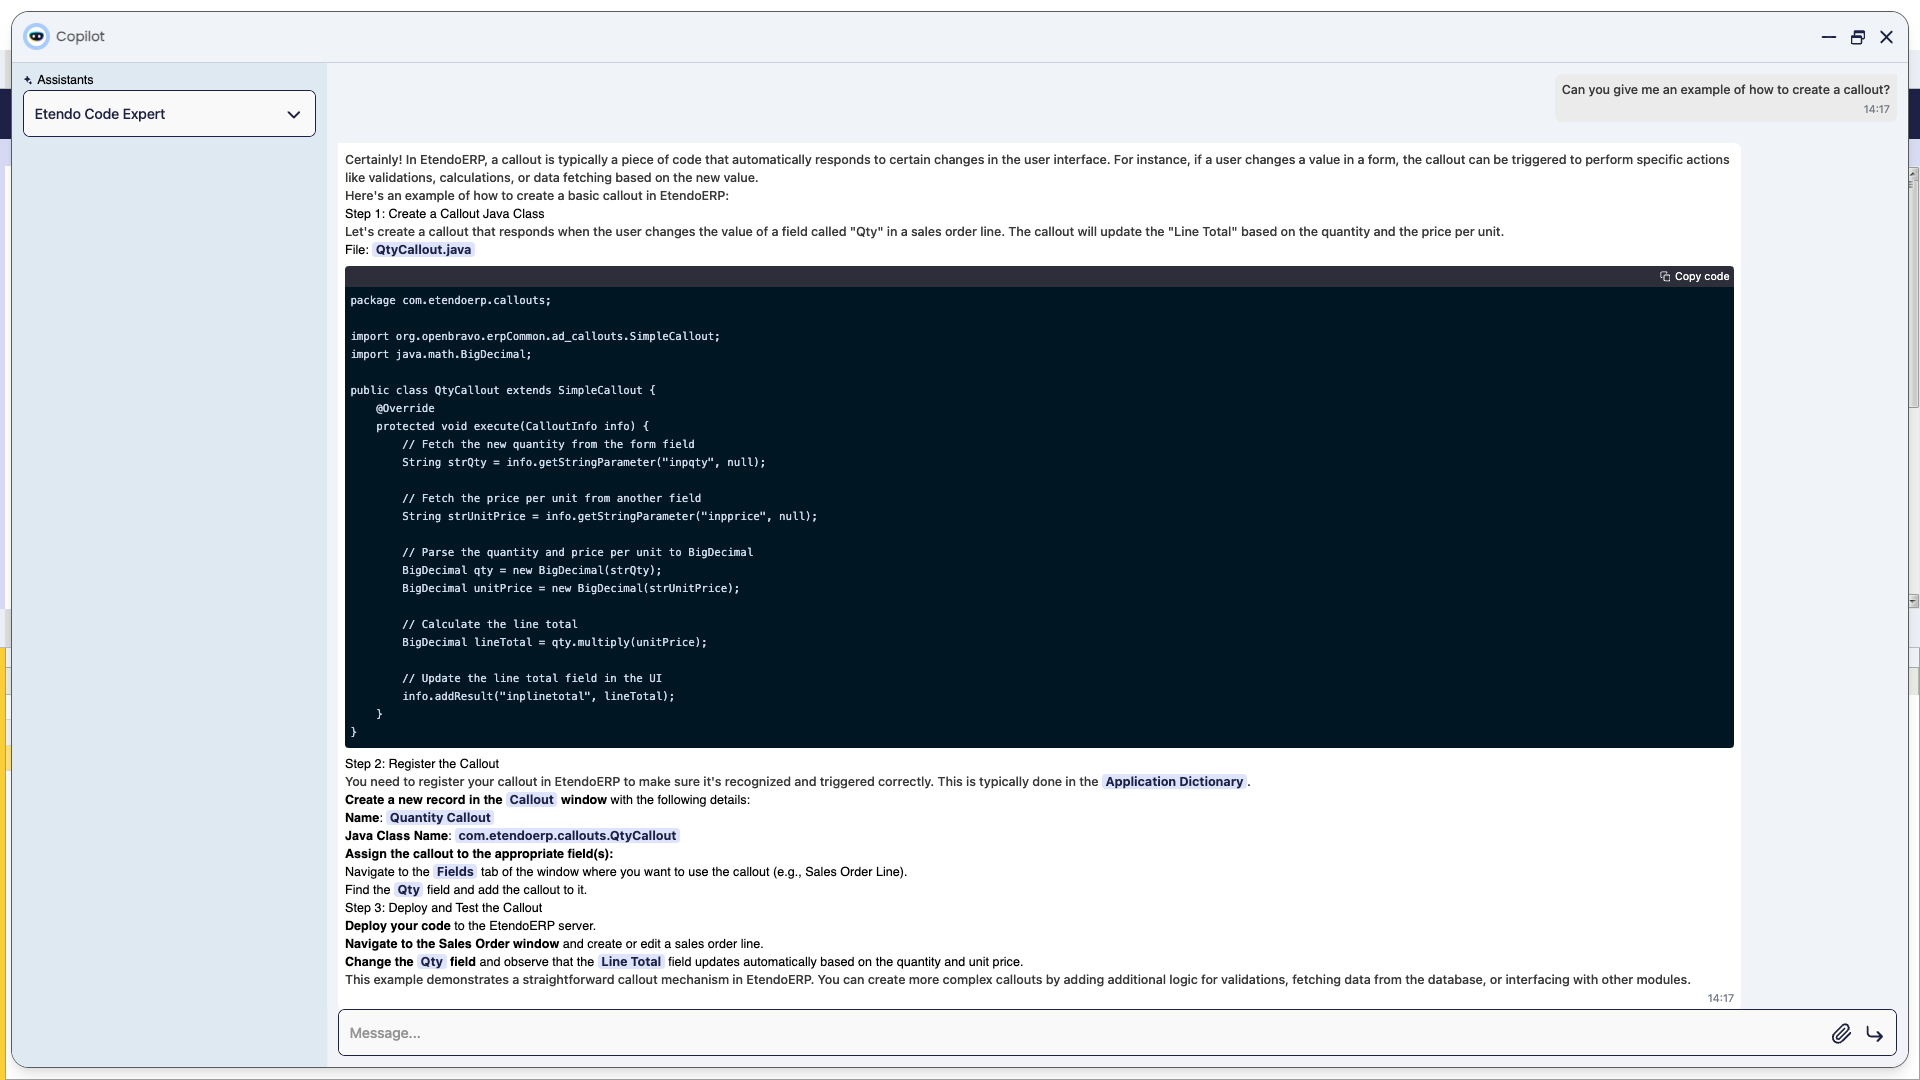
Ask the agent for what you need to create.
Event Handler Creator
This agent is capable of creating Event Handlers in Etendo Classic. You only need to provide the Java package of the module where it should be exported and specify the action to be performed.
Tools
Functionality
Event Handler Creator is an agent designed to automatically create event handlers in Java. It uses code indexed in its knowledge base to read classes that extend EntityPersistenceEventObserver, providing examples to build a new event handler. To generate an event handler, the assistant requires the following parameters:
- Java package: The package where the file will be saved.
- File name: The name of the file to create.
- Entity: The entity to observe.
- Description: A description of the functionality to be implemented by the event handler.
Usage Example
-
To use this agent, it is necessary to log in as
System Administratorrole and set the role access. For this, go to the Assistant window, select Event Handler Creator and synchronize it. Then, go to the Assistant Access window and give access to the role. -
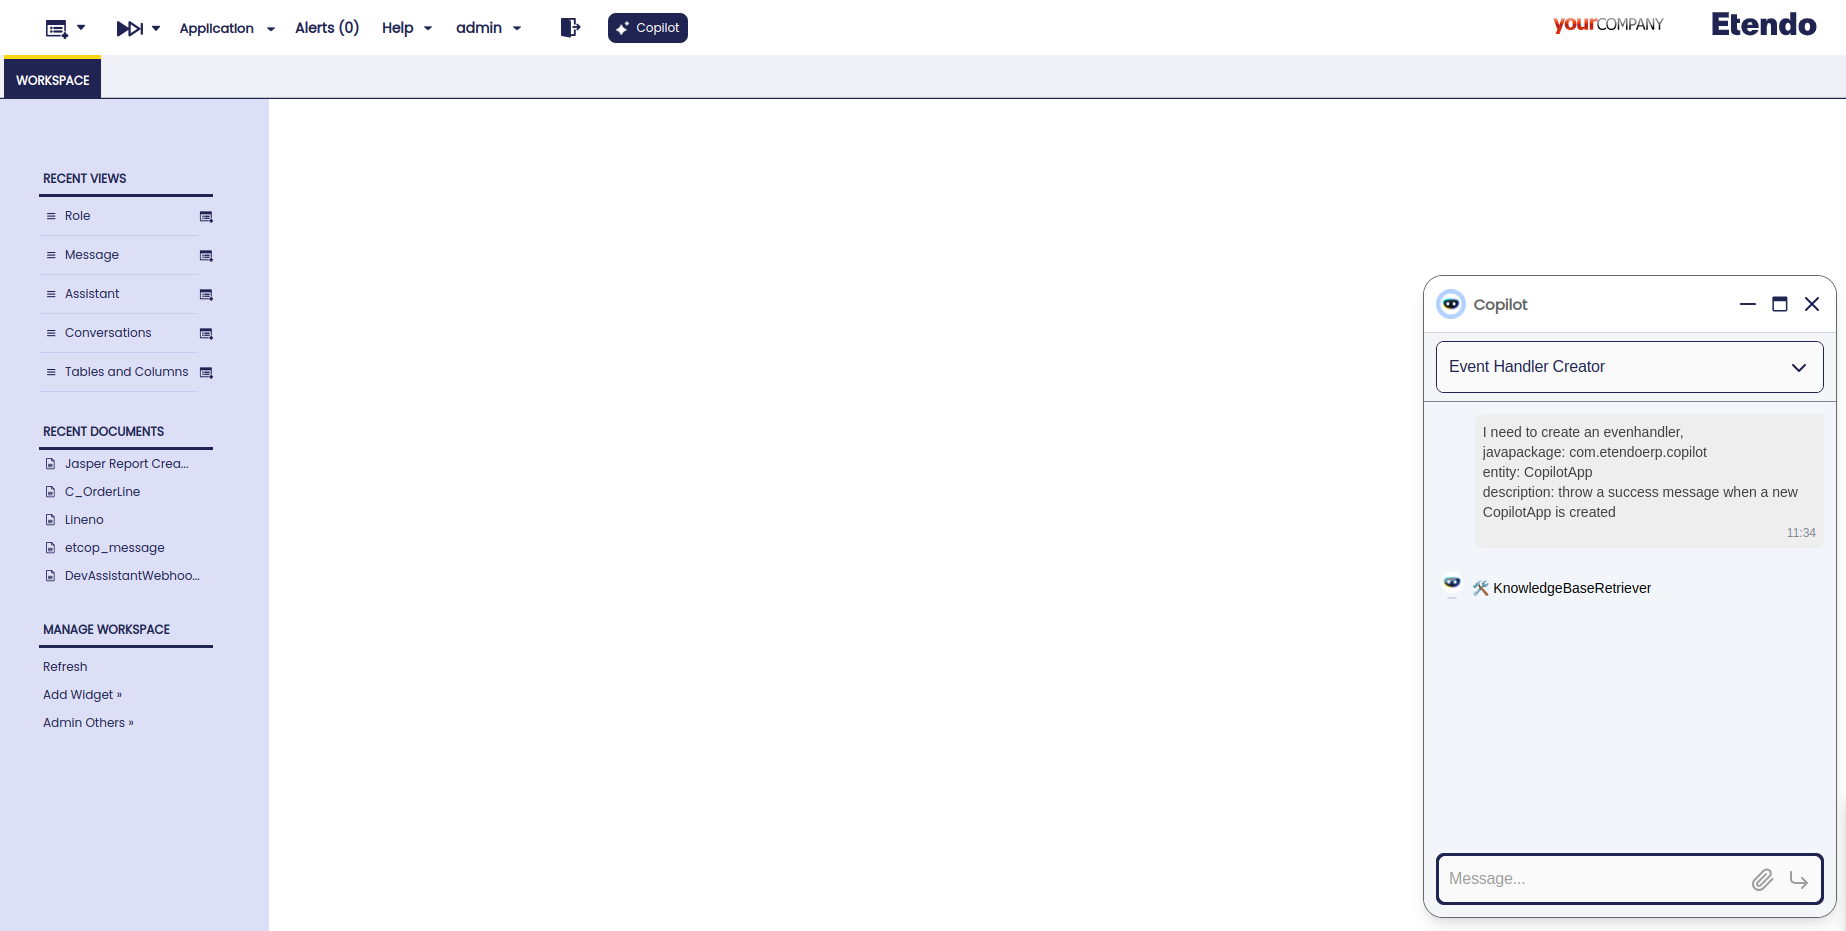
Open Copilot and select Event Handler Creator, then ask to the agent what you need to create.
-
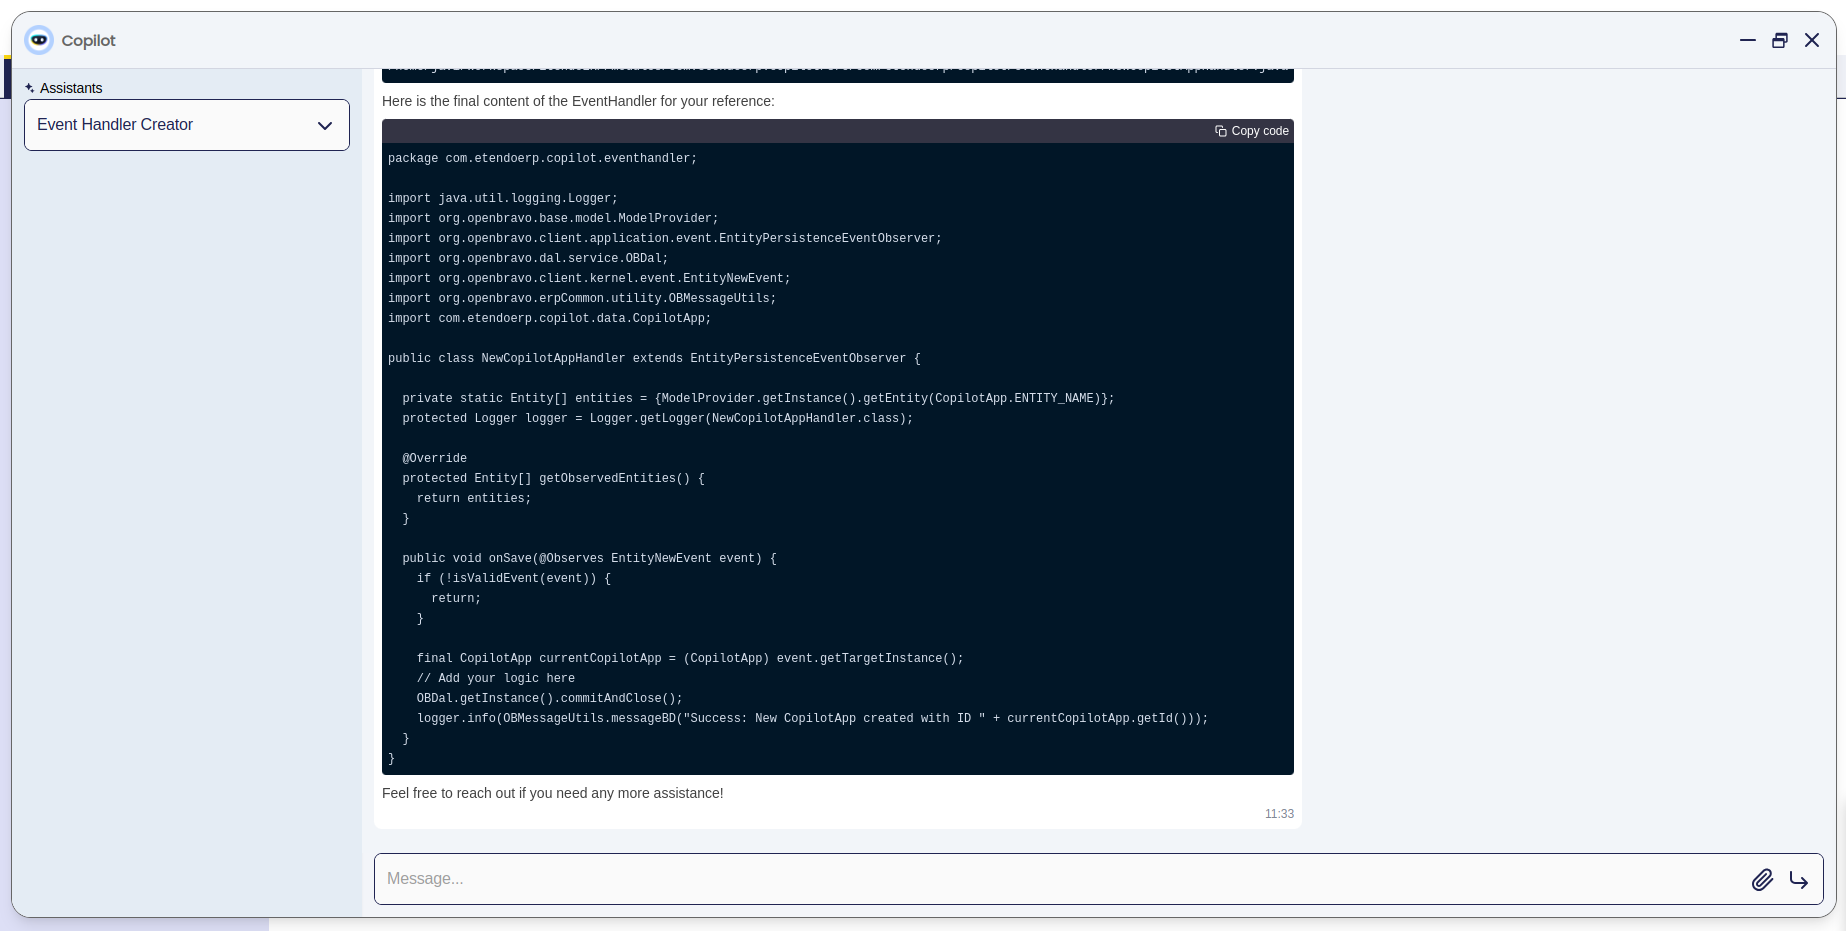
Then, this is the result given by the agent.
Jasper Report Creator
The Jasper Assistant is designed to facilitate the creation, editing, and registration of reports within the Etendo platform. Using JasperReports, it allows developers to define the structure of the report, apply styles, manage parameters, and register the reports in the system to use in different modules.
Info
This agent simplifies the process by verifying that all fields used in a report are correctly defined in the database, thus avoiding common errors such as Field not found. It also supports integrating logos, applying styles, and performing data grouping to ensure that the reports meet business requirements.
Tools
-
JasperTool
Functionality
Report Creation
The Jasper agent requests the following parameters to create a report:
- Report storage path: The location in the file system where the report file will be saved.
- Report name: The name that will be assigned to the report.
- Report encoding language: The language in which the report will be encoded (default is UTF-8).
- Report parameters: A list of parameters that the report will accept.
- SQL query: The SQL query that will provide data to the report.
- Report styles: Definition of the visual styles applied to the report.
- Data grouping: Configuration of data grouping within the report.
- Image or logo in the report: Specification of images or logos to include.
- Data distribution: Structure of how the data will be organized in the report.
Report Registration
Once the report is created, it can be registered in the system. The agent requests the following arguments:
- Report name: Name that will be used to register the report in the system.
- Module prefix: Prefix that identifies the module where the report will be registered.
- Search key: Unique key to identify the report in the system.
- Help comments: Additional information to help understand the purpose of the report.
- Description: Detailed description of the report.
- Report path: Path where the report is stored.
- Parameters: List of registered parameters that can be used when executing the report.
Report Editing
The agent also allows editing existing reports. Available actions include:
- Parameter Modification: Allows editing any already registered report parameter.
- SQL Query Update: Modification of the SQL query used by the report.
- Change of Styles and Groupings: Update of visual styles and data grouping configuration.
Usage Example
-
To use this agent, it is necessary to log in as
System Administratorrole and set the role access. For this, go to the Assistant window, select Jasper Report Creator and synchronize it. Then, go to the Assistant Access window and give access to the role. -
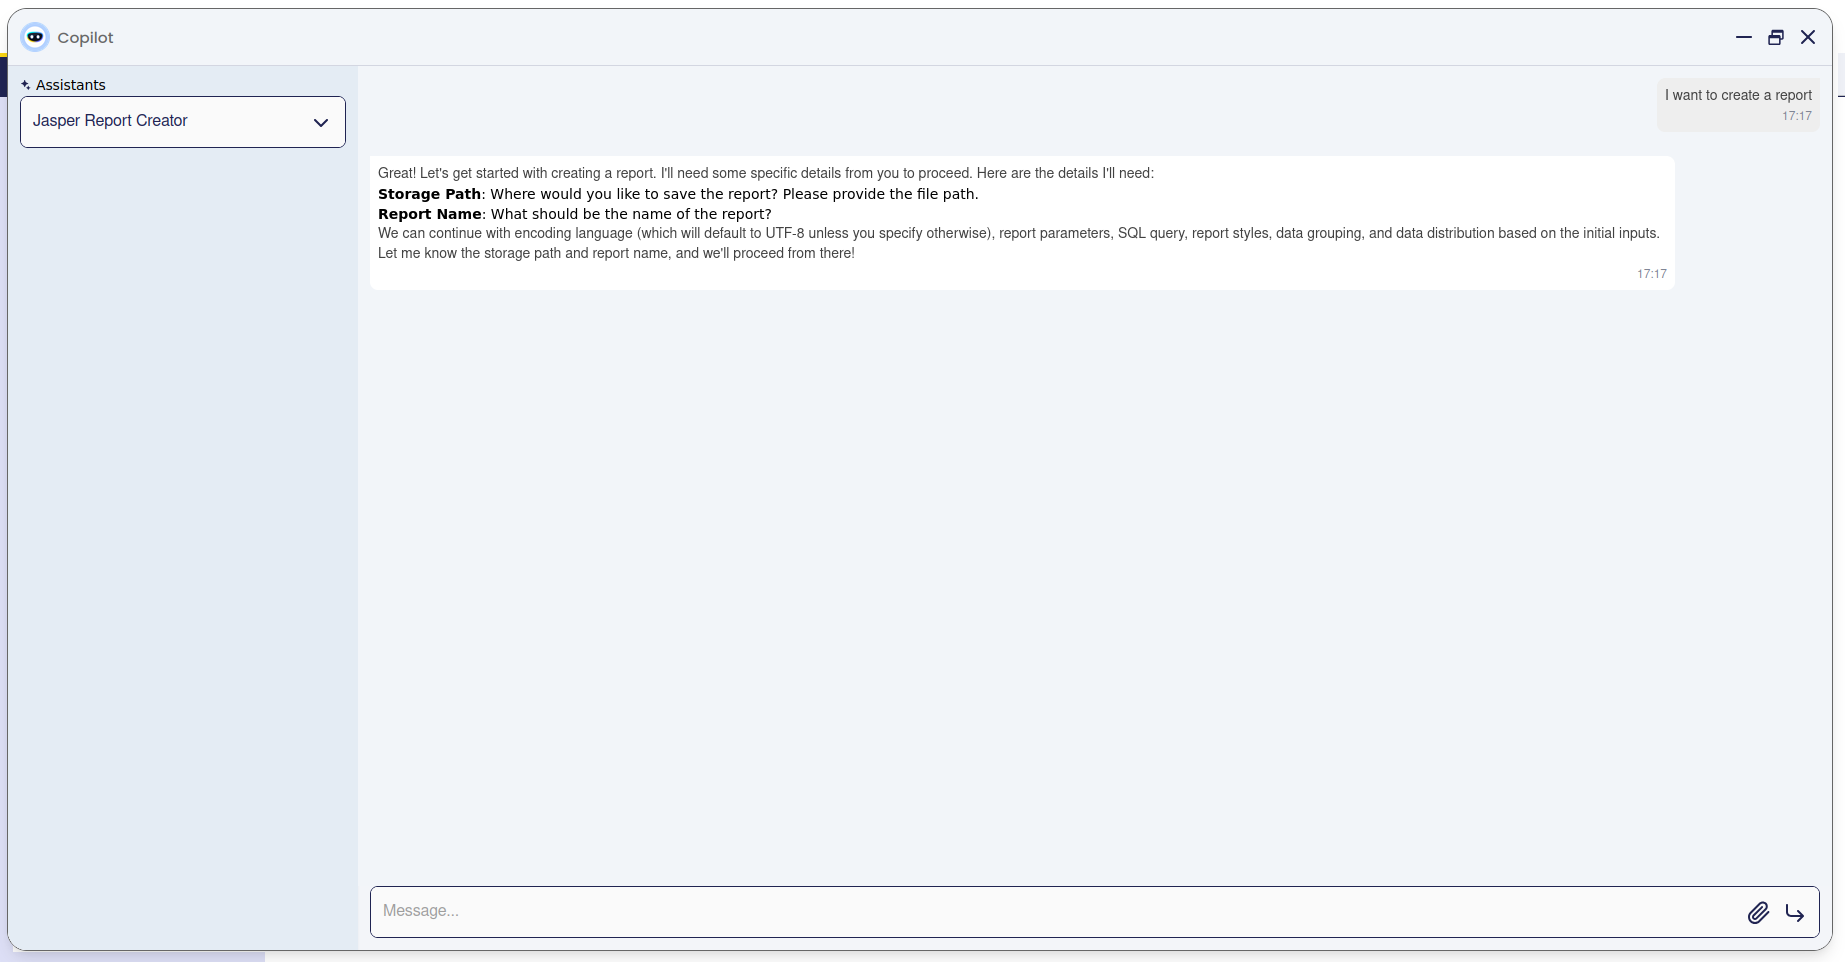
Open Copilot and select Jasper Report Creator
-
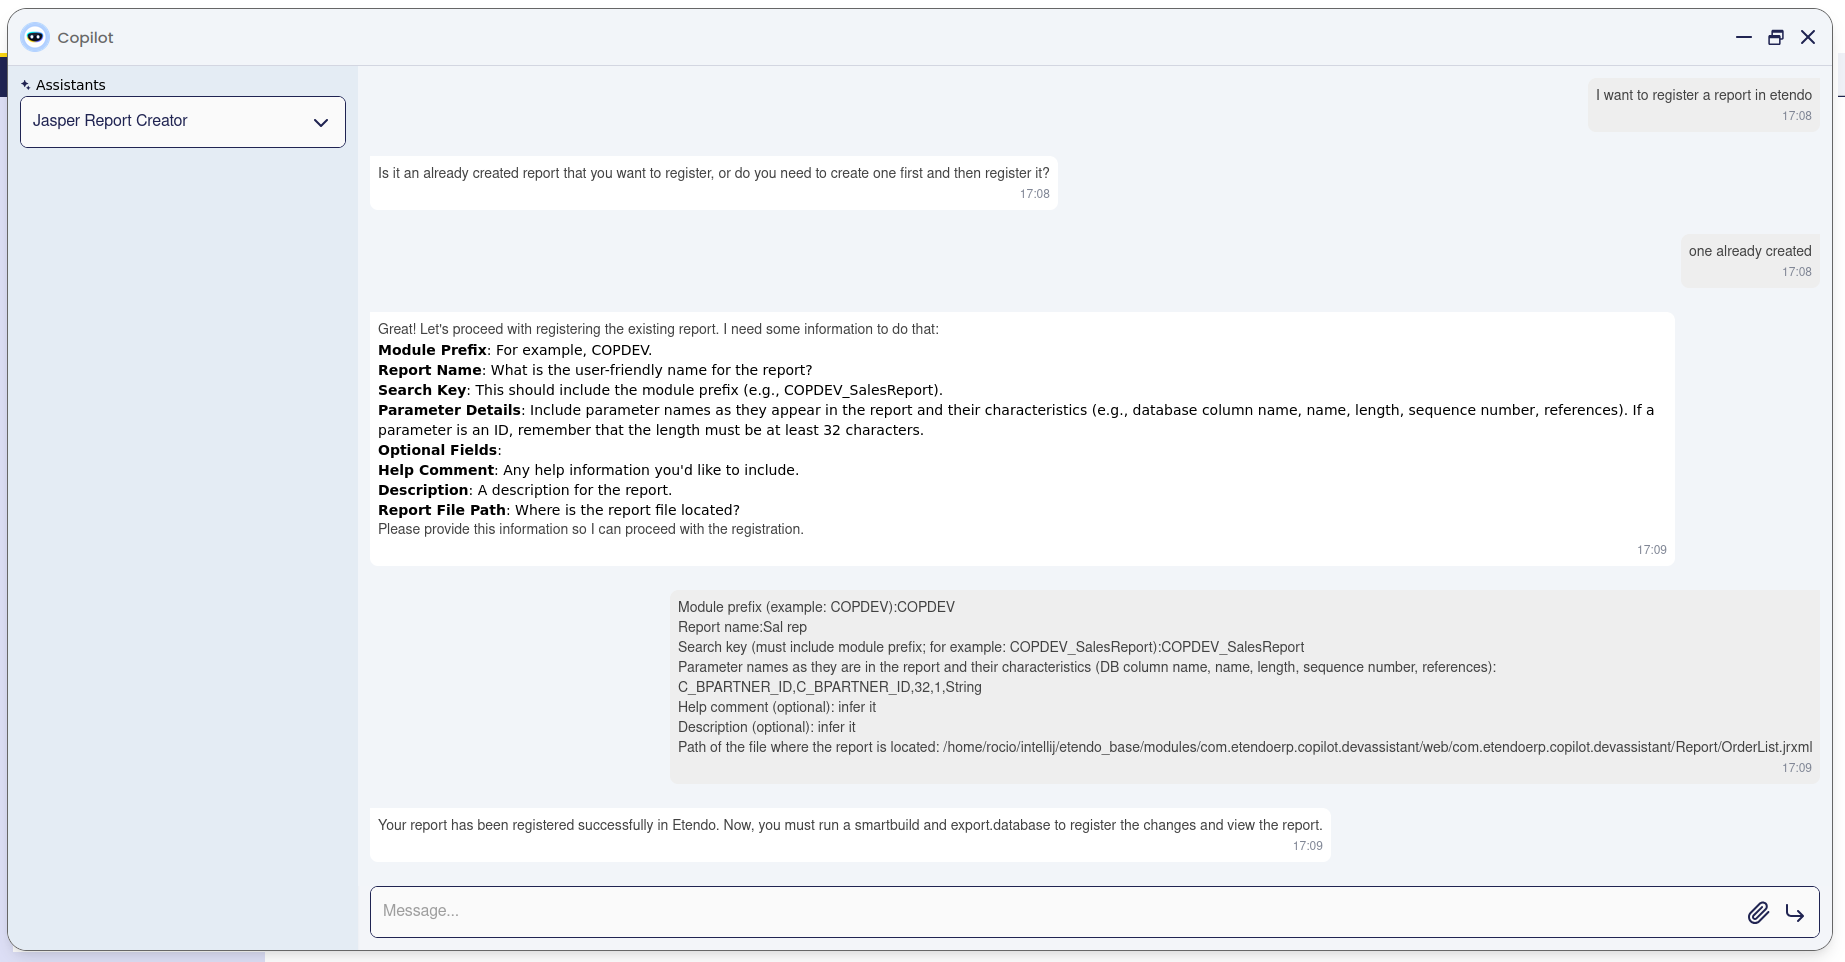
Depending on the request, the Jasper Assistant will return:
Report Creation
Report Registration
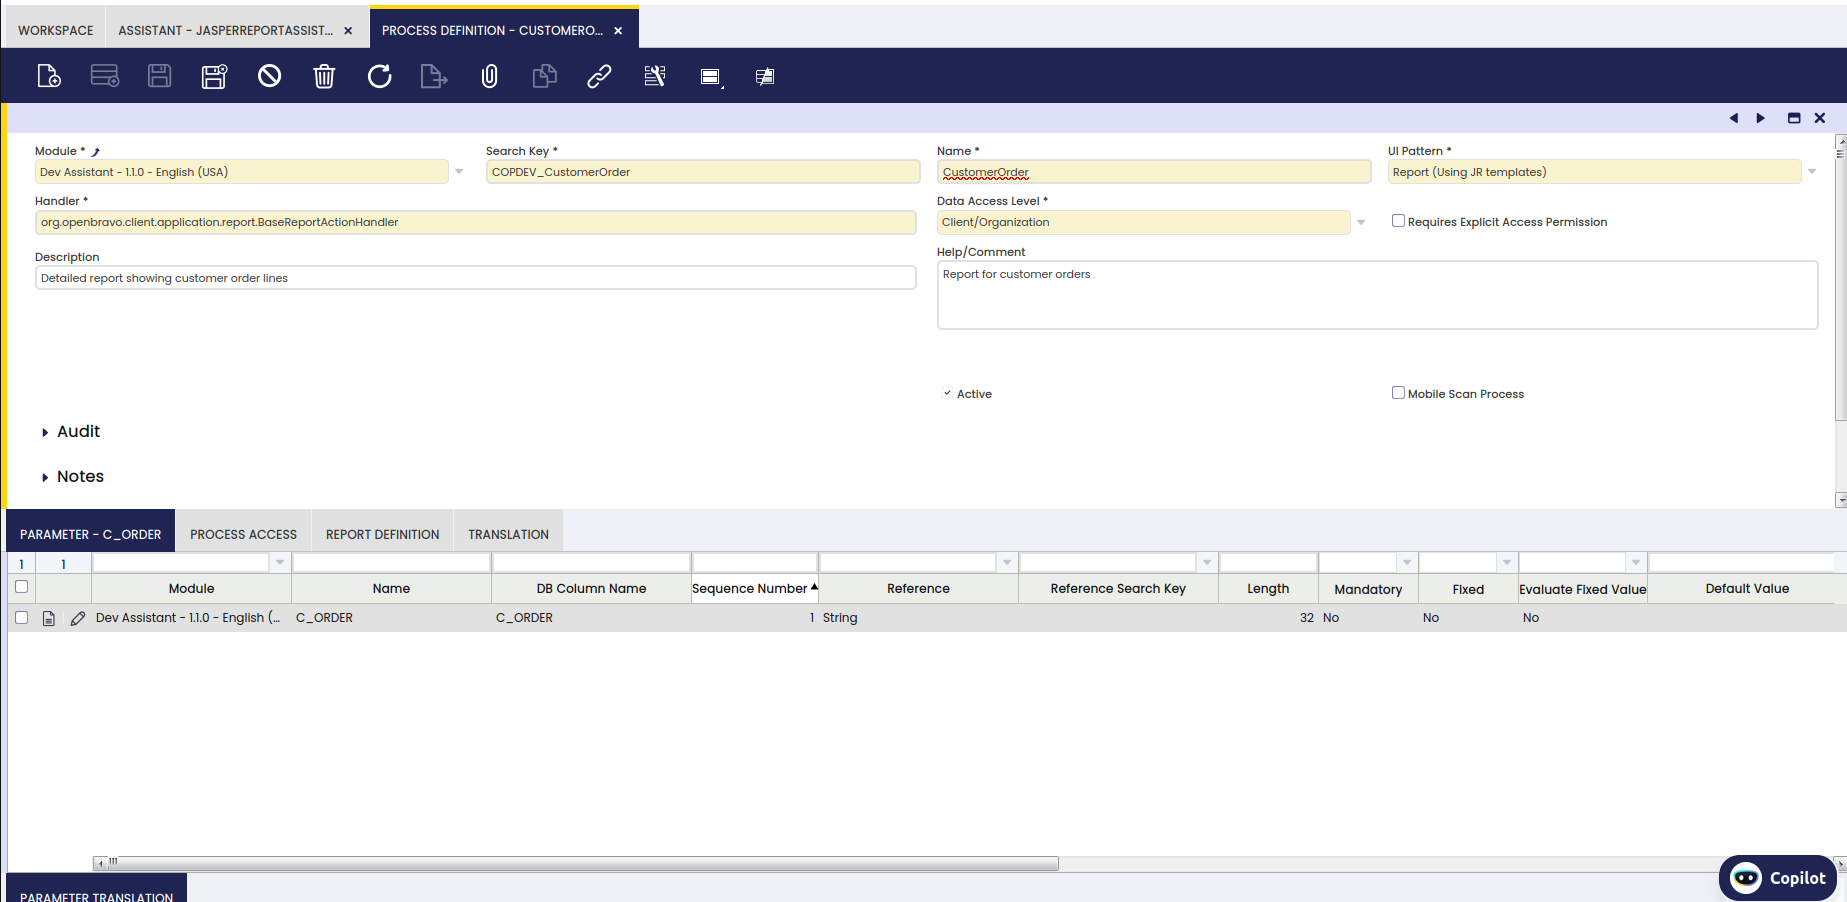
After running the smartbuild we will be able to see the process of the created report:
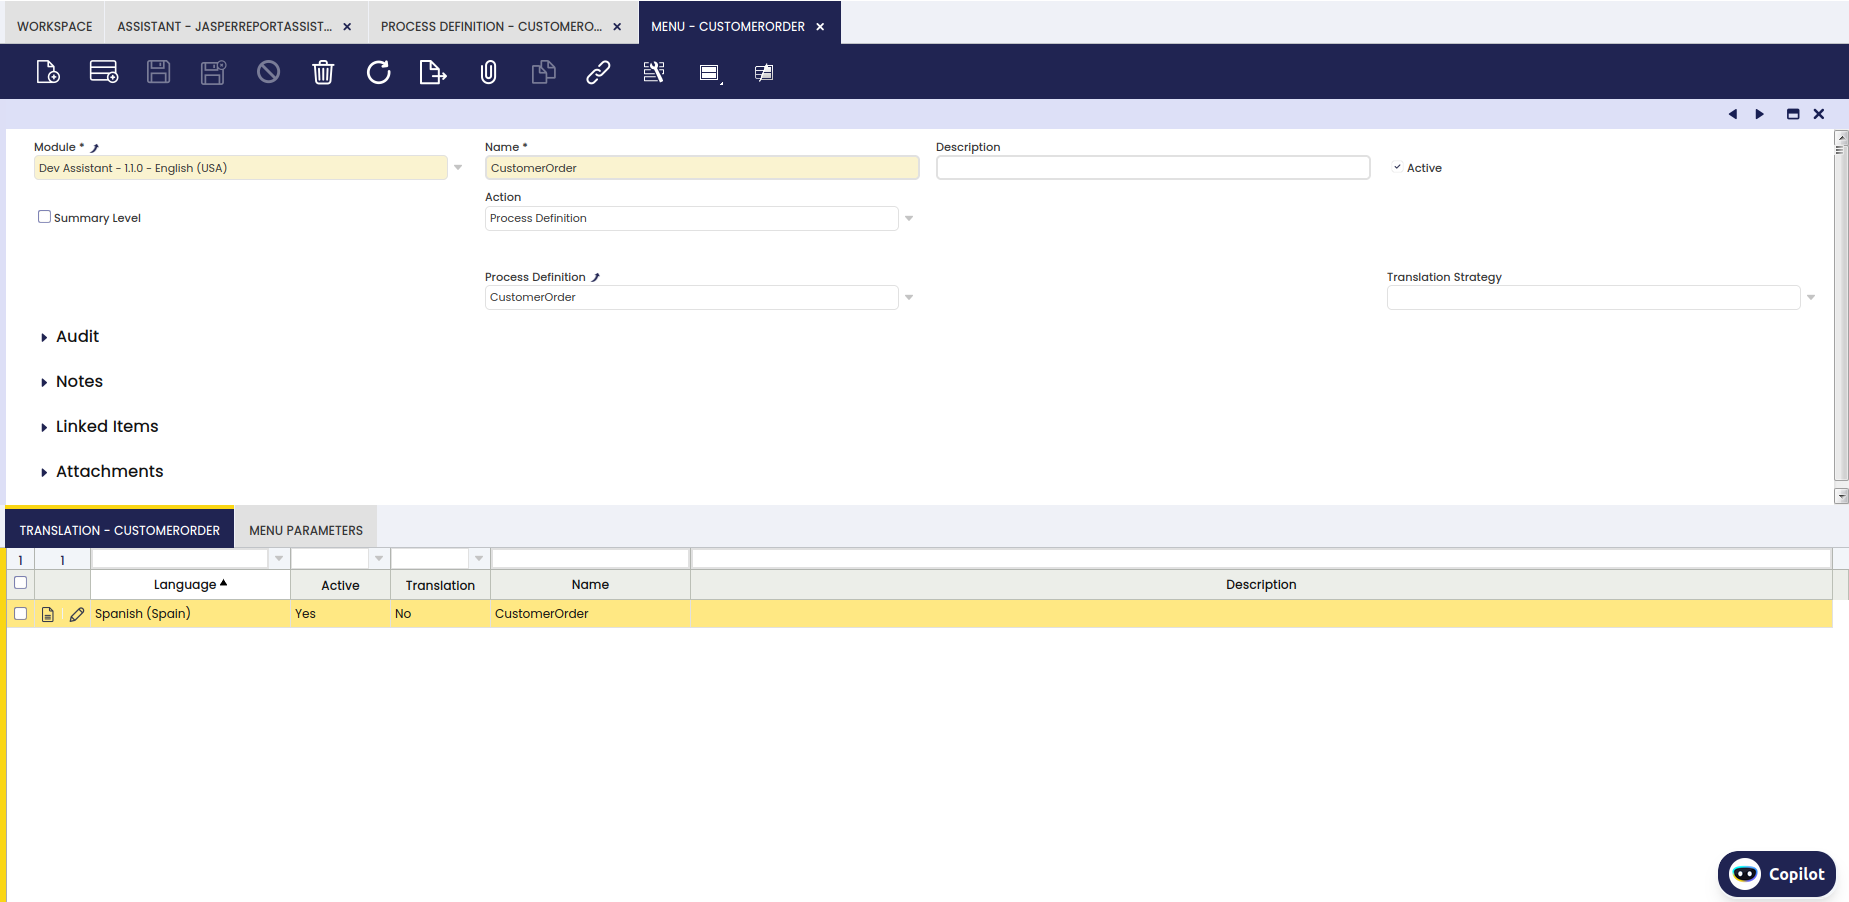
As you can see in the image, it also adds the parameters and even in the Report Definition tab, it defines the PDF Template of the report and in the Menu, it creates the Process definition that we have defined in the previous step.
Finally, we can observe the created report and set the chosen parameter to see the printed version.
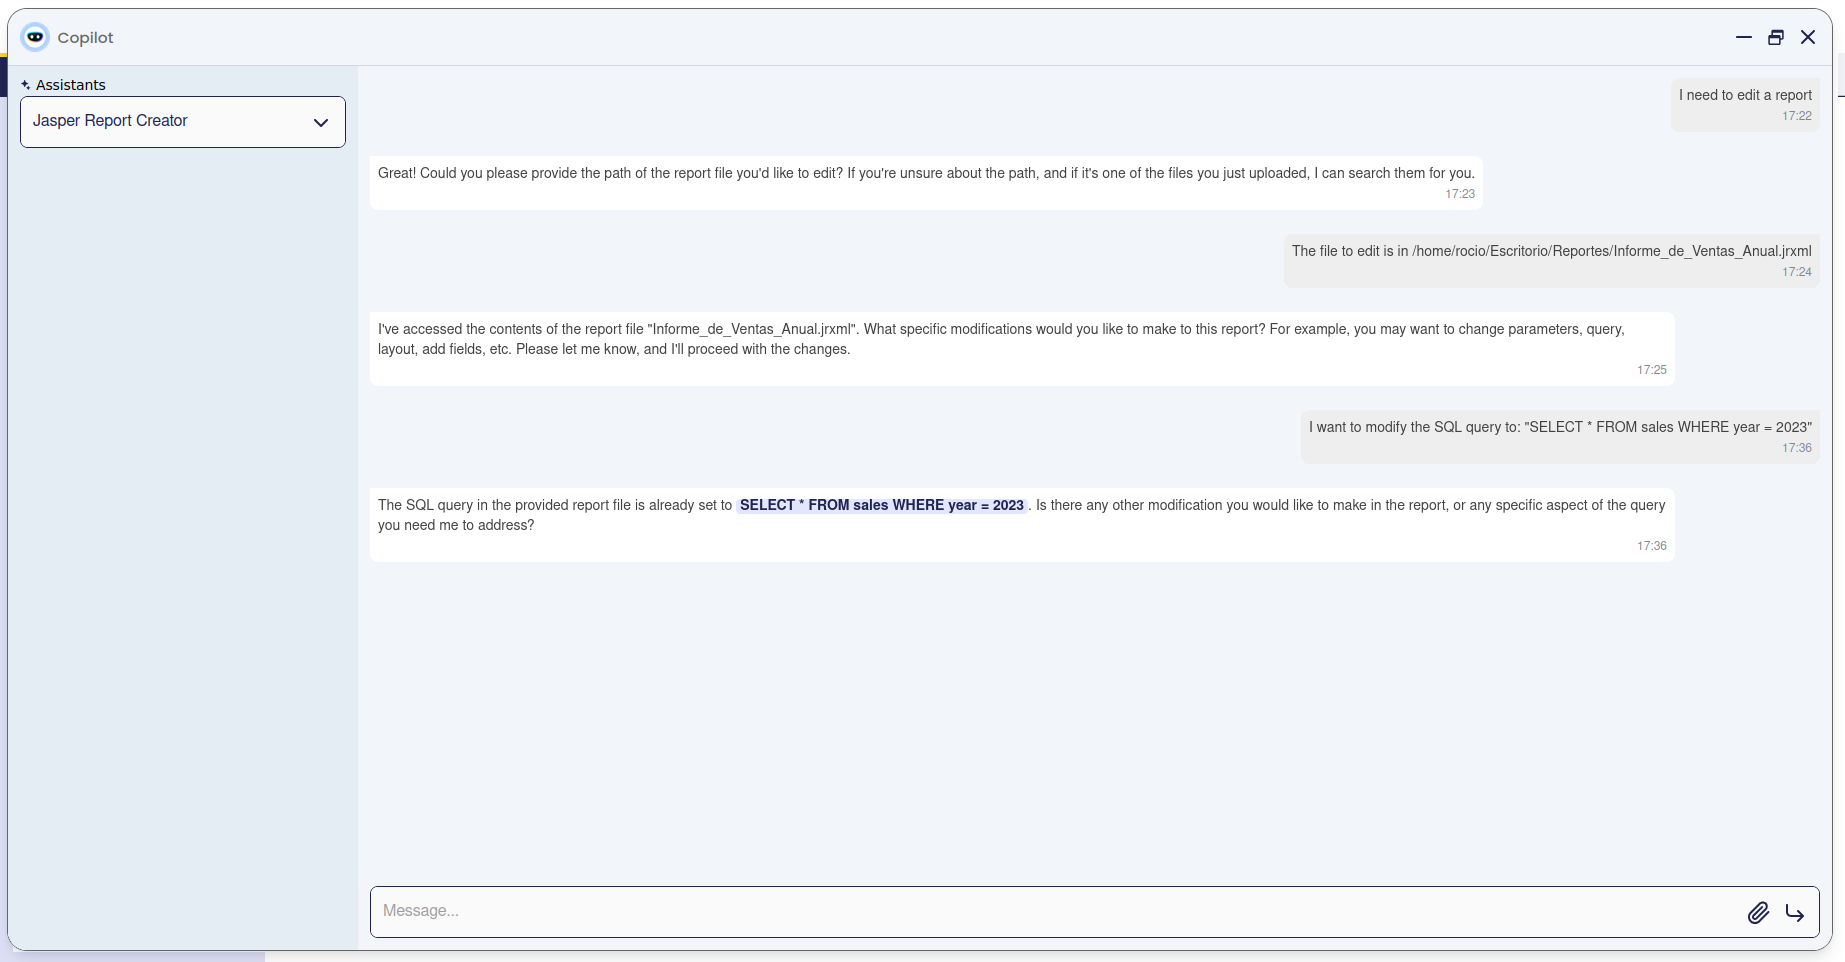
Report Editing
Message Creator
The Message Creator streamlines the process of creating and registering AD_Messages in Etendo Classic. By utilizing a webhook, it ensures efficient and error-free message creation while adhering to naming conventions and best practices.
Tools
Functionality
The Message Creator facilitates the creation of AD_Messages by interacting with Etendo Classic via a webhook. It validates the input parameters, enforces the proper format for search keys, and registers the message with the appropriate module. This agent supports both parametric and non-parametric messages and ensures messages are immediately usable in Java code.
The assistant performs the following tasks:
- Validates Input Parameters: Ensures required fields like module Java package, search key, message type, and message text are correctly provided.
- Search Key Format Enforcement: Confirms that search keys follow the required format:
PREFIX_DescriptiveName, where: PREFIXis the module's prefix in uppercase.DescriptiveNameis in CamelCase.- The total length does not exceed 32 characters.
- Message Type Validation: Confirms the message type is either
"I"(Informative) or"E"(Error). - Registers the AD_Message: Saves the message in the system, linking it to the specified module.
When creating a message, the agent will request the following information:
- Module Java Package: The Java package of the module where the message will be created (e.g.,
com.etendoerp.module). - Search Key: A unique identifier for the message following the
PREFIX_DescriptiveNameformat. - Message Type: The type of the message:
"I"for informative messages."E"for error messages.- Message Text: The content of the message.
Notes:
-
Module In Development: The module must be set to development mode to allow the agent to create it.
-
Java Usability: After creation, the AD_Message can be used in Java with:
OBMessageUtils.messageBD("MESSAGE_SEARCH_KEY"). -
Parametric Messages: If the message requires parameters,
%scan be added to the text, and the agent will provide a code snippet to useString.format.
Example:
Message Text:"The value %s is invalid."
Java Usage:
Usage Example
-
Provide the required inputs:
- Module Java Package:
com.etendoerp.module - Search Key:
MODPREFIX_InvalidInput - Message Type:
E - Message Text:
"The input provided is not valid."
- Module Java Package:
-
The assistant validates and sends the request to the webhook.
-
Upon successful creation, the system will confirm:
- Message created with the key:
MODPREFIX_InvalidInput.
- Message created with the key:
-
The message is ready for use in Java:
Module Creator
Etendo Classic allows you to create modules that provide additional functionality that can be deployed independently. These modules can range from additional reports to content packs (translations, chart of accounts, etc.).
Tools
Functionality
The Module Creator streamlines the process of building independent modules that enhance Etendo Classic with new functionalities, such as additional reports or content packs like translations or charts of accounts. By using the CreateModuleWebHook, the tool automates several critical steps. It begins by validating essential details like the module's Java package, name, description, version, and database prefix, ensuring everything is properly formatted and complete. After validation, it assigns the necessary database prefix, registers the module within the system, and allows for optional inclusion of dependencies.
To start creating your module in Etendo, follow the steps below.
-
Provide the following information:
-
Javapackage: The Java package of the module (e.g.,
com.etendoerp.copilot.prueba). - Module Name: A name for your module (e.g.,
Test Module). - Description: A brief description of the module's functionality.
- Help/Comment: Additional help text or comments regarding the module (optional).
- Version: The version of the module (e.g.,
1.0.0). - Type: The type of the module. Option are "M" for standard module, "T" for template module.
- DBprefix: A prefix for the database objects associated with the module (must be in uppercase, e.g.,
LAPY). -
License: The license type for the module. Options are:
Apache License 2.0Openbravo Public LicenseMozilla Public License 1.1Etendo Commercial License
-
Call the
CreateModuleWebHook. TheCreateModuleWebHooksimplifies the creation process by automating various steps. This webhook will: -
Validate all the parameters (such as module name, version, and license).
- Assign the database prefix.
- Register the module.
-
Optionally, add module dependencies.
-
When invoking the webhook, the body parameters should follow this structure:
body_params = {
  "Javapackage": "com.etendoerp.copilot.test",
  "SearchKey": "testmodule",
  "ModuleName": "Test Module",
  "HelpComment": "This is a test module created for demonstration purposes.",
  "Description": "This module adds test functionality to Etendo Classic.",
  "Version": "1.0.0",
  "Prefix": "LAPY",
  "Type": "M",
  "ModuleLicense": "Etendo Commercial License"
}
Note
The database prefix must always be in uppercase.
Usage Example
-
To use this agent, it is necessary to log in as
System Administratorrole and set the role access. For this, go to the Assistant window, select Module Creator and synchronize it. Then, go to the Assistant Access window and give access to the role. -
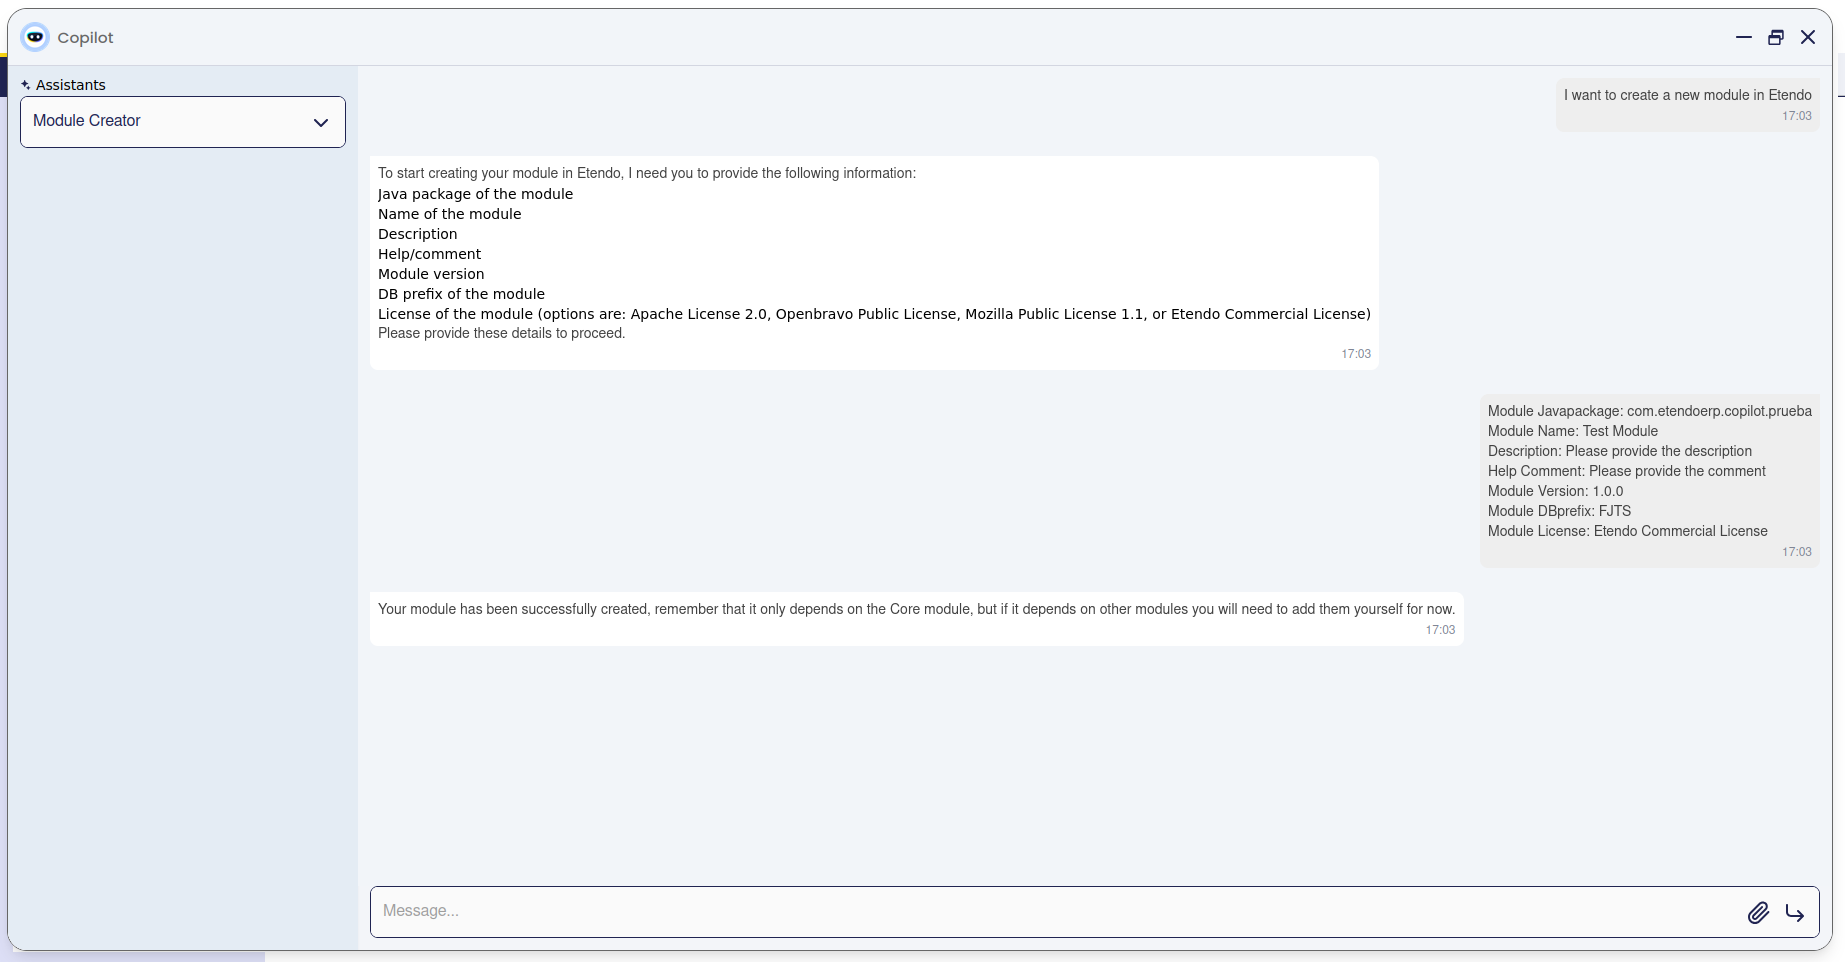
Open Copilot and select Module Creator, then ask to the agent what you need to create.
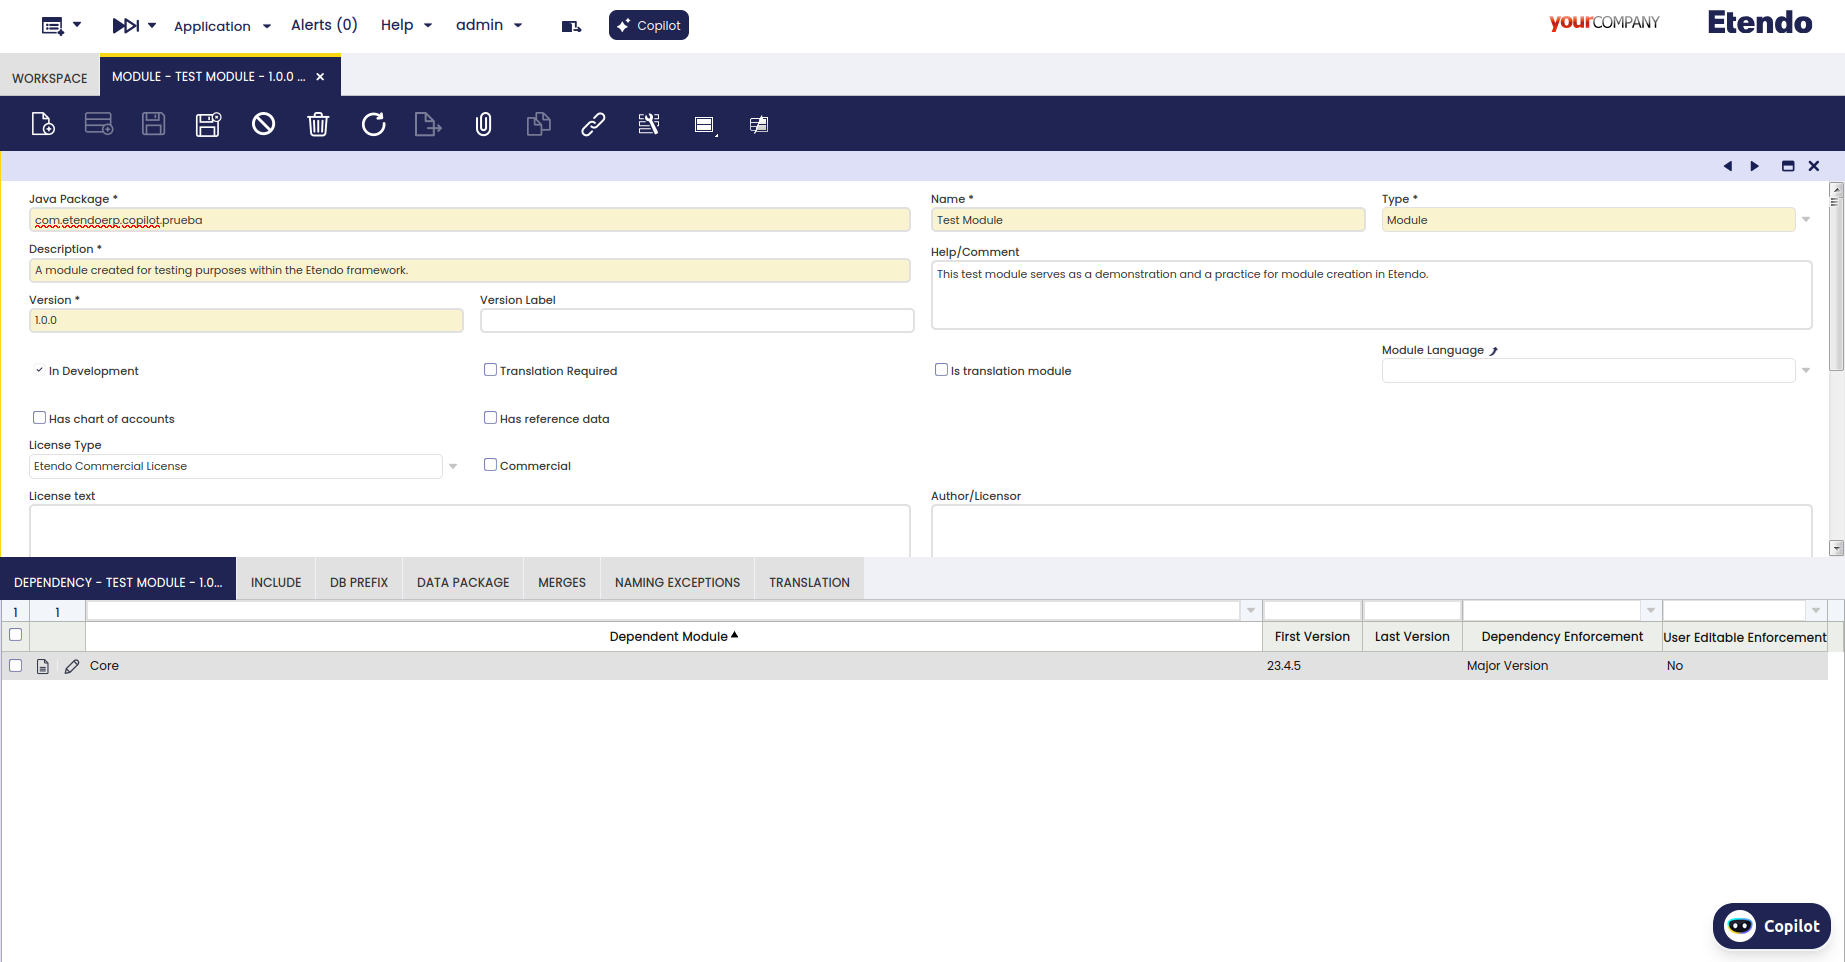
If we go to the Module window we can find the created record.
The module will also have the dependency, in this case Core with the prefix and data package mentioned by the user.
Once the webhook has been called, it will automatically:
- Register the module in Etendo.
- Assign the Java package and database prefix.
- Handle the specified license.
- Set up basic module dependencies.
You can confirm that the module has been created by navigating to the Module window in Etendo.
Note
If your module depends on other modules (besides the Core module), you need to manually add these dependencies in the Dependency tab of the module window.
Info
For further customization and development, refer to the official Etendo Developer Guide for more detailed steps.
Module Translation Creator
Tools
Functionality
The Module Translation Creator automatically translates the content of a module.
Before using the agent, the user will need to have a translation module already created with the XML files to translate.
Note
For more info check How to Create and Update Translation Modules.
Then, provide the path to the translation module to the agent (e.g., /modules/com.etendoerp.mymodule.es_ES) and it will automatically translate all the files to the desired language.
Usage Example
1. Create a new module in the Module window
- Check the flag "Is translation module".
- Select the module languague (e.g., Spanish (Spain)).
- It should depend on the module you want to translate.
-
If it's the first time the language is configured:
-
Then, go to the "Import/Export Language" window, select the language and execute the Export process (this may take some time to finish).

-
The previous step will generate XML files for all modules in the
attachments/lang/es_ESfolder. Locate the module you want to translate and copy the files to the translation module in themodules/<JAVAPACKAGE.OF.THE.MODULE>/referencedata/translation/es_ESfolder.
-
Now, to use this agent it is necessary to log in as
System Administratorrole and set the role access. For this, go to the Assistant window, select Module Translation Creator and synchronize it. Then, go to the Assistant Access window and give access to the role. -
Open Copilot and select Module Translation Creator, then ask to the assistant to translate the files in your module (e.g.,
/modules/<JAVAPACKAGE.OF.YOUR.MODULE>).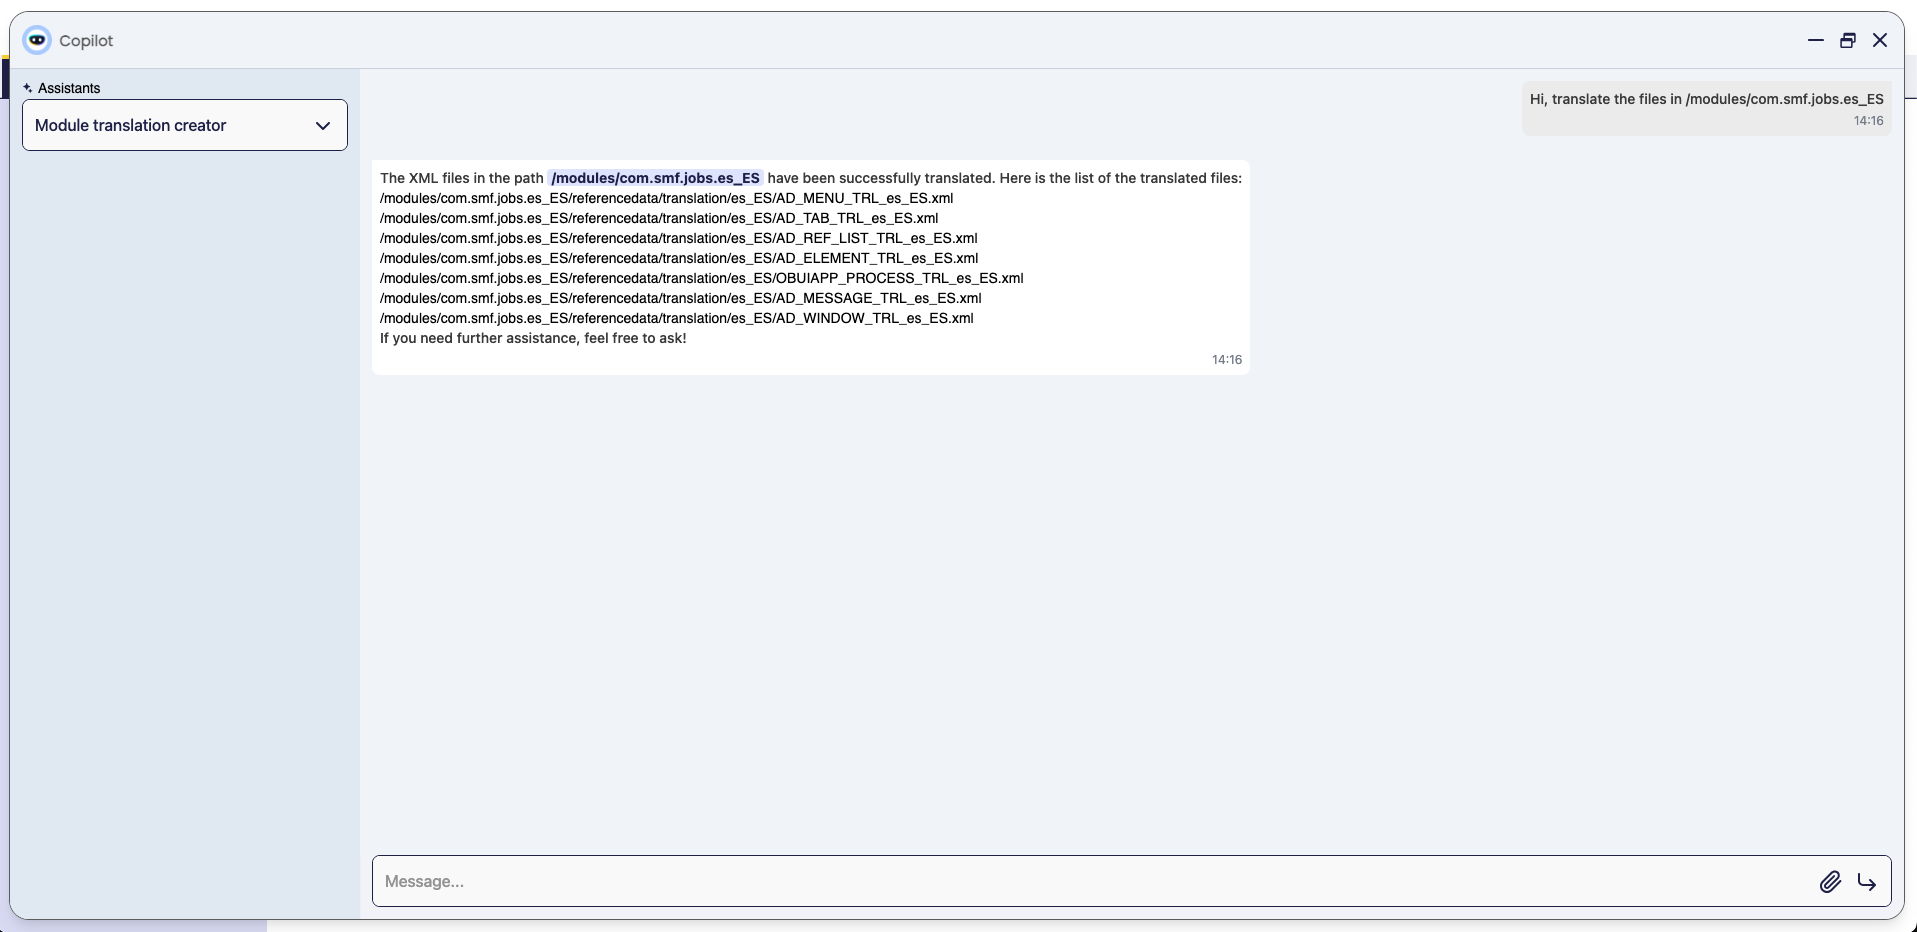
-
To apply the changes, execute these commands:
Reference Creator
The Reference Creator creates references in the Etendo Application Dictionary. This tool allows for example the addition of new list references to a specific module within the Etendo database via an HTTP request to a webhook.
It is particularly useful in the development process, enabling system administrators or developers to define new references that can later be utilized in applications. This tool automates the creation of these references, ensuring consistency and adherence to quality standards in the configuration.
Tools
Functionality
The Reference Creator is designed to facilitate the creation of references, for example, it is possible to create list of references in the Etendo Application Dictionary by providing the agent the necesary input parameters.
Usage Example
-
To use this agent, it is necessary to log in as
System Administratorrole and set the module in which the changes will be exported in development. -
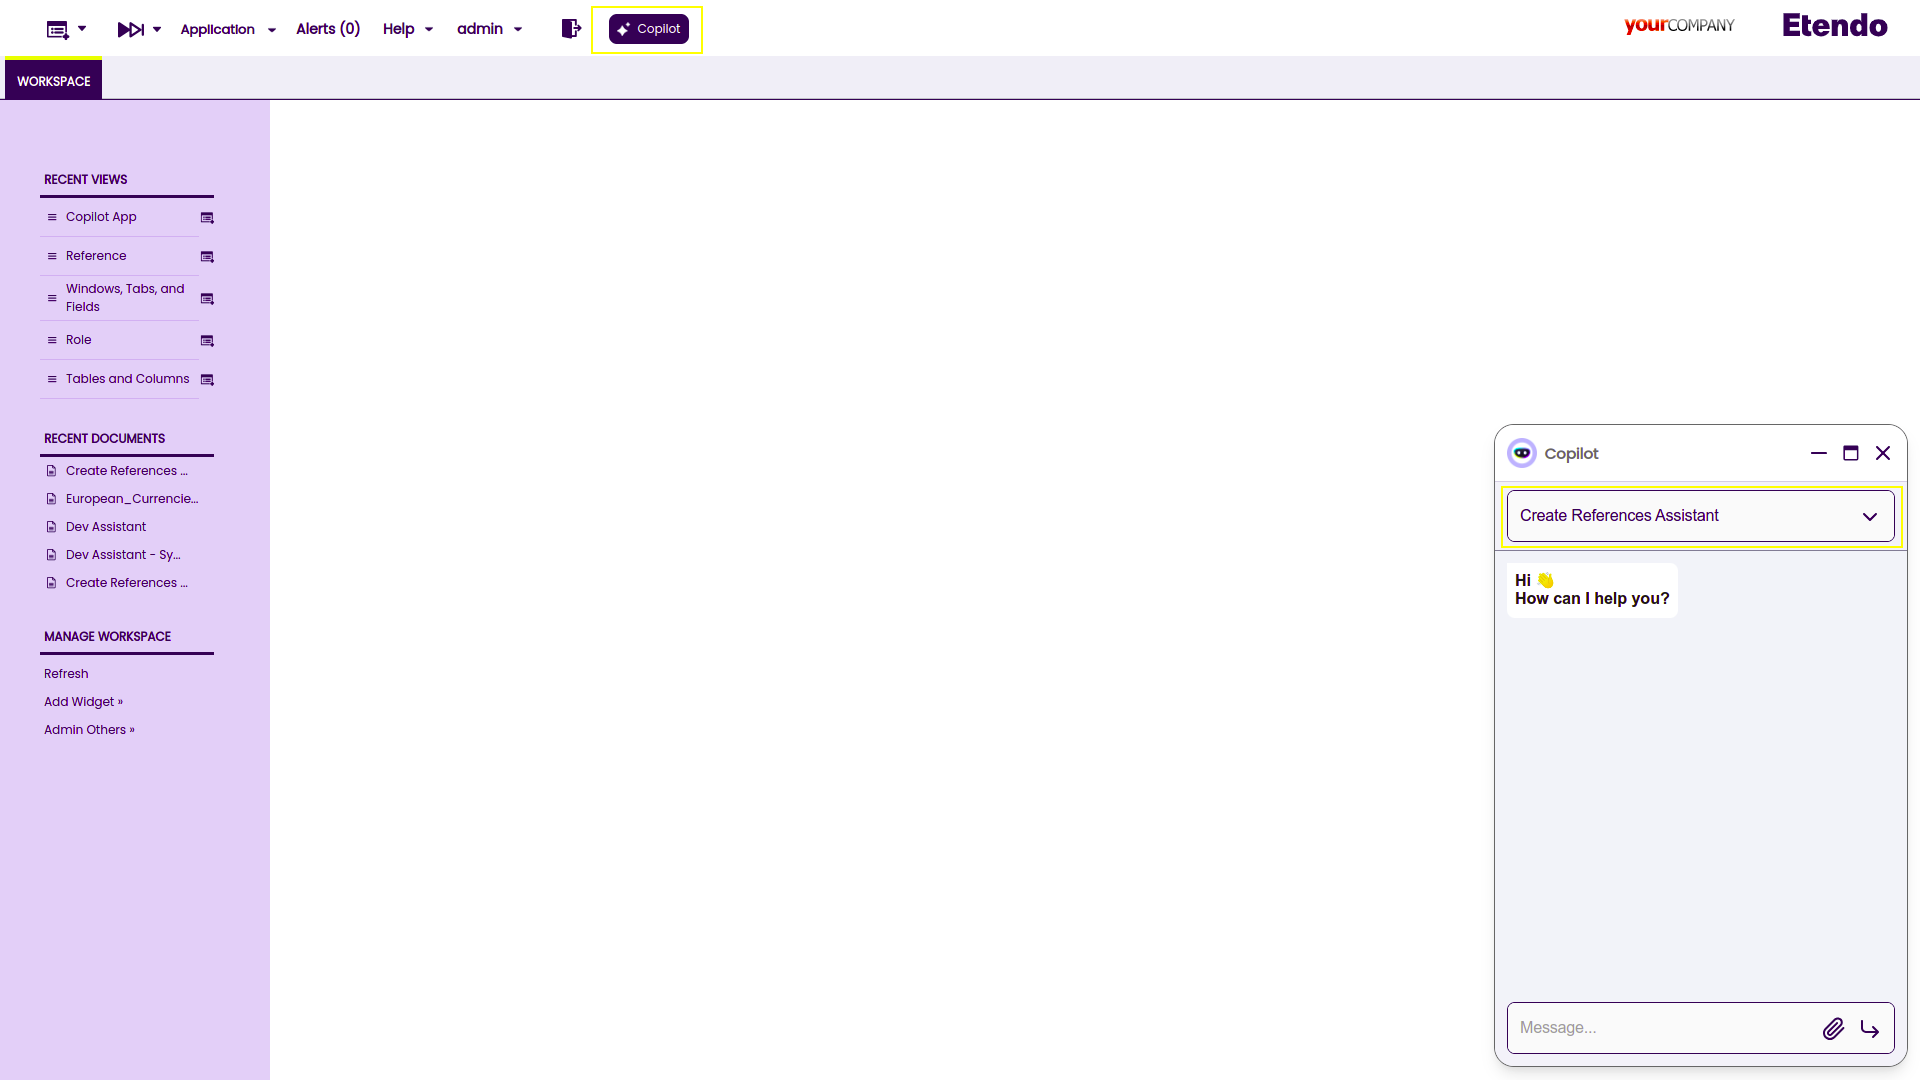
Open Copilot and select Reference Creator
-
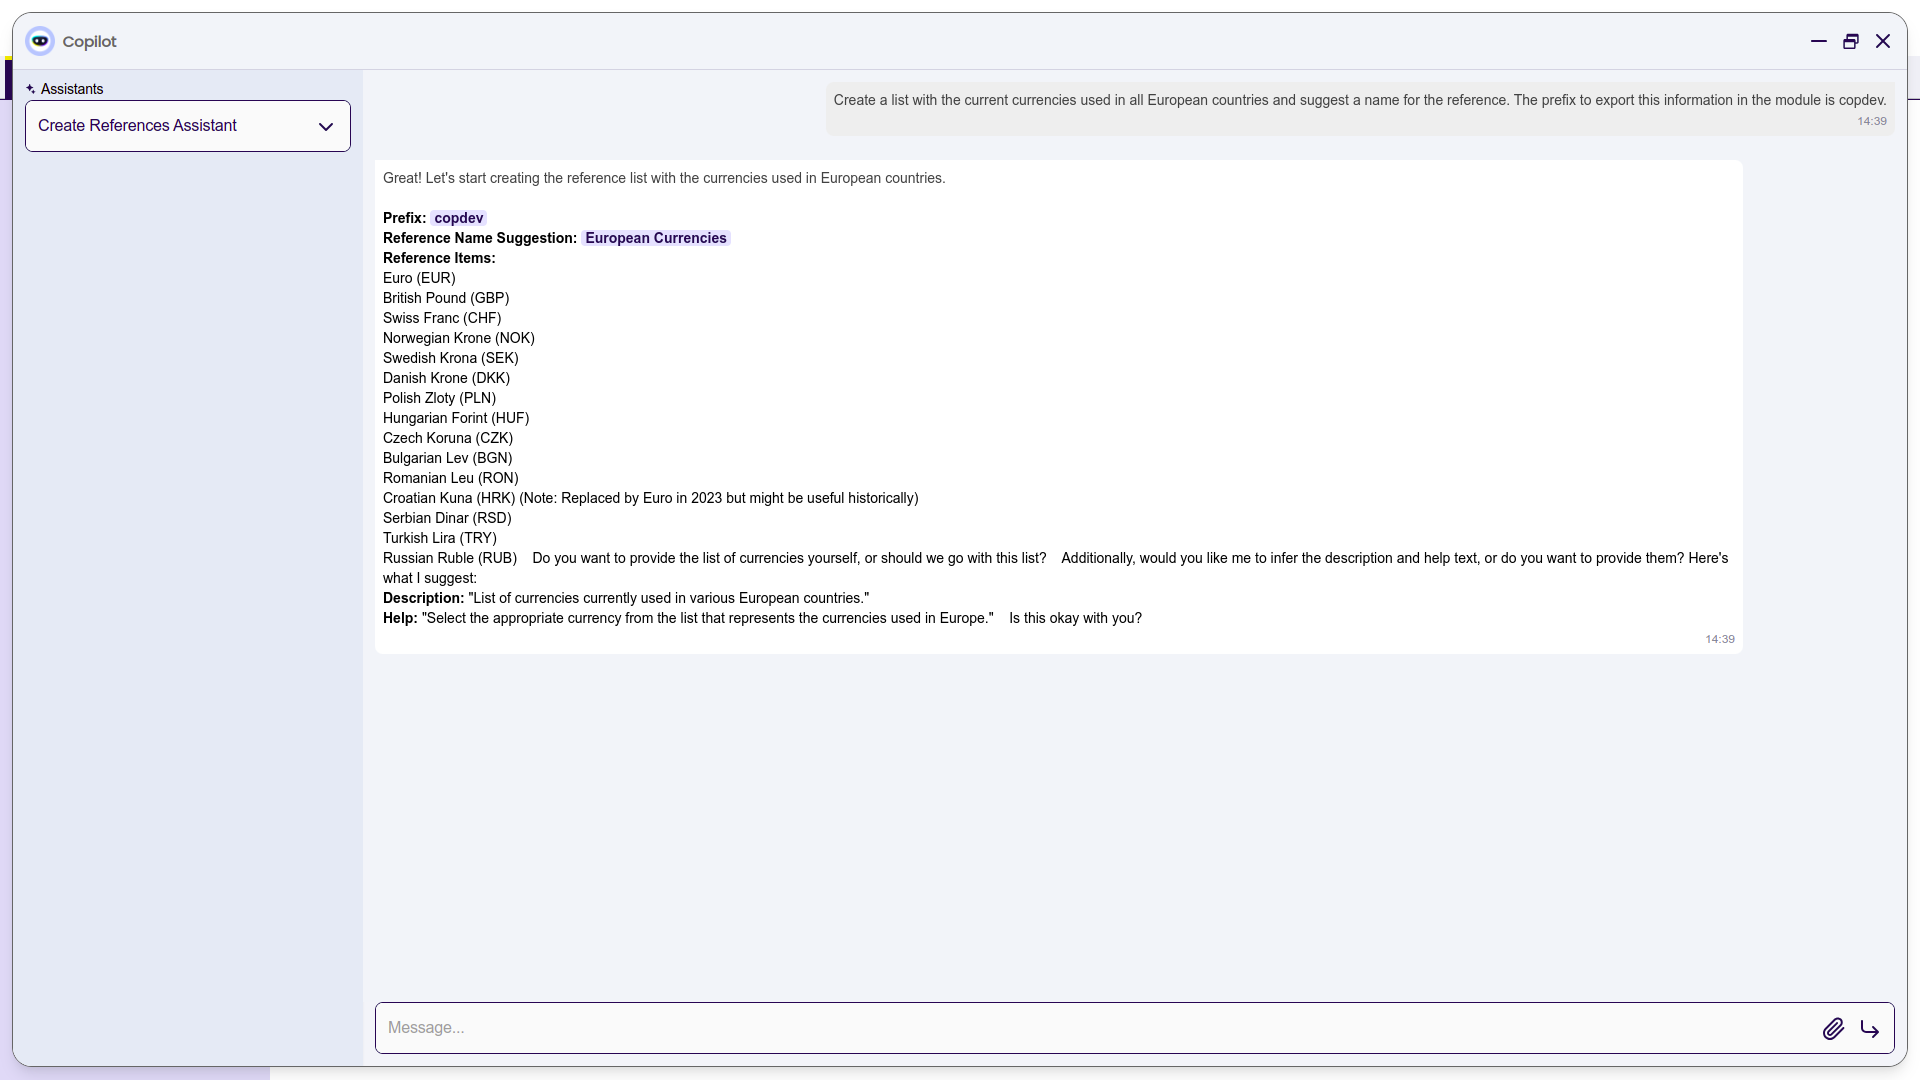
Ask the agent which reference type you need to create
-
The Create References Tool will process these parameters, verify the access token, build the request body and call the Etendo webhook to create the reference.
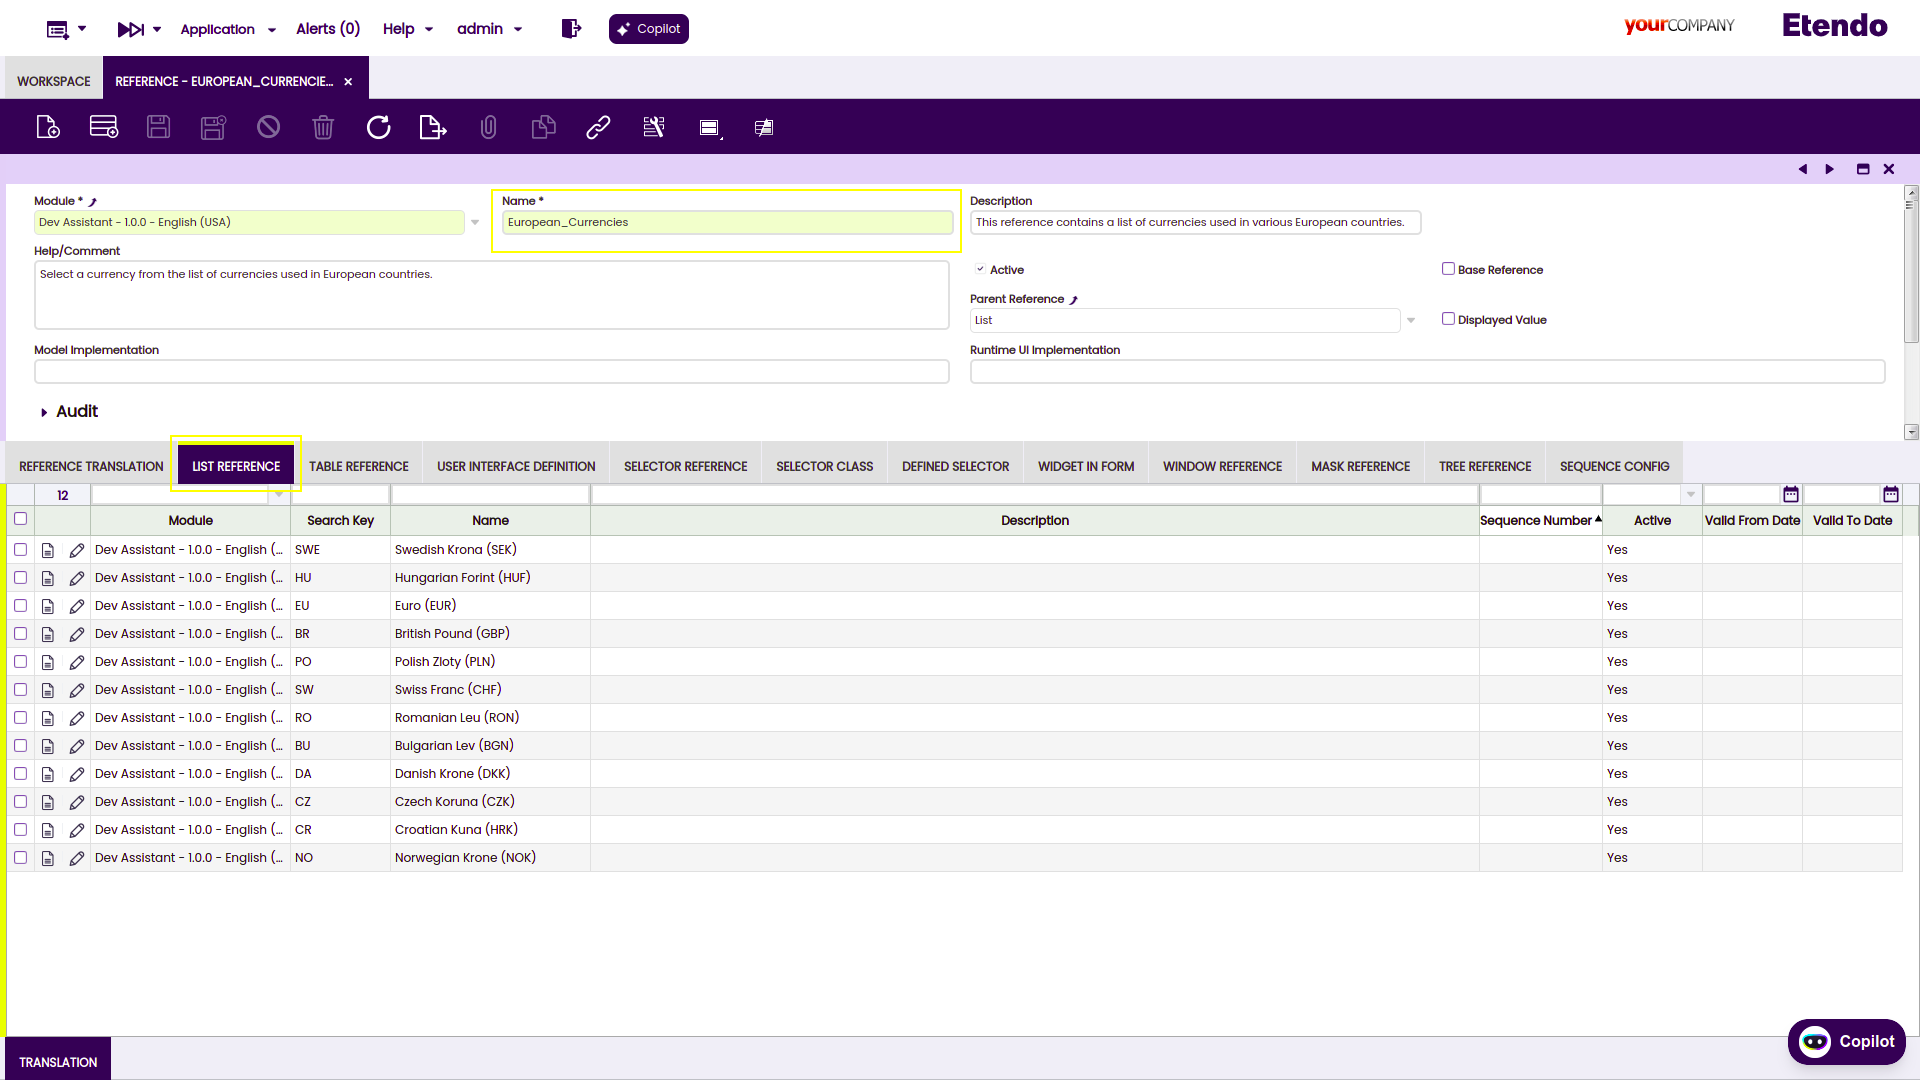
In the Reference window, Etendo shows all the fields with the corresponding information generated and in the List Reference tab, it is possible to see the new list reference created.
-
Once the development is validated by the developer, and the necessary manual modifications are made, it is possible to export the changes in the corresponding module.
Tables, Windows and Tabs Creator
Warning
The Tables, windows and tabs agent is currently in its beta testing phase. While it is designed to automate the process of creating windows and tables, there are instances where tasks may not be fully completed. Specifically, there may be issues with adding foreign keys, correctly naming elements, etc.
For optimal results, it is recommended to proceed step-by-step and be as specific as possible in your instructions to the agent. This will help mitigate potential errors and ensure more accurate task completion.
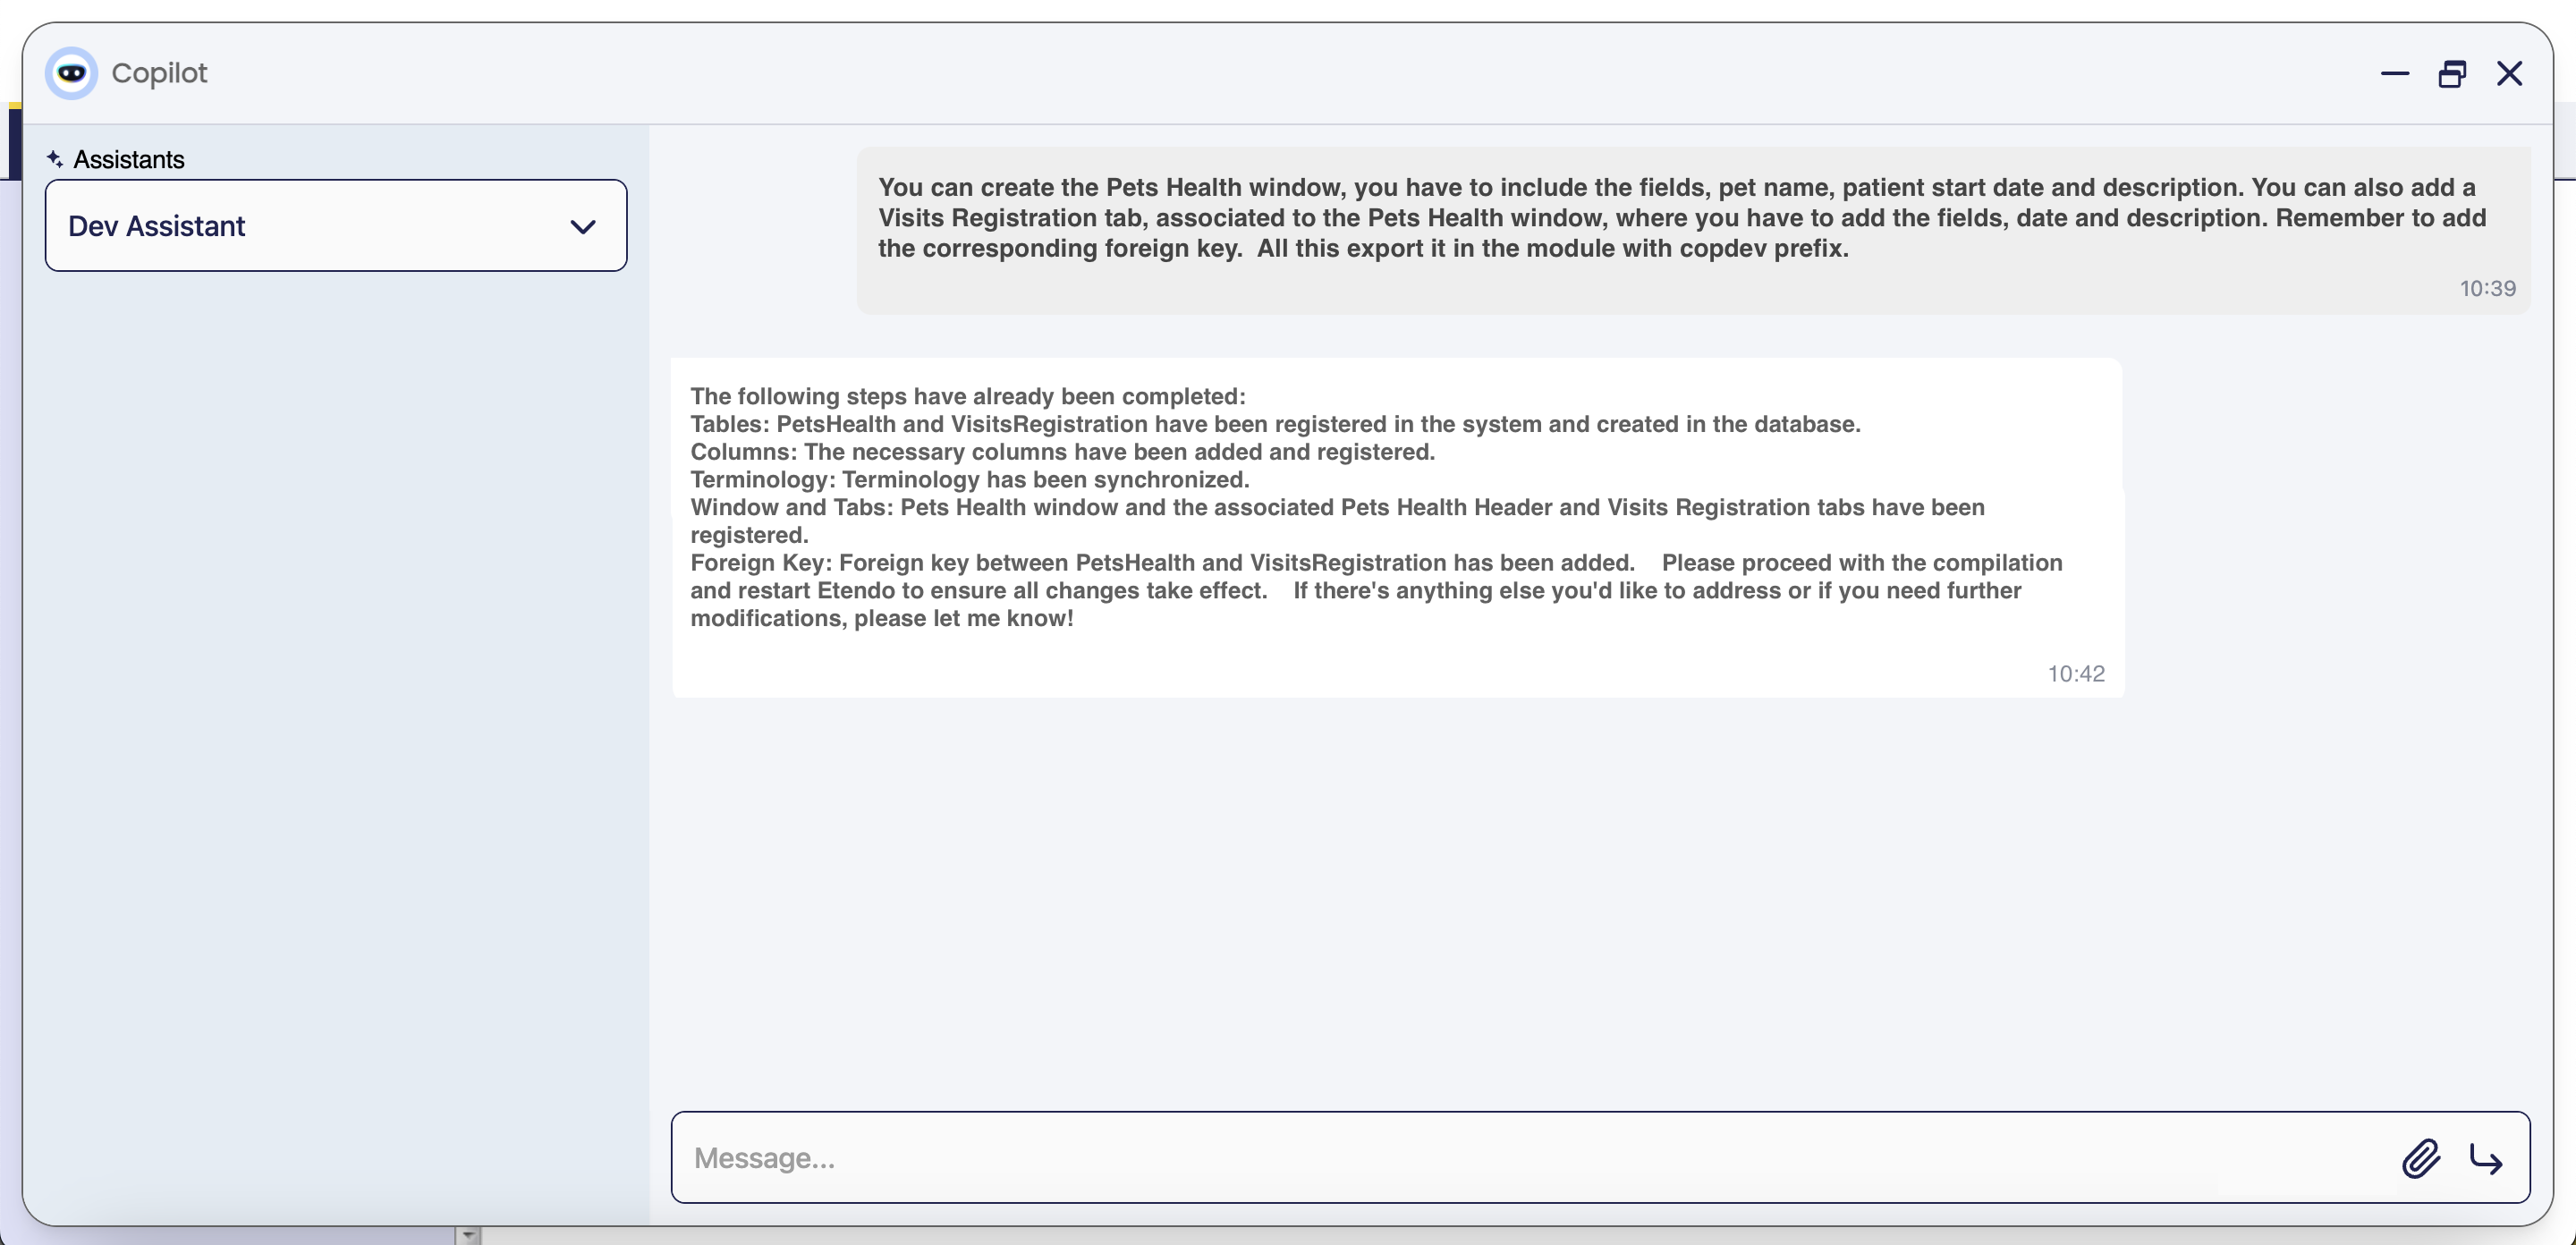
The Tables, Windows and Tabs Creator is designed to help developers and speed up the process of creating windows, tabs, fields, system elements, menu entries, etc. as well as tables and columns in the database. It is possible to give an input with all the necessary information, or the agent will go step by step, asking for more information. Also, depending on the context, the agent can make suggestions that the developer must confirm.
Tools
-
Multiple Webhooks: These webhooks are used to run the java files that create or modify the fields on the Etendo Classic and execute process or queries. These webhooks are:
CreateAndRegisterTable,RegisterFields,RegisterWindow,RegisterTab,RegisterColumns,ElementsHandler,SyncTerms.
Functionality
Info
With this agent, it is possible to create:
- Tables and Columns: both tables and columns are created based on user specification and the supported types are
string,number,tableDir,date,textandboolean(each field will have default lengths unless specified). - Windows: only Mantein type windows are supported
- Tabs: Can be created at multiple levels, although it is important to make it clear to the agent to add the corresponding foreign keys.
- Fields: Fields are created from columns, respecting the same name but without "_".
- Elements: The elements will be created automatically, sharing the name of the columns, but replacing the "_" with spaces. The help and description fields will also be added automatically.
- Menu: A menu entry is automatically created, the developer must manually place it in the desired position.
-
Ask the Tables, Windows and Tabs Creator for a window to add in the system and the module database prefix where the table will be exported. The agent will then register in the system the table and create it in database, including the mandatory columns. At this stage the agent checks if the module is in development. If is not, the assistant prompts the user for a correct prefix from a module in development. Additionally, the agent checks if the table name is already in use; if it is, asks the user to provide a new name. In case the window belongs to the module under development, new columns, tabs and fields can be added.
-
The agent will ask to the user for information to add, like columns, data types, help and description, etc.
-
The user must confirm the steps or set up a modification about the given information.
Usage Example
-
To use this agent, it is necessary to log in as
System Administratorrole and set the module in which the changes will be exported in development. -
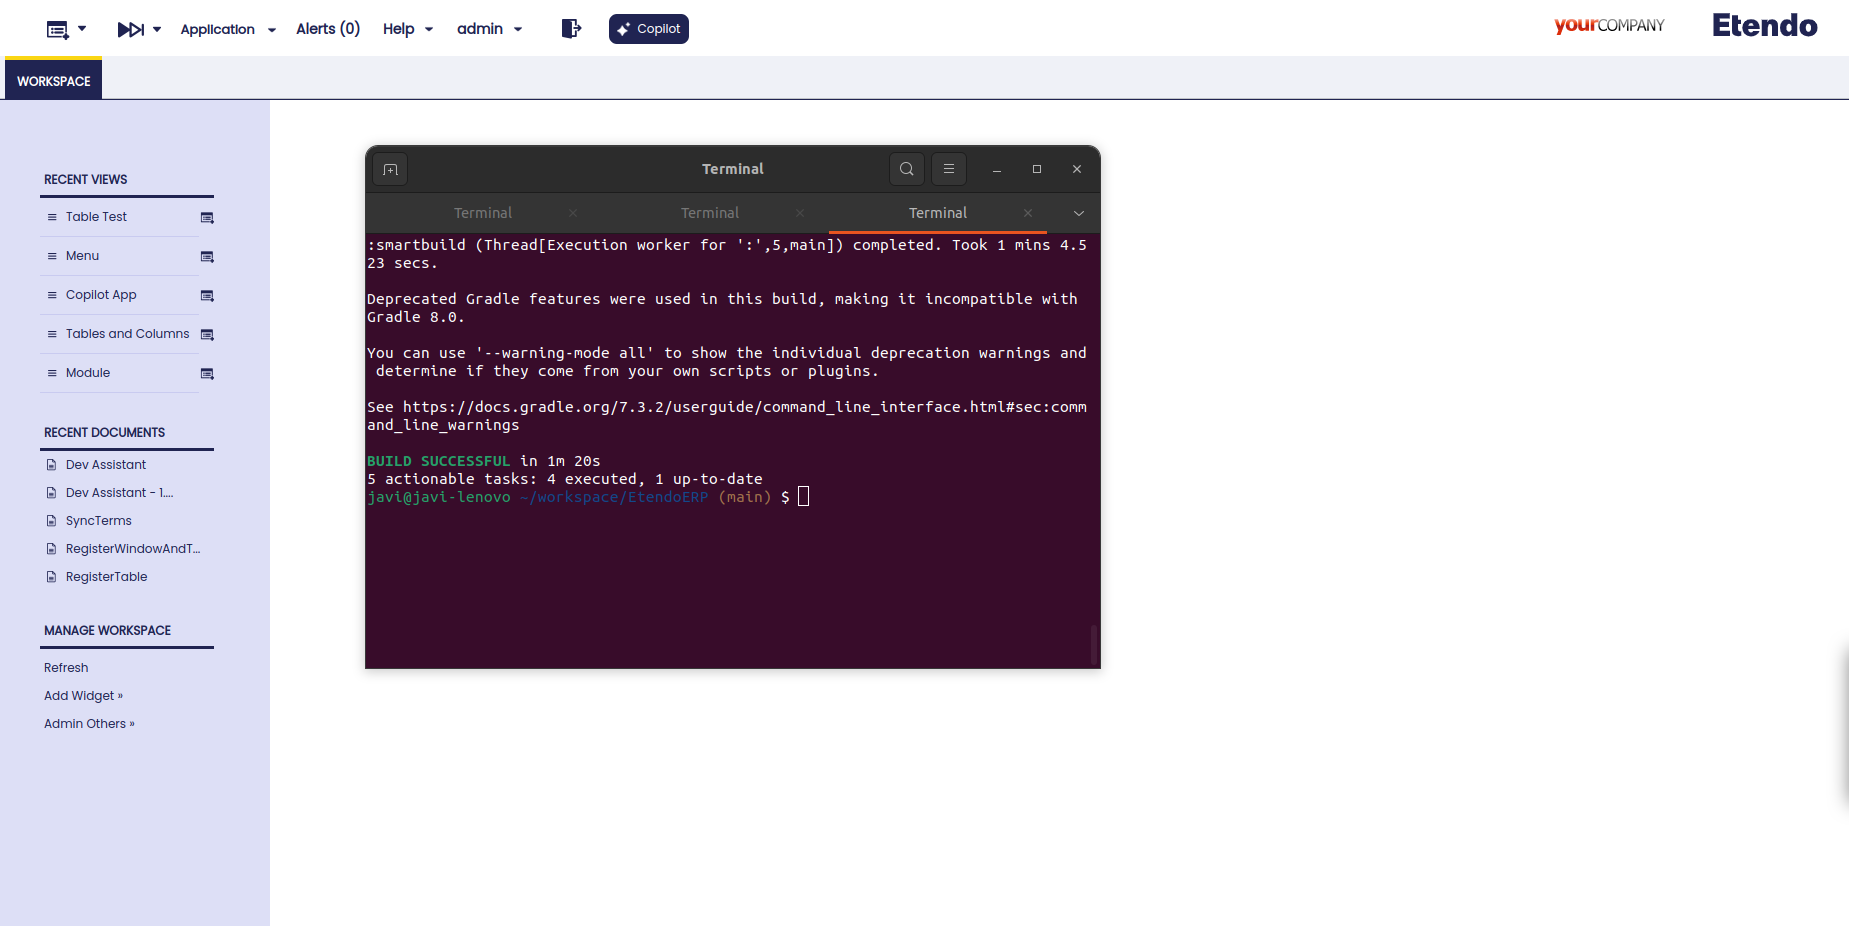
With the task complete, it is necessary recompile with a smartbuild and restart Tomcat
-
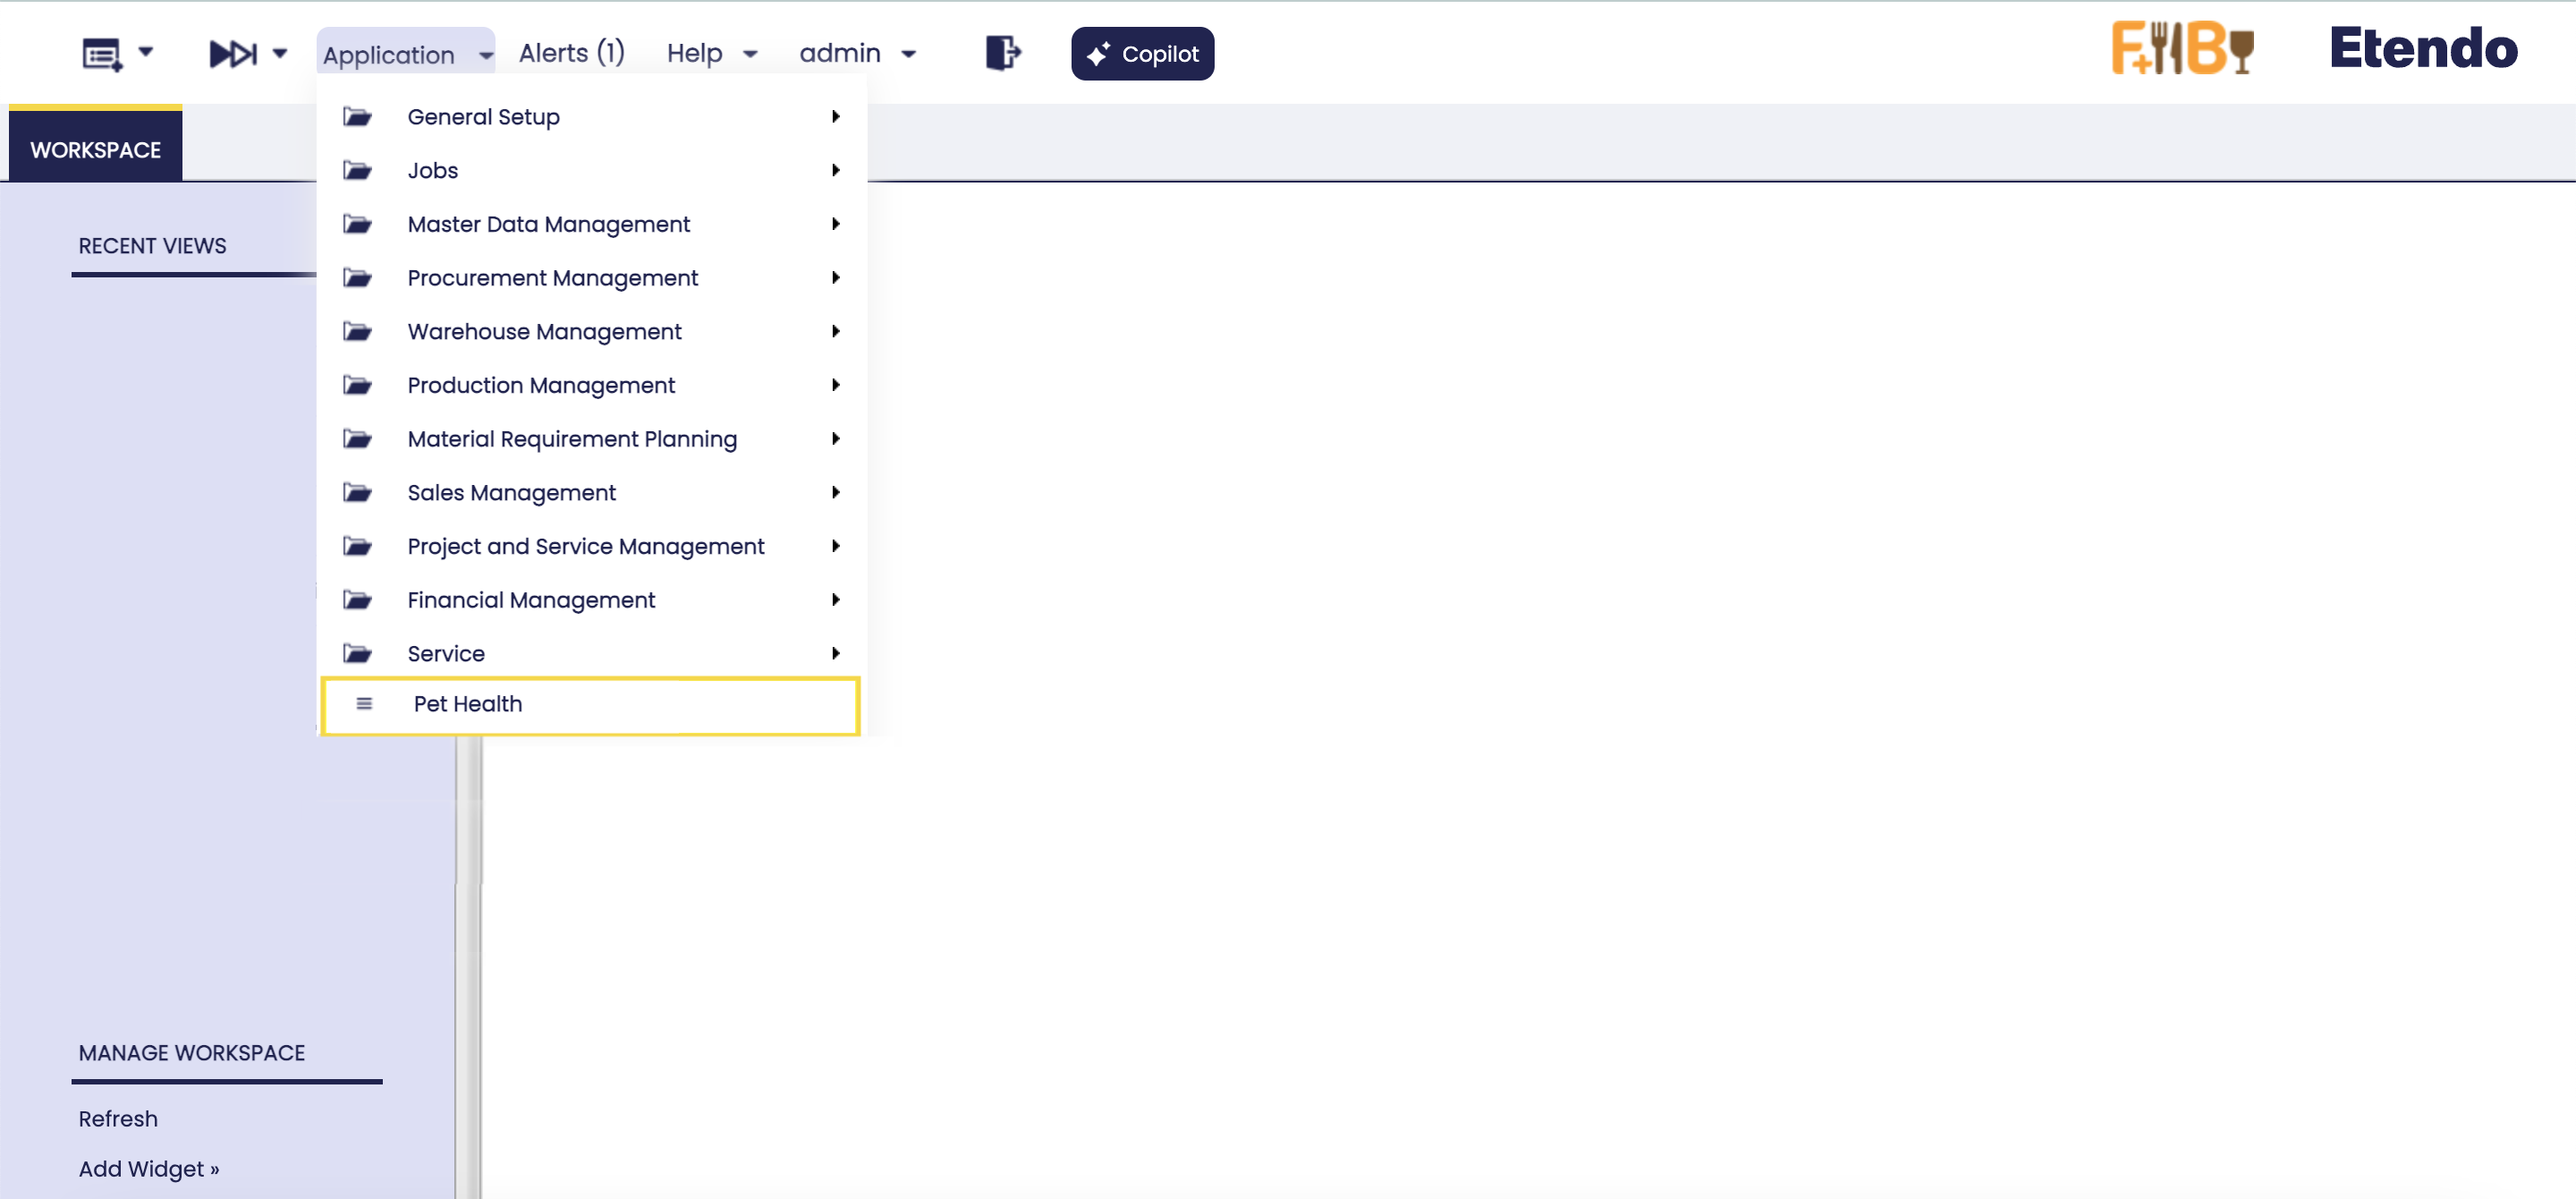
Window in the System, the window can be viewed with the user role.
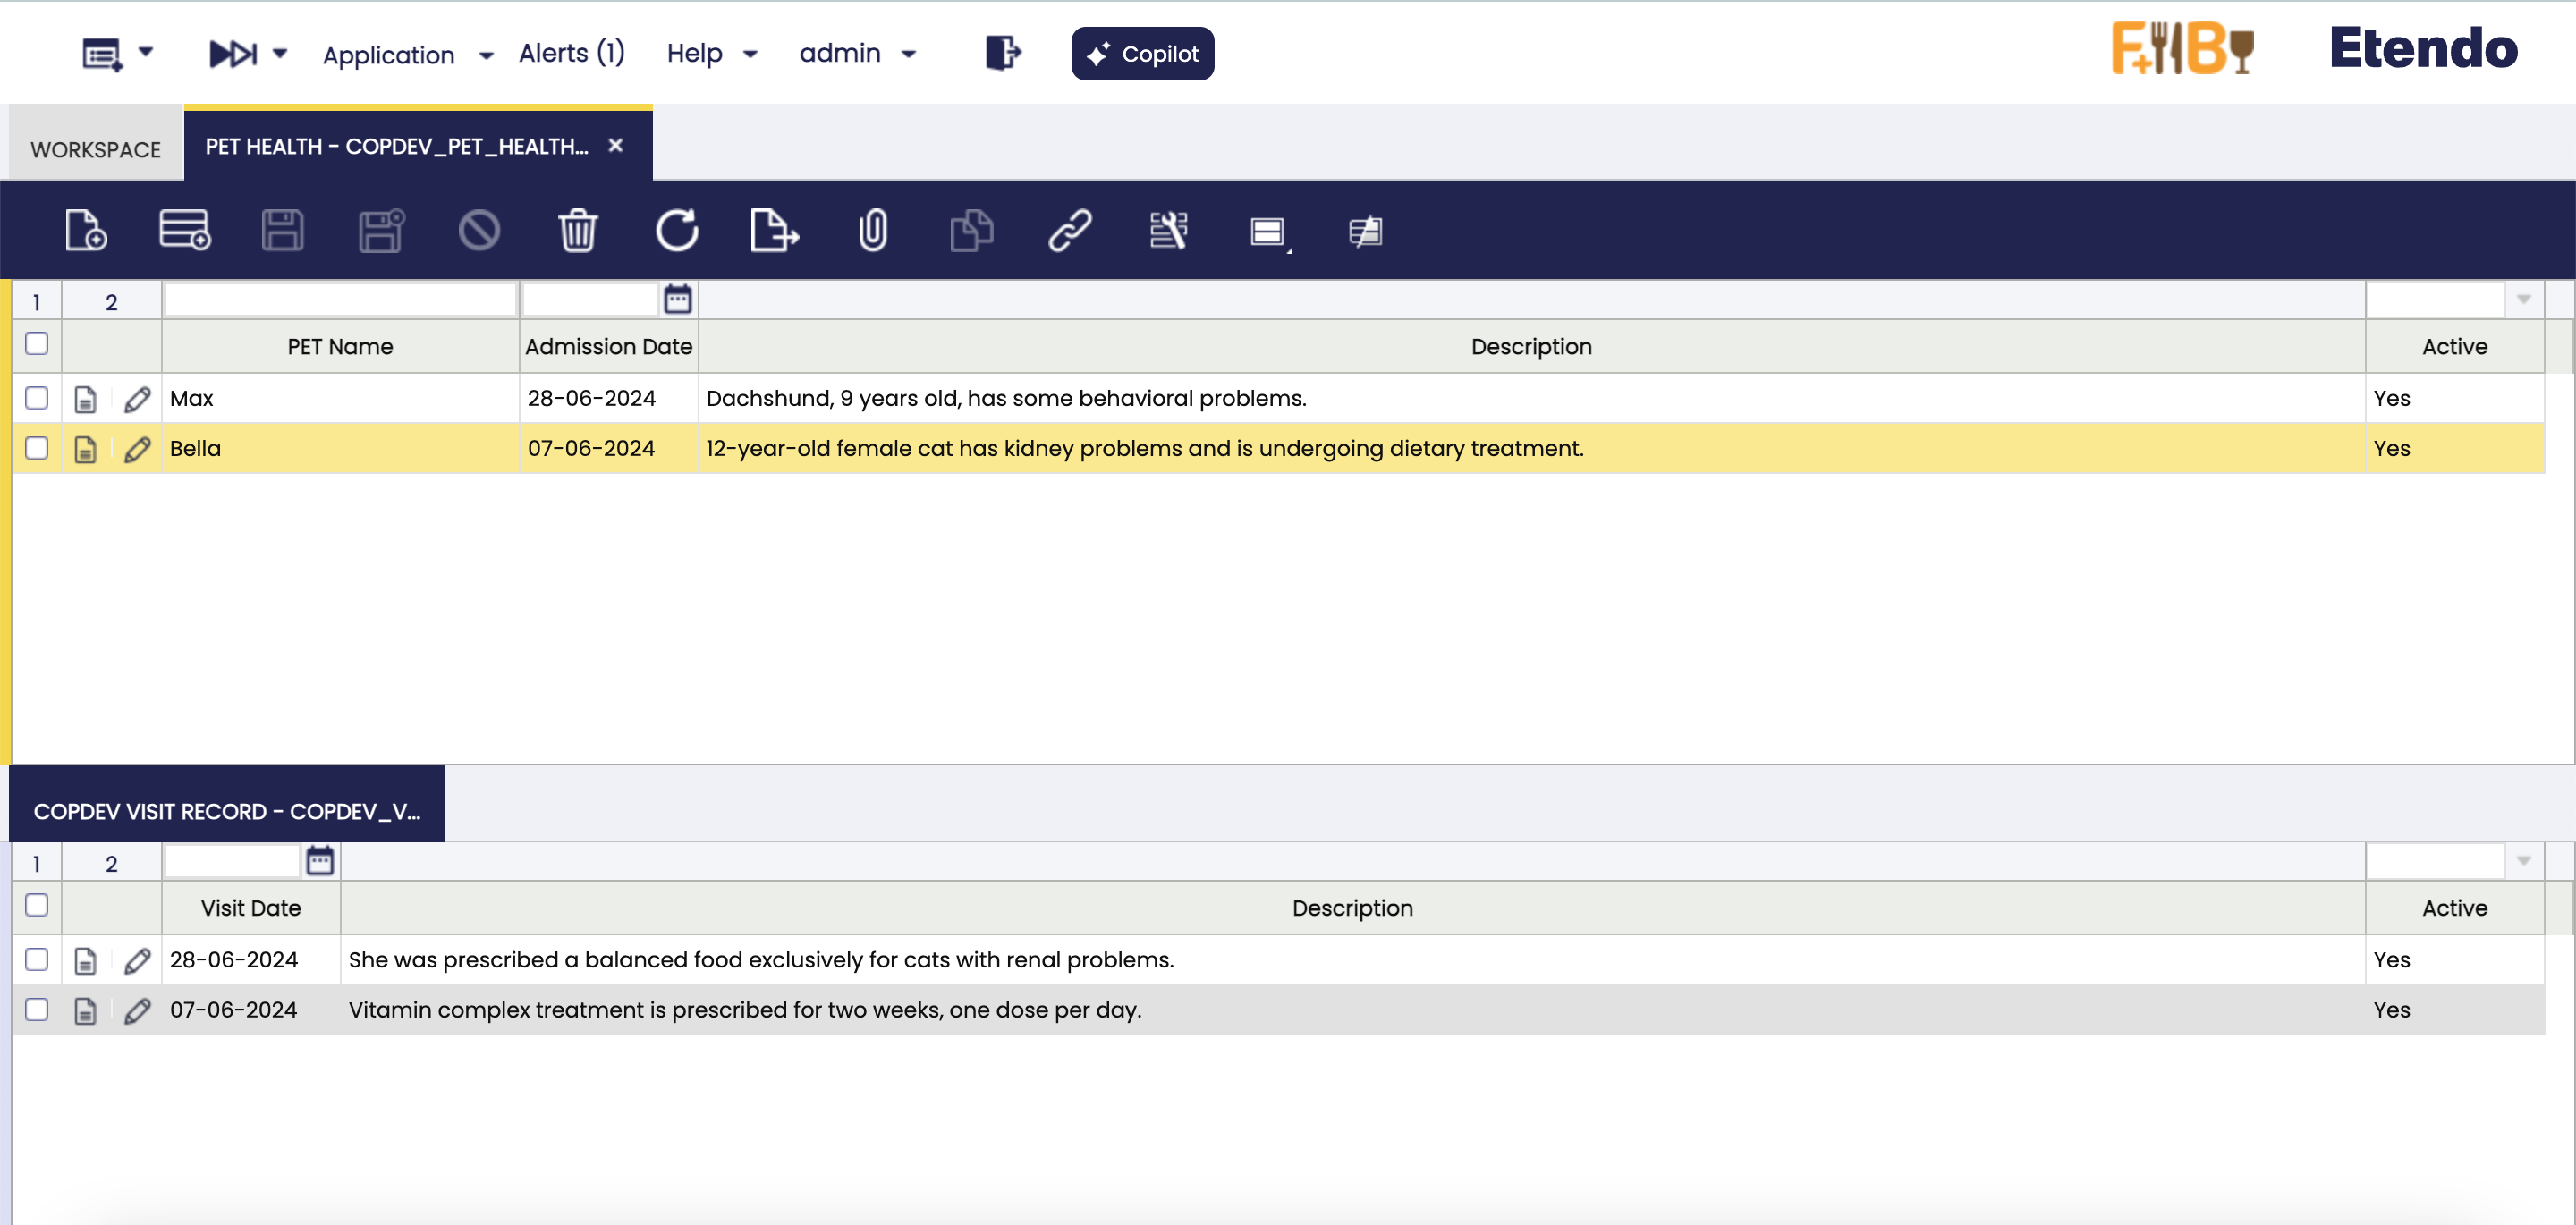
-
Once the development is validated by the developer, and the necessary manual modifications are made, it is possible to export the changes in the corresponding module.
Webhook Creator
Webhook Creator is an agent designed to facilitate the creation and registration of webhooks in Java. A webhook acts as a communicator between applications or services, allowing data to be automatically sent from one system to another in real-time when a specific event occurs.
Tools
Functionality
This agent simplifies webhook creation by automatically generating the necessary Java files and registering them in the Etendo ERP system, taking examples of indexing code readeing the classes extends of BaseWebhookService. It is necessary give some useful information:
- Module Package: The Java package where the new process will be saved. It should follow the format
java.package.of.the.module. - Webhook Name: The name of the Java file to be created.
- Parameters: The parameters will be added to the webhook for the use.
Usage Example
-
To use this agent, it is necessary to log in as
System Administratorrole and set the role access. For this, go to the Assistant window, select Webhook Creator and synchronize it. Then, go to the Assistant Access window and give access to the role. -
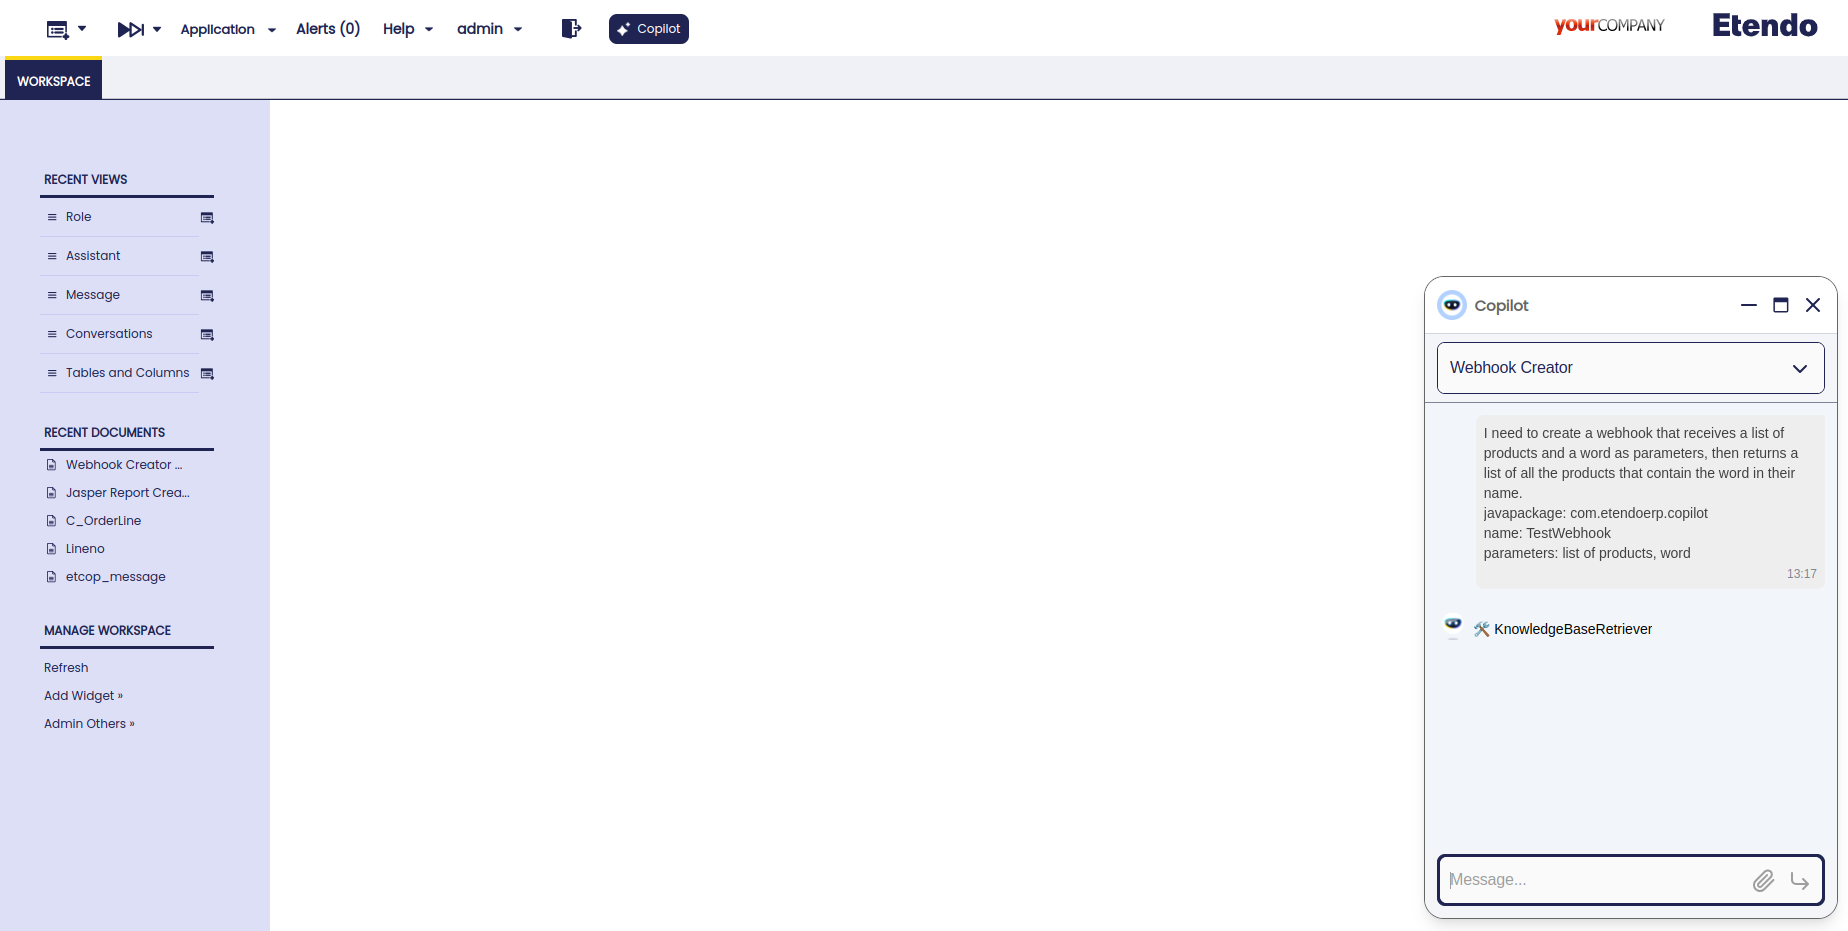
Open Copilot and select Webhook Creator, then ask to the agent what you need to create.
-
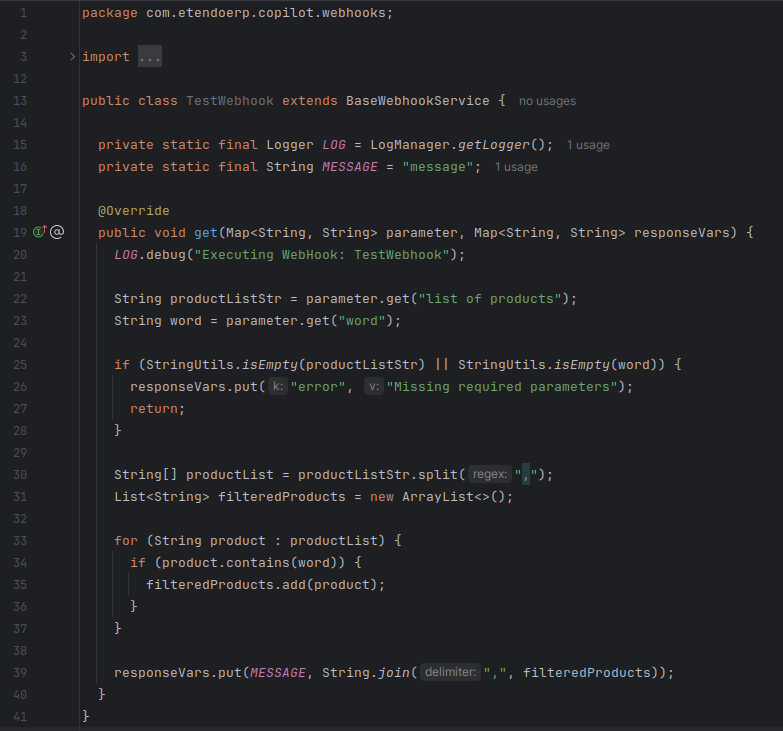
Then, this is the result given by the agent.
Test Supervisor
A supervisor that allows to generate tests for a whole Etendo Module through a workflow, checking the files without tests and generating them. The supervisor will also execute the tests and provide feedback to the user.
Functionality
This agent receives an Etendo Module and will check for Java and Javascript files, determining which ones have tests and which ones do not.
- The agent will generate a report with the results and will suggest the user to generate tests for the files without them.
- The agent will generate the Java and React tests.
Team Members
Java Test Checker
This agent receiving a Etendo Module, will check for Java files, determining which ones have tests and which ones do not. The agent will generate a report with the results and will suggest the user to generate tests for the files without them.

!!!info
    This agent is intended and designed to be used as part of a Langgraph type supervisor, it can be used individually, but does not have full functionality.

**Tools**

- [Print Directory Tool](../available-tools/print-directory-tool.md)
Java Test Executor
This agent is designed to execute tests for a Java Package, can be used to execute:

- All tests.
- Tests for a module.
- Tests for a single Java file.

This depends on the user input. The agent will execute the tests and provide feedback to the user.

!!!info
    This agent is intended and designed to be used as part of a Langgraph type supervisor, it can be used individually, but does not have full functionality.

**Tools**

- [Test Run Tool](../available-tools/test-run-tool.md)
Java Test Generator
This agent generates tests for a single Java file. It reads the Java file and creates a test file with the same name and the suffix `Test` in the same package. The agent generates test methods for each method in the Java file. The agent has a Knowledge Base with the Java classes of Etendo Classic.
This agent will generate the tests and execute them, checking for errors and providing feedback to the user.

!!!info
    This agent is intended and designed to be used as part of a Langgraph type supervisor, it can be used individually, but does not have full functionality.

**Tools**

- [Read File Tool](../available-tools/read-file-tool.md)
- [Write File Tool](../available-tools/write-file-tool.md)
- [Test Run Tool](../available-tools/test-run-tool.md)
React Test Assistant
The **React Test Assistant** is a specialized agent for creating and managing React component tests using `TypeScript` and `@testing-library/react-native`. Its primary focus is generating high-quality test files for React and React Native components within **Etendo sub-application** modules.

Detects React components (`.tsx` or `.jsx` files) that lack corresponding test files in the `__tests__` directory. Analyzes component structure, props, and dependencies, generates Jest and React Testing Library test files and covers key scenarios such as rendering, user interactions, state changes, and edge cases.

!!!info
    This agent is designed to be used within the Etendo ecosystem as part of a **Test Supervisor** LangGraph agent. However, it can be used independently with limited functionality.

**Tools**

- [Read File Tool](../available-tools/read-file-tool.md)
- [Write File Tool](../available-tools/write-file-tool.md)
Usage Example
-
To use this assistant, it is necessary to log in as
System Administratorrole and set the role access. For this, go to the Assistant window, selectTest Supervisorand synchronize it. Then, go to the *Assistant Access window and give access to the role. -
Open Copilot and select
Test Supervisor, then ask to the agent what you need to create. A suggested input could beGenerate tests for the module com.etendoerp.examplemodule. -
The agent will generate the tests and execute them, checking for errors and providing feedback to the user.
Refactor Assistant
An expert code refactoring agent focused on improving clarity, maintainability, and originality while preserving functionality. The agent analyzes code files, identifies areas for improvement, and suggests changes to variable names, documentation, and structures for better readability. It ensures imports, method names, and entity names remain unchanged to maintain functionality. Workflow includes code analysis, user confirmation, applying changes, and verifying updates. Clear explanations and a summary of changes are provided for user understanding.
Functionality
- The refactor agent receives a file path.
- The agent will read the file.
- The agent may ask to it knowledge base for suggestions.
- The agent will write the file with the changes, overwriting the original file.
- The agent will read the file again to verify the changes.
Tools
Usage Example
- To use this agent, it is necessary to log in as
System Administratorrole and set the role access. For this, go to the Assistant window, select Refactor Assistant and synchronize it. Then, go to the Assistant Access window and give access to the role. - Open Copilot and select Refactor Assistant, then ask to the agent what you need to refactor. For example, a suggested input could be
Refactor the file located in the path /modules/com.etendoerp.module/src/com/etendoerp/module/MyClass.java changing the variables to spanish. - The agent will read the file, analyze it, and suggest changes.
- The agent will write the file with the changes, overwriting the original file.
Unique Java Test Assistant
This agent is designed to generate tests for a single Java File or an Etendo Classic module.
Functionality
- This agent receives a Java file path or a module path, but its main functionality is to generate tests for a single Java File.
- In the case of a given Module, the agent will check for file without tests and generate for them.
- The agent expected behaviour is to read the Java file and generate a test file with the same name and the suffix
Testin the same package. - The agent will also generate the test methods for each method in the Java.
- This agent has a Knowledge Base with the Java classes of Etendo Classic.
Tools
Warning
The test generators provided by this tool are designed to deliver an initial batch of test cases efficiently, based on the parameters provided. However, it is important to note that the generated tests serve as a starting point and may require additional work to:
- Fix potential errors in the generated test cases.
- Improve test coverage.
- Adapt them to the specific scenarios of your project or environment.
We recommend carefully reviewing the generated tests, executing them in the development environment, and making the necessary adjustments to ensure they meet the expected functional and quality requirements.
Usage Example
- To use this agent, it is necessary to log in as
System Administratorrole and set the role access. For this, go to the Assistant window, select Java Test Generator and synchronize it. Then, go to the Assistant Access window and give access to the role. - Open Copilot and select Unique Java Test Assistant, then ask to the agent what you need to create. A suggested input could be
Generate tests for the Java file located in the path /modules/com.etendoerp.module/src/com/etendoerp/module/MyClass.java. - The agent will generate the tests and execute them, checking for errors and providing feedback to the user.
Client/Organization Initializer
This agent helps the user initialize clients or organizations.
Functionality
- Interactively gather all required information to create a new client or organization.
- Execute the creation of the client or organization and automatically validate successful completion.
- After creating a client:
- Instruct the user to log in using the newly created client’s administrator credentials.
- Prompt the user to configure this wizard’s access for the client.
- Request the creation of organizations under that client.
- After creating an organization:
- Instruct the user to log in with the administrator credentials to continue setting up the organization.
- Handle initialization failures by instructing the user to verify:
- That they are using the correct role and organization.
- Their current permissions (only a System Administrator can create clients; a Client Administrator can only create organizations).
- Automatically infer the user’s host and credentials from the session context, avoiding explicit requests for these details.
Tools
