Etendo BI Connector Module
Overview
Info
To be able to include this functionality, the Etendo BI Bundle must be installed. To do that, follow the instructions from the Marketplace.
In Etendo, it is possible to create base queries and to customize them when needed. This will provide information which can be used by Power BI.
For this process, a background setting is required in order to create CSV files that will be uploaded to a server. The files will use information from the pre-established base queries and their customazation in case there are any.
The following documentation is about the steps to consider when configuring this funtionality to create the CSV files, since it is necessary to execute the process in Etendo from different windows:
Etendo BI Connector Module Configuration
First, make the proper configurations from the Webhooks window. This will later allow BI Logs to be sent to the BI Logs Monitor window.
Webhooks window
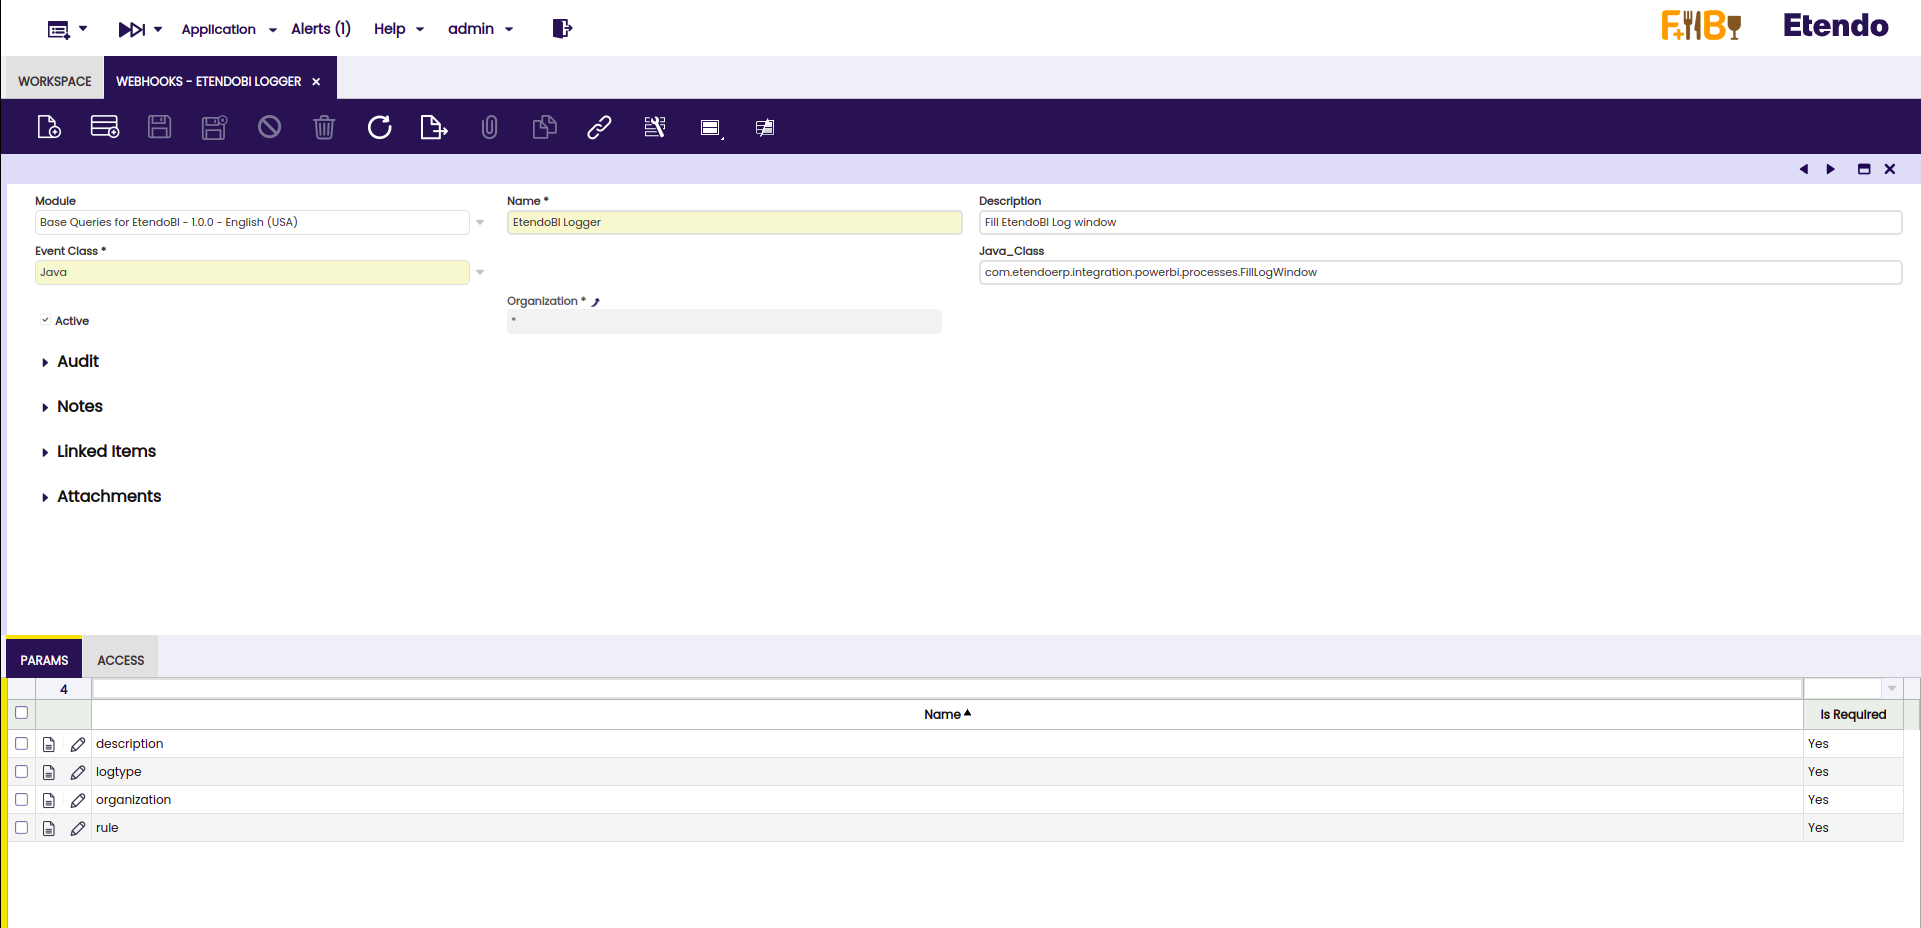
From the webhooks window, it is necessary to create a new record and complete the required fields as follows:
• Module: Base Queries for EtendoBI
• Name: EtendoBI Logger
• Description: Fill EtendoBI Log window
• Event Class: Java
• Java_Class: com.etendoerp.integration.powerbi.processes.FillLogWindow
Info
It is highly recommended to have just one Webhook for this module to work properly, as its functionality will not vary. That’s why, it is better to use the organization * in order to cover all child organizations.
In the Params tab, four records must be created under the names:
• description
• logtype
• organization
• rule
Info
For more information about Webhooks, visit Webhooks Events.
User API Token window
Then, make the proper configurations from the User API Token window. Here, it is necessary to grant access to a user role, so a token in this window needs to be created.
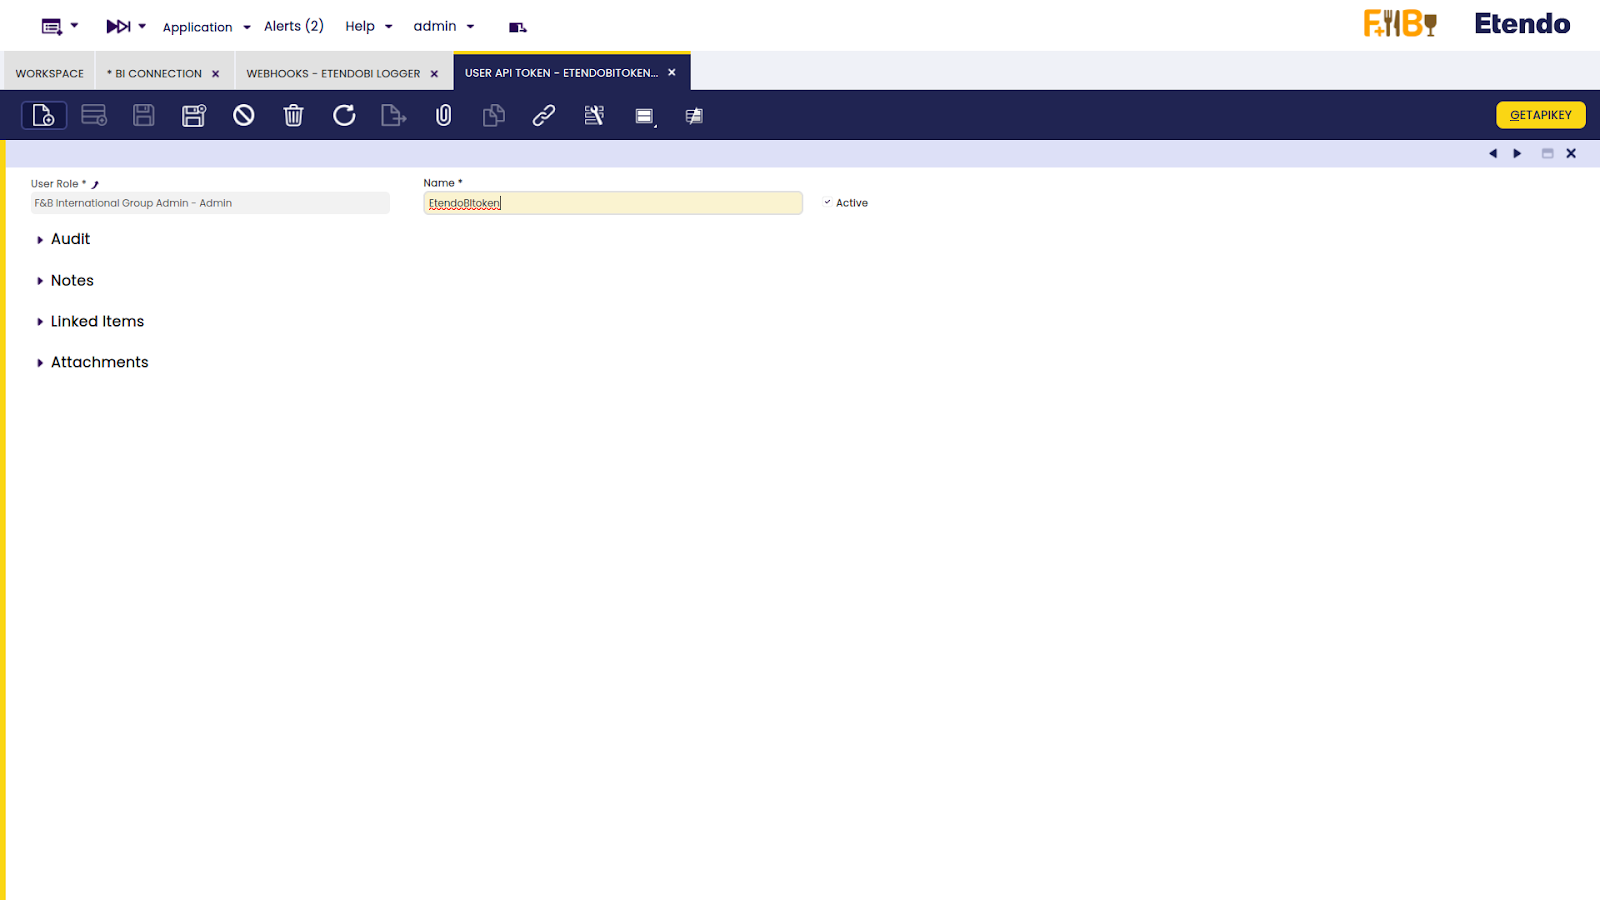
Then, go back to the Webhooks window, and create a record in the Access tab in order to add the previously generated token.

Success
This way the Webhook is configured. Now, it is necessary to configure the EtendoBI Connector module.
Etendo BI Connector Module Window
In the BI Connection window, It is necessary to create a record to specify the path to the CSVs creation script and the Webhook to use. If the EtendoBI bundle is installed and the script path was not changed, the user should use the default value of ‘repository path’ field. Otherwise, the corresponding path should be specified.
Info
It is important to note that the 'Repository path' will search for the corresponding path INSIDE the WebContent folder of the project.
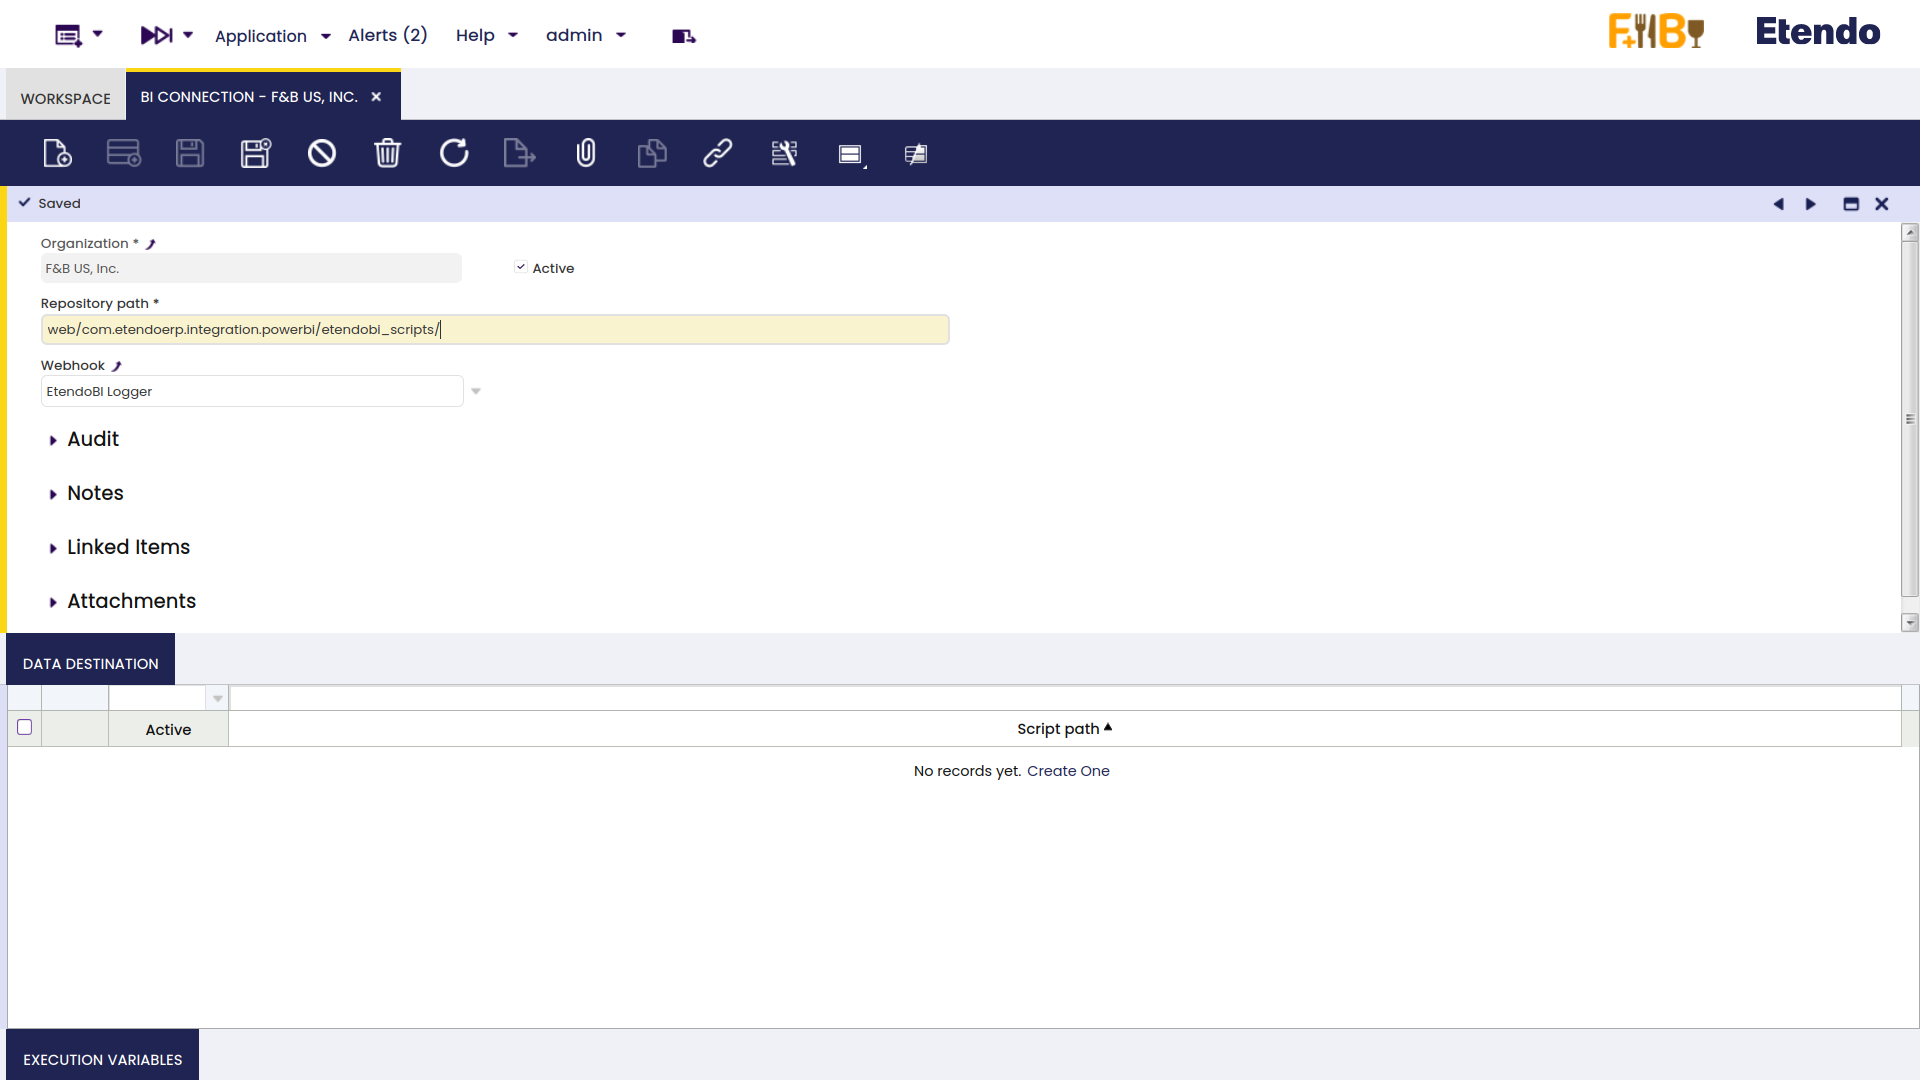
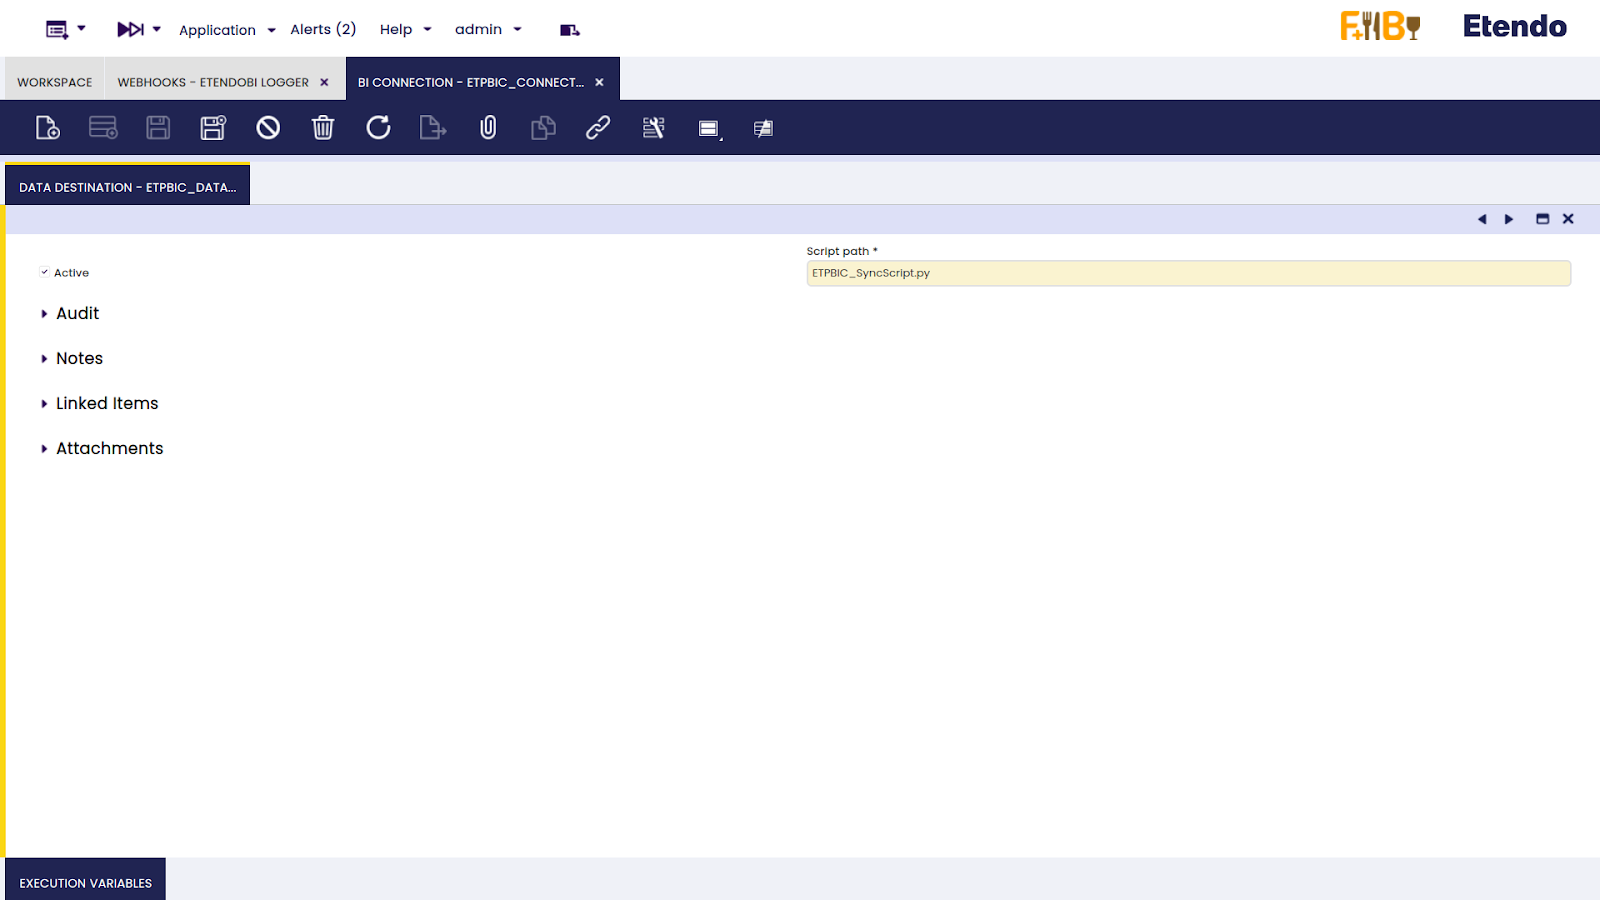
In the Data Destination tab, the file name of the script needs to be specified.
Finally, in the Execution variables tab, some records must be created being the ‘Variable’ field:
-
ip: ip of the server where the files will be uploaded (mandatory)
-
client: the name of our client (mandatory)
-
user: the user used to connect to the server. (mandatory)
-
application_url: url of our application. e.g. "https://my-domain.cloud/etendo" (mandatory)
-
port: port of the server where the user is connecting to (default: 22)
-
path: path of the server where the files will be sent (default: /)
-
private-key-path: path of the private key used for the connection to the server
-
bbdd_user: username of a read only user to access the database
-
bbdd_password: password of the read only user
-
csv_separator: delimiter to use in the final csv files (default: |)
“private-key-path” is the path of the private key used for the connection to the server. If this variable is not specified, the script will try to connect without specifying a private key. In the “bbdd_user” and “bbdd_password” variables, enter the username and password of a user with read-only permissions to the database. If either of these two variables is not found, the process will use the credentials of the database superuser.
Info
However, it is highly recommended to use a user with read only permissions as it is a great security measure.
As an example, let’s use the following values:

Info
It is important to respect the specified names for the “Variable” field.
Also, it is important to note that the script is going to create a folder named as the value of the “Client” variable, and it will contain folders for each organization that executes the background process. Therefore, if there are two BI Connections with the same “Client” value, the last execution of the process will overwrite the folder.
For example, let's say there is Organization A, which has Organizations B and C as its child organizations. If the user needs to have the same configuration for both, we can create a BI Connection using Organization A and set up two background processes that run the "EtendoBI Process," one for Organization B and the other for Organization C.
When the script is executed, a folder will be created with the value of the "Client" variable in the BI Connection window as its name. Within that folder, subfolders will be created for each organization (in this case, A_logs and A_output for Organization A, and B_logs and B_output for Organization B).
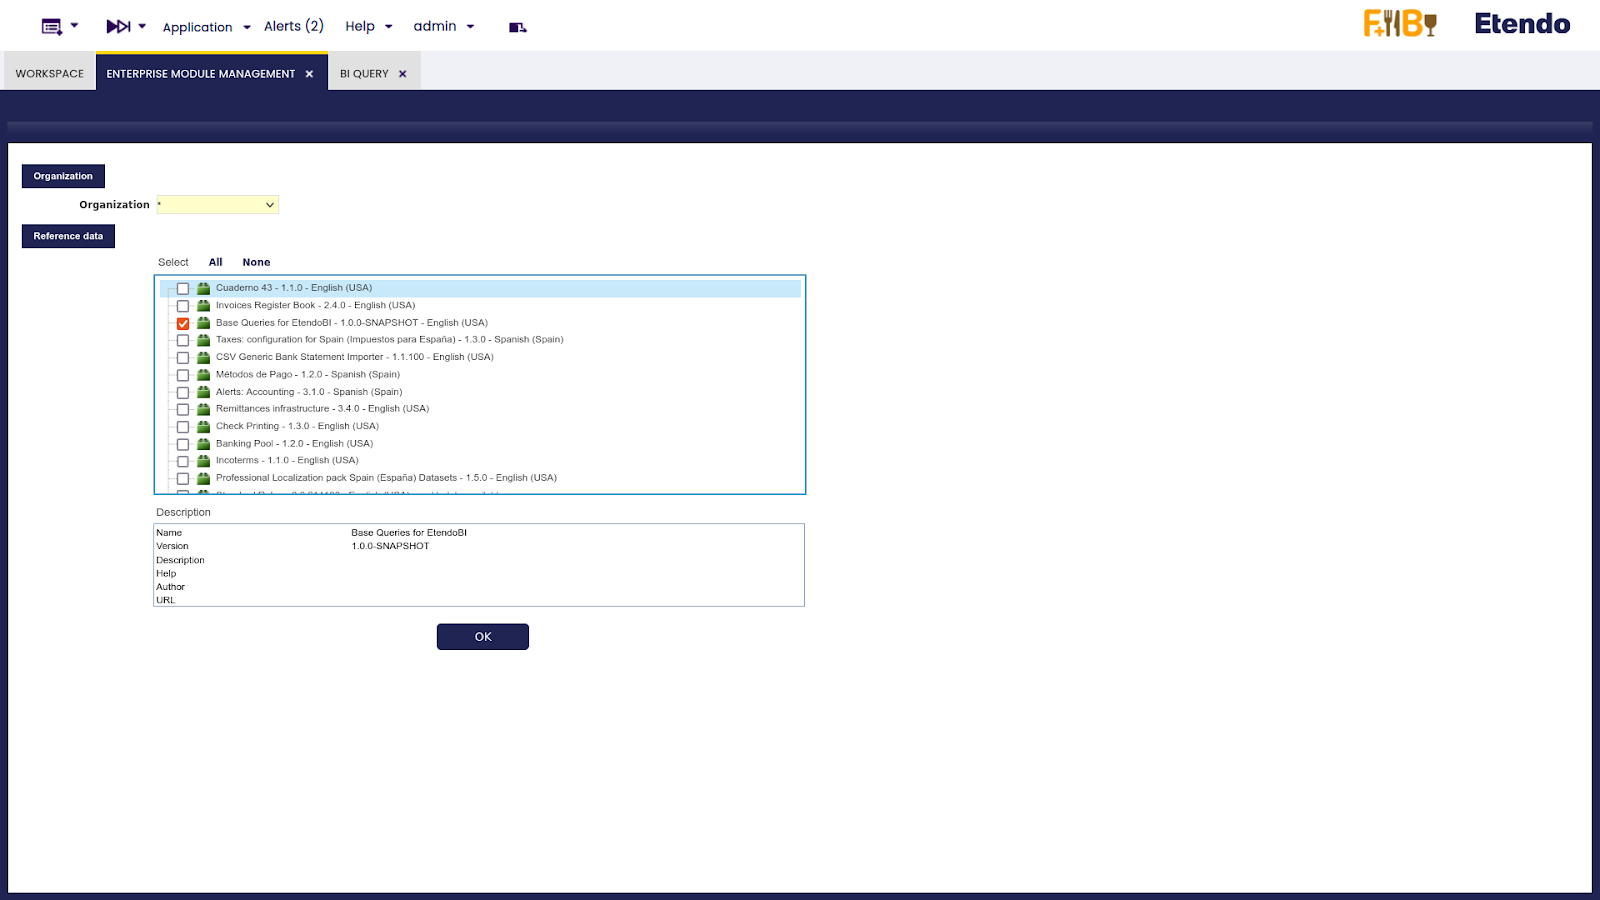
Enterprise Module Management window
To load the Etendo base queries, go to the Enterprise Module Management window, and select Base Queries for EtendoBI and then click the OK button.
BI Query window
After that, Etendo base queries should be successfully loaded in the BI Query window.
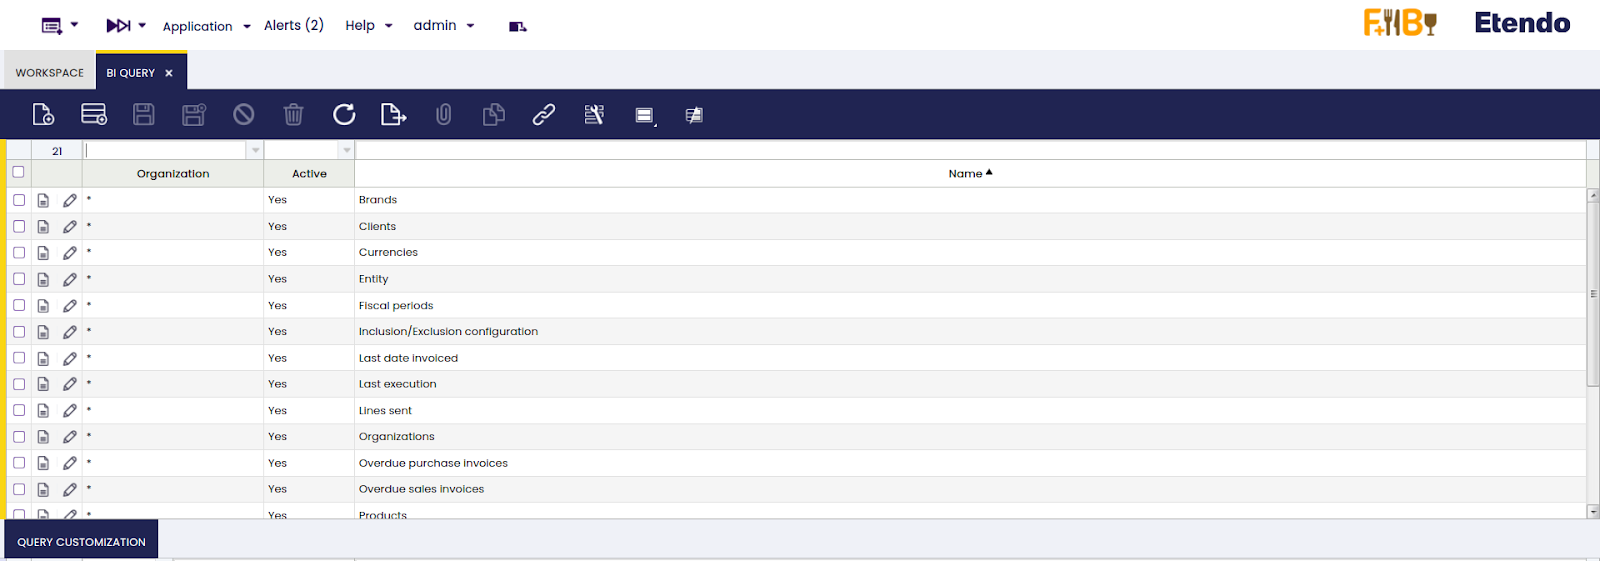
There are several points to consider when handling queries in this module.
• Primary Key Requirement: Every base query must have its primary key as the first column. This is crucial since in the script it is assumed that the first column is the identifier.
Warning
A failure to adhere to this can result in incorrect output, duplicated records, and an immense number of rows.
• Client column on base query: Every base query must include ad_client_id column, with the alias “ClientID”
• Organization column on base query: Every base query must include ad_org_id column, with the alias “OrgID”
• Custom Query Customization: The customization of the query must also include the primary key (which is the same as the base query since customization is performed on the same table) with the SAME ALIAS as the base query.
Warning
Failing to respect this can lead to improper mapping between the results of the base query and its customization, resulting in incorrect output.
Let’s see an example of a correct base query and customization.
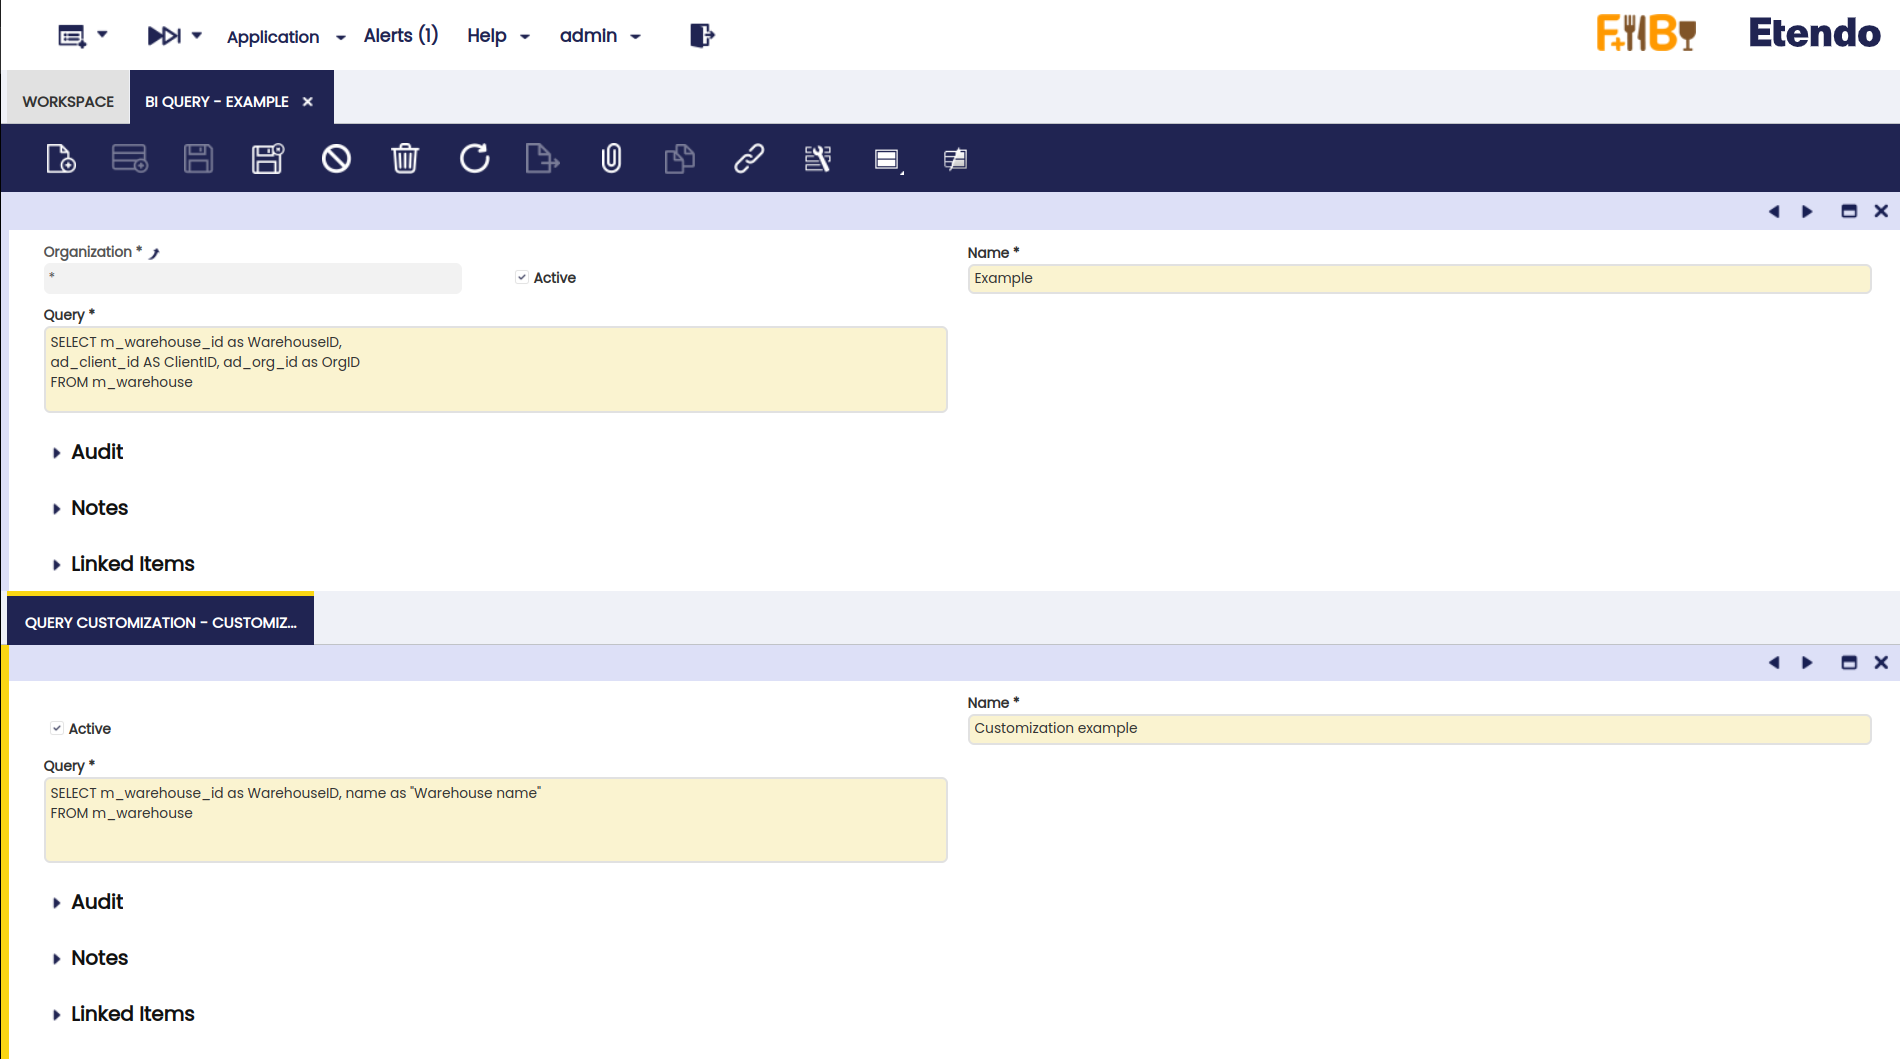
In this case, as a base query there are three columns. In its customization, there is a new column “name”.
Info
Note that there are three mandatory columns in the base query, with the correct alias for column ad_client_id and ad_org_id. It is important to make sure that “ClientID” and “OrgID” aliases are being set WITHOUT double quotes. Also, there should not be more than one space between the “as” keyword.
… ad_client_id as “ClientID”, … INCORRECT … ad_client_id as ClientID, … CORRECT
In the customization query, despite the requirement to have the primary key with the same alias as the base query, it is not necessary for it to be the first column. In this case, if instead of having:
- SELECT m_warehouse_id as WarehouseID, name as "Warehouse Name" FROM m_warehouse
We have:
- SELECT name as "Warehouse Name", m_warehouse_id as WarehouseID FROM m_warehouse
The result will be exactly the same.
The script executes the base query, and then merges the customization, using both primary keys for mapping the rows.
If a base query has a customization, the script creates three different CSVs.
-
A CSV file that contains the result of the base query. This CSV file has the prefix “EBI_” if it is an Etendo base query. If it is a client base query, it has the first three letters of the value of the “Client” variable that was set earlier as a prefix.
-
A CSV file with the prefix “BASE_”, which contains the columns from the base query, but if the customization overrides any of these values, they will be overwritten with the values from the customization. In this case, the “BASE_” CSV file will be the same as the base query since the customization does not override any values from the base query columns.
-
A CSV file with the prefix “FULL_”, which includes both the columns from the base query and any additional columns added in the customization. In the given example, the “FULL_” CSV file will contain the additional column “Warehouse Name”.
Later, at the end of the configuration, this example query will be executed to analyze the generated CSV files.
Info
It is important to note that there should be only one customization per base query. It should also be made clear that it is not possible to add constraints to the customization to remove rows from the base query. Instead, the customization allows adding or overwriting columns in the original query, using the primary key to map the records.
Base queries must all contain the ad_client_id and ad_org_id columns, with alias “ClientID” and “OrgID” (case insensitive).
Warning
If a query does not have these columns with their alias, it will produce an error and be ignored.
Process Request window
Once the query configuration is done, go to the Process Request window, create a new record, select the “EtendoBI Process” from the process field and schedule it.
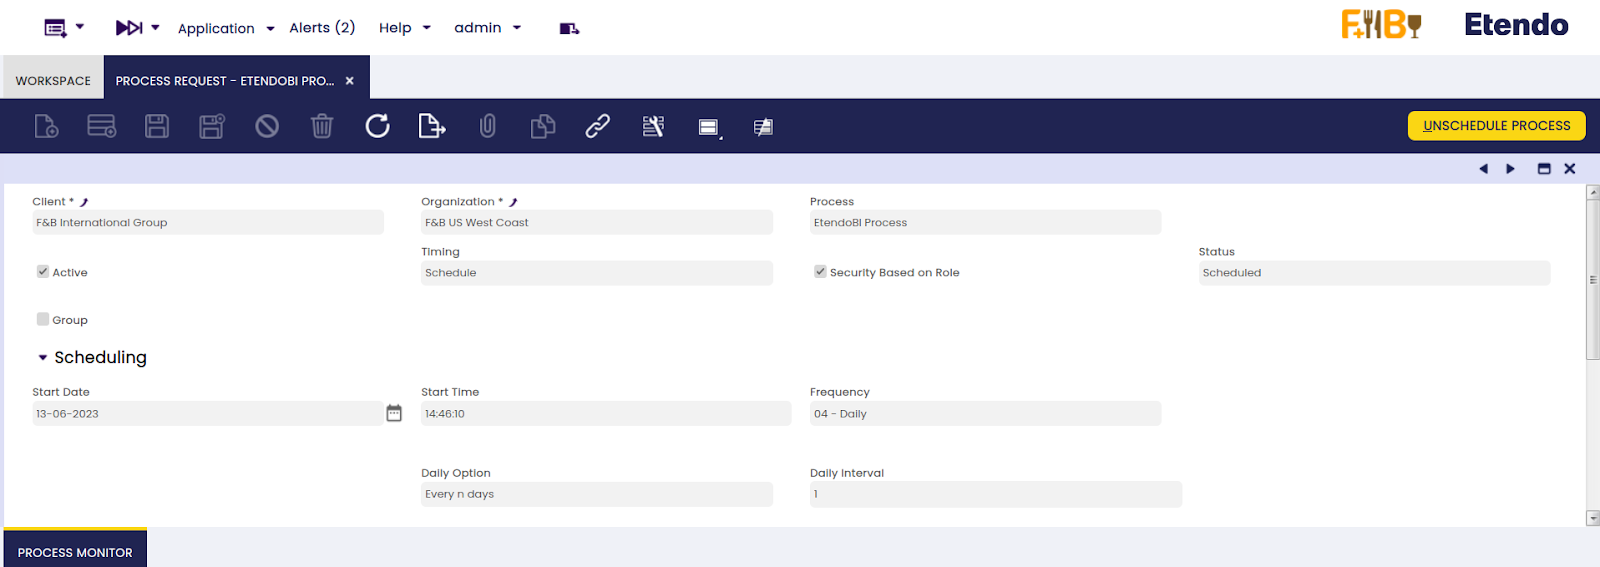
The scope of the data collection performed by the queries is based on the organization that configured the background process. In other words, all the obtained data is filtered by the client and the organization that configured the background process, and NOT by the organization used in the BI Connection window. If the organization does not have a configuration in the BI Connection, Etendo will search for the configuration in one of its parent organizations, but the data scope will remain the same (itself and its child organizations).
Info
If the organization that configured the background process does not have a BI Connection and there is no BI Connection found for its parent organizations either, the process will not be executed.
The process will never search for a BI Connection in the child organizations of the one which was set on the background process.
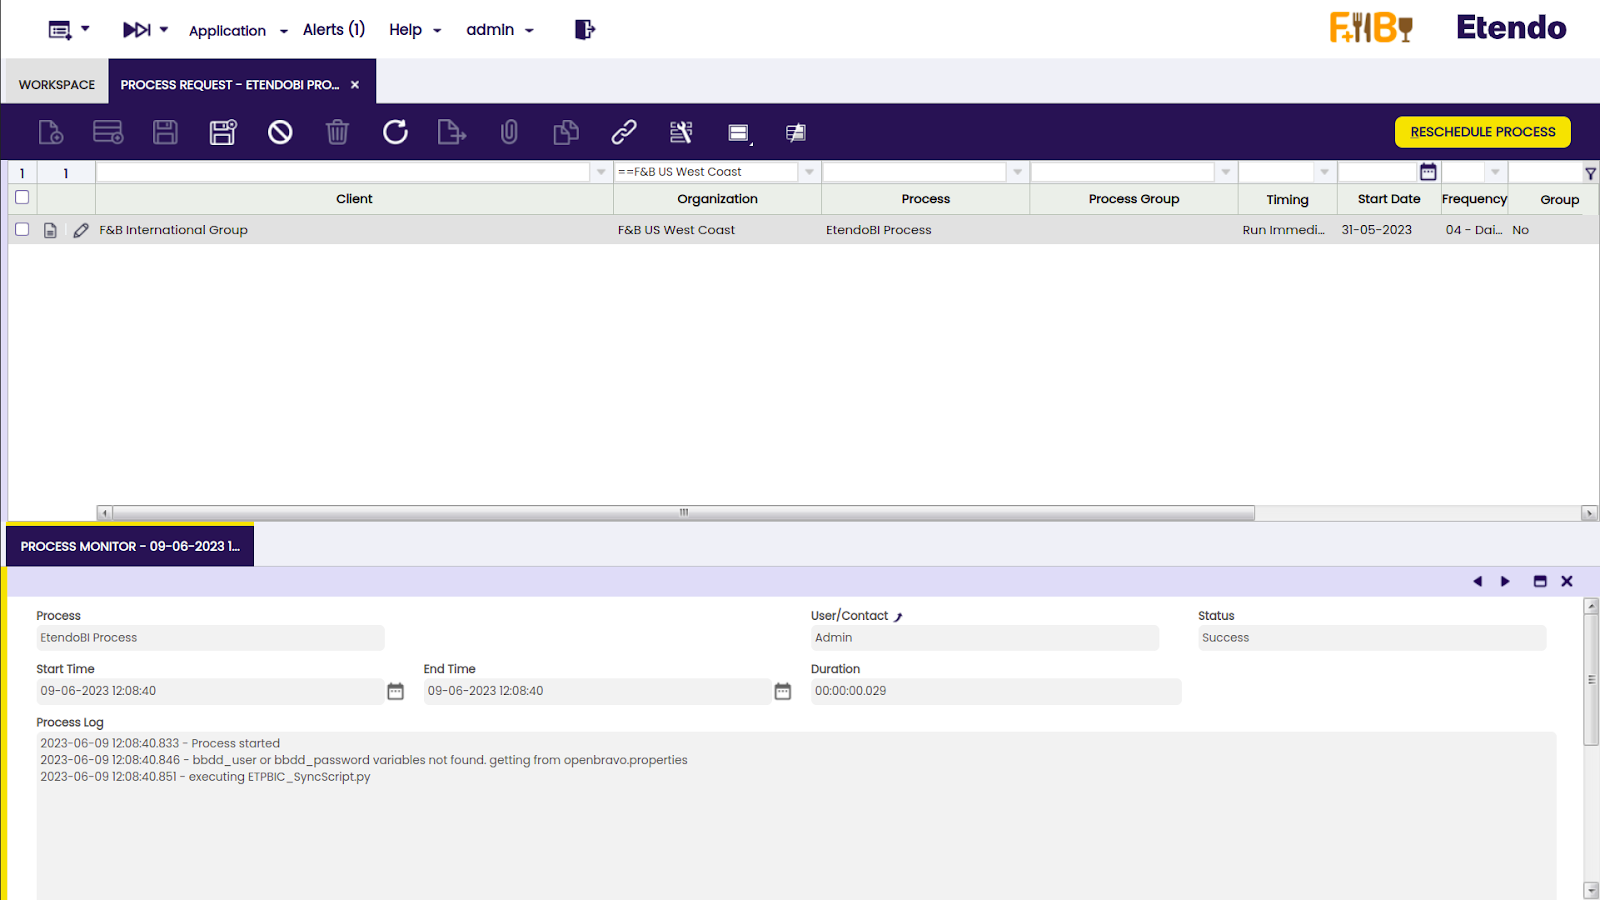
In the Process Monitor tab, the status of “Success” is shown in the new record that appears when the process is executed. It is good to know that this process executes our python script, so if there were no issues up until the execution of the python script, it will return to success status regardless of whether the python script fails.
BI Logs Monitor window
The execution process can be checked in the BI Logs Monitor window.
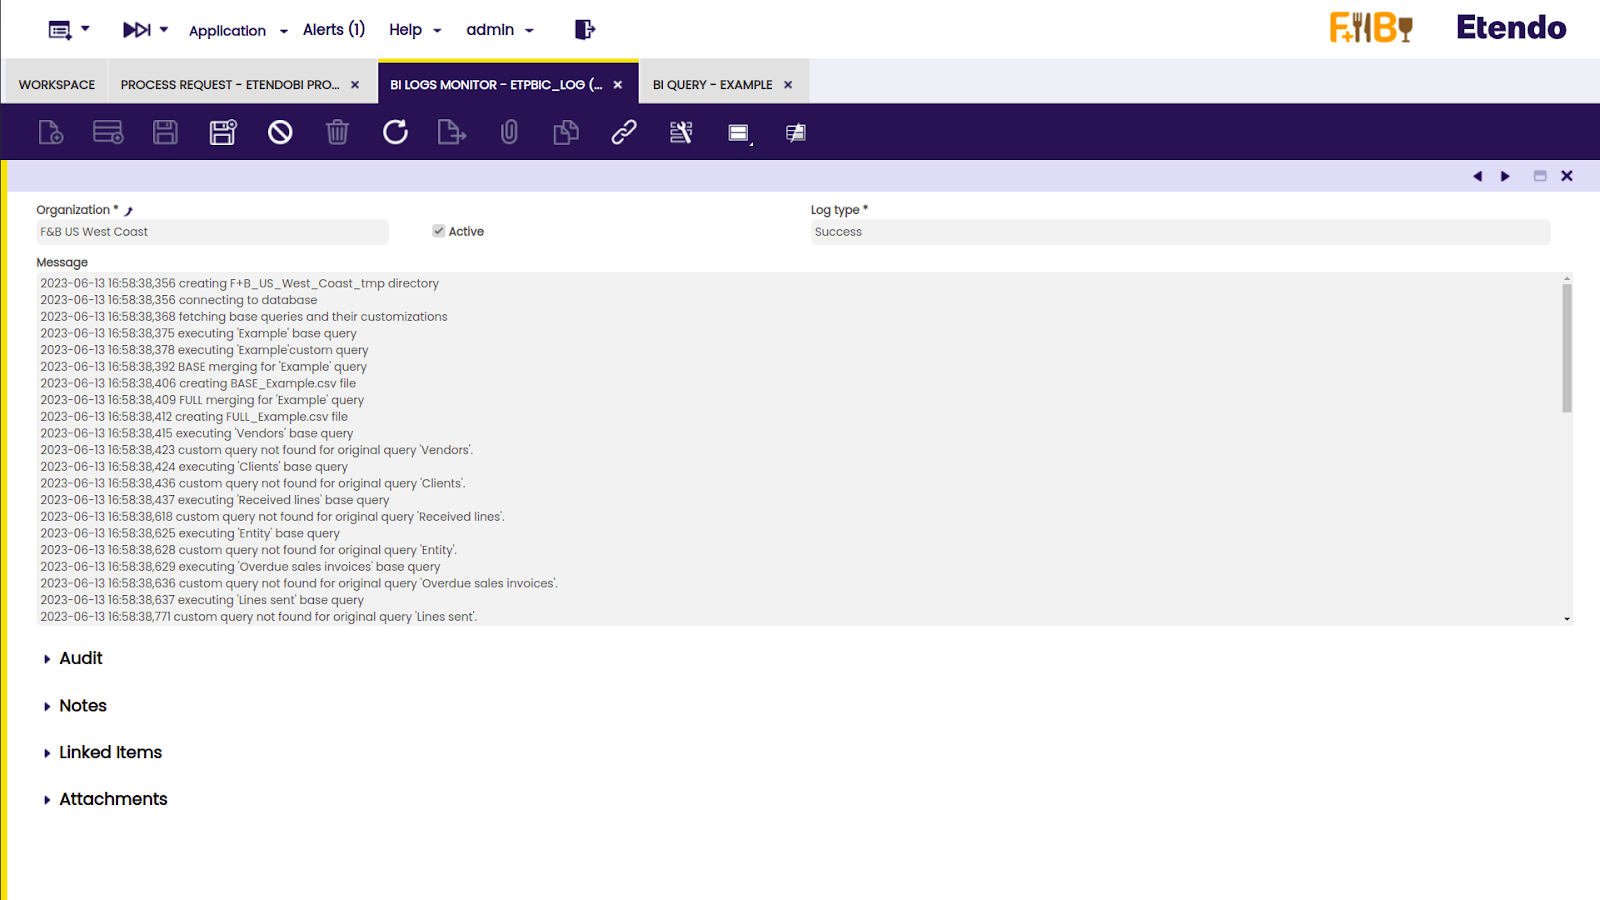
In this example image, the information about the script execution can be seen.
If no records in the Logs window were created after the execution of the script, it is possible that the error occurred on the synchronization of the files with the server. The user is able to check this by looking at the rsync log files created in the filesystem.
Info
To do that, visit the Etendo BI Bundle developer guide.