Application
Create Sequences
Application > General Setup > Application > Create Sequences
In this window, the Create Sequences process is executed.
When selecting the organization and executing the process, Etendo creates the sequences for the type of fields "Transactional Sequence" or "Non transactional Sequence".
The main advantage of these new sequences is dynamic masking, which makes it possible to add dates or dynamic strings.
Warning
The user can run this process only after a developer configures the sequence fields using transactional or non-transactional sequences.
Info
For more information about this configuration, visit the technical documentation about Sequences.
After that, in the Financial Management>Accounting>Setup>Document Sequence window the user can see and edit the sequences generated.
| List of sequences generated by the process |
Conversion Rate Download Rule
Application > General Setup > Application > Conversion Rate Download Rule
Info
To be able to include this functionality, the Financial Extensions Bundle must be installed. To do that, follow the instructions from the marketplace: Financial Extensions Bundle. For more information about the available versions, core compatibility and new features, visit Financial Extensions - Release notes.
This module automatically generates conversion ranks with a background process using Apilayer. It allows keeping currency conversions up to date.
Conversion rate, also called currency exchange rate, is the rate at which one currency may be converted into another one within a given period of time. Currency is an accepted medium of monetary exchange that may vary across countries.
Fields to note:
- From Currency: Original currency
- To Currency: Target currency
- Tolerance: The maximum difference allowed between the new conversion rate and the previous one. This is used to insert or not the new downloaded rate.
Currency
Application > General Setup > Application > Currency
Overview
Currencies and conversion rates are basic settings in Etendo.
Currencies used worldwide are automatically created and listed in the currency window once Etendo installation is completed.
Info
All these currencies are linked to the system organization (*), that means that those currencies will be shared by all the organizations in the system.
Currency
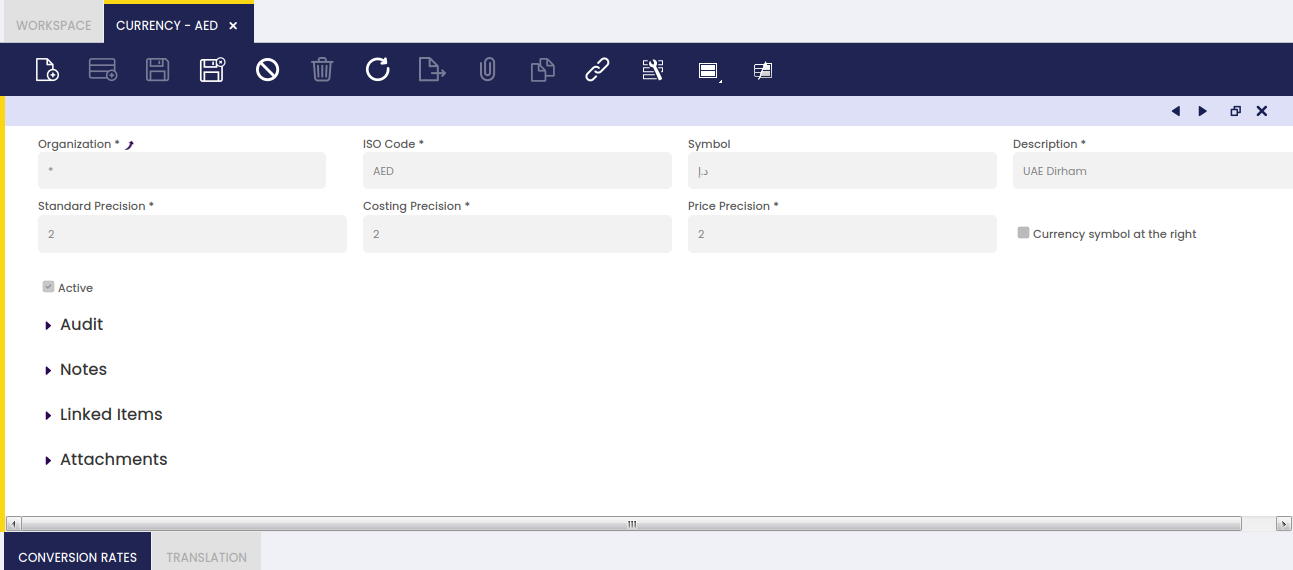
Currency window allows the user to visualize or to create and configure the currencies to use in monetary transactions.
As shown in the image above, currency relevant data is:
- the currency ISO code. Currency ISO codes are worldwide used codes for the representation of currencies and funds.
- the currency symbol which can be placed at the right or at the left of an amount
- and the currency precision or number of decimals to use while calculating amounts in that currency.
Etendo allows the user to setup three types of currency precision:
- the standard precision, defaulted to 2, is the one used overall but for prices and cost amounts calculations which can use a different precision.
This precision is the one used to calculate order and invoices amounts such as "Line Net Amount", "Total Net Amount" and "Total Gross Amount", therefore it should not be bigger than 2 unless the currency allows the user to pay smaller quantities than 0.01 - the costing precision, defaulted to 2, is the one used for product cost calculations. It is recommended to change it up to 4
- and the price precision is the one used for unit/list prices which can have more than 2 decimals precision because amounts are finally rounded to 2 by the standard precision.
Warning
Changes on currency precision can only be made at client level, therefore System Admin Role needs to be used.
Conversion Rates
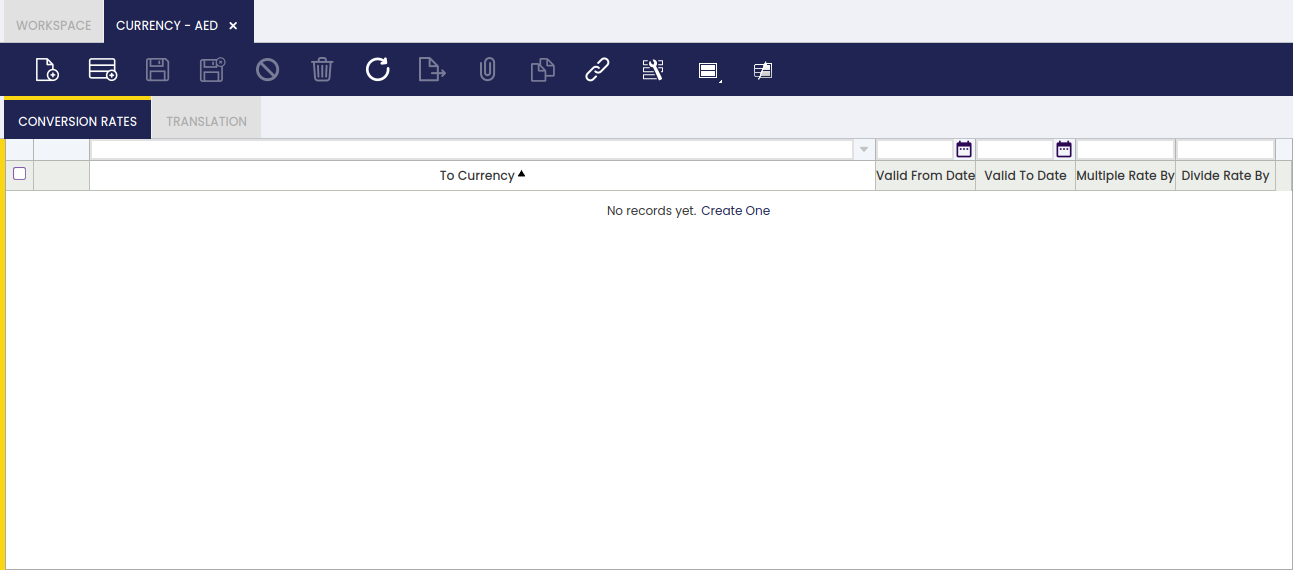
Conversion rates tab lists the available conversion rates for a given currency.
A conversion rate is the valid rate at which one currency may be converted into another one within a given period of time.
This implies that a single currency might have several conversion rates depending on:
- the currency at which might be converted
- and the period of validity
Info
Currency conversion rates can be also created in the Conversion Rates window, therefore it can be reviewed in this tab.
Note
Etendo recommends conversion rates to be configured in the Conversion Rates window, as it is required to defined both the "Multiple Rate By" (USD - €) and the "Divide Rate By" (€ - USD) to properly defined the exchange of two currencies.
Translation
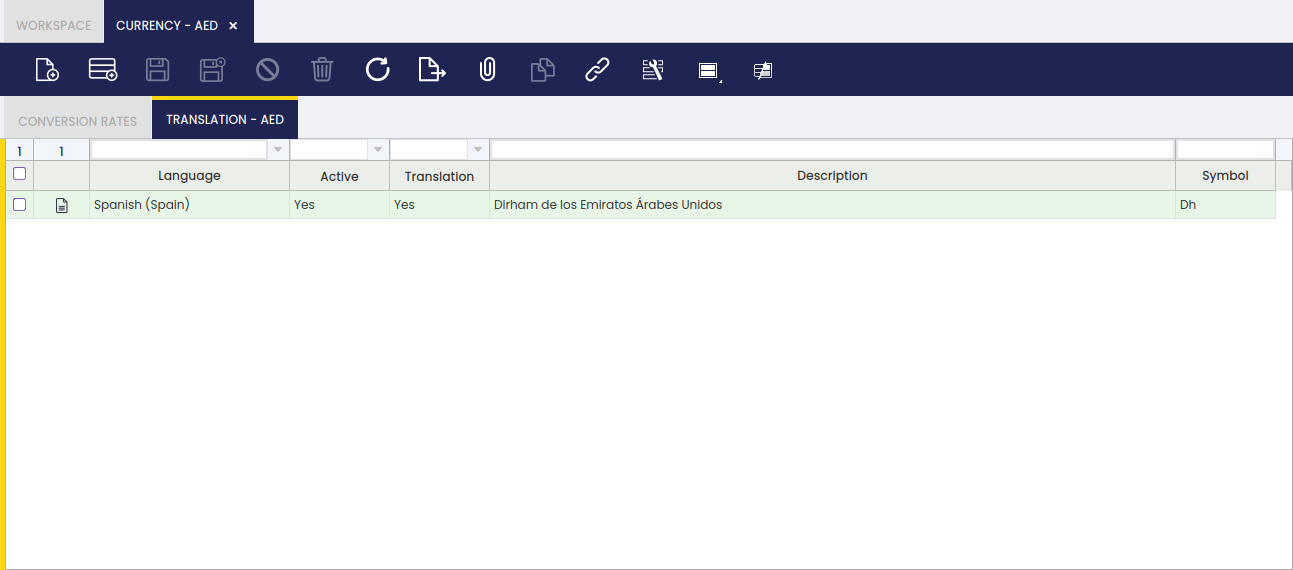
Currencies can be translated to any language if required.
Conversion Rates
Application > General Setup > Application > Conversion Rates
Overview
Conversion rate also called currency exchange rate is the rate at which one currency may be converted into another one.
Info
Conversion rates can only be created at system organization level (*), which implies they are available for all the organizations within the client.
Conversion Rate
Conversion rates window allows the user to create the rates to be used for multi currency transactions.
Etendo requires the user to enter and maintain currency exchange rate in both senses, that means to enter at the same time the two rates below:
- a Multiple rate by which is the rate by which the base amount will be multiplied for to calculate the converted amount.
- and a Divide rate by which is the rate by which the base amount will be divided by to calculate the converted amount.
For instance, USD exchange rate to EUR should have a Multiple rate by = 0.68 setting and a Divide rate by = 1.47 setting, as shown in the image below:
Country and Region
Application > General Setup > Application > Country and Region
Overview
Countries and regions are basic settings to share within Etendo.
Countries and their corresponding regions are automatically created and listed in this window once Etendo installation is completed.
Info
All these countries and regions are linked to the system organization (*), that means that those countries and regions will be shared by all the organizations in the system.
Country
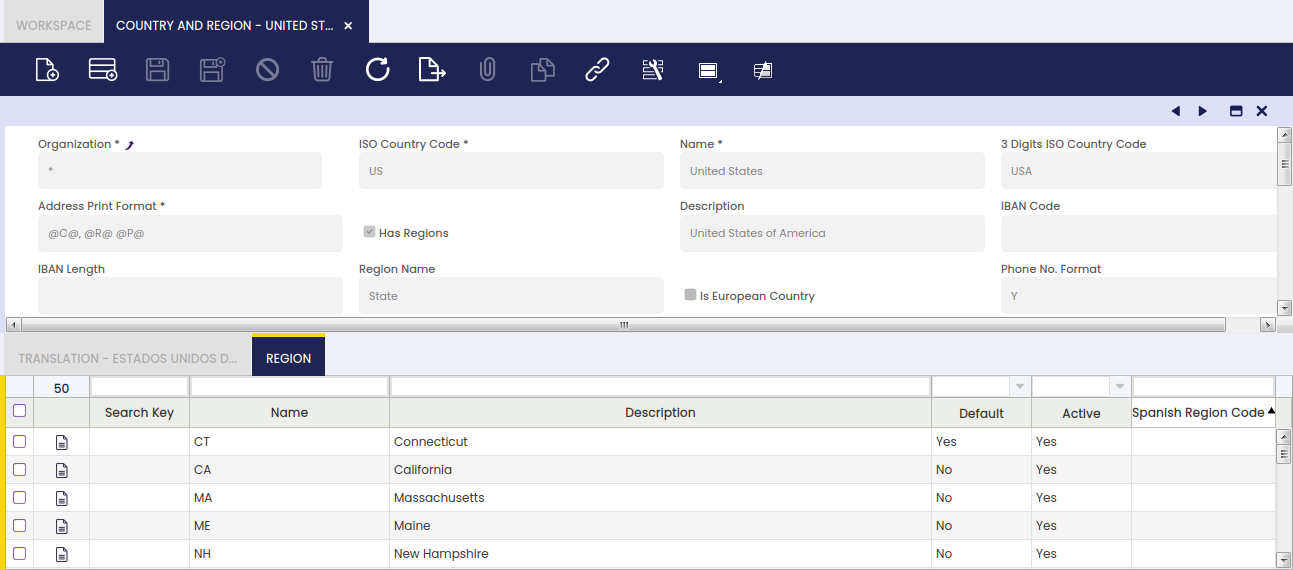
This window allows the user to visualize and/or to create and maintain the countries and the regions to be used in daily business activities.
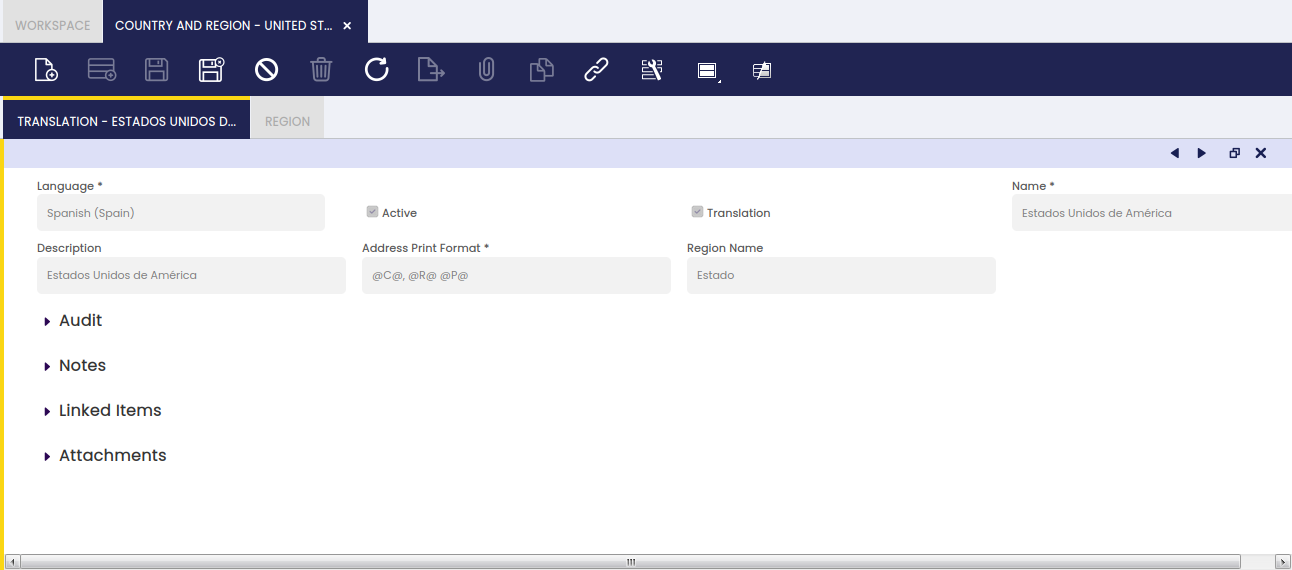
As shown in the image above, country relevant data is:
- the country ISO code.
- Country ISO codes are worldwide used codes for the representation of the countries.
- the address print format.
- whether it has any kind of regions such as states or not. "Has regions" flag needs to be enable to enter regions in the Region tab.
- the region name
- the country IBAN code of the country
- IBAN or International Bank Account Number is a system of numbering that was created to categorize the bank accounts worldwide.
- the country IBAN code length of the country.
- the Phone number format
- the default language
- and the default currency
Translation
Countries and regions can be translated to any language.
Region
Regions tab allows the user to visualize and/or to create and maintain the regions of any type of country.
Info
Country regions are simply defined by a name and a description.
Preference
Application > General Setup > Application > Preference
Overview
A preference is a type of session value which can either be an attribute or a property.
Info
Every time a user logs in Etendo, a new session is opened.
While logging in, the user enters several variables such as the Role, the Client and the Organization and, once in, the user navigates to a Window.
All those variables have a key influence on the session values the user will get.
In other words, Preferences allow the user to define session values, session values which can either be a property or an attribute defined for a single client or for all of them, or for a single organization or for all of them.
Info
Preferences can be assigned to the system or to a specific module, therefore, while exporting that module, the preferences it has assigned will also be exported, so those general settings can be reused.
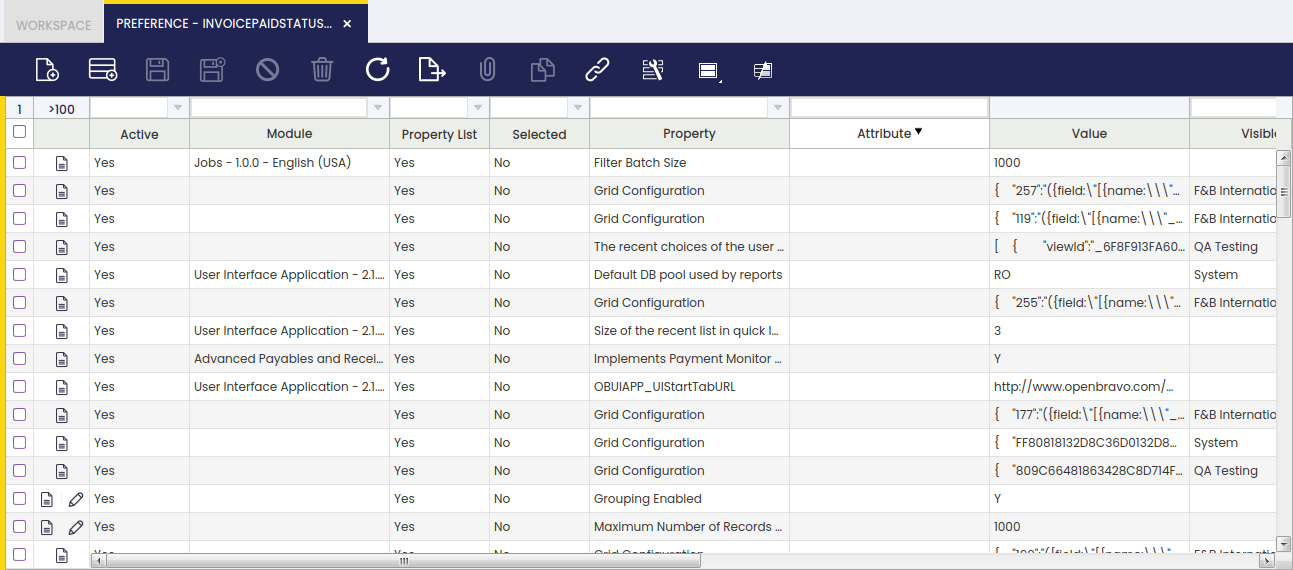
For instance, there is an existing Property named "Implements an alternative Invoice Process button". That existing property is currently assigned to the Module "Advanced Payables and Receivables Management" with a value = "Y" for any client, organization, user, role and window:
- Above preference means that if the Advanced Payables and Receivables Management module is installed, it will use an alternative invoice process button, besides every user logging in Etendo will get that feature working regardless of its role, user and the client or the organization it is working on.
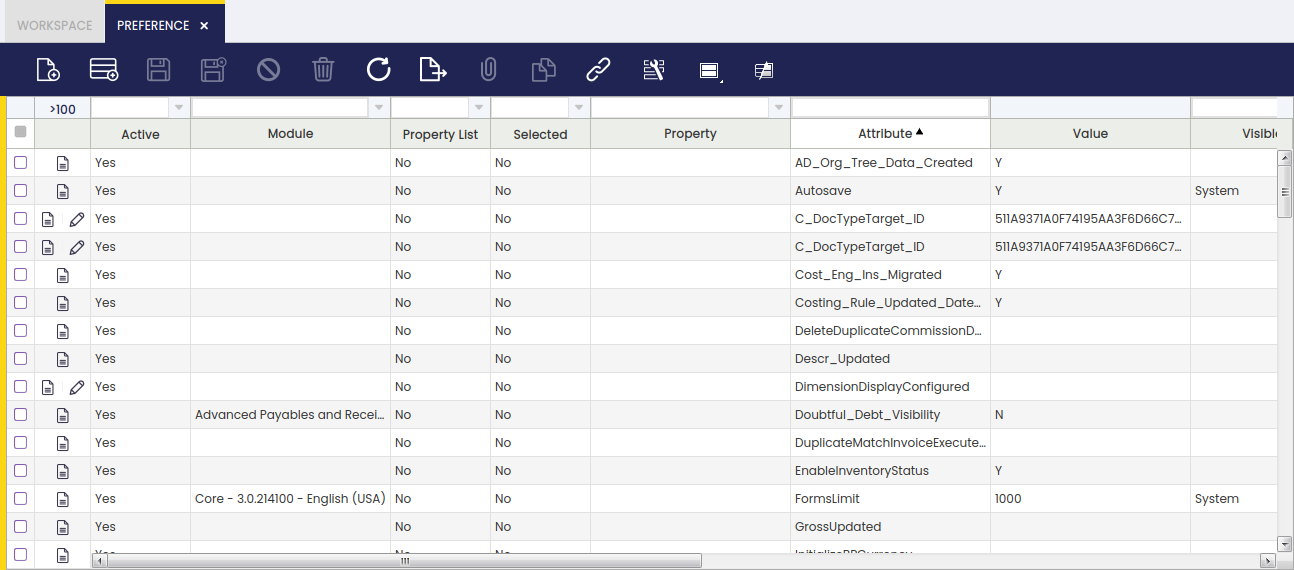
For instance, there is an Attribute named "Autosave" which is currently assigned to the system with a value ="Y". This attribute is visible and therefore applicable to System client and to (*) organization for any user, role and window.
- The preference above means that every user logging in Etendo will get that feature working regardless of its role and user and the client or the organization it is working on.
Preference
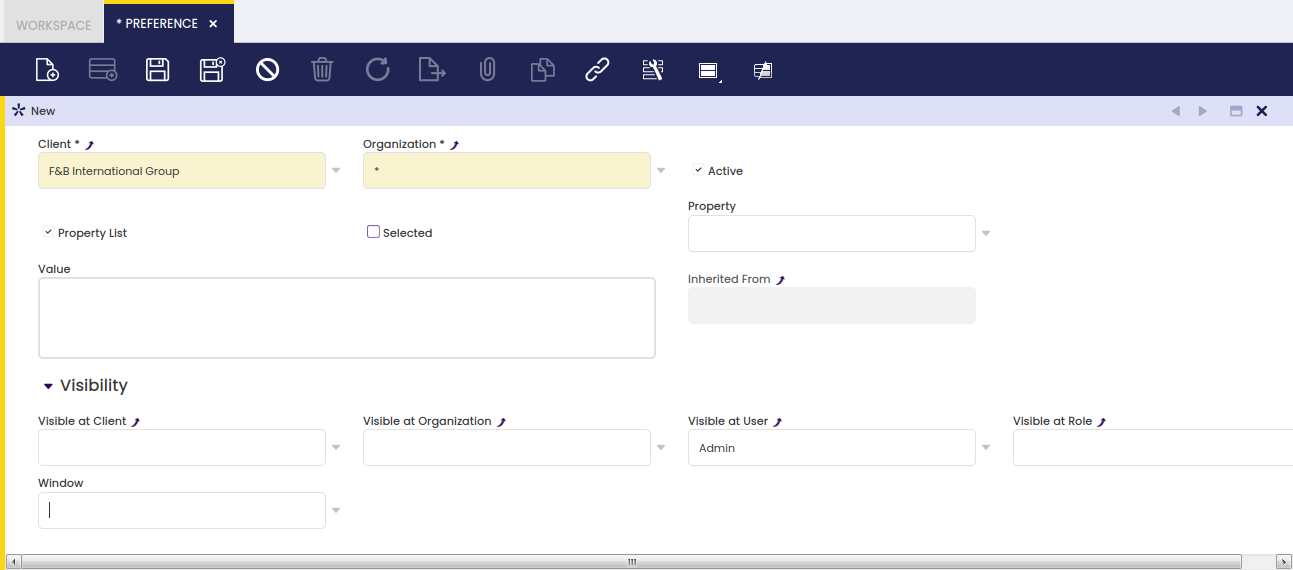
Preference window allows the user to define and maintain session values which can be visible and therefore applied to different levels such as Client, Organization, User, Role and Window.
Preference Definition
As shown in the image above there is one field named "Property List" which is key in defining a preference as a property or as an attribute:
- if the Property List checkbox is checked, the preference is configured as a property to be taken from an existing list of properties.
There are many types of properties already created, besides modules can add new properties to that list with the aim of getting those other modules or even the system can use them by setting the corresponding properties values.
Some of the available properties are listed and briefly explained below: - Enable UOM Management
If set to Value = "Y" at "System" level, it allows the user to define alternative UOM for a product, besides product's UOM.
Same way, a new field named "Operative Quantity" will then be shown in purchase, inventory and sales transaction documents, therefore "Ordered Quantity", "Movement Quantity" and "Invoiced Quantity" always shows "Operative Quantity" entered by the end-user, converted to the product's UOM.
Enable automatic Price Difference Corrections
If set to Value = "Y", it allows the creation of Price Difference correction cost adjustments. - Enable Negative Stock Corrections
If set to Value = "Y", it allows the creation of Negative Stock correction cost adjustments. - Enable Cancel and Replace
If set to Value = "Y", it allows to Cancel and Replace booked sales orders. - Cancel and Replace - Associate shipment lines to new order
This preference requires "Enable Cancel and Replace" preference enabled, and it only works if "Create netting shipment on Cancel and Replace" preference is not enabled
If set to Value = "Y", it assigns the shipment(s) related to the cancelled sales order lines to the replaced sales order lines. - Cancel and Replace - Create netting goods shipment
This preference requires "Enable Cancel and Replace" preference enabled, and it only works if "Cancel and Replace - Associate shipment lines to new order" preference is not enabled
If set to Value = "Y", it automatically creates and completes a "netting" goods shipment related to the cancelled, voided and replaced sales orders. - CSV Text Encoding
If set to Value = "Y" allows to specify the encoding to be used in the Export to CSV process - Grid configuration
If set to Value = "Y" every time a user changes a grid view, those changes are saved in this window linked to this property. - Implements customer Credit Used calculation
This property is currently assigned to the Advanced Payables and Receivables management module with a property value ="Y". This property avoids the C_BP_SOCREDITUSED_REFRESH function calculation. - Implements an alternative Invoice Process button
This property is also assigned to the Advanced Payables and Receivables management module with a property value ="Y". This property avoids the usage of core invoice process button. - Implements an alternative Financial Management
Same applies to this which allows an alternative financial management for that module. - Implements Payment Monitor management
Same applies to this, which disables core's background process and button on the invoice header that manage the payment monitor. - Recent views shown in the workspace property set to "Y"
This allows that the recent views are shown in the user workspace - Show MRP and Production fields property set to "Y"
This allows that the MRP and production fields are shown - Not allow changing exchange rate and amount
If you set this property with value = "Y", exchange rate and amount are read-only in Add Payment from Sales Invoice, Purchase Invoice, Payment In, Payment Out, Financial Account, in Select Expected Payments from Payment Proposal and in Funds Transfer from Financial Account. - Write-off limit
This property with a property value ="Y" allows configuring write-off limit in Add Payment from Sales Invoice, Purchase Invoice, Payment In, Payment Out, Financial Account and in Select Expected Payments from Payment Proposal. The write-off limit is set for each Financial Account in Financial Account window. - Show Product Characteristics Parents
Values can be 1,2,3,4, etc. The number means how many levels in the hierarchy tree the user wants to show in form view in the Product window. For example, if the tree is: Colour->Green->Green light->0034 - Allow Multiple Tabs of Window
If set to Value = 'Y' allows opening more than one tab of a single window. - Attach By Default
- If set to Value = 'Y' the "Print Document" popup will not be shown, this popup is the one which asks if the user want to attach the document or instead of it just print it without attaching. When the value of the preference is set to 'Y' the document will be automatically attached.
- If set to Value = 'N' the "Print Document" popup will not be shown, this popup is the one which asks if the user wants to attach the document or instead of it just print it without attaching. When the value of the preference is set to 'N' the document won't be attached.
- If Value is Undefined the "Print Document" popup will be shown with two options: "Yes" and "No, just print it". If "Yes" is selected, the document will be attached. If "No, just print it" is selected, the document won't be attached.
- Direct Print
- If set to Value = 'Y' the Direct Print mode is enabled.
- If set to Value = 'N' or Undefined, the standard print mode is used.
- Allow Where Parameter
- If set to Value = 'Y', it allows getting the "_where" parameter from manual datasources. A warning will be shown if the "_where" parameter is sent.
- If set to Value = 'N' or Undefined, it will not allow getting the "_where" parameter from manual datasources. An exception will be thrown if the "_where" parameter is sent.
- Allow Unsecured Datasource Request
- If set to Value = 'Y', it allows doing unsecured datasource request. A warning will be shown if the current role does not have access.
- If set to Value = 'N' or Undefined, it will not allow doing unsecured datasource request. It is required to have a role with enough access permissions. An OBSecurityException is thrown if current role does not have access.
- External Rebuild, when this preference is defined as system level with its value set to Y, it will not be possible to rebuild the system from Module Manager Console after installing/updating modules. It forces rebuilding the system from command line.
- Bypass Access Level Entity Check, when this preference is defined with its value set to Y, it will allow bypassing the check that compares role's user level with entity's access level to completely prevent accessing latter one.
- Translate Yes/No Reference in Export To CSV, when this preference is defined with its value set to Y, the value of the columns whose reference is Yes/No will be translated to the current context language when exporting the grid of a standard window into CSV.
- Disable Linked Items Section, when this preference is defined for a window with its value set to Y, the Linked Items section will be disabled for that window. If there is not any window defined in the visibility settings, this section will be disabled for every window in the application.
- Enable Screen Reader, If this preference is set to Y the full screen reader will be enabled. This will improve the accessibility to visual impaired people.
- Excel Export Format, this preference allows setting the export format to be used when generating Excel reports. Two values are supported: XLS or XLSX. When this preference is not defined, XLSX is the default Excel export format.
- "Filter by documents processed since N days ago" is related to Create Lines From in Sales/Purchase Invoice. It limits transactions starting from the current date to the defined days ago. If the preference is not defined then queries retrieve all records created since one year ago (365 days), else it will be filtered by the count of days defined as the preference value.
- if the Property List checkbox is not checked, the preference is configured as an attribute. An attribute is a free text attribute which can get whatever value.
- "ShowAuditDefault" attribute allows enabling the Audit Trail feature. Audit Trail feature allows tracking every change done to any Etendo table or entity.
- "ShowAcct" attribute allows showing Post buttons and Accounting tab whenever its value is set to "Y".
- "ForcedLinkWindowDBTableName" where "DBTableName" is the name of the table in database.
This attribute allows a direct navigation to the window which UUID is set as attribute value, instead of using the standard navigation logic. - "ModalModuleModuleJavaPackage" where "ModuleJavaPackage" is the name of the module's Java Package name or "ModalModuleModuleUUID" where Module UUID is the unique identifier of the module in the data base.
This attribute defines whether the processes within a module invoked from a menu or a button or a tab are opened in browser popups (attribute value = "N") or in modal popups (attribute value ="Y"). - Browser popups implies the deployment of the process in a new window in the browser
- Modal popups implies the deployment of the process in another layer inside the application window.
- "ModalProcessProcessUUID" where Process UUID is the UUID of the process.
This attribute defines whether a given process is opened in modal popup (attribute value ="Y") or in browser popup (attribute value ="N"). - This attribute has a higher preference than ModalModule, therefore it is possible to define all processes in a module to open in modal popups but some of them.
- "SaveAttachmentsOldWay"
This attribute defines whether attachments should be saved using the old attachment model.
Preferences Visibility
Preference visibility section defines the levels where a preference is going to be used and therefore applied.
Preference levels can be set to a given value or left empty. If a level is left empty, the preference will be valid for any value of that level.
For instance, if user level is empty, any user will be able to see that preference. In case the same preference has values at different levels, the most specific one will then be used.
Available levels are:
- Client - if this level is set to empty or to System, the preference will be visible from any client used to log in.
- Organization - if this level is set to empty or to (*), the preference will be visible from any organization used to log in.
- User - if this level is set to a given user, only that user will be able to see that preference once logged in.
- Role - if this level is set to a given role, only that role will be able to see that preference.
- Window - if this level is set to a given window, only that window will be able to see that preference.
Preference Priority
Preference Priority section defines priority of multiple preferences defined for same Property
Preference Priority will be applied while loading the default Preferences of the Logged in Role.
- Check Priority by Client (Visible at client) :
- Undefined client visibility is handled as SYSTEM.
- If pref1 or pref2 either of them which does not set to SYSTEM CLIENT will be considered.
- If pref1 or pref2 both have value set and both not set to SYSTEM CLIENT, then it will check Next Priority Level.
- Check Priority by Organization (Visible at Organization) :
- If pref1 or pref2 either of them which has value set will be considered.
- If pref1 or pref2 both have values set then, It will check the depth of the value in Organization Tree and Highest Organization's Preferences will be Considered.
- If pref1 or pref2 both have the same value set then it will check Next Priority Level.
- Check Priority by user (Visible at User) :
- If pref1 or pref2 either of them which has value set will be considered.
- If pref1 or pref2 both have value set then it will check Next Priority Level.
- Check Priority by Role (Visible at Role) :
- If pref1 or pref2 either of them which has value set will be considered.
- If pref1 or pref2 both have a value set then it will check Next Priority Level.
- Check Priority by Window (Visible at Window) :
- If pref1 or pref2 either of them which has value set will be considered.
- If pref1 or pref2 both have a value set then it will check Next Priority Level.
- SAME PRIORITY:
- If all the above levels are the same then it will and will consider preference with column "selected"=true.
Preferences Values
When logging in Etendo or entering the role or the organization, the preferences visible for that user, role, client, organization or window are stored in the Etendo session. Those session values can be obtained by using the method: org.openbravo.erpCommon.utility.Utility.getContext method.
Additionally:
- It is possible to look for the value of a given preference by using the method: org.openbravo.erpCommon.businessUtility.Preferences.getPreferenceValue.
This method shows an exception in case: - a preference property does not have a value defined for the required visibility level
- or there is a conflict caused by the definition of more than one property values for the same preference property for a given visibility level
Conflicts can be manually resolved by checking and modifying the preference.
Session Preferences
Application > General Setup > Application > Session Preferences
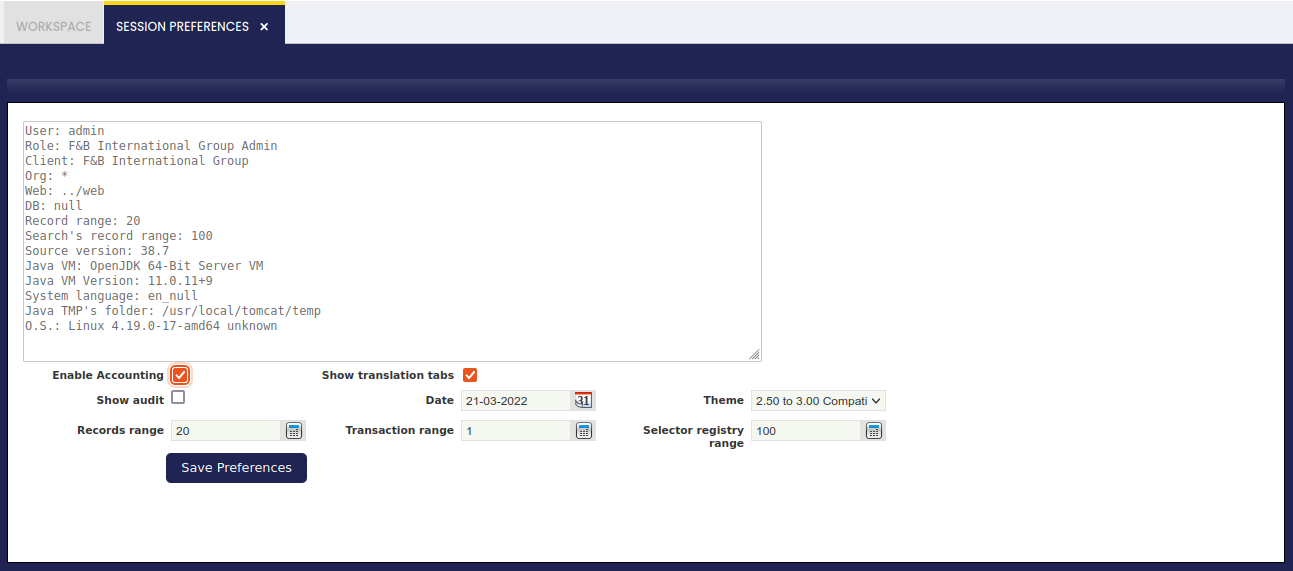
Session preferences allow showing or hiding accounting tabs or translation tabs for a given user, role, client and organization.
As shown in the image above, session preferences window allow the user to setup a list of session preferences for the user, the role, the client and the organization entered while login in Etendo.
That user will need to have access rights to this window to get these preferences setup.
Available session preferences which can be shown or hidden are:
- Enable Accounting (previously called Show accounting tabs), this option allows showing the tabs defined as "accounting tabs" in a window, besides this option allows showing the process buttons that "Post" a document.
The complete list of accounting tabs is listed below. This option if selected set the "ShowAcct preference to "Yes".
| Window Name | Tab/Sub-Tab Name |
| General Ledger Configuration | General Ledger Configuration |
| General Ledger Configuration | Documents |
| General Ledger Configuration | General_Accounts |
| General Ledger Configuration | Defaults |
| Accounting Transaction Details | Header |
| Asset Group | Accounting |
| Asset | Accounting |
| Business Partner | Customer Accounting |
| Business Partner | Vendor Accounting |
| Business Partner | Employee Accounting |
| Business Partner Category | Accounting |
| Financial Account | Accounting History |
| Financial Account | Accounting Configuration |
| Financial Account | Accounting |
| G/L Item | Accounting |
| Product | Accounting |
| Product Category | Accounting |
| Tax Rate | Accounting |
| Warehouse and storage bin | Accounting |
- Show Translation tabs, this option allows showing translation tabs.
Translation tabs are shown in many Etendo windows. This option, if selected, sets the "ShowTrl" preference to "Yes". - Show Audit - same way, this option allows showing the Audit Trail information. Audit Trail information can be found as well in many Etendo windows under the group section "Audit".
This option, if selected, sets the "ShowAuditDefault" preference to "Yes". - Theme or skin - there are two possible options, "Default" or "Classic" skin or "2.50 to 3.00 Compatible".
- Transaction Range - this one is about the number of days (counting backwards from current day) used in the implicit filter of sales order or purchase order by example. Implicit filters are the filters used not to show documents that have been completed the last x days to avoid overflow.
- "Records Range" and "Selector registry range" only applies to 2.50 views. Etendo 3 allows scrolling down to see all the records in a window, tab or selector.
Finally, the Save Preferences button allows saving the changes.
Number to Word Converter
Application > General Setup > Application > Number to Word Converter
Info
To be able to include this functionality, the Platform Extensions Bundle must be installed. To do that, follow the instructions from the marketplace: Platform Extensions Bundle. For more information about the available versions, core compatibility and new features, visit Platform Extensions - Release notes.
This module provides the infrastructure to convert a number into its equivalent in words. This functionality is especially useful while printing checks.
Once installed, this module creates a new window which can be found in the application path: General Setup // Application
Some fields to note are:
Organization that is the legal entity which requires printing checks in a given language.
Language that is the language's words into which the amounts to pay needs to be converted.
Javaclass that is the route where the Javaclass that converts amounts into a given language is located.
The "javaclass" field is required but empty by default unless another module such as the Number to Word (Spanish) or the Number to Word (English) is installed and properly applied to the legal entity for which it is required to print checks. Additionally, the Javaclass can be filled in manually.
Window Personalization
Application > General Setup > Application > Window Personalization
Overview
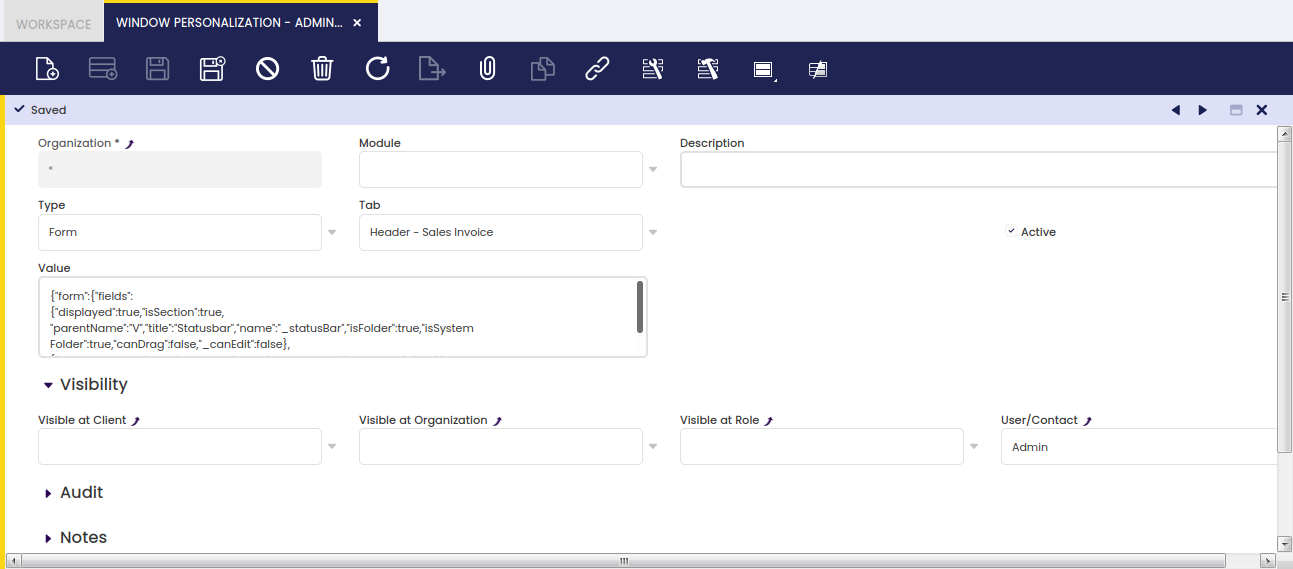
Etendo allows the customization of grid and form views. Customize windows and form views are stored once saved in the Window Personalization window. Etendo windows can be shown in Form View and in Grid View, both ways can be customized as required.
Window Personalization
Window Personalization lists and maintains the customized form views.
Once a form has been customized, saved and listed in the "Window Personalization" window, it is possible to configure the levels of visibility where that form personalization will apply.
Alert
Application > General Setup > Application > Alert
Overview
Alerts are notifications which inform about events happening whenever an alert rule has been properly defined to monitor those events.
The way "Alerts" work in Etendo is described below:
- Alert rules need to be previously defined as SQL queries. SQL queries define the event that is going to be monitored.
For instance, "Products without a defined price", "Products under stock" or "Bank account without accounting information" - An alert rule can be applied to every Etendo user or just to a set of them. Alert recipients are the Etendo users for which a given event is going to be monitored.
- An Etendo background process is permanently checking if the SQL query defined in each of the active rule alerts return any record.
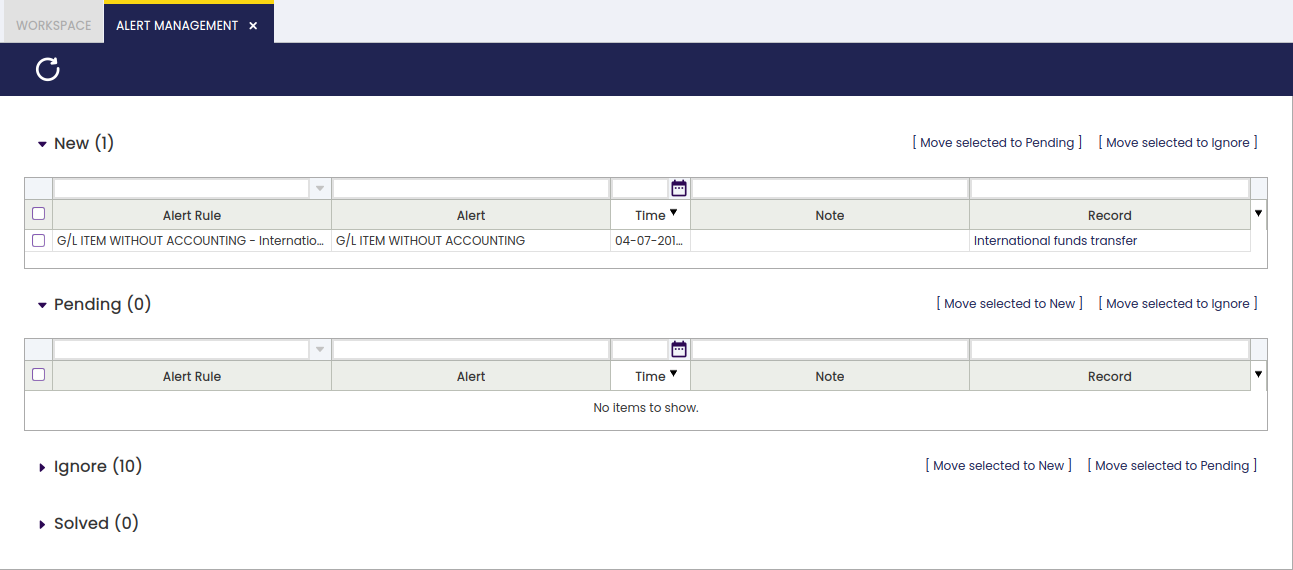
- If that is the case, Etendo creates and returns a new alert instance, which is saved in the "Alert Management" window in "New" status.
The number of alerts instances informing about events being monitored happening is shown in the "Top Navigation" menu:
Alerts instances can be visualized and managed in the Alert Management window which is opened by clicking the "Alert" option of the Top Navigation menu.
Alerts can have 4 different status:
- New - new alerts instances which reflect the events monitored happening.
- Pending - acknowledge alert instances for which an end-user action is pending to be done to get them solved or fixed.
- Ignore - not applicable alert instances which must be ignored.
- Solved - alert instances solved as the event happening is fixed or solved.
The way to manage alerts instances is by manually selecting and moving them to the next or previous status once they are manually acknowledged, ignored or solved.
Alert Rule
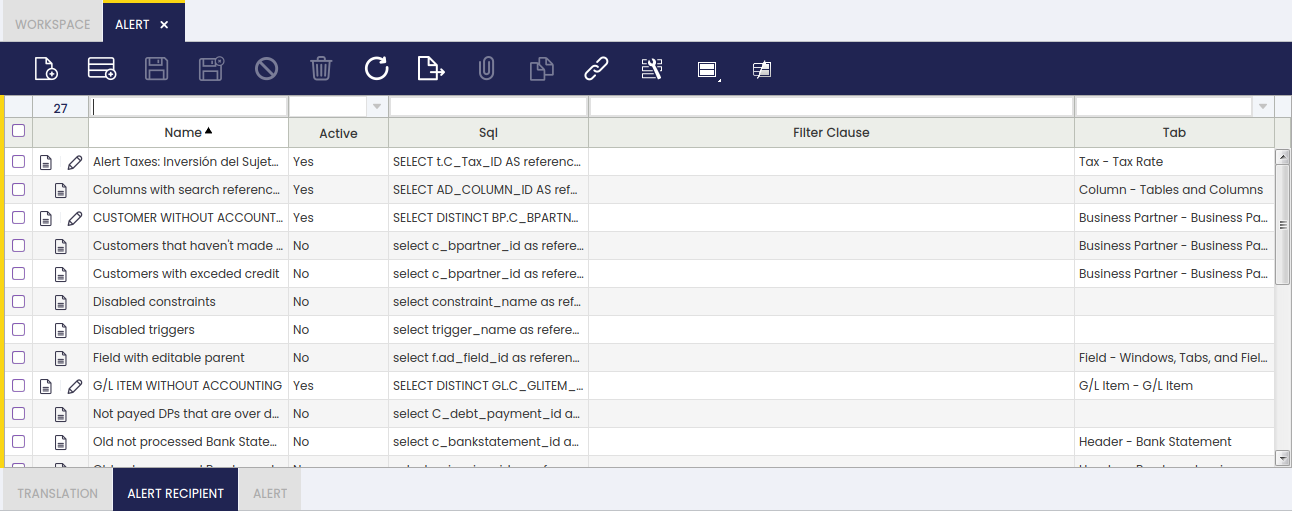
Alert window allows the definition of alert rules as SQL queries which define the event to be monitored and how it will be monitored.
Alerts are defined by entering below data:
- The "Name" of the alert which is the event to be monitored.
- The "SQL" query.
- and the "Tab" where the alert instance can be fixed or solved.
Translation
Alerts can be translated to any language required.
Alert Recipient
Alerts can be allocated to specific users or contact or to all of them.
Warning
If no Role or User is configured in the Alert Recipient tab of a given alert, that alert will apply to any Etendo user or role.
Etendo supports alerts notification to user or roles by email:
- for this, it is required to properly configure e-mail server, account and password for the corresponding client in the header of the Client window, section "Request Management".
Alert
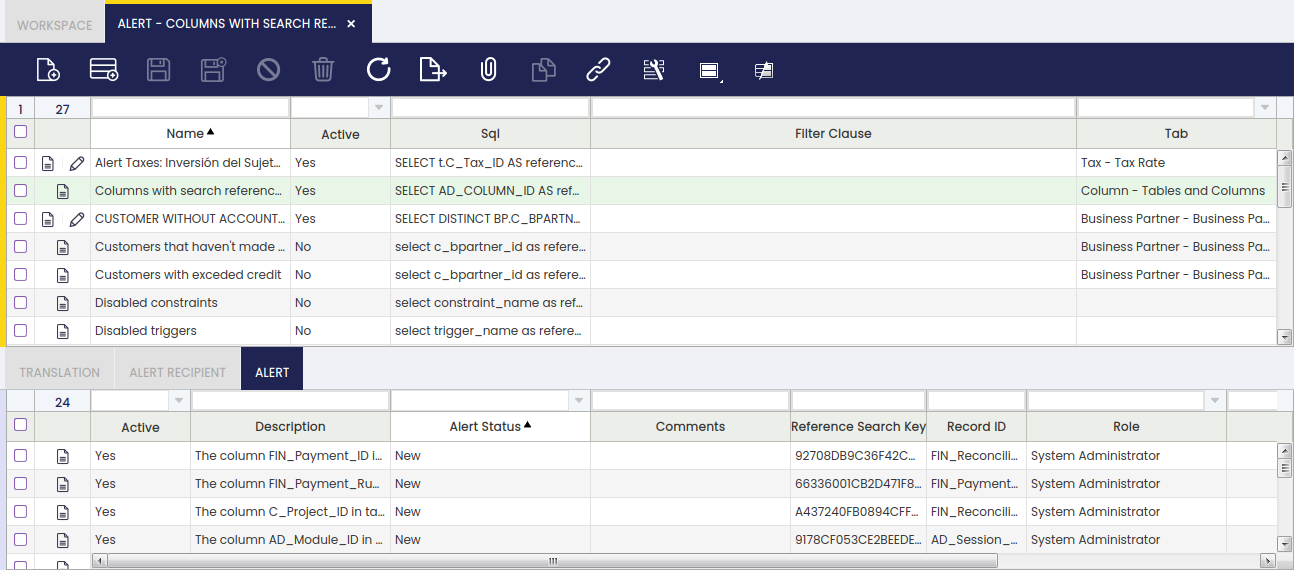
Alert tab list the events happening which generate the corresponding alert.
This work is a derivative of General Setup by Openbravo Wiki, used under CC BY-SA 2.5 ES. This work is licensed under CC BY-SA 2.5 by Etendo.


