How to Create a Tree Selector
IMPORTANT: THIS IS A BETA VERSION
This page is under active development and may contain unstable or incomplete features. Use it at your own risk.
Overview
The Tree Selector is a specialized variant of the standard Etendo Selector, designed specifically for tables that have an associated tree structure. Its configuration and usage follow the same principles as a standard selector, with one key difference: instead of displaying data in a traditional grid, it presents both the dropdown and popup using a tree grid, allowing users to navigate hierarchical data more intuitively.
Drop down tree:
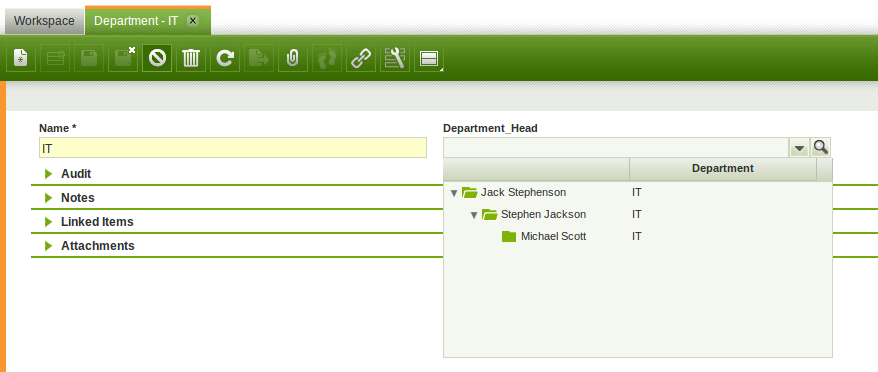
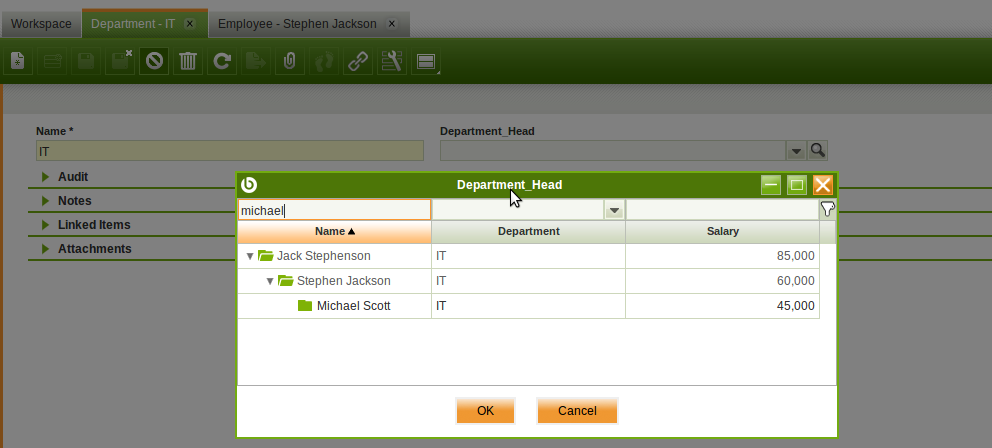
Popup tree:
Defining a Tree Selector
Defining a tree selector is very similar to defining a standard selector.
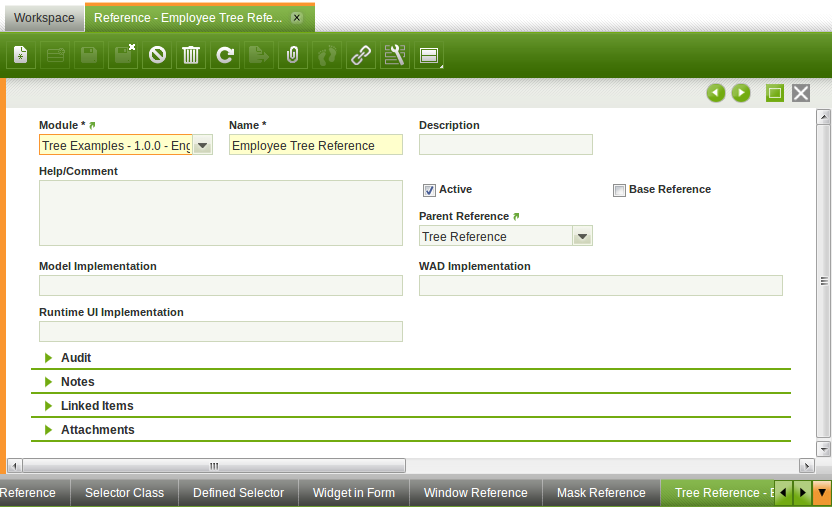
Define a Reference
Open the Reference window and create a new record in the header tab. These are the most relevant fields:
- Name, Description and Help should be set to a value specific for the reference you are creating
- Base Reference must be set to false
- Parent Reference must be set to Tree Reference
- Model, WAD and Runtime UI Implementation can be left empty most of the time if the reference is not a base reference.
Define the Tree Selector
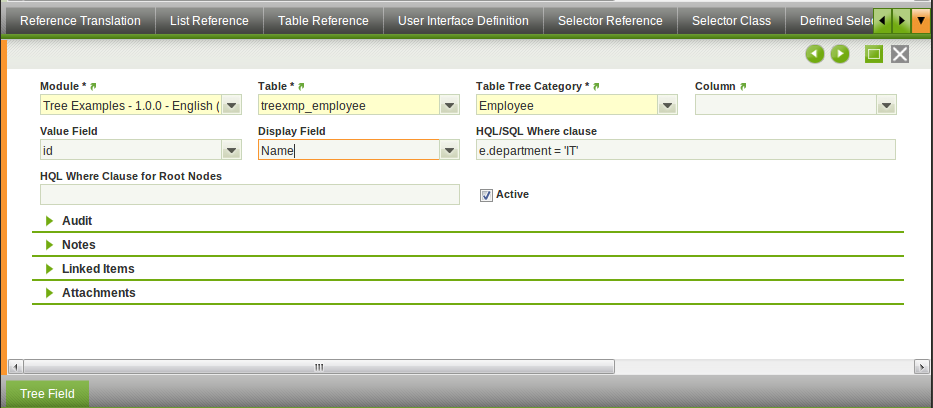
Create a new record in the Tree Reference tab.
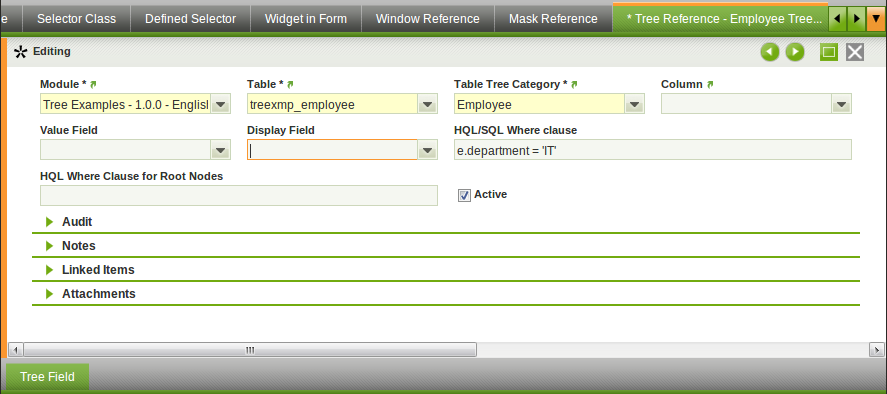
Some fields to note:
- Table: Tree Table this selector points to.
- Table Tree Category: Table Tree Category that will be used to represent hierarchically the data of the selected table.
- Column: the column in the referenced table to which the foreign key column points. If nothing is set here (the default) then the primary key column is used.
- Value Field: this tree selector field is set as the value and stored in the database as the foreign key field.
- Display Field: this selector field is displayed in the drop-down of the suggestion box.
- HQL Where Clause: this where clause is used to filter the data read from the database.
- HQL Where Clause for Root Nodes: this where clause is used to specify what are the root nodes for this tree. If it is not set, then the root nodes will be those who have parentId = null or parentId = '0'.
At this point, no Tree Selector Fields have been defined yet, so the Value Field and Display Field are empty.
Define the Tree Selector Fields
The next step is to define the Tree Selector Fields. A selector field can have several purposes:
- Be used as Value Field
- Be used as Display Field
- Be shown in the drop down tree
- Be shown in the popup tree.
A selector must have at least two fields:
- One field will be used as Value Field
- The other field will be used as Display Field and shown in the drop down tree and popup tree.
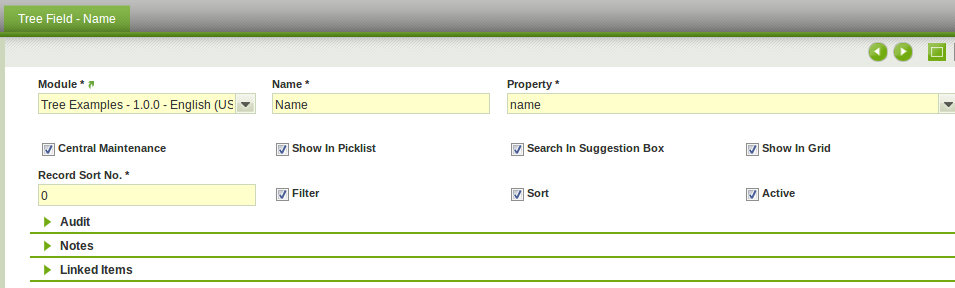
Some fields to note:
- Name: Name of the field. It will be used in the title of the column in the popup.
- Property: is a column/property from the table selected in the Tree Reference tab.
- Central Maintenance: if checked then the name, description and help/comment are copied/used from the column.
- Show in Picklist: if checked this field will be visible in the drop down tree.
- Search in Suggestion Box: if checked, this field will be used to filter the results when text is entered in the tree form item.
- Show in Grid: if checked this field will be visible in the popup tree.
- Record Sort No: Sequence number of the field. It is used to establish the field order in the drop down tree and the popup tree.
- Filter: If set, this field will be filterable in the popup
- Sort: If set, this field will be sortable in the popup
Set the Value and Display Fields of the Tree Selector
Once the Tree Selector Fields have been defined, the Value Field and Display Field fields of the Tree Reference tab can be set.
This work is a derivative of How to Create a Tree Selector by Openbravo Wiki, used under CC BY-SA 2.5 ES. This work is licensed under CC BY-SA 2.5 by Etendo.