Install Etendo - Local Development Environment
Overview
This guide covers setting up a local Etendo development environment. It uses IntelliJ IDEA with a local Tomcat instance to run Etendo, and Docker to run Copilot and Main UI as containerized services.
Prerequisites
Before starting, make sure the following are ready:
- System requirements
- PostgreSQL configured
- GitHub credentials
- Docker version
26.0.0or higher - Docker Compose version
2.26.0or higher - OpenAI API Key — required for Copilot. Use your own key from OpenAI or contact Etendo to get one. For details on supported providers, see the Copilot Installation guide.
Warning
Avoid installing Docker via Snap — its sandbox restrictions may prevent Etendo Docker containers from accessing host directories correctly. Install Docker following the official guide for your distribution.
Installation
1. Clone the Project
cd /path/to/workspace
git clone https://github.com/etendosoftware/etendo_base.git EtendoERP
cd EtendoERP
2. Add GitHub Credentials
Edit gradle.properties and add your GitHub credentials. To generate them, follow the Use of Repositories in Etendo guide.
3. Expand the Project
Source format is recommended for local development as it gives full access to the codebase.
Uncomment the core dependency in build.gradle:
Info
To know the available versions, visit the Etendo Release Notes.
4. Apply the Local Template
Run the following task to configure all required variables for Etendo, Copilot, and Main UI:
When prompted, enter your OpenAI API Key.
The template configures gradle.properties automatically with all required settings for a local environment, including Copilot and Main UI Docker services.
Availability
setup.applyTemplates is available from Etendo 26 onwards, or in earlier versions with the Etendo Gradle Plugin 3.0.0 or higher.
Info
For details about available templates, options, and advanced usage, see the How to Use Setup Apply Templates guide.
Alternative: Manual Configuration
Configure variables directly in gradle.properties and apply them by running:
Alternative: Interactive Setup
For a fully guided, property-by-property configuration, run the interactive setup instead:
For more details, see the How to Use the Interactive Setup guide.5. Start Docker Services
This starts the Copilot and Main UI containers. Both are included in the base installation.6. Install Etendo
This creates the database, compiles the sources, and deploys to the local Tomcat directory.
Run in IntelliJ
-
Download and install IntelliJ IDEA Community Edition.
-
Open the Etendo source directory with IntelliJ:

-
Install the Smart Tomcat plugin: go to
Settings>Pluginsand search forSmart Tomcat.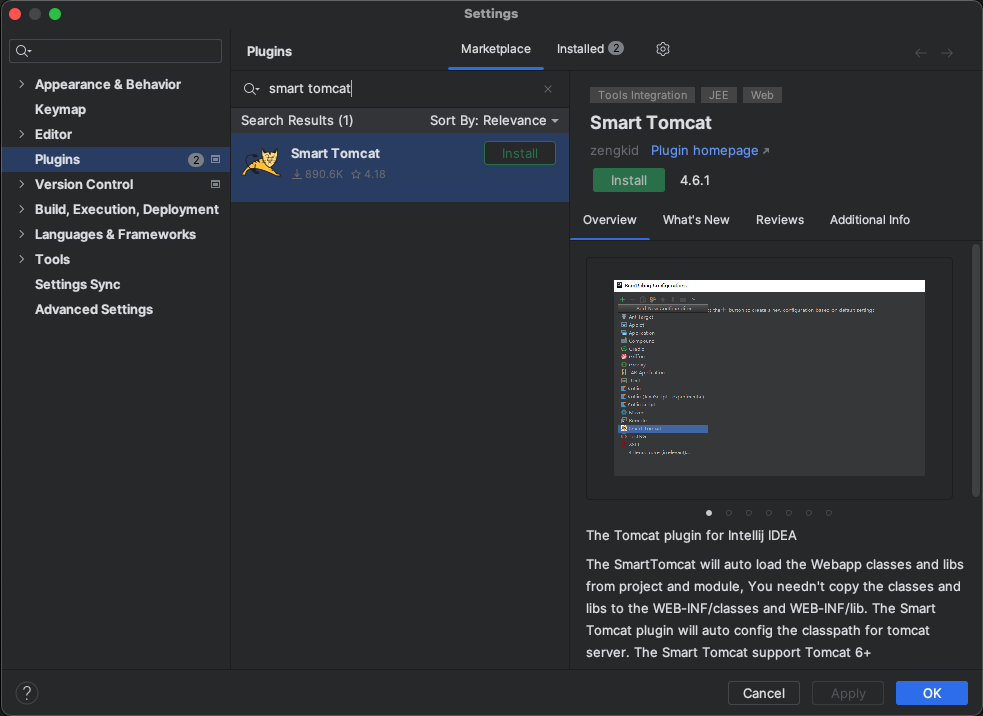
-
Download Apache Tomcat and unzip it inside the project directory.
-
Set up the Tomcat run configuration:
-
Go to
Current File>Edit Configurations.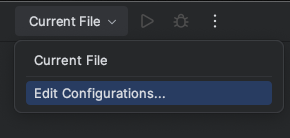
-
Click
+and add a new Smart Tomcat configuration with the following values:- Name:
Tomcat - Tomcat Server: select the unzipped Apache Tomcat directory
- Deployment directory: select the
WebContentdirectory in the project - Context path: use the same value defined in
gradle.properties(default:/etendo) - Before launch: remove all default tasks
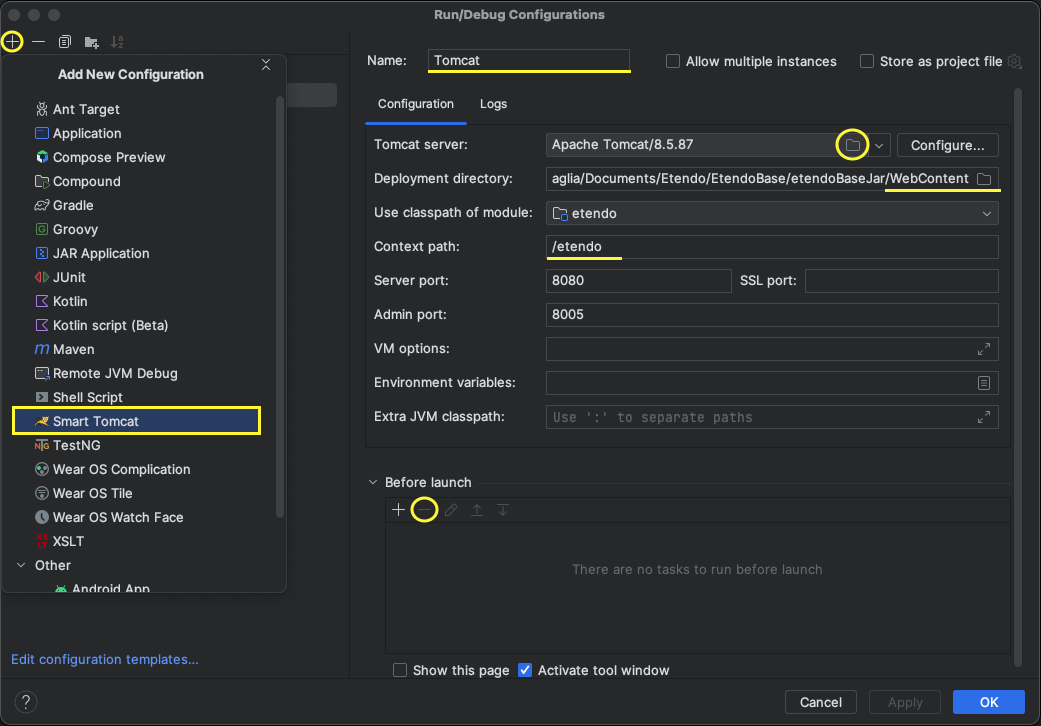
- Name:
-
-
Start Tomcat from the run configuration:

-
Download and install IntelliJ IDEA Ultimate.
-
Open the Etendo source directory with IntelliJ.
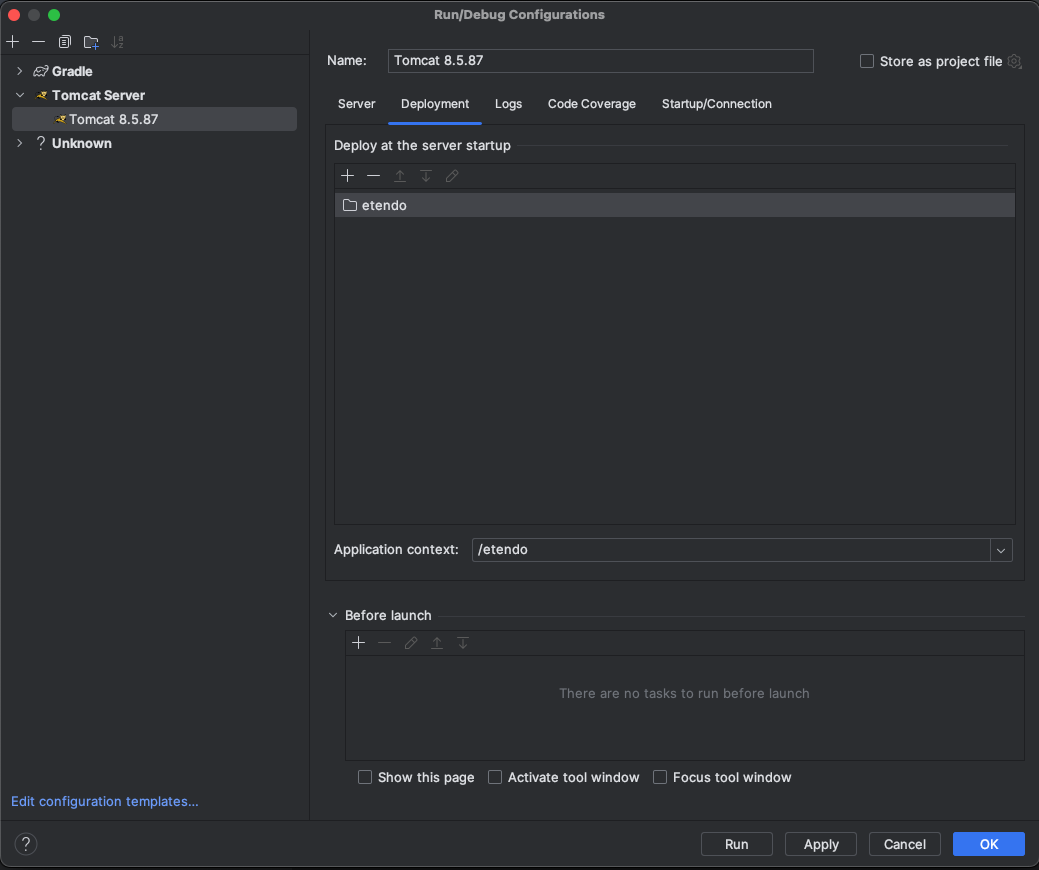
-
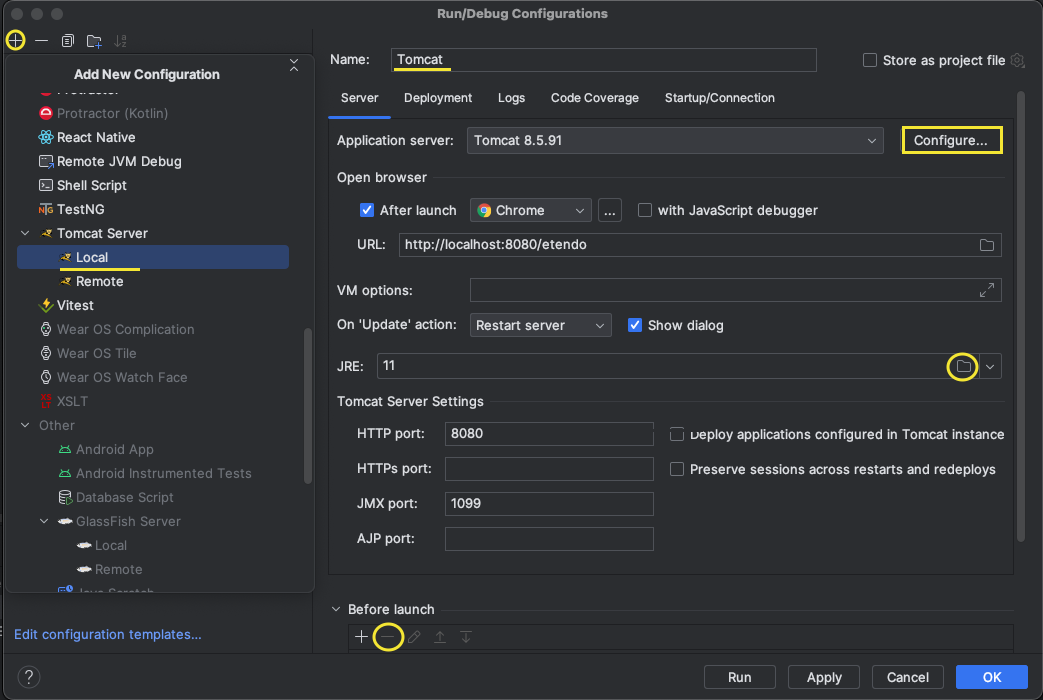
Set up the Tomcat run configuration:
-
Go to
Current File>Edit Configurations. -
Select the Tomcat configuration from the list and verify the Tomcat server settings.
-
In the Deployment section, add external sources and select the
${env.CATALINA_HOME}/webapps/etendofolder.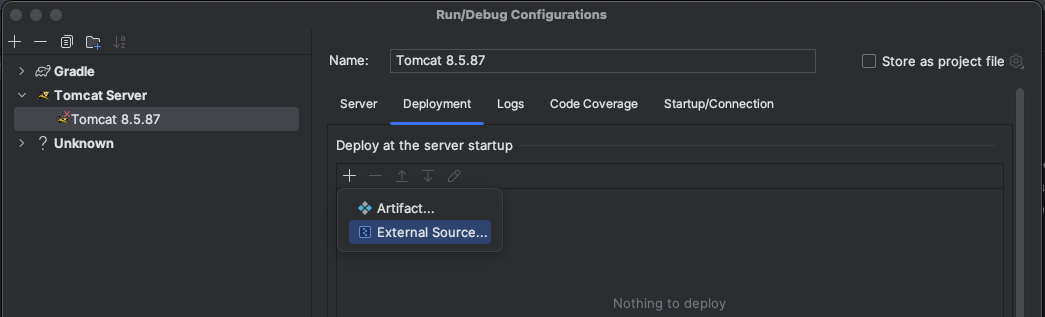
-
-
Start Tomcat from the run configuration.
Access the Installation
Once Tomcat and Docker services are running:
| Interface | URL |
|---|---|
| Main UI | http://localhost:3000 |
| Classic UI | http://localhost:8080/etendo |
Default credentials
User: admin
Password: admin
Optional
Enable Etendo Logs
-
Open
config/log4j2-web.xmland uncomment theConsoleappender reference: -
Run
smartbuildto apply the change:
This work is licensed under CC BY-SA 2.5 ES by Futit Services S.L.