Etendo RX
Javapackage: com.etendoerp.etendorx
Etendo SSO Login
Etendo allows you to authenticate using these external provider accounts: Google, Microsoft, LinkedIn, GitHub and Facebook. Using the Single Sign-On (SSO) protocol is possible due to the integration through:
Set up Etendo to Login with EtendoAuth Middleware Service (Recommended)
To enable login to Etendo using external providers (Google, Microsoft, LinkedIn, GitHub or Facebook), you need to perform two main steps:
- Enable the SSO (Single Sign-On) feature through a system preference
- Configure the connection settings in
gradle.properties
-
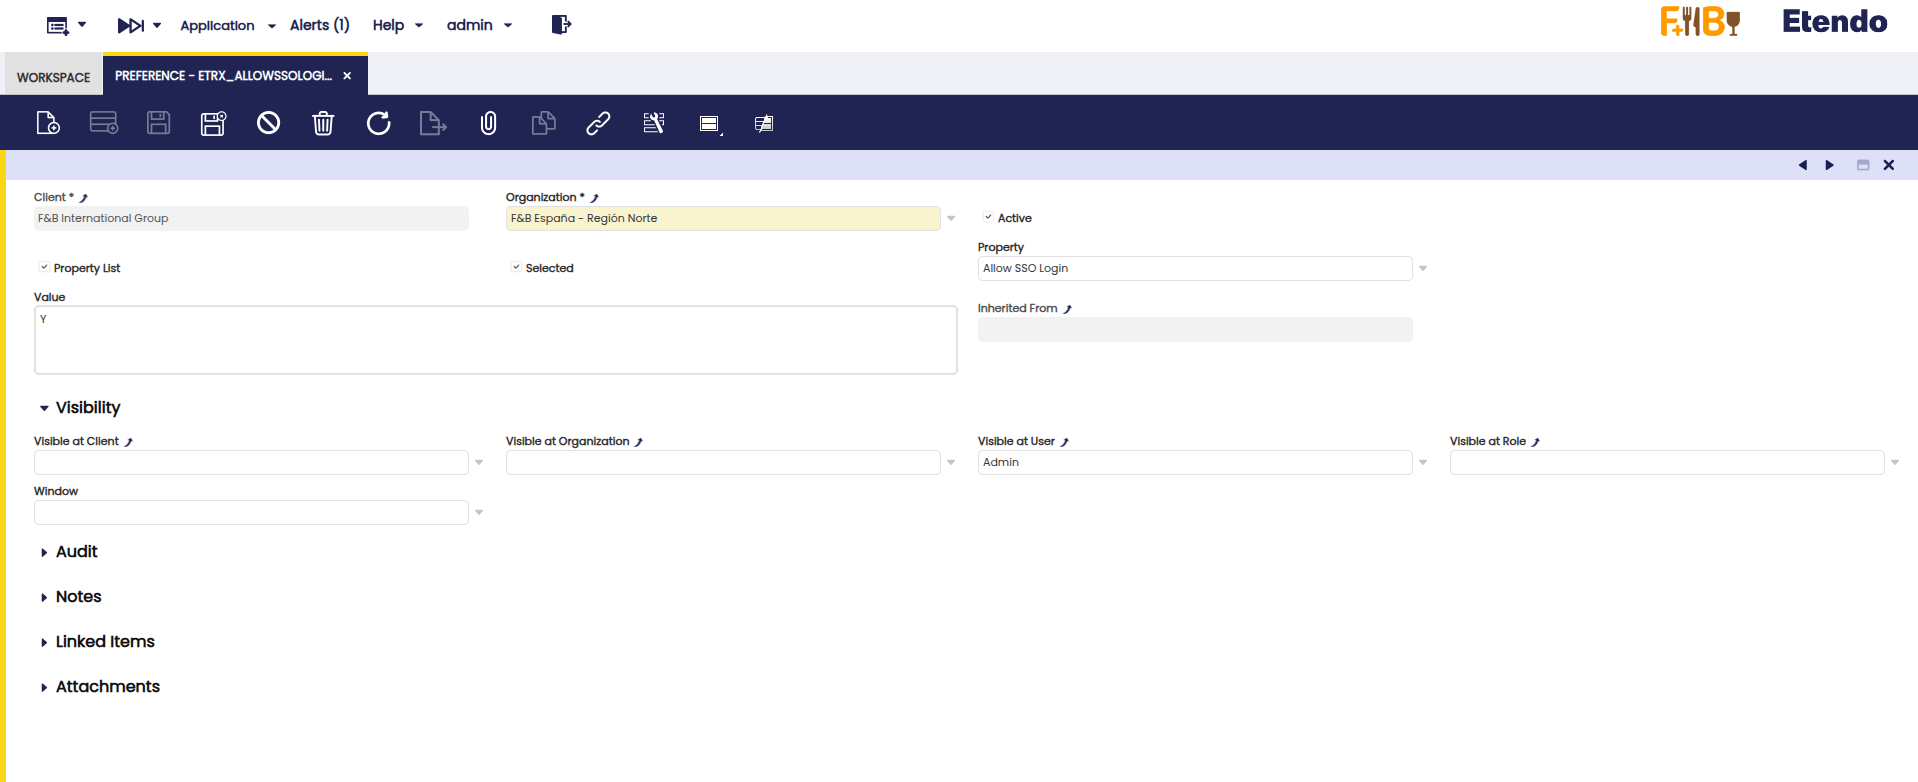
Enable the SSO Login Preference
- Log in as System Administrator
- Go to the Preferences window
-
Create a new preference with the following settings:
- Property:
Allow SSO Login - Selected: Yes
- Value:
Y
- Property:
-
Configure EtendoAuth Middleware Integration
To authenticate via the EtendoAuth Middleware, follow these steps:
- Open the
gradle.propertiesfile -
Add the following properties:
gradle.propertiessso.auth.type=Middleware sso.middleware.url=https://sso.etendo.cloud sso.middleware.redirectUri=http://localhost:8080/etendo/secureApp/LoginHandler.html authentication.class=com.etendoerp.etendorx.auth.SWSAuthenticationManagerWarning
This module cannot be configured together with Etendo Advanced Security because both use the
authentication.classproperty.Note
During development, you can use
localhost. However, for production, set your actual domain.With these settings, Etendo will be able to authenticate users through external login providers using the middleware.
Potential SSO Configuration Mismatch
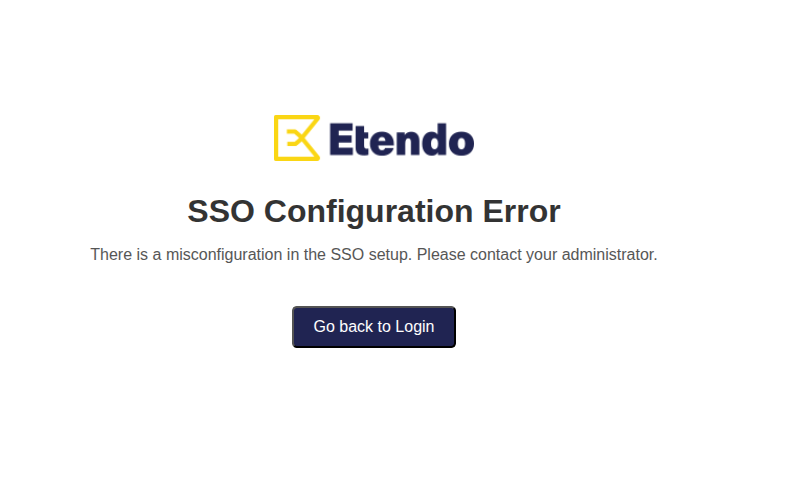
If any of the steps above are omitted, attempting to log in using an external provider will display the following error message:
To resolve this issue, ensure that both the SSO preference and the corresponding entry in
gradle.propertiesare correctly configured and consistent with each other.
- Open the
Info
For more information about the use of the SSO Login functionality, visit the SSO Login User Guide.
How to Integrate your own Auth0 Login Provider with Etendo (Optional)
This option is recommended only if you need to implement your own authentication service and cannot use the EtendoAuth Middleware service. Follow this guide to configure an Auth0 application and enable social login in Etendo.
-
Create a New Auth0 Application
- Go to the Auth0 Dashboard: https://manage.auth0.com/dashboard
- Sign up or log in to your Auth0 account.
-
Create a new application for the Etendo integration:
- In the left-hand menu, go to Applications → Applications.
- Click Create Application in the top-right corner.
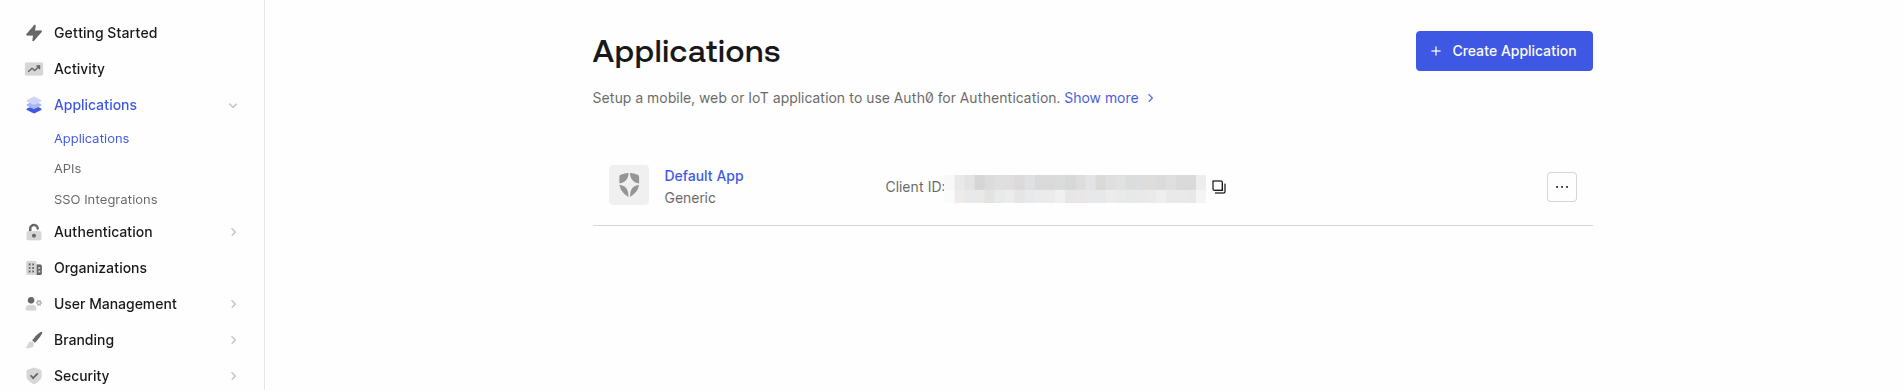
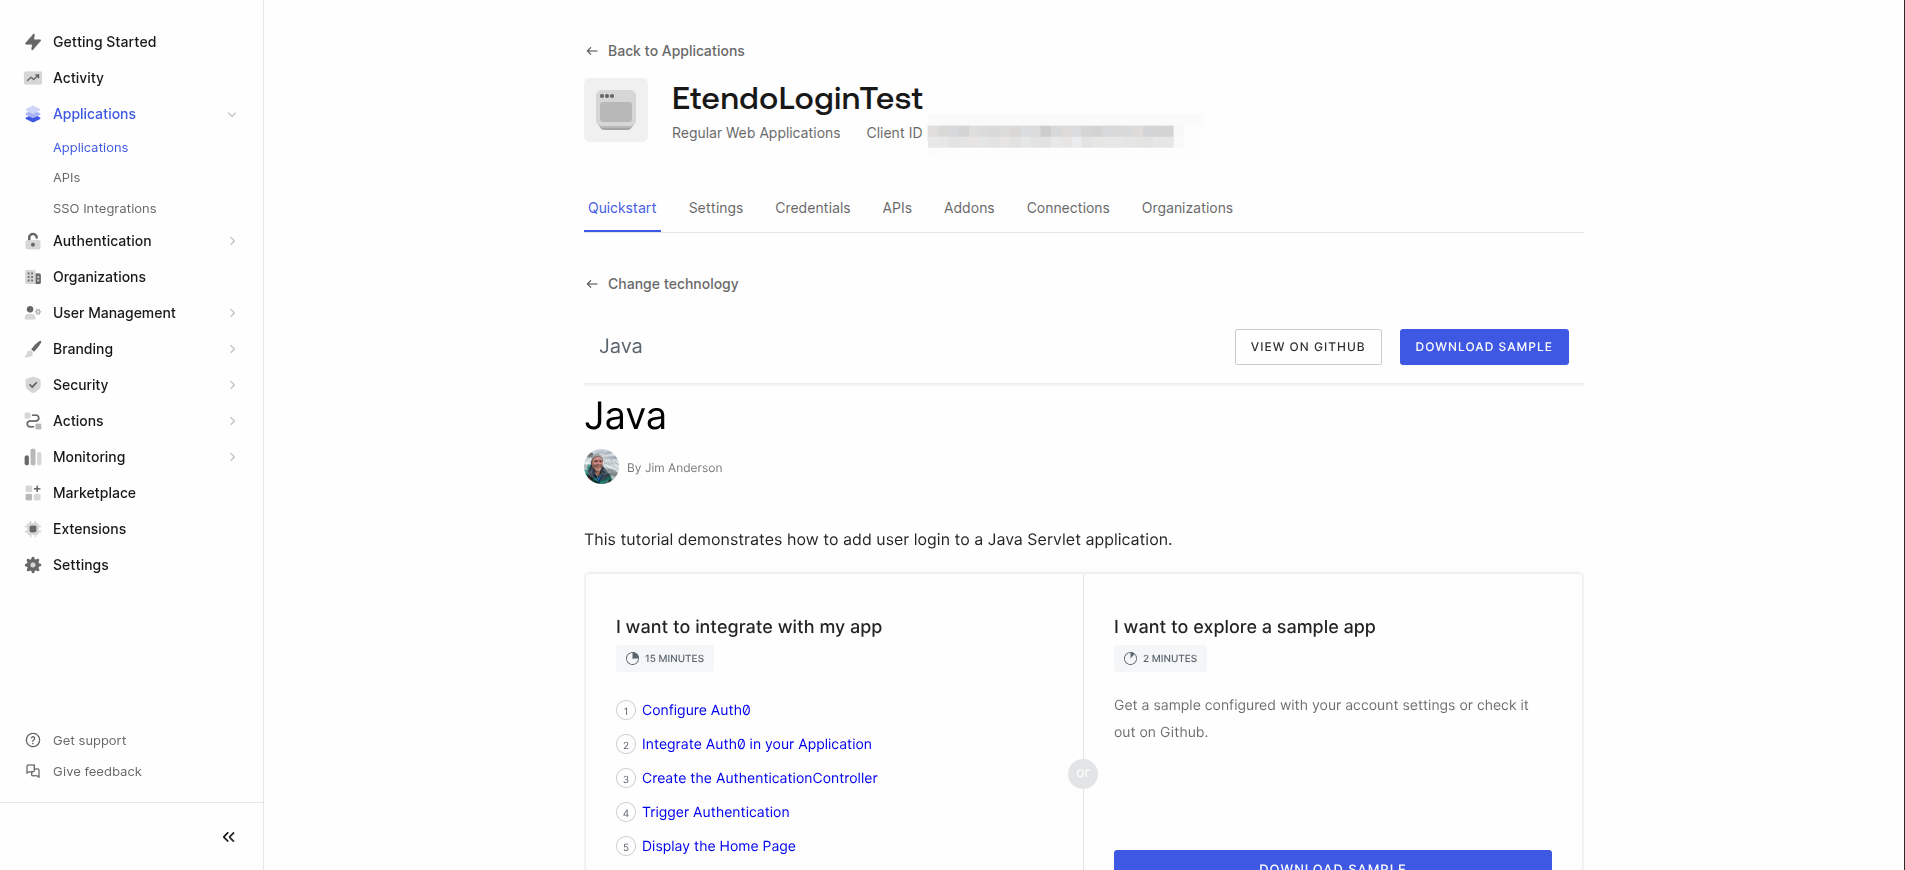
- Choose a name and select Regular Web Application.
-
Choose the Technology Stack
-
After creating the application, choose the technology used in the project. For Etendo, select Java.
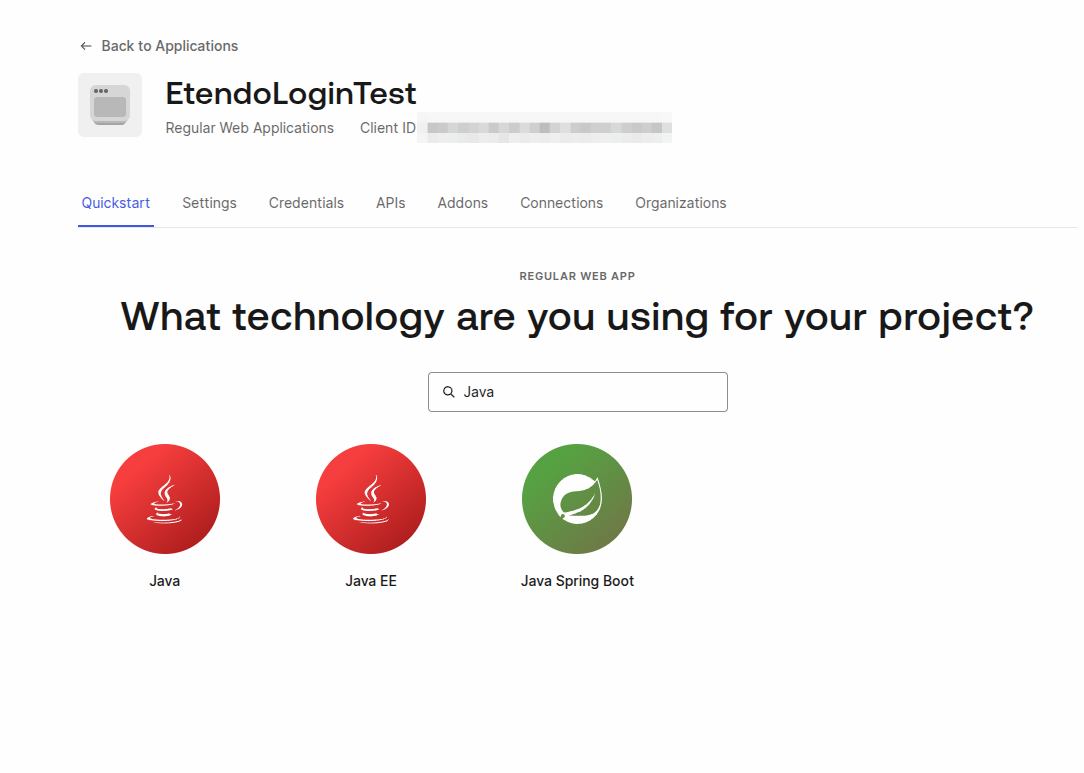
-
You will be redirected to the Quick Start tab of the newly created application.
-
-
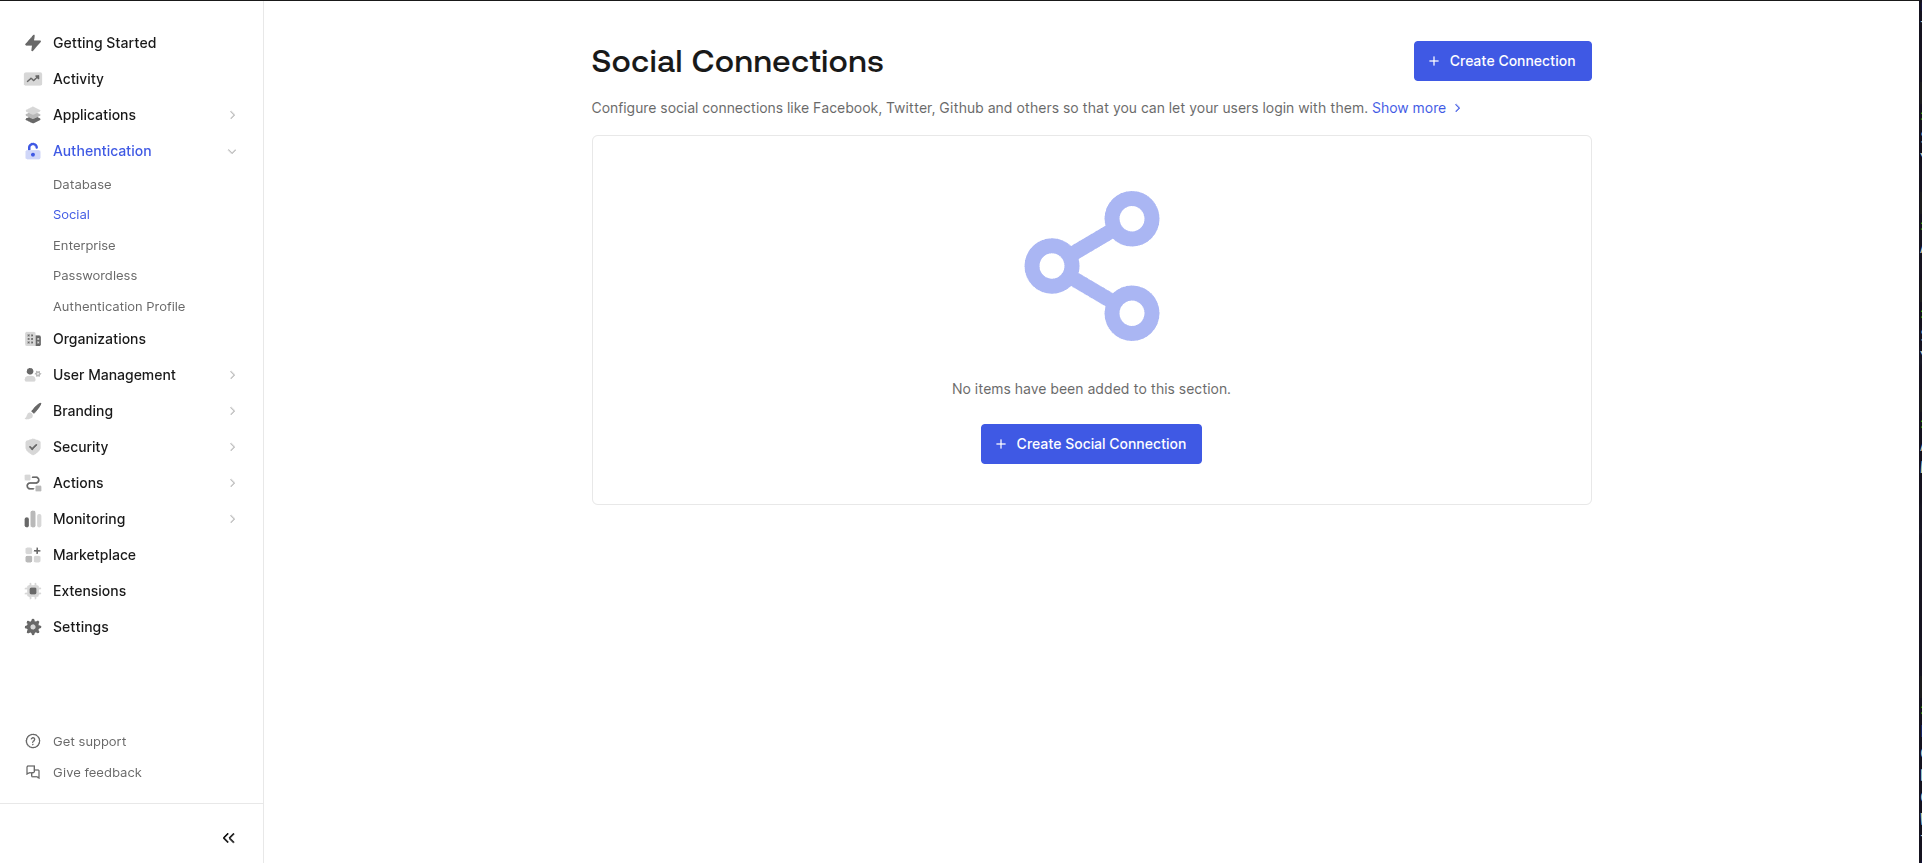
Configure Social Login Providers
-
In the left-hand menu, go to Authentication → Social.
-
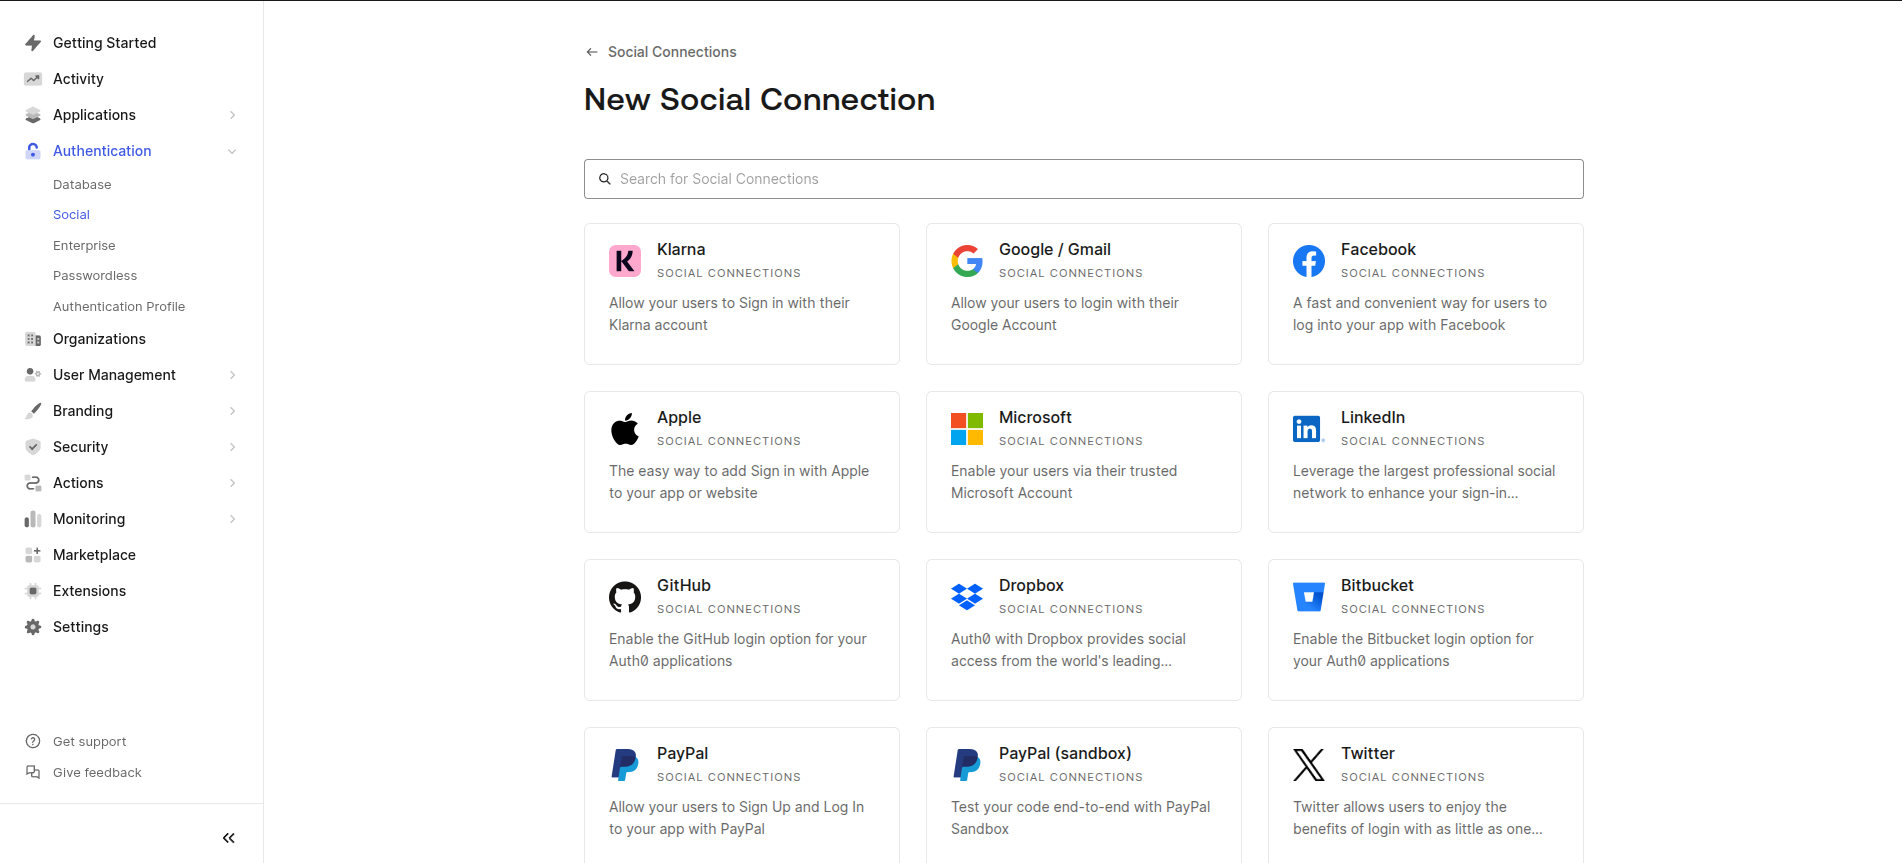
Click Create Social Connection.
-
Choose the selected social login providers (Google, Facebook, etc.).
-
Follow the configuration steps provided by
Auth0for each provider.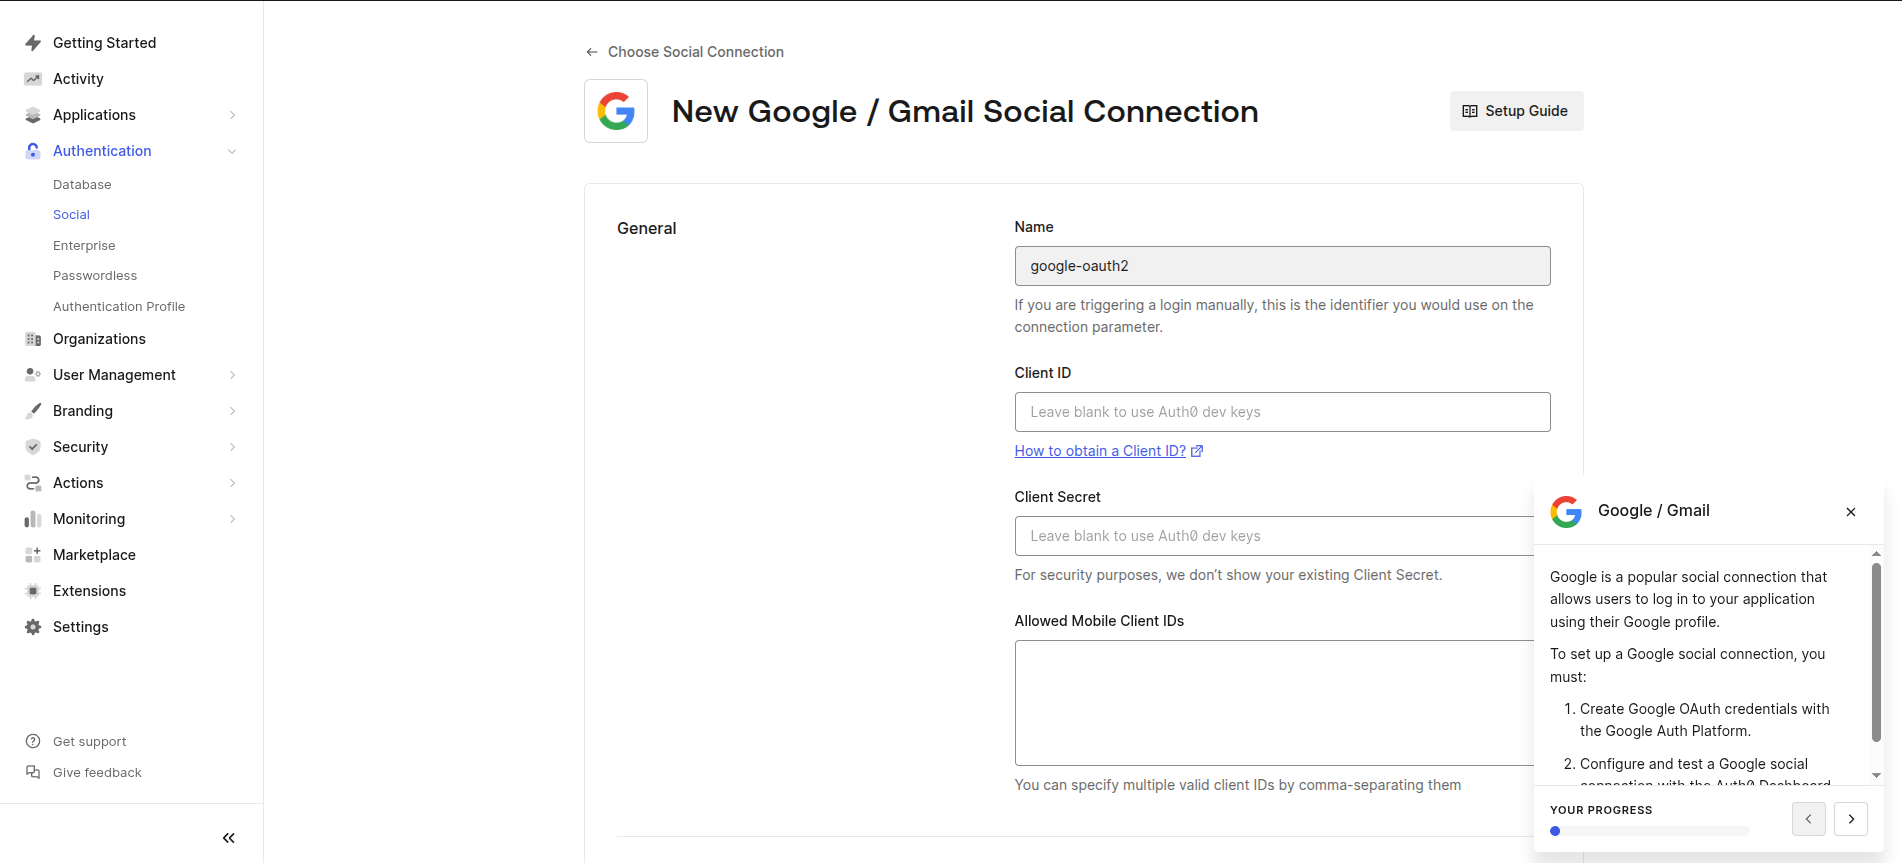
-
After setup, go to the Applications tab within the connection and link it to your application.
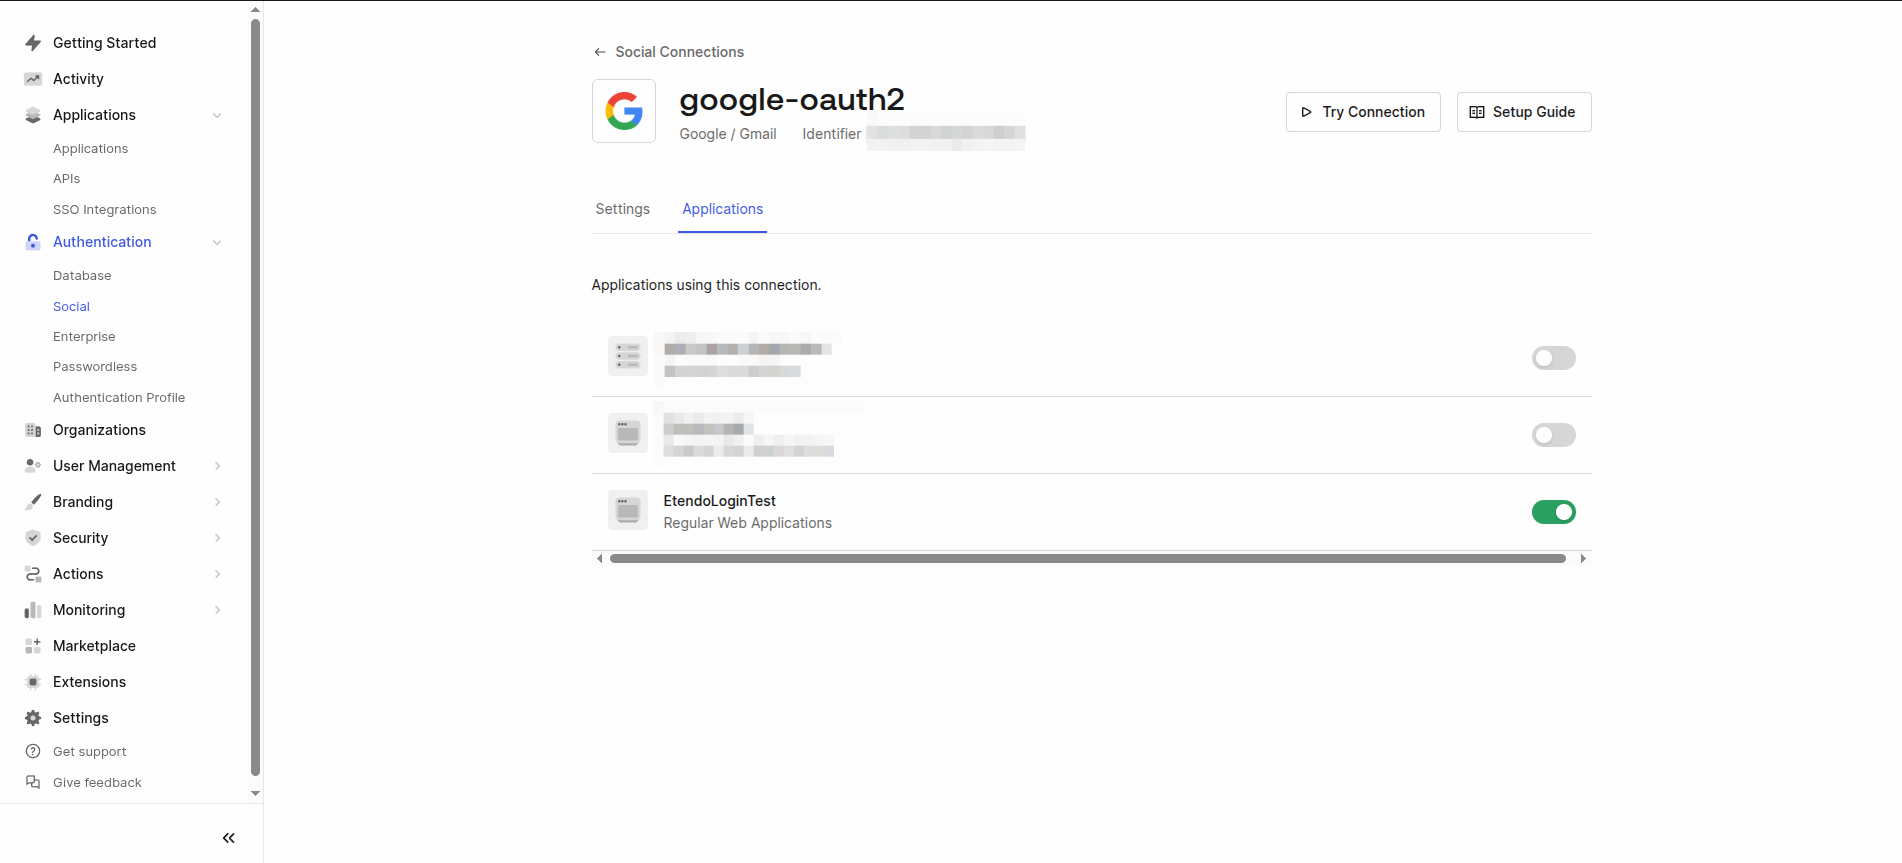
-
Repeat this process for every provider you want to enable.
-
-
Retrieve and Set Credentials
-
Return to the application and go to the Settings tab.
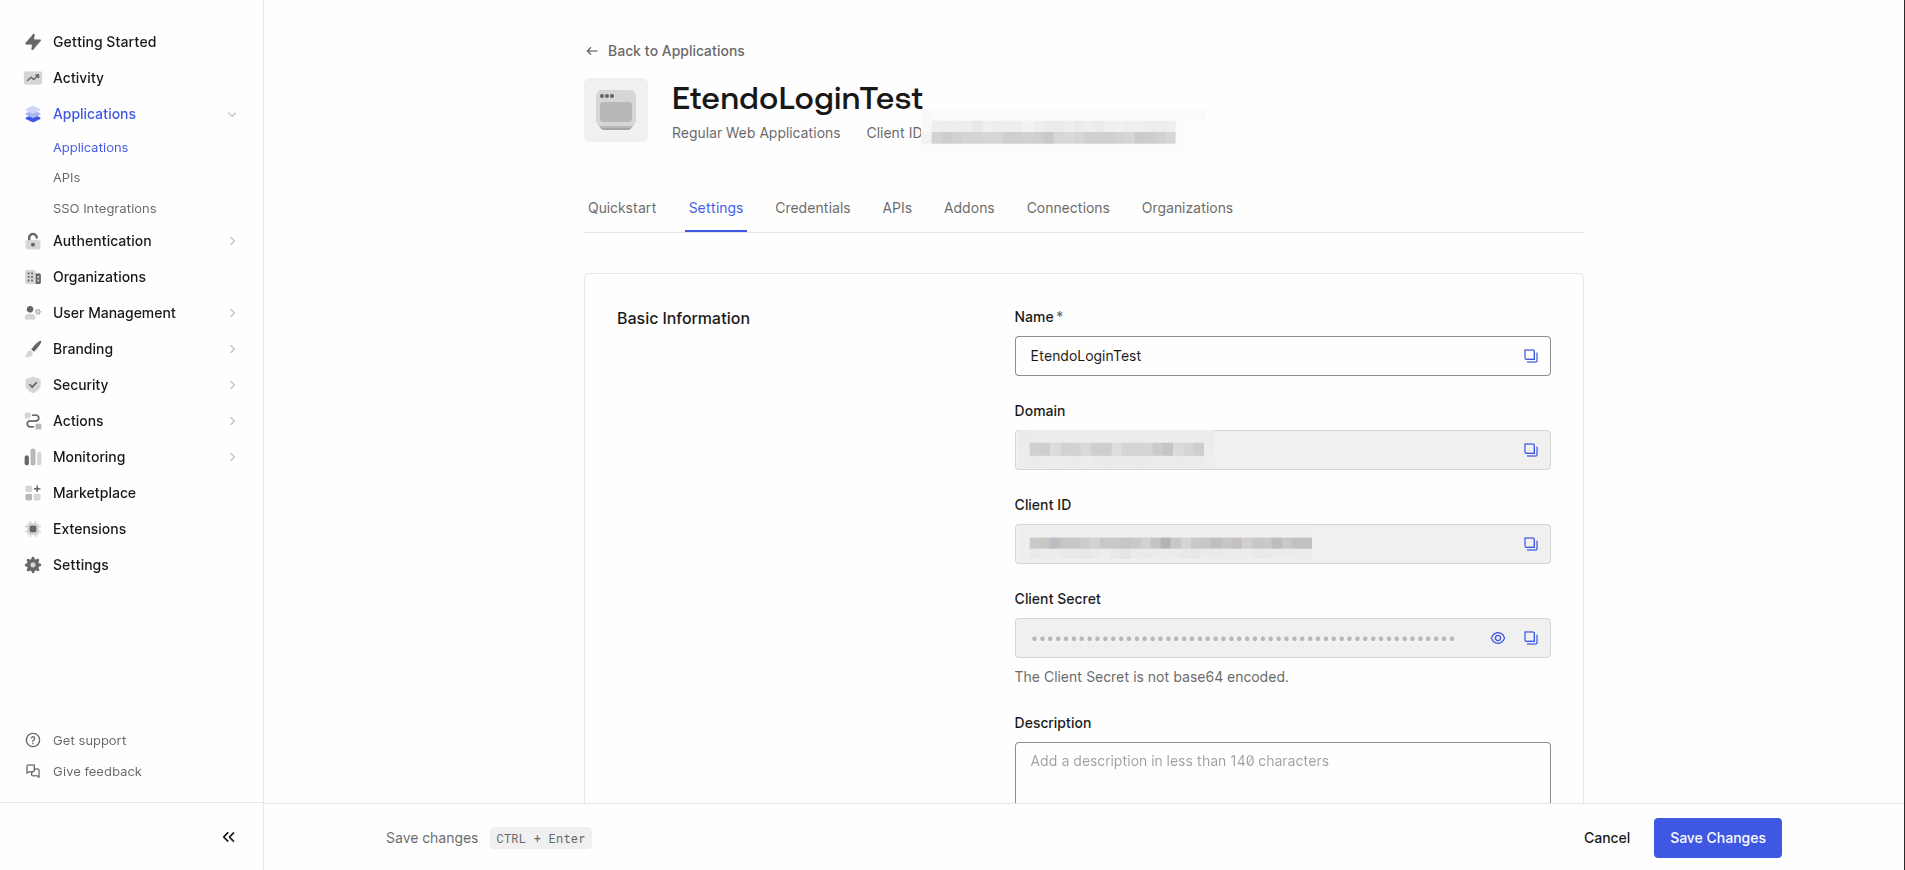
-
Locate the following credentials:
- Domain
- Client ID
- Client Secret
-
Add them to the
gradle.propertiesfile in the following format:gradle.propertiessso.domain.url=your-domain.auth0.com sso.client.id=your-client-id sso.client.secret=your-client-secret sso.auth.type=Auth0 authentication.class=com.etendoerp.etendorx.auth.SWSAuthenticationManagerWarning
This module cannot be configured together with Etendo Advanced Security because both use the
authentication.classproperty.
-
-
Configure Callback and Logout URLs
In the Settings tab, configure the following allowed URLs:
-
Allowed Callback URLs:
The URLs Auth0 redirects to after a successful login.
-
Allowed Logout URLs:
The URLs Auth0 redirects to after the user logs out.
http://localhost:8080/etendo,
http://localhost:8080/etendo/web/com.etendoerp.etendorx/resources/logout-auth0.html
Note
During development, you can use
localhost. However, for production, set your actual domain in Application Login URI. If you're still in development, you may leave it blank. -
-
Set the Callback URL
Add the callback URL to the
gradle.properties: -
Compile the Project
Once all properties are configured, compile the project:
-
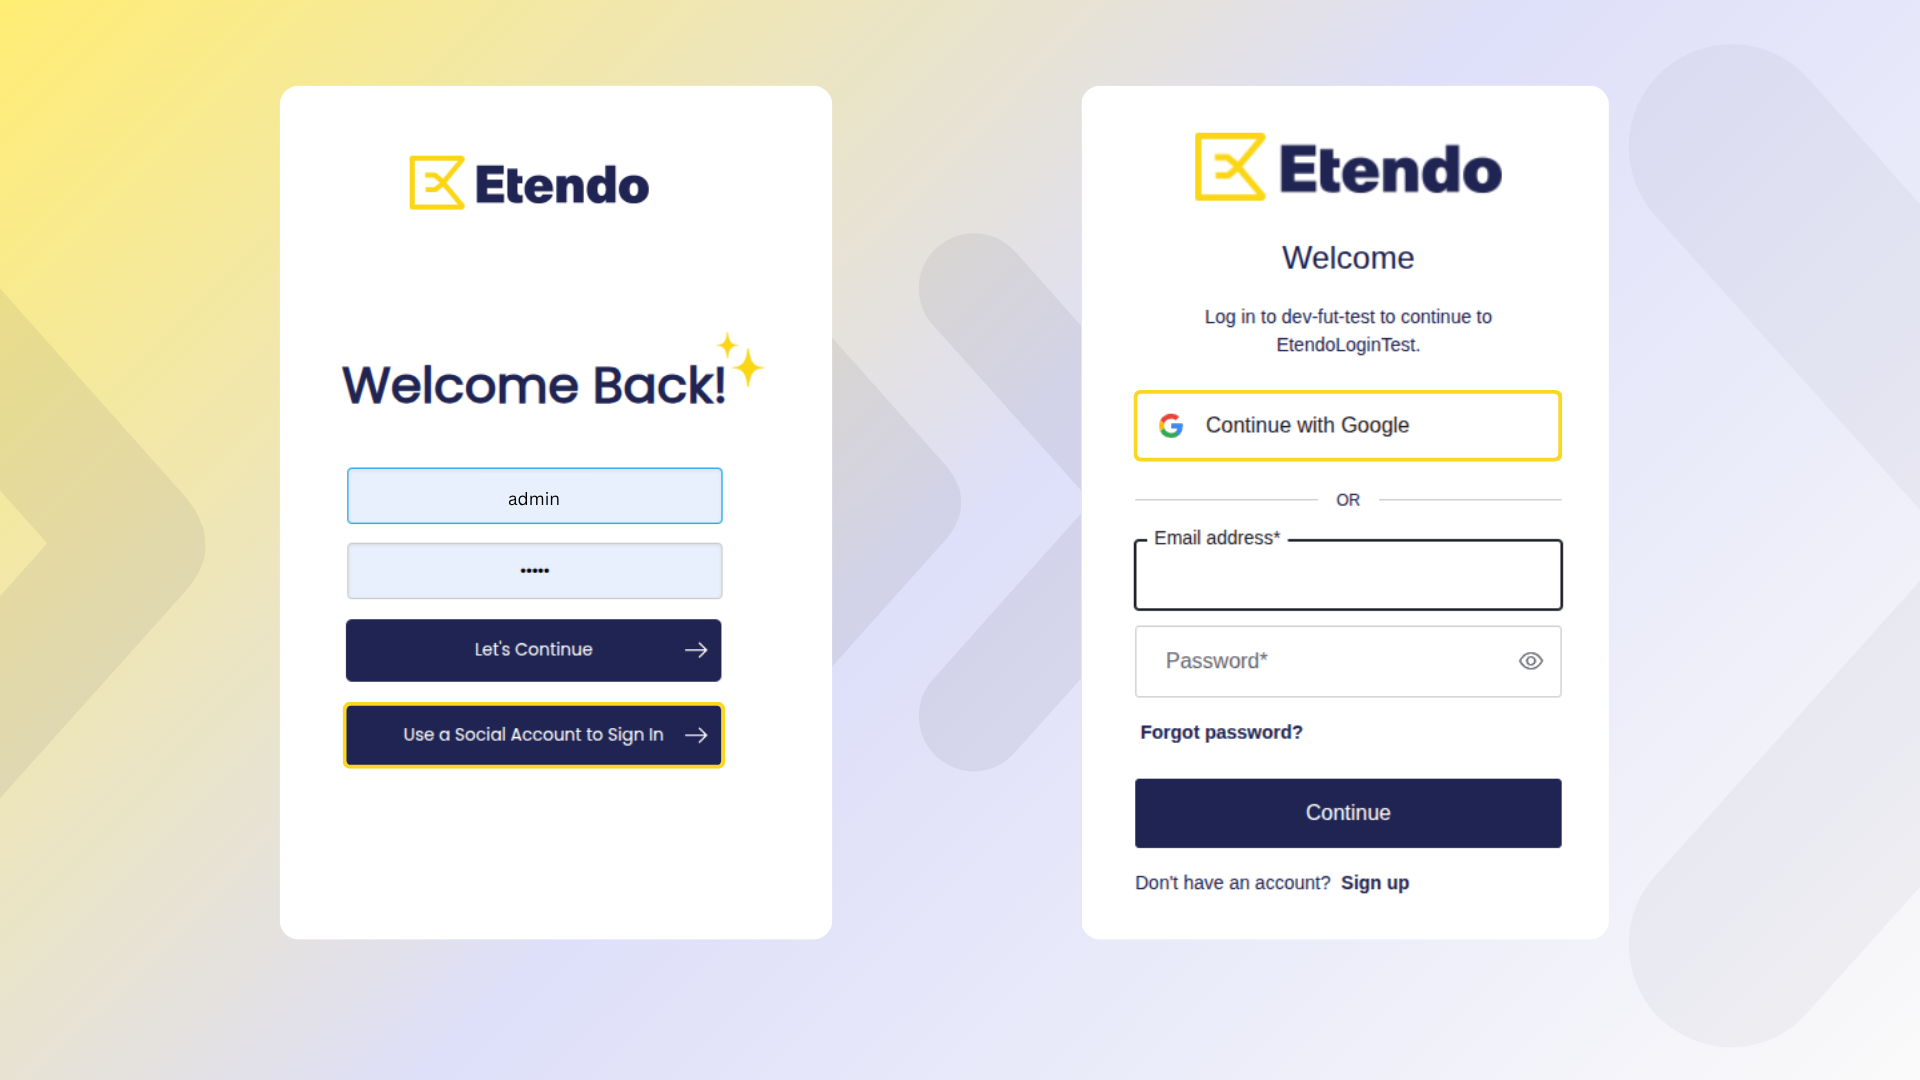
Log In via External Providers
- Start the Tomcat server.
- Open the Etendo login page and click Use a Social Account to Sign In
- Here you will see the
Auth0login page with the configured providers.
Tip
Customize the login screen in Branding > Universal Login in the Auth0 dashboard.
Info
For more information about the use of the SSO Login functionality, visit the SSO Login User Guide.
OAuth Provider
Overview
This section describes the OAuth Authentication service included in Etendo RX module.
The OAuth authentication process facilitates the provider type configuration, allowing users to securely authenticate and authorize access to their information using their preferred provider.
OAuth enables an authentication method through a security protocol for obtaining a token needed to make API calls to access specific resources on behalf of their owner. This authentication allows Etendo to retrieve the necessary information to access third-party applications.
OAuth Provider Window
Application> Etendo RX> OAuth Provider.
This document explains how to configure an OAuth provider to request access tokens. In addition, the implementation to connect Google Drive with Etendo via Etendo Middleware is explained.
You can choose between two methods:
-
Use the preconfigured provider offered by Etendo Middleware, which simplifies the process (Recommended method).
-
Manually configure an external provider if you prefer not to use our middleware, giving you full control over the configuration.
Warning
When using manual configurations, EtendoRX must be installed and properly configured, as it handles the communication with OAuth providers directly. For more information, visit Etendo RX
Etendo Middleware Setup (Recommended)
Configuration Variables
Add the following properties to the gradle.properties file:
## Middleware Configs
sso.middleware.url=https://sso.etendo.cloud
sso.middleware.redirectUri=http://localhost:8080/etendo/secureApp/LoginHandler.html
sso.google.api.key=AIzaSyAiJGP3Tnlg7-PgZyHrwtAID4i7NuBUbRo
sso.google.api.id=743458387087
Note
During development, you can use localhost. However, for production, set your actual domain.
Compile Environment
Run the following command to compile and set up the environment:
Create the Connection with Etendo Middleware
- Log in as admin.
- Open the oAuth Provider window.
-
Use the toolbar button: Create Etendo Middleware Provider.

-
After clicking the button, refresh the grid. A new record will appear, containing the default configuration to connect with Etendo Middleware.
Get Access Token
- Select the newly created middleware.
- Click on Get Middleware Token.
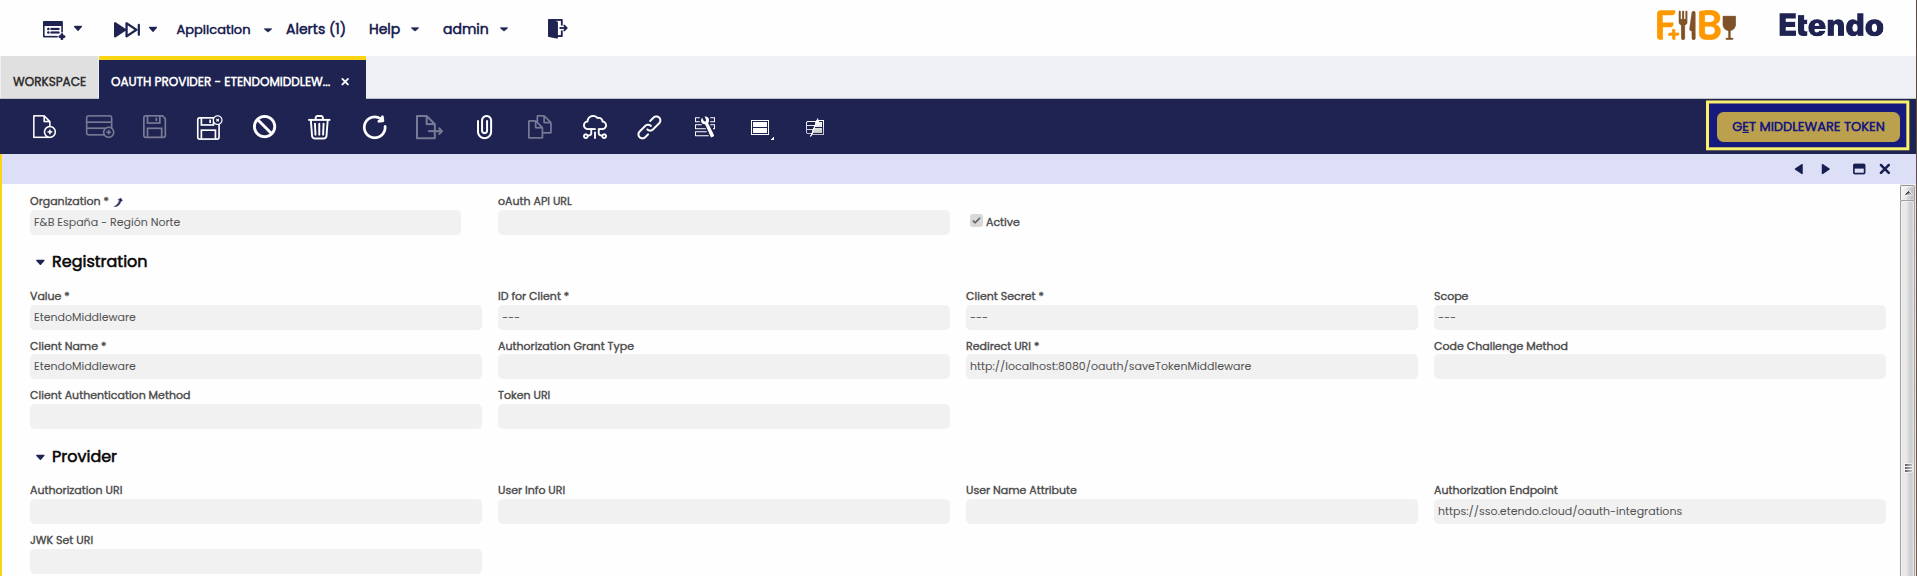
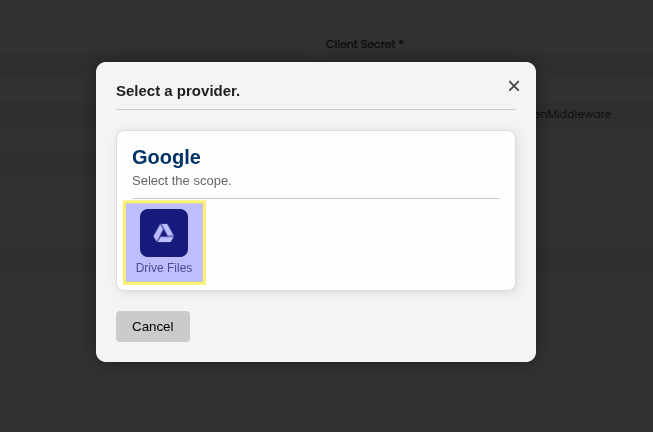
- Choose Drive File as the scope.
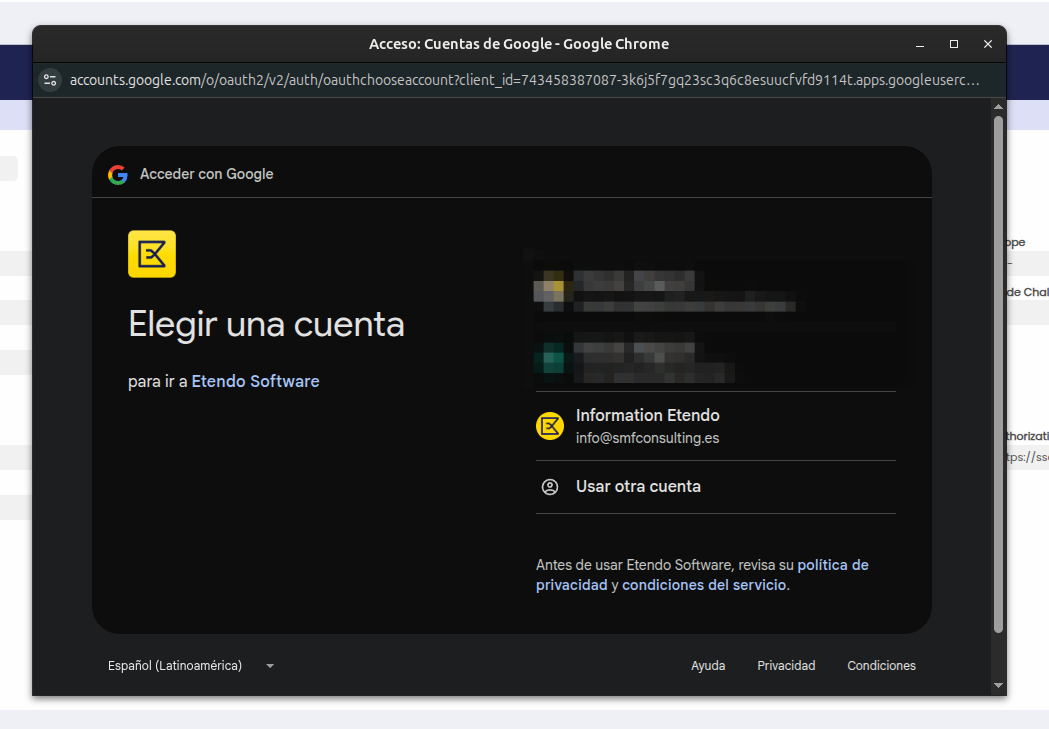
- Accept Google’s consent screen.
Token Created in the Token Info Tab
Once the flow is completed, an access token will be generated and can be viewed in the Token Info tab.
Info
Tokens obtained via Etendo Middleware have a default validity period of 1 hour. Once expired, a new token must be requested in order to maintain access to the associated third-party services.
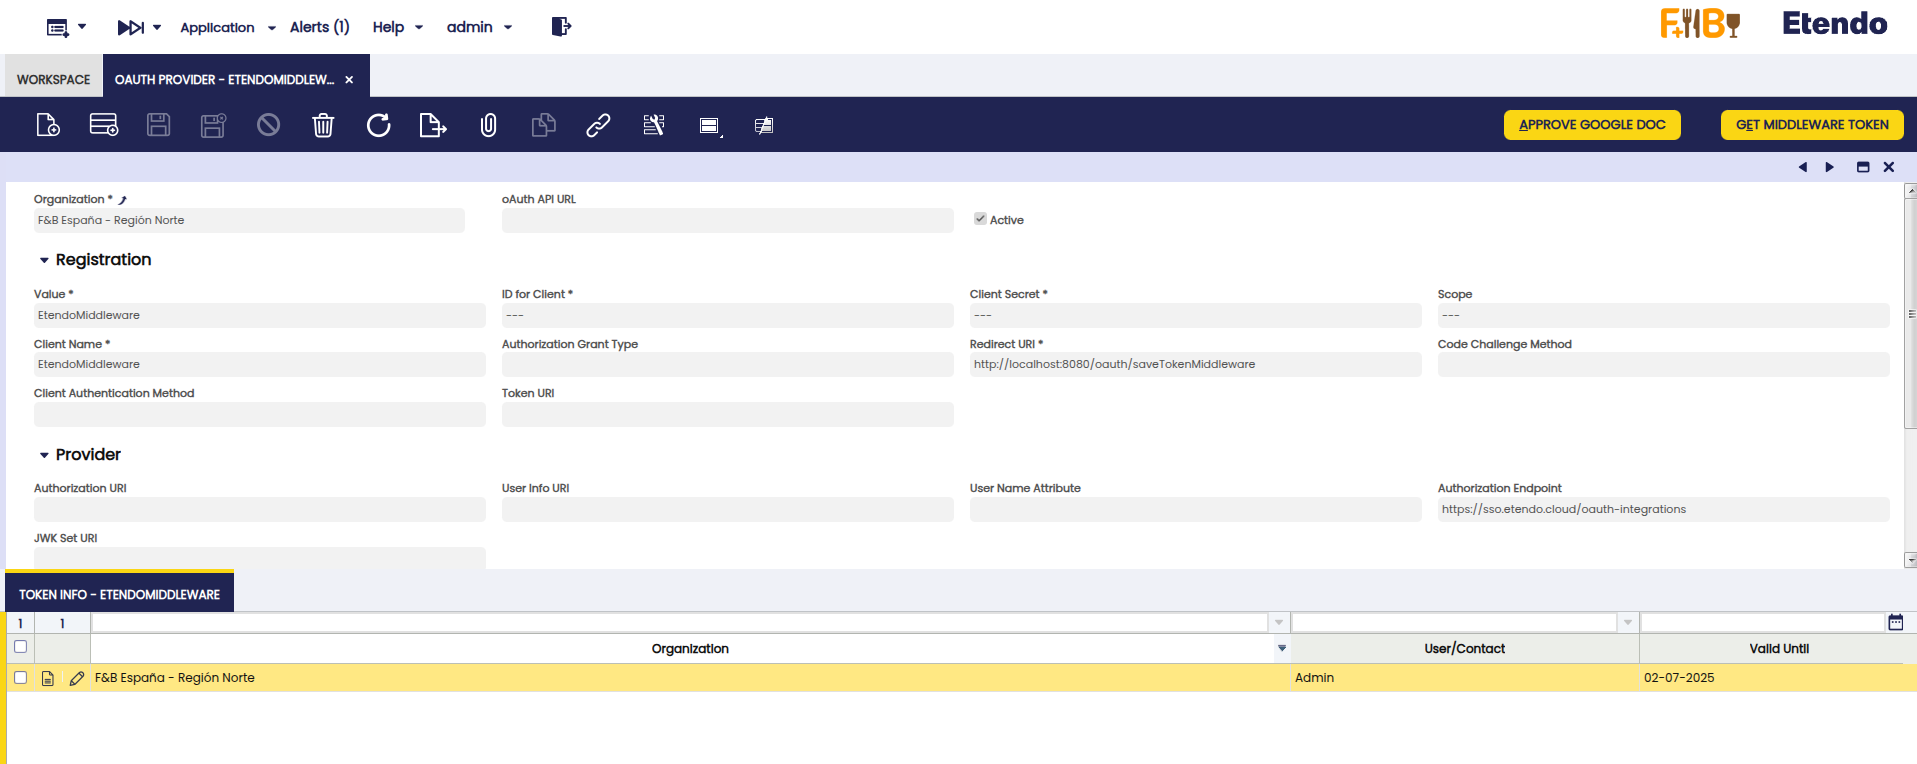
Allowing Etendo to access a Document
When the token was created on the Token Info tab, if you select it, the button will show up: Approve Google Doc.
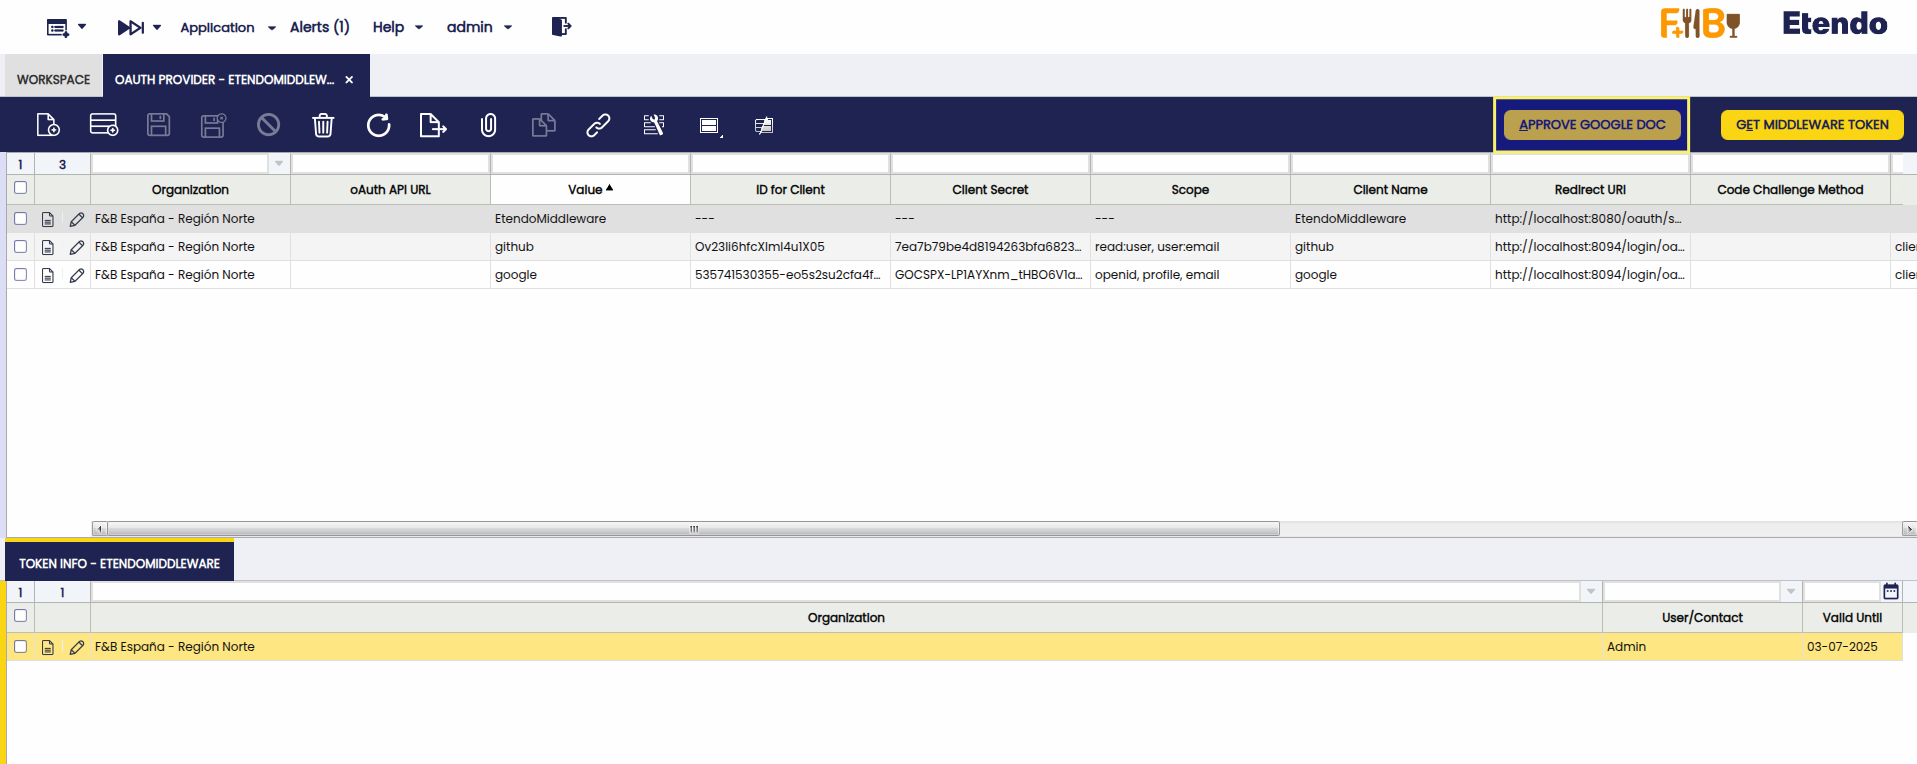
Clicking this button opens a pop-up window listing all documents from the Google Drive linked to the account selected during the token authorization process.
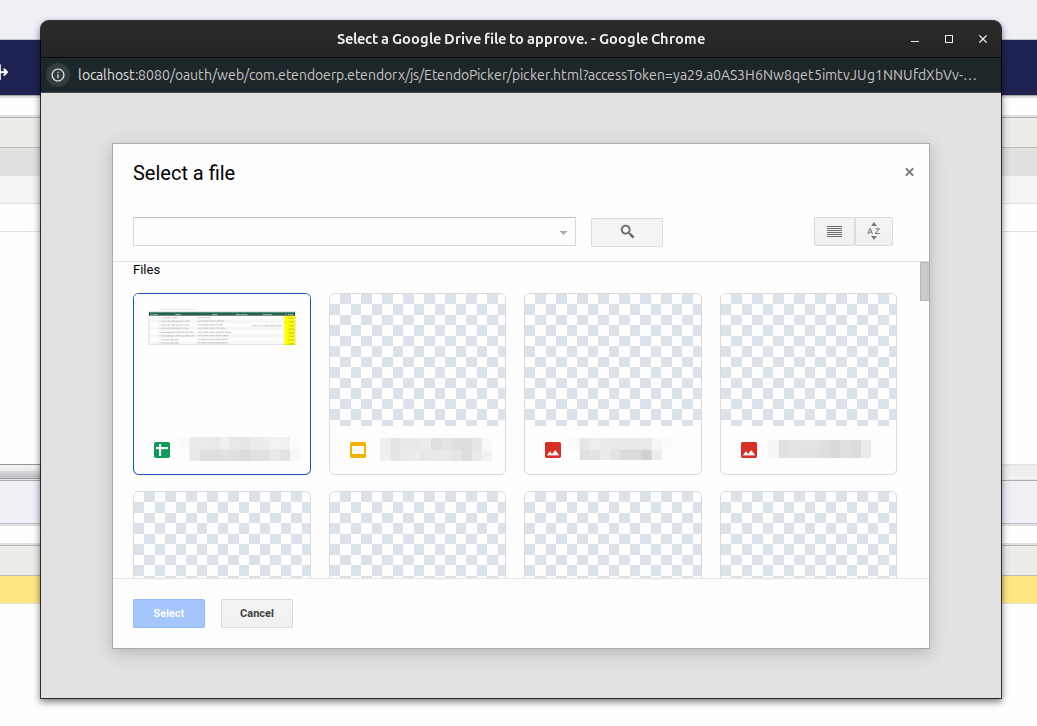
When you select a document, the process will authorize Etendo to access that document.
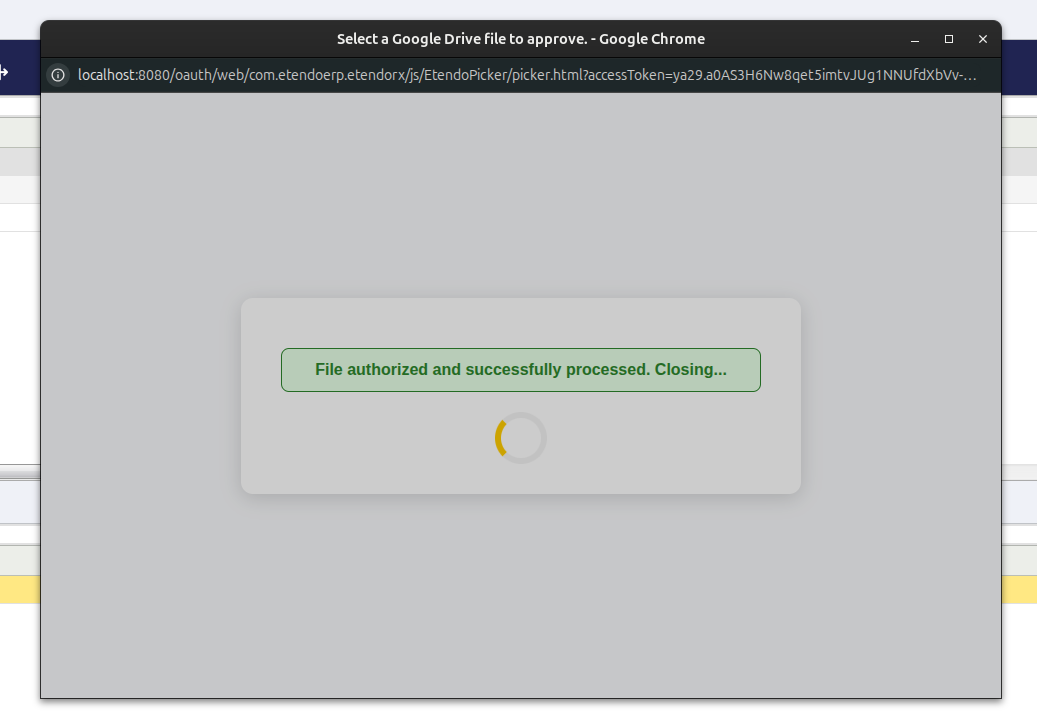
Info
Both the token and the granted permission can be used by other functionalities within the Etendo platform.
Info
To revoke access, simply delete the token record. Once removed, the connection to the third-party service will no longer be valid.
Manually Configure a Provider (Optional)
This method is intended for users who prefer to register a custom OAuth provider without using EtendoMiddleware. It provides full control over registration, authorization, and token handling parameters.
Warning
Manual provider configuration requires EtendoRX to be installed and enabled. RX is responsible for managing the direct connection with external OAuth providers. For more information, visit Etendo RX
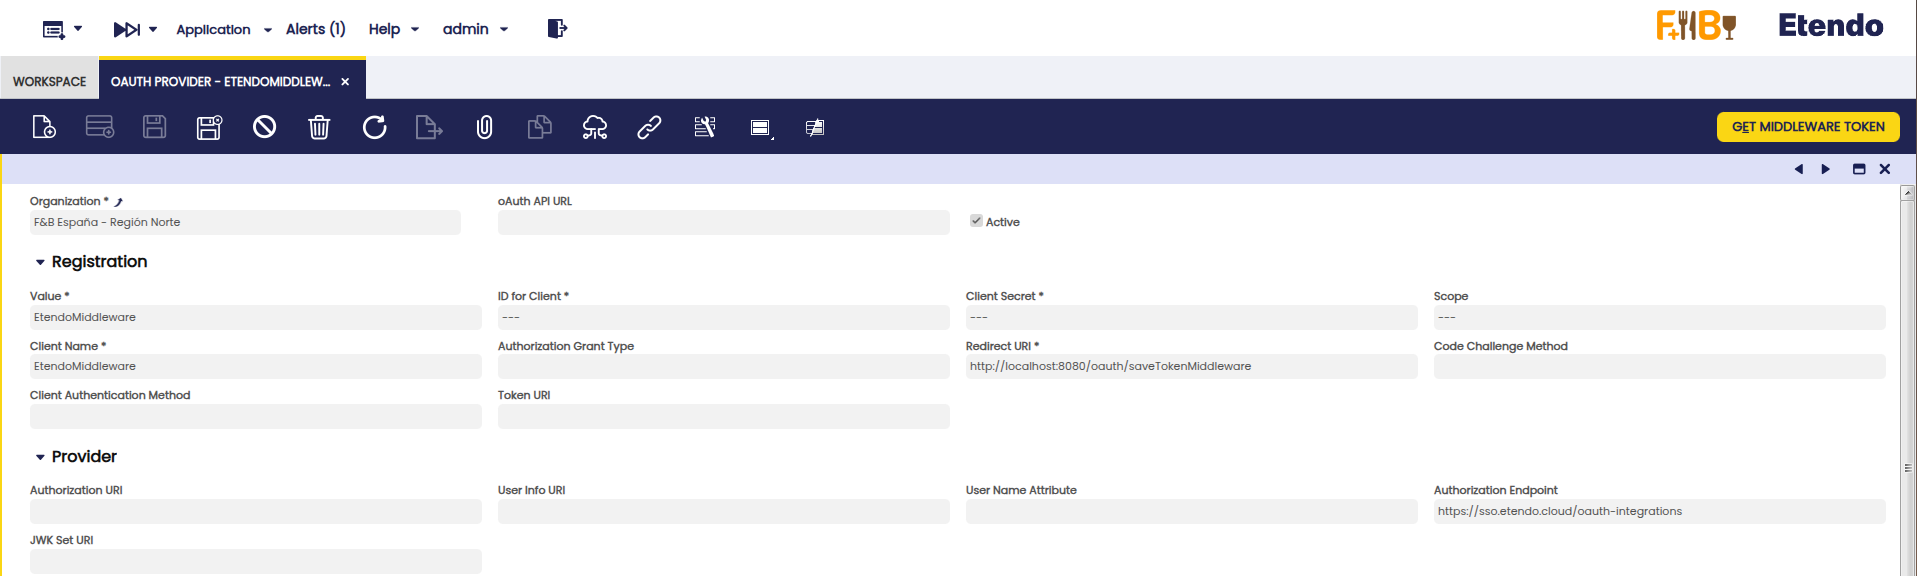
Header
Fields to note:
- Organization: Defines the organization scope for this provider.
- oAuth API URL: Base URL of the external OAuth API provider. It is used as the primary endpoint for communication with the provider’s authentication and token services. (optional)
- Active: Checkbox to enable or disable this provider configuration.
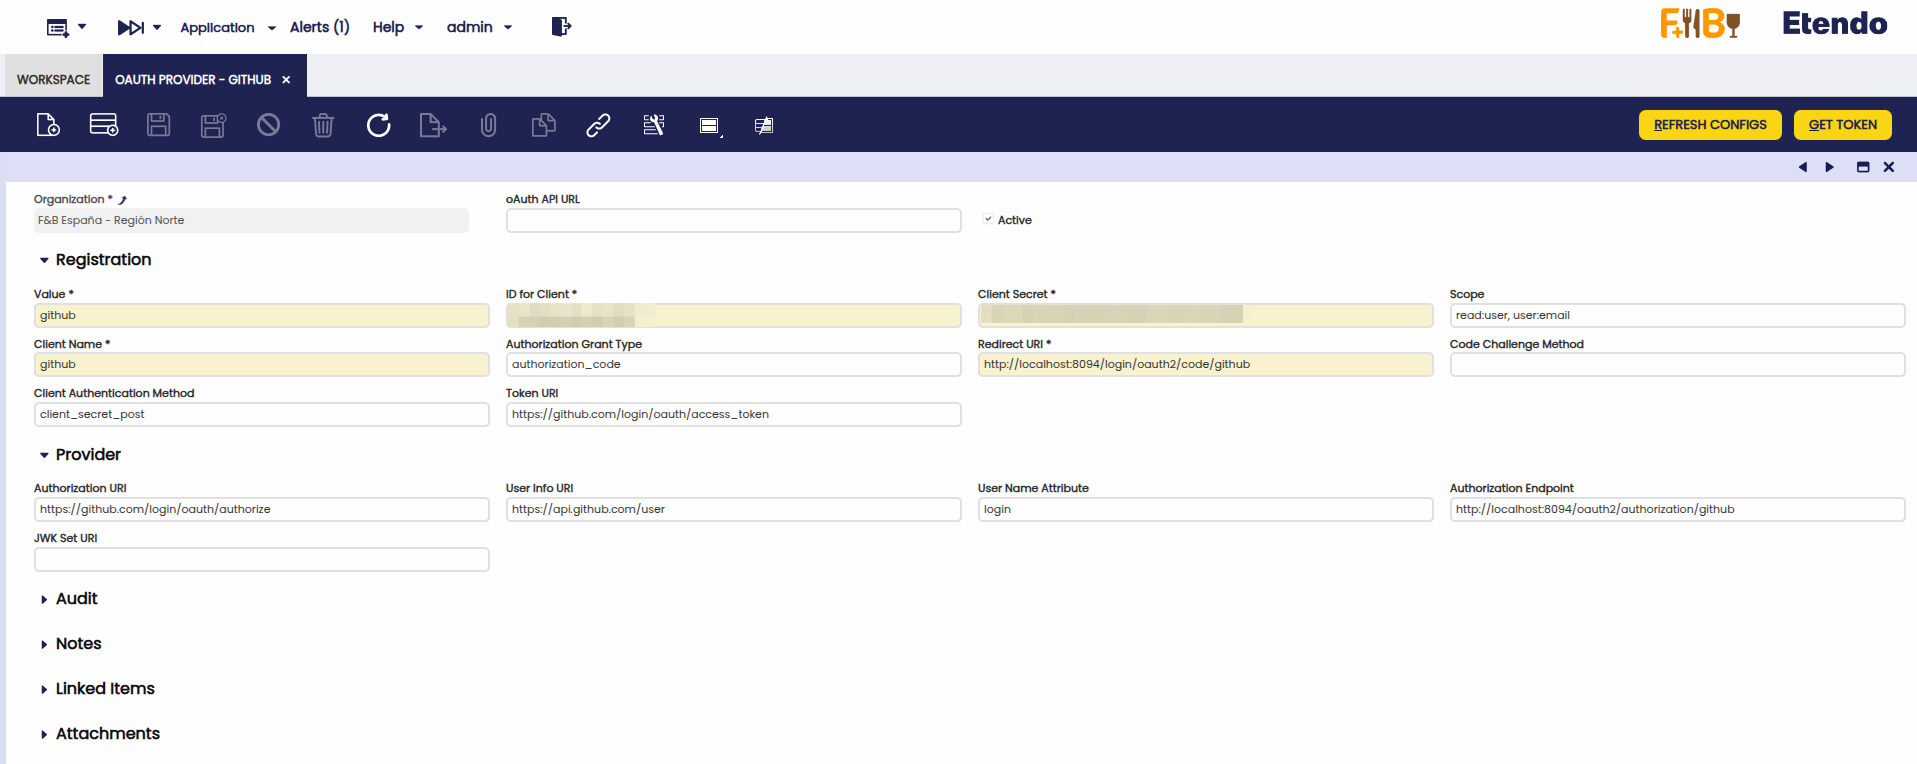
Section: Registration
This section defines how your application is registered with the OAuth provider. It includes credentials, the authorization flow, requested scopes, and essential URLs for completing the authentication.
Fields to note:
- Value: Internal technical identifier for the provider.
- ID for Client:
client_idprovided by the OAuth provider. - Client Secret:
client_secretprovided by the OAuth provider. - Scope: List of requested permissions (These scopes can be found in the provider documentation. e.g., openid, profile, email, https://www.googleapis.com/auth/drive).
- Client Name: Display name for the client.
- Authorization Grant Type: Flow type (e.g., authorization_code, client_credentials, password).
- Redirect URI: Redirect URL to receive the authorization code or token. This should point to the RX Auth Service URL.
- Code Challenge Method: PKCE method (S256 or plain).
- Client Authentication Method: Method to send client credentials (e.g., client_secret_post, client_secret_basic).
- Token URI: Endpoint to exchange authorization code for tokens (access_token and optional refresh_token).
Section: Provider
This section defines the OAuth provider's endpoints required for your app to connect and validate tokens properly.
- Authorization URI: Endpoint to initiate the authorization flow.
- User Info URI: Endpoint to fetch user details using the access_token.
- User Name Attribute: Attribute used to identify the user (e.g., email, sub).
- Authorization Endpoint: Endpoint used to request the provider token through the RX Auth Service.
- JWK Set URI: URL where the provider publishes public keys to verify signed JWTs.
Token Info tab
This tab stores the tokens generated through the ERP. While full tokens are not displayed for security reasons, the following information is available:
- User: ERP user who generated the token.
- Provider: The OAuth provider from which the token was issued.
- Valid Until: Token expiration date and time.
Buttons
-
Refresh Config
Restarts the services defined in RX Config, useful if configuration changes were made.
-
Get Token: Starts the authorization flow with the external OAuth provider.
If everything is properly configured, clicking Get Token and accepting the consent will generate the desired access token.
After refreshing the grid in the Token Info tab, a new record will appear.
Info
To revoke access, simply delete the token record. Once removed, the connection to the third-party service will no longer be valid.
This work is licensed under CC BY-SA 2.5 ES by Futit Services S.L..