How to configure MCP servers on Etendo agents
Overview
This guide provides step-by-step instructions to help you create and configure Model Context Protocol (MCP) Servers for Etendo Copilot.
MCP Servers extend agent functionality by providing external tools and resources that can be dynamically loaded and used during agent interactions.
What is Model Context Protocol (MCP)?
Model Context Protocol (MCP) is an open-source protocol that enables seamless integration between Large Language Models (LLMs) and external tools, data sources, and services. More information can be found in the Model Context Protocol (MCP) concept page.
Step-by-Step Guide
1. Create MCP Server Configuration
- Open the MCP window in Etendo Classic (System Administrator role):
-
Navigate to Service → Copilot → MCP Servers Configuration
-
Create a new record with the following information:
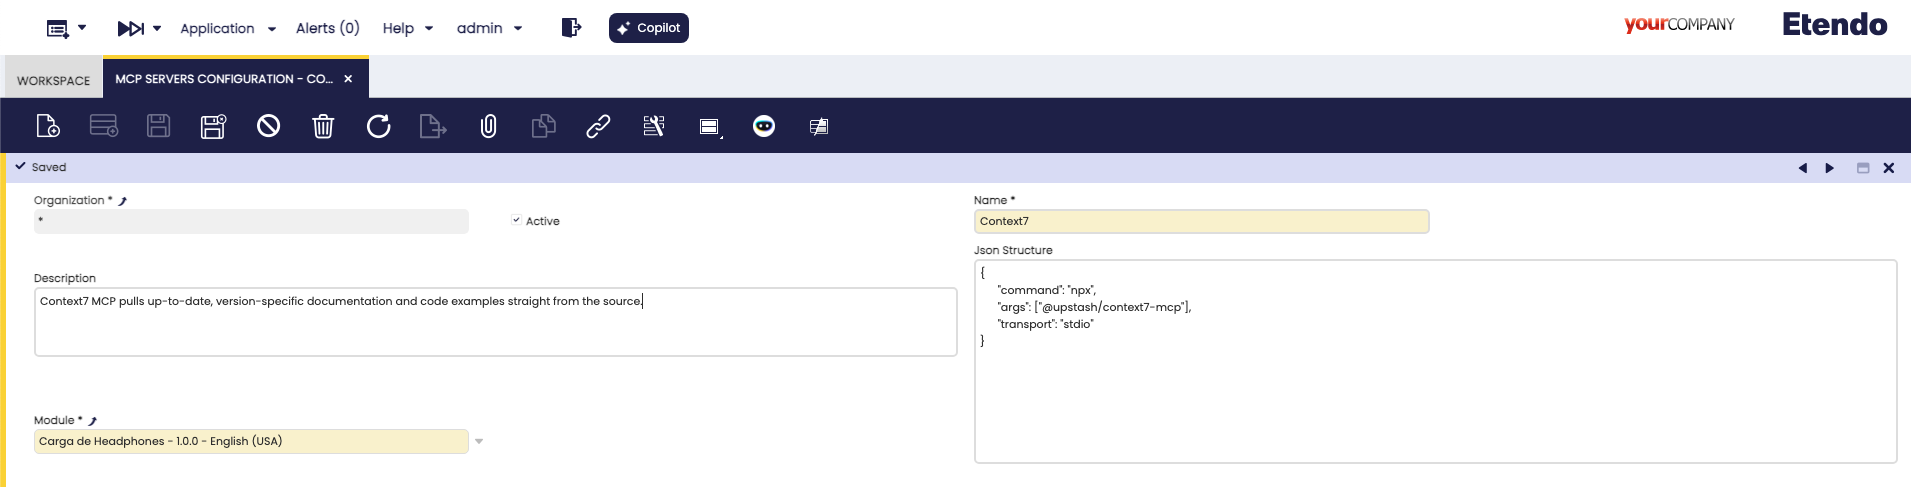
- Name: A descriptive name for your MCP server
- Description: A brief description of what the MCP server provides
- JSON Structure: The configuration JSON for the MCP server
2. Configure JSON Structure
The JSON Structure field contains the MCP server configuration. Paste only the JSON for a single MCP server (the inner object). Do NOT include wrapping keys like mcp, servers, or the server name.
Example full config elsewhere:
{
  "mcp": {
    "servers": {
      "context7": {
        "type": "stdio",
        "command": "npx",
        "args": ["-y", "@upstash/context7-mcp"]
      }
    }
  }
}
What you paste in Etendo:
Another example (filesystem):
{
  "command": "npx",
  "args": ["@modelcontextprotocol/server-filesystem", "/tmp/mcp-test"],
  "transport": "stdio"
}
If transport is omitted and command is present, it defaults to stdio.
Important: The system automatically validates the JSON structure when you save the MCP configuration. If the JSON is invalid, you will receive an error message and the record will not be saved until the JSON is corrected.
3. Link MCP Server to Agent
- Open the Agent window in Etendo Classic:
-
Navigate to Server → Copilot → Agent
-
Select an existing agent or create a new one
-
Navigate to the MCP tab within the Agent window:
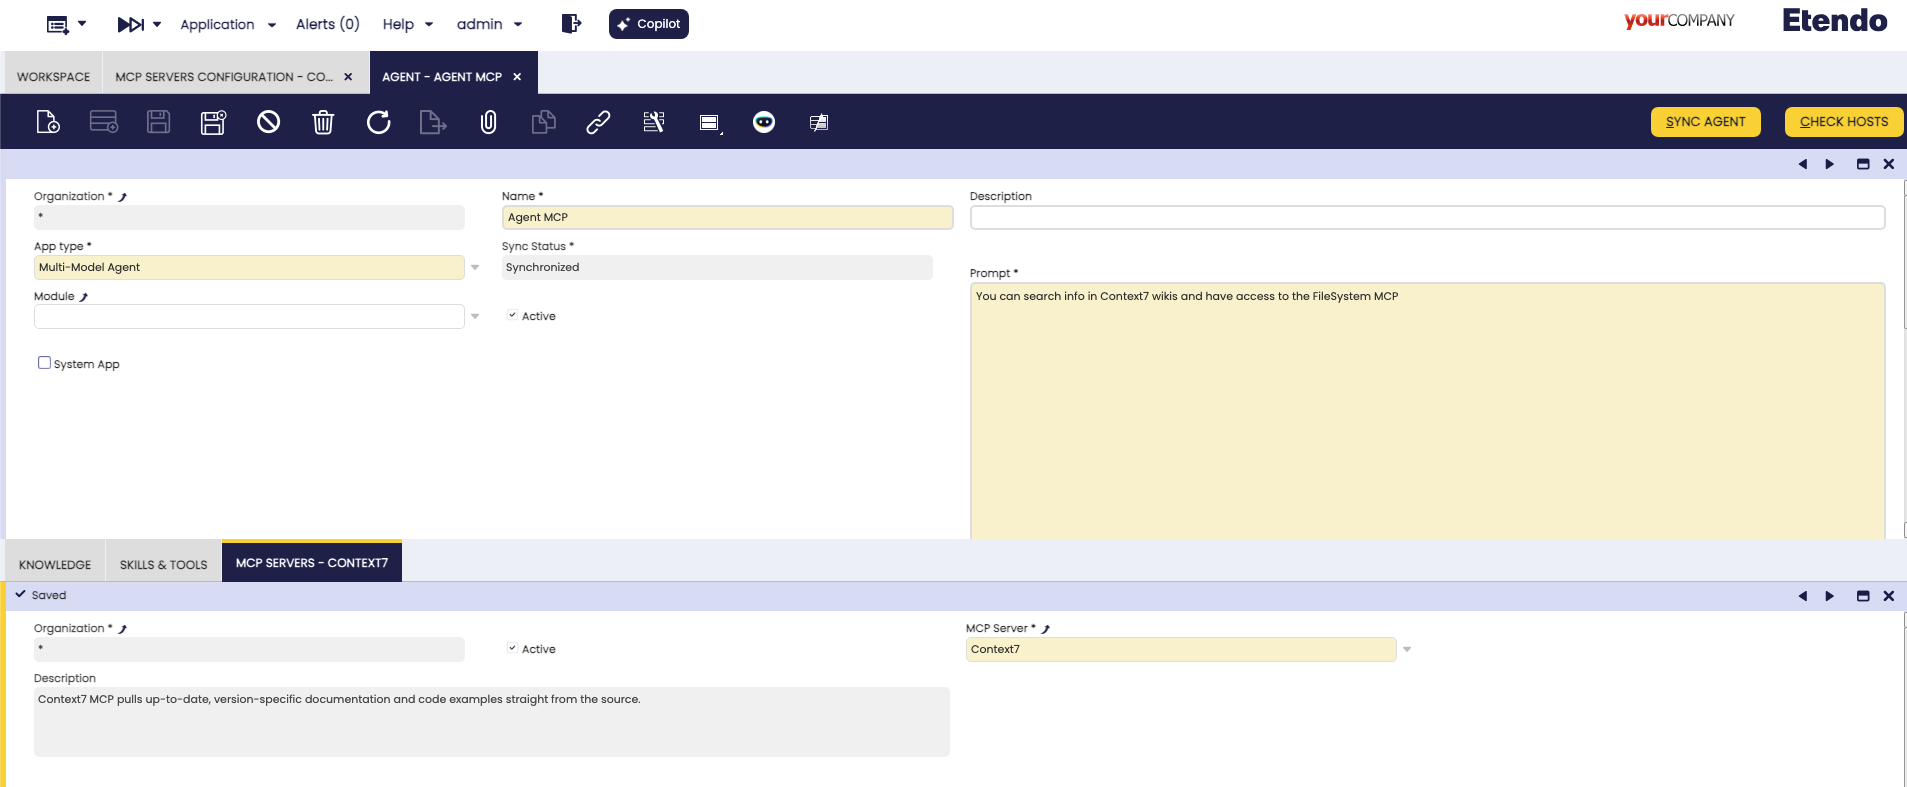
- Create a new record in the MCP tab:
- MCP Server: Select the MCP server you created in step 1
4. Test MCP Integration
-
Start a conversation with your configured agent
-
Request actions that would utilize MCP tools:
-
Observe agent behavior:
- The agent will automatically detect available MCP tools
- MCP tools will be invoked when appropriate for the user's request
- Tool execution results will be integrated into the agent's response
By default, the transport parameter is set to 'stdio' if not set. Currently, only MCP Servers that use NPX or HTTP work in Etendo since it's a beta functionality.
Example: Filesystem MCP Server
Here's a complete example of setting up a filesystem MCP server:
MCP Server Configuration
Name: Filesystem MCP Server
Description: Node.js server implementing Model Context Protocol (MCP) for filesystem operations.
JSON Structure:
{
  "command": "npx",
  "args": ["@modelcontextprotocol/server-filesystem", "/tmp/mcp-test"],
  "transport": "stdio"
}
Agent Integration
- Link the filesystem MCP server to your agent
- Sync the agent configuration
- Test with filesystem operations:
User: "What files are in the working directory?"
Agent: "I'll check the files in the directory for you." [Invokes filesystem MCP tool] "Here are the files I found: config.txt, data.json, readme.md"
User: "Can you read the contents of config.txt?"
Agent: [Invokes filesystem read tool] "Here's the content of config.txt: [file contents]"
More MCP Servers
Browse additional MCP servers and examples: https://github.com/modelcontextprotocol/servers